This document provides more information for certain aspects of EDB Postgres Replication Server, version 7. EDB Postgres Replication Server (referred to hereafter as EDB Replication Server) is a replication streaming system available for PostgreSQL® and for EDB Postgres™ Advanced Server. The latter will be referred to as Advanced Server.For general information about EDB Replication Server and basic instructions for installing, configuring, and setting up a replication network, see the EDB Postgres Replication Server Getting Started Guide.
In the following descriptions, a term refers to any word or group of words that are language keywords, user-supplied values, literals, etc. A term’s exact meaning depends upon the context in which it is used.
• Italic font introduces a new term, typically, in the sentence that defines it for the first time.
• Fixed-width (mono-spaced) font is used for terms that must be given literally such as SQL commands, specific table and column names used in the examples, programming language keywords, etc. For example, SELECT * FROM emp;
• Italic fixed-width font is used for terms for which the user must substitute values in actual usage. For example, DELETE FROM table_name;
• Square brackets [ ] denote that one or none of the enclosed terms may be substituted. For example, [ a | b ] means choose one of “a” or “b” or neither of the two.
• Braces {} denote that exactly one of the enclosed alternatives must be specified. For example, { a | b } means exactly one of “a” or “b” must be specified.
• Ellipses ... denote that the preceding term may be repeated. For example, [ a | b ] ... means that you may have the sequence, “b a a b a”.
• Most of the information in this document applies to both the PostgreSQL and EDB Postgres Advanced Server database systems. The term Advanced Server is used to refer to EDB Postgres Advanced Server. The term Postgres is used to generically refer to both PostgreSQL and Advanced Server. When a distinction needs to be made between these two database systems, the specific names, PostgreSQL or Advanced Server are used.
• The installation directory path of the PostgreSQL or Advanced Server products is referred to as POSTGRES_INSTALL_HOME. For PostgreSQL Linux installations, this defaults to /opt/PostgreSQL/x.x for version 10 and earlier. For later versions, use the PostgreSQL community packages. For Advanced Server Linux installations accomplished using the interactive installer for version 10 and earlier, this defaults to /opt/edb/asx.x. For Advanced Server Linux installations accomplished using an RPM package, this defaults to /usr/edb/asx.x. The product version number is represented by x.x or by xx for version 10 and later.
• runServer.sh. Setting up and starting a replication server on a host machine to serve as a replication node
• runRepCLI.sh. Creating, configuring, and maintaining a replication network that provides the snapshot and data streaming between producer and consumer databasesFor information on the RepCLI commands for creating the replication network using runRepCLI.sh, see Section 2.2.
./runServer.sh --host host_ip_address--config EPRS_HOME/server/etcThe full directory path to the EPRS_HOME/server/etc directory. If you want to have multiple replication servers running on the same host machine, you need to make a copy of the EPRS_HOME/server directory and modify certain properties files located in the EPRS_HOME/server/etc directory of the additional replication server.Note: The general format of the EPRS_HOME directory is /usr/edb/rs-x.x where x.x is the EDB Replication Server version number, which is initially 7.0.
2.2 RepCLI CommandsThe EDB Replication Server RepCLI commands are invoked by the runRepCLI.sh script located where the EDB Replication Server client package has been installed, which is EPRS_HOME/client/bin.Generally, RepCLI commands must be run from the EPRS_HOME/client/bin directory on the host running the replication server as the leader service in order for the effect of the RepCLI commands to be relevant to the replication network.Alternatively, if the client package has been installed on a different host than where the leader service is running, you can run the RepCLI commands from this separate host if the client.properties file in the EPRS_HOME/client/etc directory is edited to specify the host IP address and port of the leader service.The following shows the content of the client.properties file:2.2.1 Getting Help (help)The help command provides a syntax summary of all RepCLI commands.The version command provides the EDB Replication Server CLI’s version number.The encrypt command encrypts the text supplied in an input file and writes the encrypted result to a specified output file. Use the encrypt command to generate an encrypted password in a text file that can be referenced by the adddb command that requires the database user password.Note: The following permission is required for encrypt command:
Make sure that infile contains only the text that you want to encrypt and that there are no extraneous characters or empty lines before the text or after the text that you want to encrypt.The following example creates an encrypted password file in the home directory of the Linux user invoking the runRepCLI.sh script.File pwdfile contains the following:The joinnetwork command adds the specified replication server to the replication network.-servername servername-host host-port port[ -ngxpasspath directory ][ -user username ]The joinnetwork command invoked for any replication server other than the first replication server, which starts as the leader service, must be given with the -user option.The directory containing the .ngxpass password file. If the option is omitted, the .ngxpass file will be searched for in the user’s home directory or by the setting of environment variable NGXPASSPATH.Replication user running the command. This parameter is omitted when running the joinnetwork command for the first time in a replication network when creating the replication server initially to be used as the leader service but is required for all subsequent usage of joinnetwork. username must be either admin or a user with the join_network permission.The following example adds a replication server to be identified by the name remoteService to the replication network.The leavenetwork command removes the specified replication server from the replication network.-servername servername[ -ngxpasspath directory ]-user usernameThe directory containing the .ngxpass password file. If the option is omitted, the .ngxpass file will be searched for in the user’s home directory or by the setting of environment variable NGXPASSPATH.The adddb command adds a database to a replication server.[ -servername servername ]-dbid dbid-dbhost host-dbport port-dbuser user-database dbname[ -ngxpasspath directory ]-user usernameSpecify postgresql if the database is a PostgreSQL database. Specify enterprisedb if it is an Advanced Server database.The encrypted password of the database user. See Section 2.2.3 for encrypting the password.The directory containing the .ngxpass password file. If the option is omitted, the .ngxpass file will be searched for in the user’s home directory or by the setting of environment variable NGXPASSPATH.The removedb command removes a database from a replication server.[ -servername servername ]-dbid dbid[ -ngxpasspath directory ]-user usernameBefore using the removedb command, be sure all publications that had been created in the database with the createpub command are first removed by using the removepub command.Use the leavepub command to disconnect the database from all publications it had been joined to with the joinpub command.The directory containing the .ngxpass password file. If the option is omitted, the .ngxpass file will be searched for in the user’s home directory or by the setting of environment variable NGXPASSPATH.The createpub command creates a new publication.-createpub -pubname pubname-servername servername-dbid dbid[ -ngxpasspath directory ]-user usernameSpecify W if the database can only write to this publication, which makes it a producer only. Specify RW if the database can also accept changed data from other databases that have joined this publication. The latter makes this database both a consumer and producer of the publication. If -nodetype is omitted, the default is W.The directory containing the .ngxpass password file. If the option is omitted, the .ngxpass file will be searched for in the user’s home directory or by the setting of environment variable NGXPASSPATH.Note: All the tables must have a primary key if they have to be replicated, otherwise it will throw an error while creating a publication.The joinpub command specifies a database that is to be a receiver of data from a publication as well as possibly a contributor of changed data to that publication. After a database has joined a publication, it can begin receiving and/or pushing its own changed data to other databases joined to that publication.-servername servername-dbid dbid-pubname pubname[ -filtername filtername ][ -ngxpasspath directory ]-user usernameTypically, the joinpub command is used when creating the initial replication network before snapshots are taken to all target databases and streaming has been started.
• Add the database with the adddb command.
• Join the publication with the joinpub command.
• Take a snapshot to the target database with the startsnapshot command.
• Confirm if the snapshot is replicated to the target node with the checksnapshot command.
• Rerun the startstreaming command.Note that the startstreaming command must be re-executed even if streaming is already running on the replication network.Specify R if the database can only read from this publication, which makes it a consumer only. Specify W if the database can only write to this publication, which makes it a producer only. Specify RW if the database can stream and receive changed data to and from other databases that have joined this publication. The latter makes this database both a consumer and producer of the publication. If -nodetype is omitted, the default is R.The directory containing the .ngxpass password file. If the option is omitted, the .ngxpass file will be searched for in the user’s home directory or by the setting of environment variable NGXPASSPATH.The leavepub command specifies a database that is no longer to be a receiver or a contributor of data for a specified publication. The leavepub command cancels the initial joinpub command that was used to join the database to the publication.-dbid dbid-pubname pubname[ -ngxpasspath directory ]-user usernameThe directory containing the .ngxpass password file. If the option is omitted, the .ngxpass file will be searched for in the user’s home directory or by the setting of environment variable NGXPASSPATH.The following is an example of leaving a publication to which the database had been previously joined with the joinpub command.The removepub command removes a publication from the replication network. The removepub command cancels the effect of the createpub command that was initially used to create the publication.-removepub -pubname pubname[ -ngxpasspath directory ]-user usernameThe directory containing the .ngxpass password file. If the option is omitted, the .ngxpass file will be searched for in the user’s home directory or by the setting of environment variable NGXPASSPATH.To modify an existing publication by adding tables to a publication the addtables command is used.-user usernameThe directory containing the .ngxpass password file. If the option is omitted, the .ngxpass file will be searched in the user’s home directory or by setting the environment variable NGXPASSPATH.The following applies when you use the addtables command:
• To modify an existing publication by removing tables from a publication the removetables command is used.-user usernameThe directory containing the .ngxpass password file. If the option is omitted, the .ngxpass file will be searched in the user’s home directory or by setting the environment variable NGXPASSPATH.The following applies when you use the removetables command:
• To use the removetables command you should have the remove_pub permission. o remove alltables specify all the tables name via comma separated
• Publication pubname has no table.2.2.14 Adding a Filter (addfilter)The addfilter command creates a filter for a publication, which defines a selection rule that rows must satisfy in order to be replicated to a target consumer database. When the filter is enabled on a target database, the filtering is applied for both snapshots and changed data streaming.Note: Filters do not work for an offline snapshot as the data movement takes place outside the replication server.-addfilter filtername-pubname pubname-filtertable filtertable-filterrule "filterrule"[ -ngxpasspath directory ]-user usernameSpecify R for row level filtering.The row selection rule formatted as an SQL WHERE clause without the WHERE keyword. Rows from snapshots or changed data streams that evaluate to true are replicated to target databases that have enabled the filter. All other rows are not replicated. Note: Enclose the filterrule text by double quotation marks ("filterrule").The directory containing the .ngxpass password file. If the option is omitted, the .ngxpass file will be searched for in the user’s home directory or by the setting of environment variable NGXPASSPATH.The enablefilter command applies and activates a filter on a target database. Publication database rows from snapshots and changed data streams must then pass the filter rule in order to be replicated to the target database.-enablefilter filtername-pubname pubname-targetdbid target_dbid[ -ngxpasspath directory ]-user usernameIf the target database has been joined to the publication using the joinpub command with the -filtername option, then that filter is already enabled on the database, and it is not necessary to use the enablefilter command to activate it. See Section 2.2.9 for the joinpub command.A filter that has been enabled on the database can be disabled so the filter rule no longer applies until the filter is enabled again. See Section 2.2.17 for the disablefilter command.The directory containing the .ngxpass password file. If the option is omitted, the .ngxpass file will be searched for in the user’s home directory or by the setting of environment variable NGXPASSPATH.The updatefilter command changes the attributes of an existing filter.-updatefilter filtername-pubname pubname-filtertable filtertable-filterrule "filterrule"[ -ngxpasspath directory ]-user usernameSpecify R for row level filtering.The row selection rule formatted as an SQL WHERE clause without the WHERE keyword. Rows from snapshots or changed data streams that evaluate to true are replicated to target databases that have enabled the filter. All other rows are not replicated. Note: Enclose the filterrule text by double quotation marks ("filterrule").The directory containing the .ngxpass password file. If the option is omitted, the .ngxpass file will be searched for in the user’s home directory or by the setting of environment variable NGXPASSPATH.The following example changes the filter rule to dname='SALES'.The disablefilter command deactivates a filter on the target database. Publication database rows from snapshots and changed data streams are no longer required to pass the filter selection rule in order to be replicated to the target database.-disablefilter filtername-pubname pubname-targetdbid target_dbid[ -ngxpasspath directory ]-user usernameThe directory containing the .ngxpass password file. If the option is omitted, the .ngxpass file will be searched for in the user’s home directory or by the setting of environment variable NGXPASSPATH.The removefilter command removes the definition of a filter from the publication. This filter can no longer be applied to any target database.-removefilter filtername-pubname pubname[ -ngxpasspath directory ]-user usernameThe directory containing the .ngxpass password file. If the option is omitted, the .ngxpass file will be searched for in the user’s home directory or by the setting of environment variable NGXPASSPATH.The startsnapshot command removes any existing rows from the publication tables in the target database. It then loads the rows from the publication database into the tables of the target database.-pubname pubname-dbid target_dbid[ -ngxpasspath directory ]–user usernameThe following applies to usage of the startsnapshot command:When a new target database is joined to a publication, the startsnapshot command must first be executed against the target database before streaming is started.Thus, when attempting to join a database to a publication when streaming is active, a sequence of steps is shown in the following example where deptpub is the publication, deptpub was created in localService, the database identifier is db2 of the target database that has been added to remoteService, and admin is the user:The directory containing the .ngxpass password file. If the option is omitted, the .ngxpass file will be searched for in the user’s home directory or by the setting of environment variable NGXPASSPATH.The following is a sample execution of the startsnapshot command.2.2.20 Reloading a SnapshotIf you change the cluster configuration (remove a database, publication, and/or subscription) after a snapshot operation, repeat the snapshot by including the reload option. This is necessary as the Kafka queues (topics) are re-populated with a fresh copy of data from the source database.Stop streaming before you execute the startsnapshot command with the reload option, otherwise, the operation will fail (an error message is logged in the server). Once the snapshot is completed explicitly restart the streaming.Note: The reload option does not work for an offline snapshot.-startsnapshot -pubname pubname-dbid target_dbid–user usernameThe directory containing the .ngxpass password file. If the option is omitted, the .ngxpass file will be searched for in the user’s home directory or by the setting of environment variable NGXPASSPATH.To take a snapshot in an offline mode run the following command from the EPRS_HOME/client/bin directory:./runRepCLI.sh –startsnapshot -pubname pubname -offlineThe directory containing the .ngxpass password file. If the option is omitted, the .ngxpass file will be searched for in the user’s home directory or by the setting of environment variable NGXPASSPATH.The checksnapshot command confirms if the data is replicated to the target node.-checksnapshot -pubname pubname-dbid target_dbid[ -ngxpasspath directory ]–user usernameRun the checksnapshot command without first running startsnapshot command. The status should be pending (for Data Publishing as well as Data Import).Now run the startsnapshot command after the checksnapshot command (after a delay of few seconds) to confirm if data is replicated to target node. The status should be completed (for Data Publishing as well as Data Import)The directory containing the .ngxpass password file. If the option is omitted, the .ngxpass file will be searched for in the user’s home directory or by the setting of environment variable NGXPASSPATH.The following is a sample execution of the checksnapshot command.The following is a sample execution of the checksnapshot command for an offline snapshot.The startstreaming command begins the streaming of changed data from the publication to databases that are joined to the publication.[ -ngxpasspath directory ]-user usernameThe directory containing the .ngxpass password file. If the option is omitted, the .ngxpass file will be searched for in the user’s home directory or by the setting of environment variable NGXPASSPATH.The stopstreaming command stops the streaming of changed data from the specified publication.[ -ngxpasspath directory ]-user usernameThe directory containing the .ngxpass password file. If the option is omitted, the .ngxpass file will be searched for in the user’s home directory or by the setting of environment variable NGXPASSPATH.The setadminpassword command sets an administrator password.A prompt then appears for the admin user password. The password must then be used for all subsequent RepCLI commands when -user admin is specified stating that admin is the user running the command.Save the given password in the .ngxpass file.2.2.26 Creating a Role (createrole)The createrole command creates a role with a set of permissions. When a user is assigned a role, the user then has the permissions of that role.-createrole role_name[ -permissions permission[,...] ][ -ngxpasspath directory ]-user usernameThe directory containing the .ngxpass password file. If the option is omitted, the .ngxpass file will be searched for in the user’s home directory or by the setting of environment variable NGXPASSPATH.2.2.27 Creating a User (createuser)The createuser command creates a new username to be specified by the -user parameter when the user wishes to run a RepCLI command.-createuser newusername[ -permissions permission[,...] ][ -roles role[,...] ][ -ngxpasspath directory ]-user usernameSave the given password in the .ngxpass file.The directory containing the .ngxpass password file. If the option is omitted, the .ngxpass file will be searched for in the user’s home directory or by the setting of environment variable NGXPASSPATH.The updateuser command updates the permissions or roles for the specified username.-updateuser username_privilege[ -permissions permission[,...] ][ -roles role[,...] ][ -ngxpasspath directory ]-user usernameThe directory containing the .ngxpass password file. If the option is omitted, the .ngxpass file will be searched for in the user’s home directory or by the setting of environment variable NGXPASSPATH.The following is an example of updating permissions of a user named streamer to access publication deptpub with the pub_deptpub permission.The updatepassword command updates the password for the specified user.-username user_for_update[ -ngxpasspath directory ]-user usernameSave the given password in the .ngxpass file.The directory containing the .ngxpass password file. If the option is omitted, the .ngxpass file will be searched for in the user’s home directory or by the setting of environment variable NGXPASSPATH.The listserver command displays information about the replication servers in the replication network.[ -ngxpasspath directory ]–user usernameThe directory containing the .ngxpass password file. If the option is omitted, the .ngxpass file will be searched for in the user’s home directory or by the setting of environment variable NGXPASSPATH.2.2.31 List Databases (listdb)The listdb command displays information about the databases added to replication servers.[ -parentservername parentservername ][ -ngxpasspath directory ]–user usernameThe replication server of the databases for which information is to be displayed. These are the databases that were added to this replication server with the adddb command. If this option is omitted, then all databases in the replication network are displayed.The directory containing the .ngxpass password file. If the option is omitted, the .ngxpass file will be searched for in the user’s home directory or by the setting of environment variable NGXPASSPATH.The following example lists the database that was added to the remoteService1 replication server.2.2.32 List Publications (listpub)The listpub command displays information about the publications created in the specified database.[ -parentdbid parentdbid ][ -ngxpasspath directory ]–user usernameThe database identifier of the database containing the publications as created with the createpub command whose information is to be displayed. If the option is omitted, then all publications of the replication network are displayed.The directory containing the .ngxpass password file. If the option is omitted, the .ngxpass file will be searched for in the user’s home directory or by the setting of environment variable NGXPASSPATH.The following example lists the publications created in the database identified by db1. The result happens to be the same as in the previous example.The following example attempts to list the publications created in the database identified by db2. In this example, there are no such publications.The listpubtable command lists the tables in the specified publication.-listpubtable -pubname pubname[ -ngxpasspath directory ]-user usernameThe directory containing the .ngxpass password file. If the option is omitted, the .ngxpass file will be searched for in the user’s home directory or by the setting of environment variable NGXPASSPATH.The listconsumer command lists the consumer databases by publication in the replication network.[ -ngxpasspath directory ]–user usernameThe directory containing the .ngxpass password file. If the option is omitted, the .ngxpass file will be searched for in the user’s home directory or by the setting of environment variable NGXPASSPATH.The listconflicts command lists conflicts that have been detected.[ -pubname pubname ][ -ngxpasspath directory ]-user usernameThe directory containing the .ngxpass password file. If the option is omitted, the .ngxpass file will be searched for in the user’s home directory or by the setting of environment variable NGXPASSPATH.The replicationlag command lists the size in bytes, the time of the last consumption, and the Logical Sequence Number (LSN) of the last consumed WAL record by the consumer database.[ -ngxpasspath directory ]-user usernameSpecify bytes to display the replication lag in number of bytes. Specify time to specify the last time of consumption and the time lag. Specify all to display both sets of information. If -lagtype is omitted, the default is all.The directory containing the .ngxpass password file. If the option is omitted, the .ngxpass file will be searched for in the user’s home directory or by the setting of environment variable NGXPASSPATH.The following examples are from an MMR type replication network with three consumer databases. The publication is within database db1 while the other two consumer databases are db2 and db3.Note: The displayed output format has been modified in order to see the results more easily in this document.Note: The following output format has been significantly modified in order to see the results more easily in this document.The replicationlatency command provides an end-to-end database level latency for the last transaction that is successfully replicated and applied on the target database.-replicationlatency-pubname pubnameThe directory containing the .ngxpass password file. If the option is omitted, the .ngxpass file will be searched for in the user’s home directory or by the setting of environment variable NGXPASSPATH.The following is an example of execution of the replicationlatency command.Note: The following permission is required for replicationlatency command:
The addkafkaacl command adds the ACL.-allowprincipal User:CN=common_name,-topic topic_name[ -ngxpasspath directory ]-user usernameThe -allowprincipal option represents an SSL user name, for example:Comma-separated values are allowed for the options -authorizerproperties, -allowhosts, and -operations.The directory containing the .ngxpass password file. If the option is omitted, the .ngxpass file will be searched for in the user’s home directory or by the setting of environment variable NGXPASSPATH.The following example adds a Kafka ACL allowing principal SSL user represented by common name 127.0.0.1 to perform operations Read and Write on topic testpub-test_db1-public.jobhist from IP hosts 172.16.252.3 and 172.16.252.5.The removekafkaacl command removes the ACL.-allowprincipal User:CN=common_name,-topic topic_name[ -ngxpasspath directory ]-user usernameThe -allowprincipal option represents an SSL user name, for example:Comma-separated values are allowed for the options -authorizerproperties, -allowhosts, and -operations.The directory containing the .ngxpass password file. If the option is omitted, the .ngxpass file will be searched for in the user’s home directory or by the setting of environment variable NGXPASSPATH.The following example removes the ACLs for topic testpub-test_db1.The listkafkaacl command lists the ACL.-topic topic_name[ -ngxpasspath directory ]-user usernameThe directory containing the .ngxpass password file. If the option is omitted, the .ngxpass file will be searched for in the user’s home directory or by the setting of environment variable NGXPASSPATH.The following example lists ACLs for topic testpub-test_db1.To enable adding events in Kafka uncomment the following line in EPRS_HOME/server/etc/logback.xml before you start the replication servers.[ -ngxpasspath directory ]The directory containing the .ngxpass password file. If the option is omitted, the .ngxpass file will be searched for in the user’s home directory or by the setting of environment variable NGXPASSPATH.The following is an example of listevents command with MMR (two servers) setup:The following command filters the events added to Kafka (under topic) based on the severity level. If the severity argument is not provided listevents displays all the events.[ -ngxpasspath directory ]The directory containing the .ngxpass password file. If the option is omitted, the .ngxpass file will be searched for in the user’s home directory or by the setting of environment variable NGXPASSPATH.Note: For getting all the messages uncomment the following line in EPRS_HOME/server/etc/logback.xml file.
The type of filtering that is supported is row level filtering. The selection of rows to replicate is based upon the column value content of the row. The filtering rule is given in the format of an SQL WHERE clause.
• enablefilter – Applies the filter to the tables of a database that has joined the publication (see Section 2.2.15)
• updatefilter – Change the selection rule of an existing filter (see Section 2.2.16)
• disablefilter – Disables the application of the filter on a database that was previously enabled with the filter (see Section 2.2.17)
• removefilter – Removes the filter from the publication, thus preventing its usage on any database (see Section 2.2.18)
• Filtering of rows occurs for both snapshots from the startsnapshot command and changed data streaming implemented by the startstreaming command.Add the database to localService and create the publication:Now, create two filters for the public.emp table:Join the two databases to the publication. The -filtername option is used to immediately enable the filters on the databases.For database node2 on researchService with filter rule deptno=20, the filtered stream results in the following:For database node3 on salesService with filter rule deptno=30, the filtered stream results in the following:
4 Security
• Authentication. Confirmation of the identity of the user requesting access to the system
• Authorization. Identifying the roles and privileges that the authenticated user has been granted
• Access Control. Determining if the user has the roles or privileges to access requested objectsThe user described in the previous bullet points is an EDB replication user created, stored, and maintained by EDB Replication Server using RepCLI commands. This user is not a Linux user account nor is it a Postgres database user.
• REST Security. Implemented using the facilities of JAX-RS 2.0 Jersey to provide authentication, authorization, and access control.
• Kafka Security. Provides TLS certificate-based authentication as specified as part of the configuration of Kafka components. TLS provides encrypted communications.
• setadminpassword – Sets the password for the administrator username admin. This must be the next RepCLI command executed after the first joinnetwork command that starts the leader service (see Section 2.2.25).
• createrole – Defines a role based on the role based access control approach whereby a role is granted a set of permissions. A user can then be assigned to one or more such roles. This gives the user the permissions included in the roles (see Section 2.2.26).
• createuser – Creates a username to be specified with the -user parameter when invoking a RepCLI command. The user can perform the RepCLI commands to which privilege has been granted either by roles or permissions assigned to the username either by the createuser command or by a subsequent updateuser command (see Section 2.2.27).
• updateuser – Update the permissions or roles assigned to a username (see Section 2.2.28)
• updatepassword – Update the password for a username created by the createuser command (see Section 2.2.29)Each RepCLI command requires specification of the -user option to identify the user invoking the command. By default, a prompt is then made for the user’s password.
• The password file is named .ngxpass and stores the passwords in plain text format if the -savepassword option is specified.
• The .ngxpass file is created and updated under the home directory of the Linux root user who started the replication server.
• The .ngxpass file has restricted access permitted only to the user and denied to the public.
• If subsequent RepCLI commands are to be invoked with the runRepCLI.sh script by a Linux user account who is not the root user, then in order to avoid the password prompt, the .ngxpass file must exist in this user’s home directory. Copy the .ngxpass file from the root home directory to this user’s home directory and then modify the .ngxpass file permissions to allow access only to this user.The username of the user as defined by the createuser commandThe user can optionally specify the full path to the directory that contains the .ngxpass file with the -ngxpasspath option when invoking a RepCLI command. The replication server searches for the file in the given custom path.If the file is not found in the custom path or if the -ngxpasspath option is not specified, the replication server then checks for it in the directory given by the NGXPASSPATH environment variable.If the NGXPASSPATH environment variable is not set or if the file is not found under its custom path, then the password file is searched for under the user’s home directory.If the .ngxpass file is not found, then the user is prompted for the password.Thus, for ongoing simplicity in running RepCLI commands, the -savepassword option should be specified when creating a user.The following example shows the creation of the .ngxpass file.Set the administrator password and save it using the -savepassword option.In response to “Enter admin password”, the text ‘password’ was entered. The password file is created under the root user’s home directory /root:The /root/.ngxpass file now contains two usernames and their passwords:Note: For the “Enter user password” prompt for the admin user, no text was given in response. The admin password was obtained from the .ngxpass file.The new user pubmanager now invokes a command without supplying a password as it is also obtained from the .ngxpass file.Note: For the “Enter user password” prompt for the pubmanager user, no text was given in response. The pubmanager password was obtained from the .ngxpass file.Note: If the Linux user executing the runRepCLI.sh script is not the root user account as in this example, then in order to avoid the password prompt for saved passwords copy the /root/.ngxpass file to the home directory of the Linux user who is executing the runRepCLI.sh script. Make sure the ownership and permission for the copied file, (for example, /home/user/.ngxpass) is permitted only to the Linux user (as represented by user) who is the executor of the runRepCLI.sh script.All additional RepCLI commands invoked by user pubmanager will react in the same manner whereby the password for pubmanager will be obtained from the .ngxpass file.4.1.2 Permissions and Roles
Remove tables from a publication with removetables. db_dbid pub_pubname Note: When a database is added or a publication is created, resource type permission is created. For any database added, the name of the permission is db_dbid where dbid is the database identifier assigned to the database with the adddb command. For any publication created the name of the permission is pub_pubname where pubname is the publication name assigned with the createpub command.
4.1.2.1 Assigning PermissionsStarting with the administrator user admin, additional users can be created with various levels of permissions.The following example shows the creation of usermanager with the create_user permission who then has permissions to create other users with various permissions.The usermanager is then used to create user pubcreator with permissions to create the replication network components.Create the user usermanager assigning it the create_user, set_user_password, and update_user permissions:With usermanager as the user given with the -user option, create user pubcreator with permissions to add a database, create a publication, join a publication, and start a snapshot, and check the snapshot.Now, complete the replication node as user pubcreator.As user pubcreator, perform an initial snapshot.Confirm if the data is replicated to the target node with checksnapshot.User streamer must be updated to provide permission to access publication deptpub upon which streaming is to be started because the publication was created by user pubcreator and not by streamer. The permission to be granted is pub_deptpub. The user streamer is updated by usermanager who has the update_user permission.User streamer can now start the streaming.The row appears in database node2.4.1.2.2 Using RolesThe createrole command can be used to assign a group of permissions to one specific role, which then can be assigned to individual users.Create the role repsrvrmaker with permissions join_network, add_db, create_pub, join_pub, start_snapshot, check_snapshot, and start_streaming. Create the user smith assigning it the repsrvrmaker role privilege:Now, use the new user smith to complete the replication node by adding the producer database, creating the publication, adding the consumer database, and joining the publication:Take an initial snapshot with user smith. The node2 database now shows the rows initially inserted on node1.Start the streaming and insert another row into the node1 database table.The new row now appears in node2:
4.2 TLS/SSL SecurityKafka supports server and client authentication using Transport Layer Security (TLS)/Secure Sockets Layer (SSL) certificates. The TLS configurations for the Kafka brokers and clients (producer/consumer) must be provided along with the configuration of the keystore and truststore.Note: In the following example, the EDB Replication Server client and server will be running on the same, single host machine with one replication server. Thus, only a single set of files are generated. If the replication network is to contain multiple replication servers, then this process must be repeated for each broker of each separate replication server.Step 1: Generate the keystores, which is a key pair used for encryption along with the certificate to identify the machine for the server and client.Java’s keytool utility can be used to generate the keystores.Step 2: Create a certificate authority (CA) to self-sign the server and client certificates. Note that the password testpass is given in all of the following examples.Step 3: The certificate authority created in Step2 is to be added to the server and client truststore so that certificates signed with this certificate authority can be trusted by servers and clients. The same truststore will be used for both server and client machines.Step 4: Make some modifications to the openssl.cnf file. This file may be found in the directory location /etc/pki/tls.Assuming the keystore and truststore files are located in directory /home/user/cert, perform the edits in the section of file openssl.cnf for parameters dir, certificate, and private_key as shown by the following:In section v3_req, add the indicated new field followed by the addition of the alternate_names section and its list of fields:Step 5: In the directory where you have created the keystore and truststore files, perform the following modifications. It is assumed this directory is /home/user/certs.Final Steps for the Server: Export the server certificate from its keystore to sign it and import it back.Step 6a: Export the server certificate.Step 6b: Generate the certificate signing request:Step 6c: Import ca-cert to server keystore:Step 6d: Import the signed server certificate back to server keystore:Final Steps for the Client: Export the client certificate from its keystore to sign it and import it back.Step 7a: Export the client certificate.Step 7b: Generate the certificate signing request:Step 7c: Import ca-cert to client keystore:Step 7d: Import the signed client certificate back to client keystore:Note: In the following example, the EDB Replication Server client and server will be running on the same, single host machine with one replication server. Thus, only a single set of properties files are modified. If the replication network is to contain multiple replication servers, then the properties files must be modified for each broker of each separate replication server.Modify all other ssl parameters to point to the proper directory locations and specify the passwords.Modify the Path and Password parameters to point to the proper directory locations and specify the passwords.Modify the kafkastore.ssl parameters to point to the proper directory locations and specify the passwords.Note: In the following example, the EDB Replication Server client and server will be running on the same, single host machine with one replication server. Thus, only a single set of properties files are modified. If the replication network is to contain multiple replication servers, then the properties files must be modified for each broker of each separate replication server.Modify the Path and Password parameters to point to the proper directory locations and specify the passwords.Modify all other ssl parameters to point to the proper directory locations and specify the passwords.Modify all other ssl parameters to point to the proper directory locations and specify the passwords.
Monitoring is the process of examining, logging, and reacting to certain information related to the performance of a replication network based upon its internal components such as the Kafka brokers and message exchanges to and from consumers and producers.Monitoring is based on a group of attributes referred to as metrics, which measure various characteristics during the operation of the Kafka brokers.Metrics are read using a feature called Jolokia to read MBeans using the JMX interface. Information on Jolokia and its architecture is available from the following website:
5.1 Metrics
• Broker Metrics. See Section 5.1.1.
• Topic and Partition Metrics. See Section 5.1.2.
• Client Metrics. See Section 5.1.3.EDB replication server monitors a subset of these metrics that are considered to be of significant importance. For a summary of the metrics considered for monitoring using EDB replication server, see Section 5.1.4.5.1.1 Broker Metrics5.1.1.1 Under-Replicated PartitionsOne way to do this is by using kafka-topics.sh tool with the --zookeeper, --describe, and --under-replicated options. See the Kafka documentation for instructions on its usage.5.1.1.2 Active Controller CountCase 1: More than one active controllerCase 2: No active controllerThe request handler idle ratio metric indicates the percentage of time the request handlers are not in use. The lower this number, the more loaded the broker is. Based on experience, it is recommended that idle ratios lower than 20% indicate a potential problem, and lower than 10% is usually an active performance problem.5.1.1.4 All Topics Bytes In5.1.1.5 All Topics Bytes OutNote: The outbound bytes rate also includes the replica traffic. This means that if all of the topics are configured with a replication factor of 2, you will see bytes out rate equal to the bytes in rate when there are no consumer clients. If you have one consumer client reading all the messages in the cluster, then the bytes out rate will be twice the bytes in rate. This can be confusing when looking at the metrics if you’re not aware of what is counted.5.1.1.6 All Topics Messages In5.1.1.7 Partition Count5.1.1.8 Leader Count5.1.1.9 Offline Partition Count5.1.3 Client Metrics5.1.3.1 Record Error RateThis metric should always be zero, and if it is anything greater than that, the producer is dropping messages it is trying to send to the Kafka brokers. There is also a record-retry-rate attribute that can be tracked, but it is less critical than the error rate because retries are normal.5.1.3.2 Request Latency Average5.1.3.3 Fetch Latency AverageThis is the average amount of time a consumer fetch from the brokers takes. This latency is governed by the consumer configurations fetch.min.bytes and fetch.max.wait.ms.5.1.4 Summary of Metrics
Analogous to Bytes In Per Second
Step 1: Monitoring can be performed from a host on which a replication server is running or from a separate host with no replication server.To accomplish the latter, install the edb-rs-libs and the edb-rs-monitor packages on the host to perform the monitoring. See the EDB Postgres Replication Server Getting Started Guide for installation instructions.Step 2: In the monitor.properties file located in directory EPRS_HOME/monitor/etc, set the following parameters:ngen.total.nodes=number_of_replication_servers
ngen.jolokia.host.node.n=replication_server_host_ip
ngen.jolokia.port.node.n=8778ngen.sender.email=alert_sender_email_address
ngen.sender.email.encrypted.password=encrypted_sender_passwd
ngen.recipient.email=recipient_email_addressEncrypt the sender email password for ngen.sender.email.encrypted.password with the encrypt command executed with the runMonitor.sh script in the EPRS_HOME/monitor/bin directory:./runMonitor.sh –encrypt –input unencrypted_password_file–output encrypted_password_fileNote: You may also be required to permit access to the sender email account by this monitoring application in order for it to send an email.The following is an example of the monitor.properties file:The monitor logging information is stored in the directory and file specified by the property element of the EPRS_HOME/monitor/etc/logback.xml file as shown by the following:This logging information is also displayed on the terminal from which the runMonitor.sh -start command is invoked as described in the next step.Step 3: Using the root user account or any Linux user account that has read and execute permissions on the EPRS_HOME/monitor/bin directory, start the monitoring:cd EPRS_HOME/monitor/binNote: Throughout the following examples, the text between the square brackets [c.e.n.m.m.JolokiaMonitorThread] has been deleted so the metrics can be more easily readable in this document.Step 4: If a critical problem occurs, the monitoring output appears as follows:The monitor.properties file is configured as shown by the following:Step 1: In the monitor.properties file located in the directory set the following parameters in EPRS_HOME/monitor/etc:ngen.total.nodes=number_of_replication_servers
ngen.jolokia.host.node.n=replication_server_host_ip
ngen.jolokia.port.node.n=8778ngen.sender.email=alert_sender_email_address
ngen.sender.email.encrypted.password=encrypted_sender_passwd
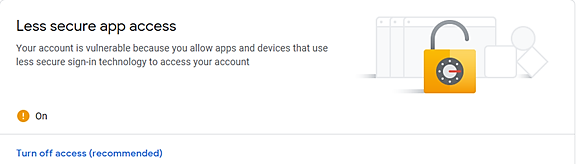
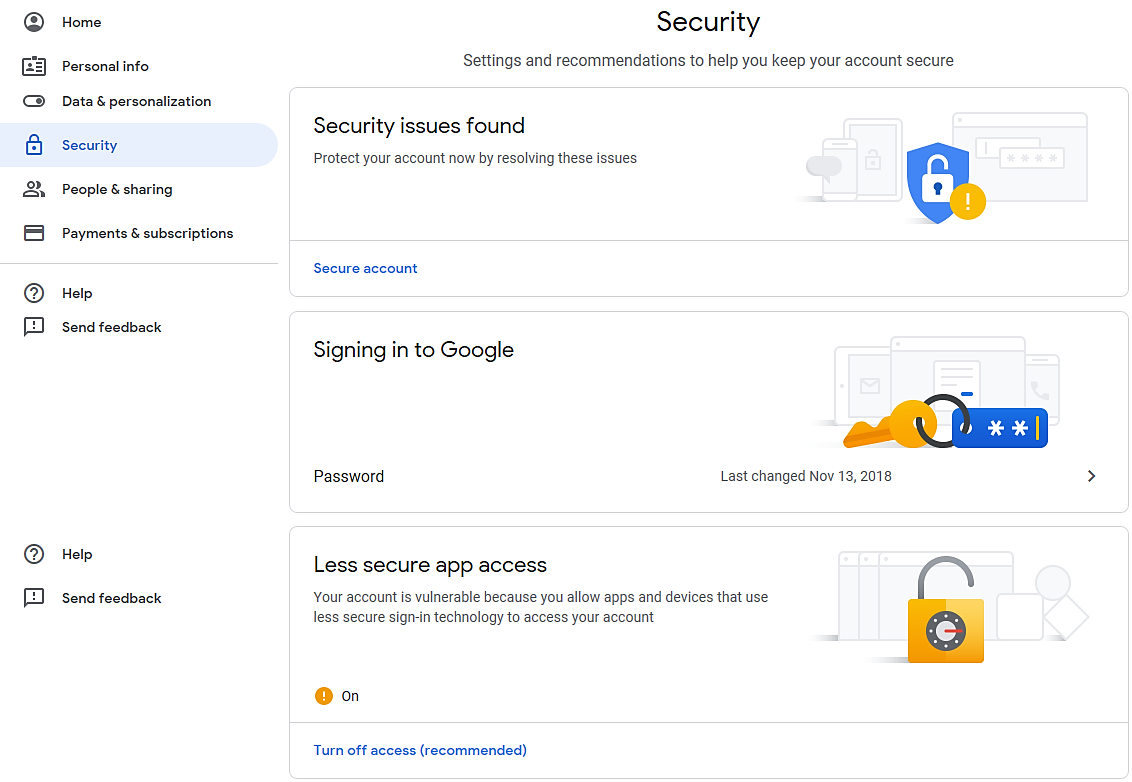
ngen.recipient.email=recipient_email_addressStep 2: Encrypt the sender email password for ngen.sender.email.encrypted.password with the encrypt command executed with the runMonitor.sh script in the EPRS_HOME/monitor/bin directory:./runMonitor.sh –encrypt –input unencrypted_password_file–output encrypted_password_fileStep 3: Sign in to your Gmail account.Step 4: Go to Settings > Accounts > Google Account settings > security.Step 5: Enable Less secure app access.Step 6: Run the ./runMonitor.sh command to send an email.
• Conflict Detection, Handling, and Recovery. Primary key uniqueness and foreign key constraint violations (see Section 6.1)
• AWS Cloud Computing. AWS instance configuration for a replication network (see Section 6.2)
•
• 6.1.1 Primary Key Uniqueness
•
• Log the conflict, skip the replication of the conflicting row, and continue replication of the remaining changed data (see Section 6.1.1.2).
• Log the conflict and periodically retry by a certain time interval, the transaction containing the conflicting row (see Section 6.1.1.3).Usage of the stop, skip or retry action is determined by the setting of the following parameter in the application.properties file located in the EPRS_HOME/server/etc directory located on the host of the replication server to which the database that may contain the conflict has been added:The default policy is STOP.The following parameter defines the retry period in seconds when the RETRY policy has been set:unique.conflict.retry.period=number_of_secondsThe default retry period is 60 seconds. The following shows these parameters in the application.properties file:The conflict logging information is stored in the directory and file specified by the property element of the EPRS_HOME/server/etc/logback.xml file as shown by the following:This logging information is also displayed by the output of the runServer.sh command used to start the replication server.Note that this conflict logging information is contained only in the EPRS_HOME/server/etc directory of the host machine running the replication server whose added database has encountered the conflict.6.1.1.1 Stop Conflict Resolution PolicyNote: For a three-node cluster the replication stops only for the target node that has any conflicts. In case of a database without any conflicts replication will be active on it.The started replication server is joined to the replication network, the consumer database is added to this remoteService replication server, and the publication joined on the consumer database:The following insert of a row in the consumer database will cause a subsequent uniqueness conflict. Since this database was not given write permission to the publication with the -nodetype RW option in the joinpub command, this insert is not streamed to the producer database.Now the following inserts in the producer database are attempted to stream to the consumer, but the uniqueness conflict on the deptno primary key value of 50 results in the cause of the conflict.The listconflicts command displays the conflicting information.The log file from the remoteService replication server contains the following warning regarding the uniqueness conflict:6.1.1.2 Skip Conflict Resolution PolicyAs streaming continues, the change data capture continues and is replicated to the target databases.The started replication server is joined to the replication network, the consumer database is added to this remoteService replication server, and the publication joined on the consumer database:The following insert of a row in the consumer database will cause a subsequent uniqueness conflict. Since this database was not given write permission to the publication with the -nodetype RW option in the joinpub command, this insert is not streamed to the producer database.Now the following inserts in the producer database are streamed and applied to the consumer database except for the row affected by the uniqueness conflict on the deptno primary key value of 50.All of these newly inserted rows are applied to the consumer database except for the row with deptno of 50 as the original conflicting row manually inserted into the consumer database is still present.The listconflicts command displays the conflicting information.The log file from the remoteService replication server contains the following warning regarding the uniqueness conflict:6.1.1.3 Retry Conflict Resolution Policyunique.conflict.retry.period=number_of_secondsNote: For a three-node cluster the replication stops only for the target node that has any conflicts. In case of a database without any conflicts replication will be active on it.The started replication server is joined to the replication network, the consumer database is added to this remoteService replication server, and the publication joined on the consumer database:The following insert of a row in the consumer database will cause a subsequent uniqueness conflict. Since this database was not given write permission to the publication with the -nodetype RW option in the joinpub command, this insert is not streamed to the producer database.None of these inserts are applied to the consumer database since there is now a conflict on the row with primary key value 50. The transaction is retried every 60 seconds but does not occur on the consumer database.The listconflicts command displays the conflicting information.The log file from the remoteService replication server contains the following warning regarding the uniqueness conflict:6.1.2 Foreign Key ConstraintThis policy is a repeated retry of the stream for every time interval as set by the following parameter in the application.properties file located in the EPRS_HOME/server/etc directory located on the host of the replication server to which the database that may contain the conflict has been added:foreign.key.conflict.retry.period=number_of_secondsThe default number_of_seconds setting is 10 seconds.The producer and consumer databases, node1 and node2, contain the public.dept and public.emp table definitions where the dept table is the parent while the emp table is the child:For every row in the emp table, the deptno value must have a corresponding, existing row in the dept table with the identical deptno primary key value.For the consumer database node2, there are no rows in either table.The started replication server is joined to the replication network, the consumer database is added to this remoteService replication server, and the publication joined on the consumer database:The consumer database now has the same rows as the producer database, but then a row in the dept table is deleted. Since this database was not given write permission to the publication with the -nodetype RW option in the joinpub command, this deletion is not streamed to the producer database.Since there is now a foreign key violation since the parent dept row with primary key value of 30 does not exist, the replication of the emp rows into node2 does not occur.The listconflicts command displays the conflicting information. Note that the same SQL command resulting in the foreign key violation is repeatedly displayed.At some later point, the missing row is manually reinserted into the dept table to correct the violation, and then the replication of the emp rows occurs after a 10 second interval.The log file from the remoteService replication server contains the following warning regarding the foreign key constraint violation:
•
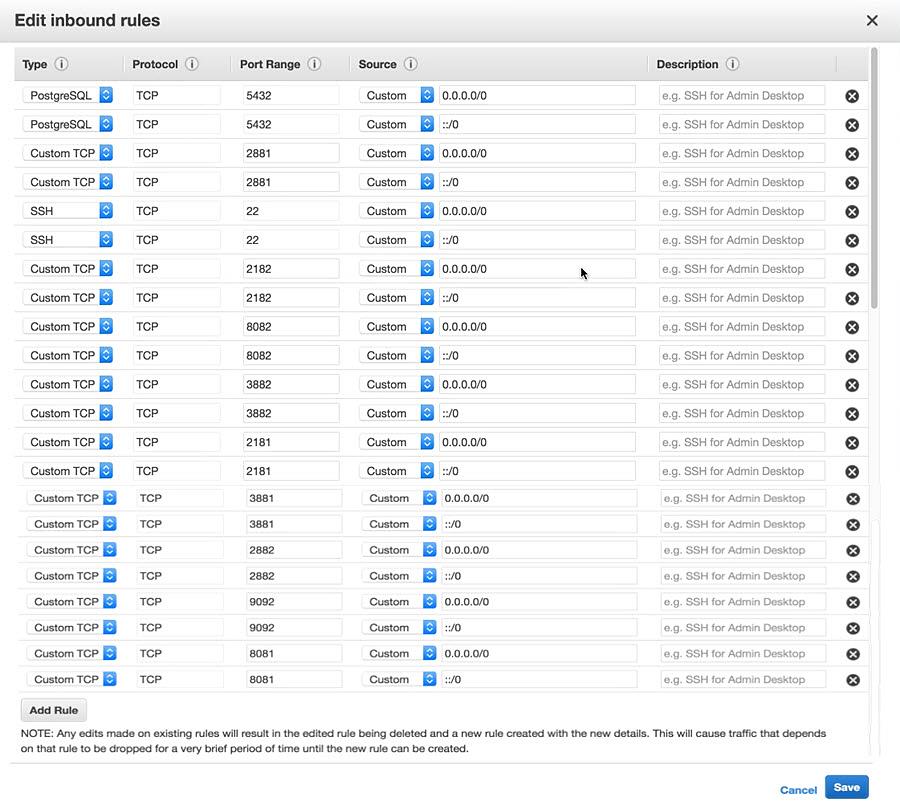
• 6.2.1 Security Group AccessA security group acts as a virtual firewall for your instance to control inbound and outbound traffic. For each security group, you add rules that control the inbound traffic to instances. For information about security groups, see the following website:The following table lists the required port numbers along with their relationship to the properties files of the replication server. (The required port list has a fewer ports than the list of ports shown in Figure 6‑1.)
6.2.2 Firewall Port AdditionsWhen referencing host locations within RepCLI commands with options such as -host or -dbhost, only certain references may be used.The following example shows the RepCLI commands for the creation of a replication node, which needs access across regions. Wherever a host needs to be specified, use the public DNS. Do not use a public or private IP address. For example, use the public DNS: ec2-54-234-249-50.compute-1.amazonaws.com. Do not use the public IP: 54-234-249-50.
The two databases being compared are referred to as the source database and the target database. The source database can be of type EnterpriseDB. The target database must also be of type EnterpriseDB.Note: The Data Validator does not validate columns having the following data types. Tables containing one or more columns of these types will only be partially validated.
•
•
•
•
•
•
•
• Note: Make sure that the data streaming between the source and target EDB Postgres Replication Server tables has been completed before using the Data Validator in EDB Postgres Replication Server (single-master or multi-master). If streaming is still in progress, it is possible that the Data Validator will show differences in tables.
Step 1: When you install the EDB Postgres Replication Server, the components for the Data Validator are installed as well.
runValidation.sh (Linux) Note: EPRS_HOME is the directory where EDB Postgres Replication Server is installed. This may or may not be the same as the Postgres home directory depending upon how EDB Postgres Replication Server is installed. The general format of the EPRS_HOME directory is /usr/edb/rs-x.x where x.x is the EDB Replication Server version number, which is initially 7.0.Step 3: Edit the datavalidator.properties file located in the EPRS_HOME/ datavalidator/etc directory and specify the connection information for the source and target databases you want to compare.Any of these parameters can be overridden by an option when you invoke the Data Validator script. See Section 7.2 for additional information on invoking the Data Validator.The following are the parameters in the datavalidator.properties file.
The following is the initial content of the datavalidator.properties file after installation:Step 4: Determine the location for the Data Validator logs directory.The Data Validator generates a log file with a name formatted as datavalidator_yymmdd-hhmiss.log in the logs directory for each run.If there are row differences between the source and target tables, a file with a name formatted as datavalidator_yymmdd-hhmiss.diff is also generated that contains the output of the errors in diff format. Use a graphical diff tool like Kompare to view this file to highlight the specific differences.Data Validator attempts to create a subdirectory named logs within the EPRS_HOME/ datavalidator/bin directory the first time you invoke the Data Validator without the -ld option. If you do not invoke the Data Validator as the root account, it is likely that the run will fail as it attempts to create subdirectory logs in the EPRS_HOME/ datavalidator/bin directory where typically only the root account has this privilege.
• Run the Data Validator as the root account. This enables the Data Validator to create the logs subdirectory within the EPRS_HOME/datavalidator/bin directory, and then to create the log and diff files in the logs subdirectory.
• Create the EPRS_HOME/datavalidator/bin/logs directory structure before running the Data Validator. Modify the permissions on directory EPRS_HOME/datavalidator/bin/logs so the operating system account you use to run the Data Validator has the privilege to create files in the directory.
• Use the -ld log_directory_path option to allow the Data Validator to create the log and diff files in the specified directory location log_directory_path. Be sure the operating system account you use to run the Data Validator has the proper privileges to either create the lowest level subdirectory specified by log_directory_path if it does not already exist or to create files within the specified directory if the full directory path already does exist.
The current working directory from which you invoke the Data Validator script runValidation.sh must be the bin subdirectory containing the script (that is, EPRS_HOME/datavalidator/bin)../runValidation.sh { –ss | --source-schema } schema_name[ option ] ...schema_name is the name of the schema in the source database containing the tables to be validated. The choices for option are listed later in this section within the Options subsection../runValidation.sh –ss schema[ -ts schema ][ -ld log_directory_path ][ -sdbms database_type ][ -sh host ][ -sp port ][ -sdb dbname ][ -su user ][ -spw password ][ -tdbms database_type ][ -th host ][ -tp port ][ -tdb dbname ][ -tu user ][ -tpw password ][ -bs row_count ][ -fs row_count ]For clarity, the preceding syntax diagram shows only the single-character form of the option. The Options subsection lists both the single-character and multi-character forms of the options.Specification of any database connection option (-sdbms through -tpw listed in the preceding syntax diagram) overrides the corresponding parameter in the datavalidator.properties file. See Section 7.1 for information on the datavalidator.properties file.The tables within the source schema that are to be included for comparison. If omitted, all tables within the source schema are compared against tables in the target schema with the exception of those tables excluded from comparison using the -et option. Note: There must be no white space between the comma and table names.The tables within the source schema that are to be excluded from the comparison. If omitted, only those tables specified with the -it option are included for comparison. If both the -it and -et options are omitted, all source schema tables are included for comparison. Note: There must be no white space between the comma and table names.-srs, --skip-rowsonlyin-source { true | false }When true is specified, the logging of differences for rows that exist only in the source database table are skipped. The default is false.-srt, --skip-rowsonlyin-target { true | false }When true is specified, the logging of differences for rows that exist only in the target database table are skipped. The default is false.-srb, --skip-rowsin-both { true | false }When true is specified, the logging of differences for rows that exist both in the source and target database tables with the same primary key, but with different non-primary key values are skipped. The default is false.Directory path to where the Data Validator log and diff files are to be created and stored. If log_directory_path does not exist, Data Validator attempts to create it. If a full directory path is not specified log_directory_path is created or assumed to be located relative to the EPRS_HOME/datavalidator/ bin subdirectory where the runValidation.sh script is invoked. (That is, the logs directory is EPRS_HOME/datavalidator/bin/log_directory_path.) Be sure the operating system account used to invoke the runValidation.sh script has the privileges to create the directory if it does not already exist, or to create files in the specified directory if it does already exist. If omitted, the default is the EPRS_HOME/bin/logs directory.-ds, --display-summary { true | false }Specify true to display only the Data Validator summary. This omits the source and target database connection information as well as the detailed breakdown of the results by a source database table. Specify false to display all of the Data Validator results. The type and amount of information that is displayed at the command line console when the Data Validator is invoked is the same information that is also stored in the log file for that run. If omitted, the default is false (that is, all of the Data Validator results is displayed).The type of the source database server. Supported types are oracle, enterprisedb, sqlserver, sybase, and mysql.The port number on which the source database server is listening for connections.The port number on which the target database server is listening for connections.The -bs option specifies the number of rows to group in a batch to be used for comparison across the source and target database tables. For example, if a table contains 1000 rows, then a -bs setting of 100 requires 10 batch iterations to complete the comparison across the source and target databases. The Data Validator reads 100 rows, both from the source and target tables, and adds them in source and target buffers. The validation thread then reads the 100 rows from the source and target buffers and performs the comparison. It will then move to read and prepare the next 100 rows for comparison and so on. Note that the actual database round trips required to bring in 100 rows from the database depends on the -fs option for the fetch size. For example, an -fs setting of 100 needs just one round trip whereas an -fs setting of 10 requires 10 database round trips.Performing data validation for tables that are quite large in size may cause the Data Validator to terminate with an out of heap space error when using the default fetch size of 5000 rows. Use the -fs option to specify a smaller fetch size to help avoid the out of heap space issue. The result set iteration will bring in as many rows as represented by the row_count value in a single database round trip.The following lists the tables in schema EDB along with the content of tables DEPT and EMP in the source database:The following lists the tables in the schema public along with the content of tables dept and emp in the Advanced Server edb target database:
• The Source DEPT table contains one extra row with DEPTNO 50 that does not exist in the target Advanced Server dept table.
• The rows in the EMP table with EMPNO values 9001 and 9002 have column values that differ between the Source and target Advanced Server tables
• In this example, the JOBHIST table contains identical rows for both the source and target Advanced Server tables.The content of the datavalidator.properties file is set as follows:The Data Validator log files are created in directory /EPRS_home/datavalidator/bin/logs/ as specified with the -ld option. The operating system account used to invoke the runValidation.sh script has write access to the EPRS_home directory so the Data Validator can create the /EPRS_home/datavalidator/bin/logs subdirectory.
• There is one error in the DEPT table (the missing row).
• There are two errors in the EMP table (the two rows with mismatching column values)
• The JOBHIST table contains no errors.
A control replication origin will be auto-created as part of the Publication database registration process. The origin will be named after the database name that is _ngx_DBNAME for example _ngx_inventory. The control replication origin will be removed once the Publication database is unregistered.Note: In case the replication origin fails to create or remove, there will not be any impact on the relevant adddb or removedb operation and only a warning message will be logged.Step 1: Open a SQL terminal (for example psql) and start the user transaction.Step 2: Setup replication origin session for the current transaction, before performing any other (query) operation.Step 3: Make the changes in the application by running user-specific queries (intended for bulk change).Add multiple rows in the table exclude_user_test which is also a part of the Publication. Simulate bulk changes (5K) that are to be skipped from replication. This table will also be part of EPRS7 cluster Publication.Step 4: Reset replication origin.
9.1.1 RepCLI Error Messages
1. Error: Set admin password first before execution of other command(s).Cause: The admin password is not set before adding a database to the replication server.Workaround: Set the admin password before adding a database to the replication server.
2. Cause: Incorrect username or password given.Workaround: Provide the correct username or password.
3. Causes: This error can occur in the following scenariosWorkaround: Provide the correct encrypted password. Provide the correct IP address (IP address of the database host). Check if the database server is running or not. Encrypt the database password using encrypt command and use the same while adding the database.
4. Error: Failed to add database with id db1. WARNING: Connection error: FATAL: no pg_hba.conf entry for host "x.x.x.x", user "xxx", database "database_Id", SSL off.Cause: The IP address for the database host is not present in pg_hba.conf file.Workaround: Add the IP address of the database host in the pg_hba.conf file located at var/lib/edb/asx/. For a cluster the pg_hba.conf file is located at /var/lib/edb/asx/clusterx.asx is the EDB Advanced Version andclusterx is the cluster on which the database is running, for example, cluster1 or cluster2 and so on.
5. Cause: The database does not exist or an incorrect database id is provided.Workaround: Provide the correct database id or create the database with the create database command.
6. Cause: Incorrect servername is provided or the server does not exist in the network.Workaround: Provide the correct servername or register the server in the network with the joinnetwork command.
7. Cause: Publication does not exist or an incorrect publication name is given.Workaround: Provide the correct publication name or create a publication.
8. Cause: Incorrect database_Id provided or the database does not exist.
9. Error: Snapshot cannot be performed, Publication database id database_Id is same as the Consumer database id database_Id.Cause: The publication database is the same as the consumer database.Workaround: The publication and consumer database should be different.
10. Error: One or more Subscriptions are associated with Publication publication_name. Please un-subscribe (via leavepub command) before removing the Publication.Workaround: Run leavepub command for all the subscription databases before removing the publication.Error: Cannot register database because it is already registered by a publication service.Cause: Database can be registered with the replication cluster only once.Workaround: Database is already registered. You can create a publication with required tables with the createpub command.Error: Exception in thread "main" javax.ws.rs.ProcessingException: java.net.ConnectException: Connection refused (Connection refusedCause: Occurs whenever a connection cannot be made to the EDB Replication Server.Workaround: Check that you have entered the correct host IP address and port number of the server. Check that the server is running. Check that in the pg_hba.conf file, the hostname is mapped to the correct network IP address, which matches the IP address returned by the Linux ifconfig command. Check in the pg_hba.conf file if the publication server has access to the database.Error: Connection refused. Check that the hostname and port are correct and that the postmaster is accepting TCP/IP connections.Cause: Occurs when attempting to save a publication database definition. The publication server cannot connect to the database server network location.Workaround: Verify that the correct IP address and port for the database server are given. Verify that the database server is running and is accessible from the host running the publication server.Error: Could not connect to the database server. Reason: FATAL: number of requested standby connections exceeds max_wal_senders (currently n)Cause: Occurs when attempting a snapshot replication from a publication database which is by default configured with the log-based method of synchronization replication (that is, WAL based logical replication), and the additional concurrent connection for logical replication exceeds the current setting, n, of the max_wal_senders configuration parameter in the postgresql.conf file.Workaround: Increase the value of max_wal_senders in the postgresql.conf file for the database server running the publication database. Restart the database server containing the publication database.asx is the EDB Advanced Version andclusterx is the cluster on which the database is running, for example, cluster1 or cluster2 and so on.Error: Currently no publication exists on the publication server. Please create at least one publication on the server and then retry.Cause: If you join a publication when there are no publications on the specified publication server, then this error message is thrown.Error: Database cannot be removed. Reason: Publication database connection cannot be removed as one or more publications are defined against it.Cause: There are existing publications on the database.Workaround: Make sure all the publications pertaining to the publication database have been removed. Use leavepub command to leave the publication and removepub command to remove the publication.Error: Database connection cannot be added. FATAL: no pg_hba.conf entry for host "xxx.xxx.xx.xxx", user "user_name", database "database_name", SSL offWorkaround: Verify that the database host IP address, port number, database user name, password, and database identifier are correct. Verify there is an entry in the pg_hba.conf file permitting access to the database by the given user name originating from the IP address where the EDB Replication Server is running.Cause: Occurs when attempting to define a filter rule on a column with a binary data type in a publication table. Filter rules are not permitted on such columns.Workaround: Do not add filters on binary data type columns.Cause: When adding a filter rule on a publication table, the same filter name or the same filter clause (WHERE clause) cannot be used more than once on a given table.Workaround: Modify the duplicate filter name or filter clause so it is unique for the table.Error: The triggers creation failed for one or more publication tables. Make sure the database is in valid state and user is granted the required privileges.Cause: Either the user does not have the trigger creation privilege or there is a database server problem. The database server message is displayed as part of the error.Error: Problem occurred in publish process. Reason: Connection refused. Check that the hostname and port are correct and that the postmaster is accepting TCP/IP connections.Resolution: Occurs when attempting synchronization replication and the controller database is not accessible by the publication server.Workaround: Verify that the correct IP address and the port have been defined in the publication database definition of the controller database. Verify that the database server is running and is accessible from the host running the publication server.9.1.13 Unable to Create PublicationYou can get an error that the Publication cannot be created for the following scenarios:
1. Error: Publication cannot be created. Publication publication_name already exists on the publisher server. Please choose a different name and then proceed.Cause: Publication names must be unique within a publication server.Workaround: Enter a different publication name.
2. Error: Publication cannot be created. Table schema.table_name replica identity is set to replica_identity_setting. To define a Filter, the table replica identity should be set to FULL.Cause: Occurs when a table filter is attempted to be defined on a publication table used in a log-based replication system.Workaround: Use the ALTER TABLE statement to change REPLICA IDENTITY to FULL.
3. Error: Publication cannot be created. Table table_name does not contain a primary key. Transactional replication is not supported for a non-pk table.Cause: All tables used for synchronization replication must have primary keys.Workaround: Create a primary key on the table.Error: The publication schema cannot be created. Reason: ERROR: Permission denied for database db_name.Cause: Occurs when attempting to create the publication database definition and the specified publication database user does not have the privilege to create a schema in database db_name.Workaround: Grant the CREATE privilege on the database to the publication database user.Error: A replication slot is not available on the target database server. Please configure the max_replication_slots GUC on the database server.Cause: Occurs when attempting to add a publication database definition with the log-based method of synchronization replication, and the max_replication_slots configuration parameter in the postgresql.conf file is not set to a large enough value to accommodate the additional database.Workaround: Increase the value of the max_replication_slots parameter and restart the database server.Error: main" javax.ws.rs.ProcessingException: java.net.ConnectException: Connection refused (Connection refused)Cause: EDB Replication Server is not running.
5. ngen.server.host=x.x.x.xNote: Make sure that the following directories are present after installing EDB Replication Server.
Step 2: Verify that the EDB Replication Server is running.Step 3: For the master definition node in a multi-master replication system, verify that the publication database user is a superuser and has the privilege to modify pg_catalog tables.Step 4: Verify that the network IP address returned by the ifconfig command matches the IP address set for ngen.server.host in application.properties.Step 5: Verify that the ports are not preoccupied. If the ports are preoccupied change the ports in application.properties and server.properties. Refer to section 6.2.2 for more details.Step 6: Verify that sufficient free disk space is available otherwise EDB Replication Server will run into problems while installing and configuring.Step 7: If you have configured a firewall make sure that the firewall settings allow access to the ports used by EDB Replication Server in a cluster setup with EDB Replication Servers running on different machines.Step 8: For a geographically distributed network make sure to substantially increase the value of the parameter zookeeper.session.timeouts in the server.properties file located at /usr/edb/rs-x.0/server/etc. Otherwise, there would be frequent outages between the broker and the zookeeper. The default value is 6000.
9.4.1 Java Runtime ErrorsIf you run into errors regarding the Java Runtime Environment such as the Java program cannot be found or Java heap space errors, check the parameters set in the EDB Replication Server startup configuration file ngxReplicationServer-7.config file located at /usr/edb/rs-x.0/common/etc/sysconfigThe following is an example of the content of the EDB Replication Server startup configuration file:9.4.1.1 Starting the Publication ServerStep 2: Check the log file of the database server running the controller database for errors.
• Make sure to explicitly define a primary key for the newly added partition table. If you add a partition later using the Alter Table command then make sure to add a primary key constraint explicitly.Step 1: Add a new partition to an existing publication partition table.Example: The following is an example of an MMR with three nodes cluster node1, node2 and, node3. In this case partition by range is used with subpartition as list.
4. Create publication on one of the nodes and then use joinpub command for the other nodes.
6. Check that the events_queue table is present across all the nodes:Step 2: Insert or update the data in the partitioned table. Check if the changes in the partition table replicate to the target database table(s) as well.Step 3: Verify that after adding the database the following control objects are created under _ngx_rep_cluster control schema in the given publication database.Step 4: Verify that after removing the database the following control objects are removed from _ngx_rep_cluster control schema in the given publication database.