1.1 What’s New
7.2 Import Options
7.8 Example
8.2.2 Error Loading Data into Table: TABLE_NAME
8.2.3 Error Creating Constraint CONS_NAME_FK
9.1 Overview
9.2.1 Class 02 - Warning
9.2.9 Class 17 - Data Loading
1.1 What’s New
In the following descriptions a term refers to any word or group of words that are language keywords, user-supplied values, literals, etc. A term’s exact meaning depends upon the context in which it is used.
Note: EnterpriseDB does not support the use of Migration Toolkit with Oracle Real Application Clusters (RAC) and Oracle Exadata; the aforementioned Oracle products have not been evaluated nor certified with this EnterpriseDB product.
We recommend following the methodology detailed in Section 2.1, The Migration Process.
To convert a client application to use a Postgres database, you must modify the connection properties to specify the new target database. In the case of a Java application, change the JDBC driver name (Class.forName) and JDBC URL.Most Linux and Windows systems include graphical tools that allow you to create and edit ODBC data sources. After installing ODBC, check the Administrative Tools menu for a link to the ODBC Data Source Administrator. Click the Add button to start the Create New Data Source wizard; complete the dialogs to define the new target data source.The application will contain a call to SQLConnect (or possibly SQLDriverConnect); edit the invocation to change the data source name. In the following example, the data source is named "OracleDSN":To connect to an instance of Postgres defined in a data source named "PostgresDSN", change the data source name:After establishing a connection between the application and the server, test the application to find any compatibility problems between the application and the migrated schema. In most cases, a simple change will resolve any incompatibility that the application encounters. In cases where a feature is not supported, use a workaround or third party tool to provide the functionality required by the application. See Section 8, Migration Issues, for information about some common problems and their workarounds.
You can use an RPM package or Stack Builder to install Migration Toolkit. Stack Builder is distributed with both Advanced Server and the PostgreSQL one-click installer, available from EnterpriseDB. For more information about performing an installation with Stack Builder, see Section 4.2Before installing Migration Toolkit, you must first install Java (version 1.7.0 or later). Free downloads of Java installers and installation instructions are available at:
You can use an RPM package to install Migration Toolkit on a 64-bit Linux host. For information about configuring yum to install packages from the enterprisedb-tools repository, please see the EDB Postgres Advanced Server Installation Guide, available at:After using an RPM package to install Migration Toolkit, you must configure the Installation. Please note that you must install a Java environment before invoking Migration Toolkit.By default, the pg_hba.conf file for the RPM installer enforces IDENT authentication for remote clients. Before invoking Migration Toolkit, you must either modify the pg_hba.conf file, changing the authentication method to a form other than IDENT (and restarting the server), or perform the following steps to ensure that an IDENT server is accessible:
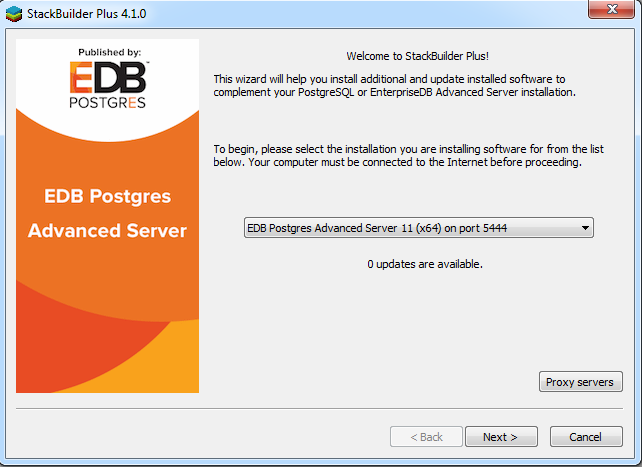
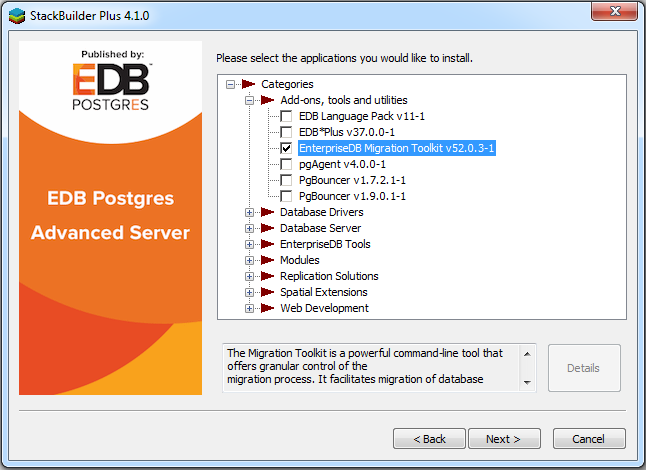
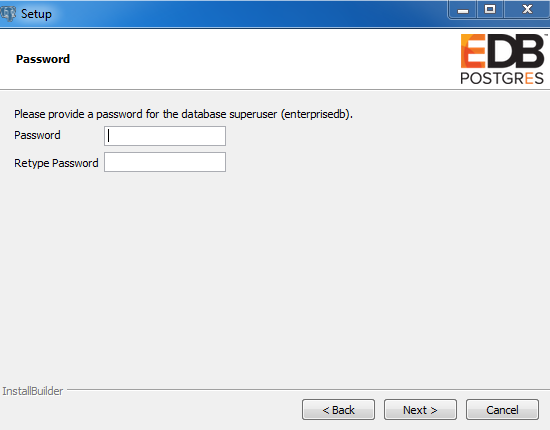
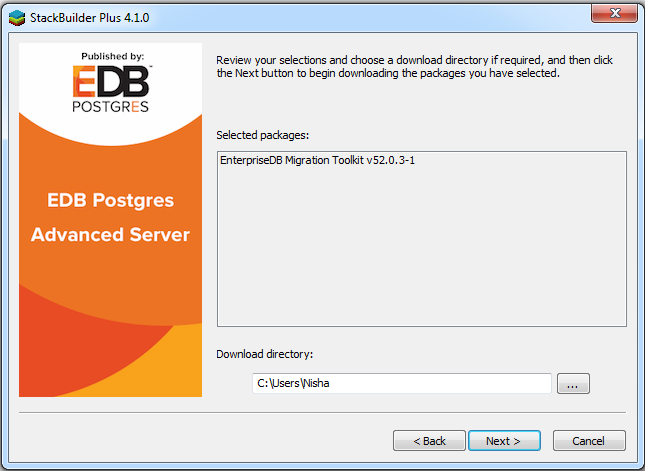
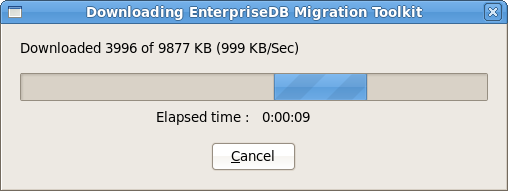
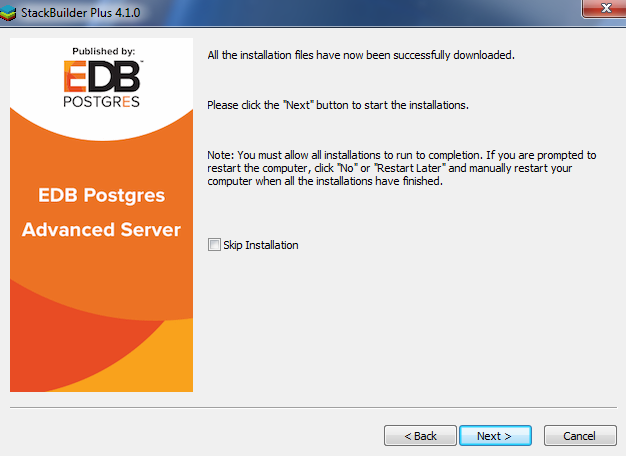
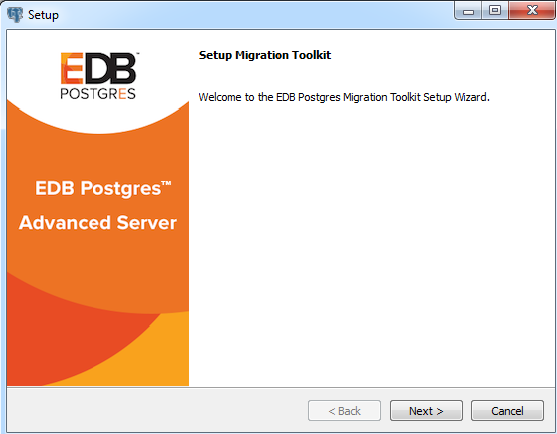
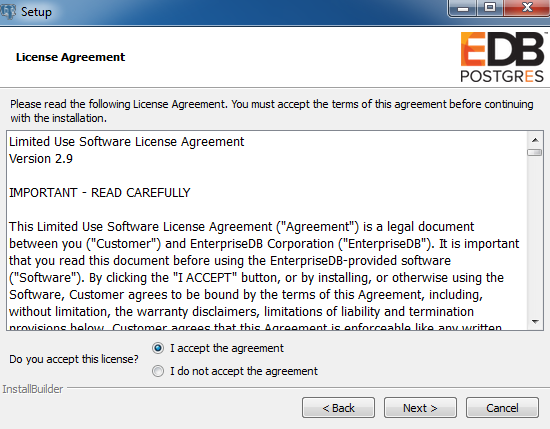
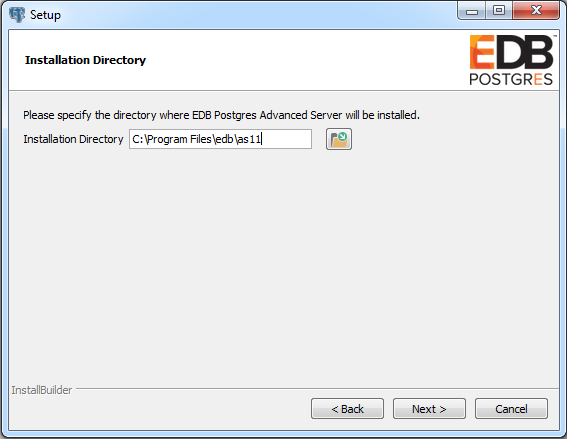
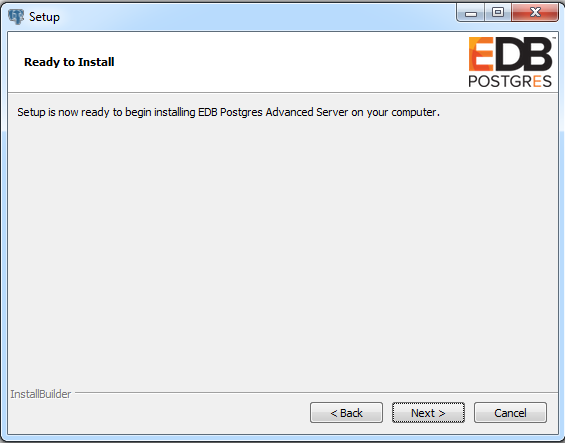
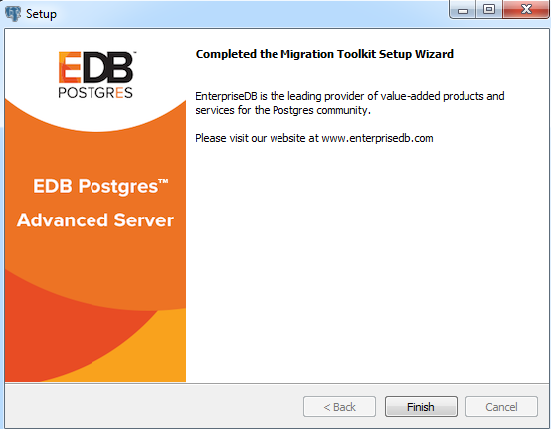
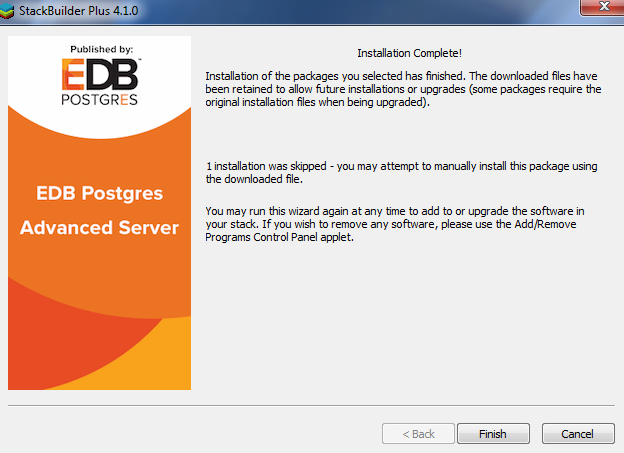
Please Note: This guide uses the term Stack Builder to refer to either StackBuilder Plus (distributed with Advanced Server) or Stack Builder (distributed with the PostgreSQL one-click installer from EnterpriseDB).Please note that you must have a Java JVM (version 1.7.0 or later) in place before Stack Builder can perform a Migration Toolkit installation. Free downloads of Java installers and installation instructions are available at:The Java executable must be in your search path (%PATH% on Windows, $PATH on Linux/Unix). Use the following commands to set the search path (substituting the name of the directory that holds the Java executable for javadir):After setting the search path, you can use the Stack Builder installation wizard to install Migration Toolkit into either Advanced Server or PostgreSQL.To launch StackBuilder Plus from an existing Advanced Server installation, navigate through the Start (or Applications) menu to the EDB Postgres menu; open the EDB Add-ons menu, and select the StackBuilder Plus menu option.Launching Stack Builder from PostgreSQLTo launch Stack Builder from a PostgreSQL installation, navigate through the Start (or Applications) menu to the PostgreSQL menu, and select the Application StackBuilder Plus menu option.Use the drop-down listbox to select the target server installation from the list of available servers. If your network requires you to use a proxy server to access the Internet, use the Proxy servers button to open the Proxy servers dialog and specify a proxy server; if you do not need to use a proxy server, click Next to open the application selection window.If you are using StackBuilder Plus to add Migration Toolkit to your Advanced Server installation, expand the Add-ons, tools and utilities node of the tree control, and check the box next to EnterpriseDB Migration Toolkit (as shown in Figure 4.3). Click Next to continue.If you are using Stack Builder to add Migration Toolkit to your PostgreSQL installation, expand the EnterpriseDB Tools node of the tree control (located under the Registration-required and trial products node), and check the box next to Migration Toolkit. Click Next to continue.After specifying a configuration mode, click Next to continue to the Password window (shown in Figure 3.7).Advanced Server uses the password specified on the Password window for the database superuser. The specified password must conform to any security policies existing on the Advanced Server host.Confirm that Migration Toolkit is included in the Selected Packages list and that the Download directory field contains an acceptable download location (as shown in Figure 4.5). Click Next to start the Migration Toolkit download (see Figure 4.6).When the download completes, Stack Builder confirms that the installation files have been successfully downloaded (Figure 4.7). Choose Next to open the Migration Toolkit installation wizard.When prompted by the Migration Toolkit installation wizard, specify a language for the installation (see Figure 4.8) and click OK to continue.Carefully review the license agreement (as shown in Figure 4.7) before highlighting the appropriate radio button; click Next to continue to the User Authentication window (shown in Figure 4.10).By default, Migration Toolkit will be installed in the mtk directory; accept the default installation directory as displayed (see Figure 4.12), or modify the directory, and click Next to continue.The installation wizard confirms that the Setup program is ready to install Migration Toolkit (as shown in Figure 4.13); click Next to start the installation.A dialog confirms that the Migration Toolkit installation is complete (see Figure 4.14); click Finish to exit the Migration Toolkit installer.When Stack Builder finalizes installation of the last selected component, it displays the Installation Completed window (shown in Figure 4.15). Click Finish to close Stack Builder.
Before invoking Migration Toolkit, you must download and install a freely available source-specific driver. To download a driver, or for a link to a vendor download site, visit the Third Party JDBC Drivers section of the Advanced Downloads page at the EnterpriseDB website:After downloading the source-specific driver, move the driver file into the JAVA_HOME/jre/lib/ext directory.
Migration Toolkit uses the configuration and connection information stored in the toolkit.properties file during the migration process to identify and connect to the source and target databases. On Linux, the toolkit.properties file is located in:A sample toolkit.properties file is shown in Figure 5.1.Figure 5.1 - A typical toolkit.properties file.Before executing Migration Toolkit commands, modify the toolkit.properties file with the editor of your choice. Update the file to include the following information:
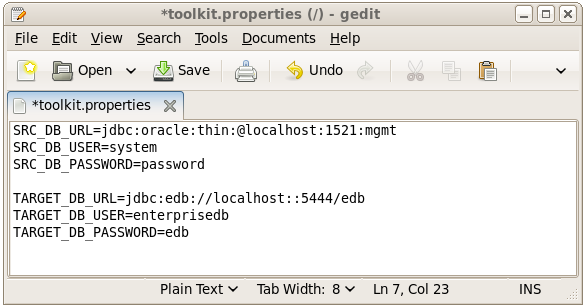
Migration Toolkit facilitates migration from an Oracle database to a PostgreSQL or Advanced Server database. When migrating from Oracle, you must specify connection specifications for the Oracle source database in the toolkit.properties file. The connection information must include:When migrating from an Oracle database, SRC_DB_URL should contain a JDBC URL, specified in one of two forms. The first form is:The protocol is always jdbc.The sub-protocol is always oracle.SRC_DB_USER should specify the name of a privileged Oracle user. Note: The Oracle user should have DBA privilege to migrate objects from Oracle to Advanced Server. The DBA privilege can be granted to the Oracle user with the Oracle GRANT DBA TO user command to ensure all of the desired database objects are migrated.SRC_DB_PASSWORD must contain the password of the specified user.
Migration Toolkit facilitates migration from a MySQL database to an Advanced Server or PostgreSQL database. When migrating from MySQL, you must specify connection specifications for the MySQL source database in the toolkit.properties file. The connection information must include:When migrating from MySQL, SRC_DB_URL takes the form of a JDBC URL. For example:The protocol is always jdbc.The sub-protocol is always mysql.SRC_DB_USER should specify the name of a privileged MySQL user.SRC_DB_PASSWORD must contain the password of the specified user.
Migration Toolkit facilitates migration from a Sybase database to an Advanced Server database. When migrating from Sybase, you must specify connection specifications for the Sybase source database in the toolkit.properties file. The connection information must include:When migrating from Sybase, SRC_DB_URL takes the form of a JTDS URL. For example:The protocol is always jdbc.The server type is always sybase.SRC_DB_USER should specify the name of a privileged Sybase user.SRC_DB_PASSWORD must contain the password of the specified user.
After installing Migration Toolkit, and specifying connection properties for the source and target databases in the toolkit.properties file, Migration Toolkit is ready to perform migrations.The Migration Toolkit executable is named runMTK.sh on Linux systems and runMTK.bat on Windows systems. On a Linux system, the executable is located in:Note: If the following error appears upon invoking the Migration Toolkit, check the file permissions of the toolkit.properties file.The operating system user account running the Migration Toolkit must be the owner of the toolkit.properties file with a minimum of read permission on the file. In addition, there must be no permissions of any kind for group and other users. The following is an example of the recommended file permissions where user enterprisedb is running the Migration Toolkit.However, the Migration Toolkit does not support importation of NULL character values (embedded binary zeros 0x00) with the JDBC connection protocol. If you are importing data that includes the NULL character, use the -replaceNullChar option to replace the NULL character with a single, non-NULL, replacement character.Once the data has been migrated, use a SQL statement to replace the character specified by -replaceNullChar with binary zeros.
Unless specified in the command line, Migration Toolkit expects the source database to be Oracle and the target database to be Advanced Server. To migrate a complete schema on Linux, navigate to the executable and invoke the following command:$ ./runMTK.sh schema_nameschema_name is the name of the schema within the source database (specified in the toolkit.properties file) that you wish to migrate. You must include at least one schema_name.Note: When the default database user of a migrated schema is automatically migrated, the custom profile of the default database user is also migrated if such a custom profile exists. A custom profile is a user-created profile. For example, custom profiles exclude Oracle profiles DEFAULT and MONITORING_PROFILE.
-sourcedbtype source_typesource_type specifies the server type of the source database. source_type is case-insensitive. By default, source_type is oracle. source_type may be one of the following values:
Append migration options when you run Migration Toolkit to conveniently control details of the migration. For example, to migrate all schemas within a database, append the -allSchemas option to the command:
If you specify the -offlineMigration option in the command line, Migration Toolkit performs an offline migration. During an offline migration, Migration Toolkit reads the definition of each selected object and creates an SQL script that, when executed at a later time, replicates each object in Postgres.Note: The following examples demonstrate invoking Migration Toolkit in Linux; to invoke Migration Toolkit in Windows, substitute the runMTK.bat command for the runMTK.sh command.To perform an offline migration of both schema and data, specify the ‑offlineMigration keyword, followed by the schema name:To perform an offline migration of schema objects only (creating empty tables), specify the ‑schemaOnly keyword in addition to the ‑offlineMigration keyword when invoking Migration Toolkit:To perform an offline migration of data only (omitting any schema object definitions), specify the ‑dataOnly keyword and the ‑offlineMigration keyword when invoking Migration ToolkitBy default, data is written in COPY format; to write the data in a plain SQL format, include the ‑safeMode keyword:By default, when you perform an offline migration that contains table data, a separate file is created for each table. To create a single file that contains the data from multiple tables, specify the ‑singleDataFile keyword:Please note: the -singleDataFile option is available only when migrating data in a plain SQL format; you must include the -safeMode keyword if you include the ‑singleDataFile option.
You can use the edb-psql command line (on Advanced Server) or psql command line (on PostgreSQL) to execute the scripts generated during an offline migration. The following example describes restoring a schema (named hr) into a new database (named acctg) stored in Advanced Server.
7.2 Import OptionsBy default, Migration Toolkit assumes the source database to be Oracle and the target database to be Advanced Server; include the ‑sourcedbtype and -targetdbtype keywords to specify a non-default source or target database.-sourcedbtype source_typeThe -sourcedbtype option specifies the source database type. source_type may be one of the following values: mysql, oracle, sqlserver, sybase, postgresql or enterprisedb. source_type is case-insensitive. By default, source_type is oracle.-targetdbtype target_typeThe -targetdbtype option specifies the target database type. target_type may be one of the following values: enterprisedb, postgres, or postgresql. target_type is case-insensitive. By default, target_type is enterprisedb.This option copies the table data only. When used with the -tables option, Migration Toolkit will only import data for the selected tables (see usage details below). This option cannot be used with -schemaOnly option.
By default, Migration Toolkit imports the source schema objects and/or data into a schema of the same name. If the target schema does not exist, Migration Toolkit creates a new schema. Alternatively, you may specify a custom schema name via the ‑targetSchema option. You can choose to drop the existing schema and create a new schema using the following option:When set to true, Migration Toolkit drops the existing schema (and any objects within that schema) and creates a new schema. (By default, -dropSchema is false).-targetSchema schema_nameUse the -targetSchema option to specify the name of the migrated schema. If you are migrating multiple schemas, specify a name for each schema in a comma-separated list with no intervening space characters. If the command line does not include the -targetSchema option, the name of the new schema will be the same as the name of the source schema.You cannot specify information-schema, dbo, sys or pg_catalog as target schema names. These schema names are reserved for meta-data storage in Advanced Server.
-tables table_listImport the selected tables from the source schema. table_list is a comma-separated list (with no intervening space characters) of table names (e.g., -tables emp,dept,acctg).Import the table constraints. This option is valid only when importing an entire schema or when the -allTables or -tables table_list options are specified.By default, Migration Toolkit does not implement migration of check constraints and default clauses from a Sybase database. Include the ‑ignoreCheckConstFilter parameter when specifying the -constraints parameter to migrate constraints and default clauses from a Sybase database.This option is valid only when importing an entire schema or when the -allTables or -tables table_list options are specified.Omit the migration of foreign key constraints. This option is valid only when importing an entire schema or when the -allTables or -tables table_list options are specified.Import the table indexes. This option is valid when importing an entire schema or when the -allTables or -tables table_list option is specified.Import the table triggers. This option is valid when importing an entire schema or when the -allTables or -tables table_list option is specified.Import the views from the source schema. Please note that this option will migrate both dynamic and materialized views from the source. (Oracle and Postgres materialized views are supported.)-views view_listImport the specified materialized or dynamic views from the source schema. (Oracle and Postgres materialized views are supported.) view_list is a comma-separated list (with no intervening space characters) of view names (e.g., -views all_emp,mgmt_list,acct_list).-sequences sequence_listImport the selected sequences from the source schema. sequence_list is a comma-separated list (with no intervening space characters) of sequence names.-procs procedures_listImport the selected stored procedures from the source schema. procedures_list is a comma-separated list (with no intervening space characters) of procedure names.-funcs function_listImport the selected functions from the source schema. function_list is a comma-separated list (with no intervening space characters) of function names.When false, disables validation of the function body during function creation (to avoid errors if the function contains forward references). The default value is true.-packages package_listImport the selected packages from the source schema. package_list is a comma-separated list (with no intervening space characters) of package names.-allDomainsImport all queues from the source schema. These are queues created and managed by the DBMS_AQ and DBMS_AQADM built-in packages. When Oracle is the source database, the -objectTypes option must also be specified. When Advanced Server is the source database, the -allDomains and -allTables options must also be specified. (Oracle and Advanced Server queues are supported.)-queues queue_listImport the selected queues from the source schema. queue_list is a comma-separated list (with no intervening space characters) of queue names. These are queues created and managed by the DBMS_AQ and DBMS_AQADM built-in packages. When Oracle is the source database, the -objectTypes option must also be specified. When Advanced Server is the source database, the -allDomains and -allTables options must also be specified. (Oracle and Advanced Server queues are supported.)-allRules
Use the -loaderCount option to specify the number of parallel threads that Migration Toolkit should use when importing data. This option is particularly useful if the source database contains a large volume of data, and the Postgres host (that is running Migration Toolkit) has high-end CPU and RAM resources. While value may be any non-zero, positive number, we recommend that value should not exceed the number of CPU cores; a dual core CPU should have an optimal value of 2.Please note that specifying too large of a value could cause Migration Toolkit to terminate, generating a 'Out of heap space' error.Truncate the data from the table before importing new data. This option can only be used in conjunction with the -dataOnly option.Include the -enableConstBeforeDataLoad option if a non-partitioned source table is mapped to a partitioned table. This option enables all triggers on the target table (including any triggers that redirect data to individual partitions) before the data migration. -enableConstBeforeDataLoad is valid only if the -truncLoad parameter is also specified.If you are performing a multiple-schema migration, objects that fail to migrate during the first migration attempt due to cross-schema dependencies may successfully migrate during a subsequent migration. Use the -retryCount option to specify the number of attempts that Migration Toolkit will make to migrate an object that has failed during an initial migration attempt. Specify a value that is greater than 0; the default value is 2.If you include the -safeMode option, Migration Toolkit commits each row as migrated; if the migration fails to transfer all records, rows inserted prior to the point of failure will remain in the target database.Including the -fastCopy option specifies that Migration Toolkit should bypass WAL logging to perform the COPY operation in an optimized way, default disabled. If you choose to use the -fastCopy option, migrated data may not be recoverable (in the target database) if the migration is interrupted.-replaceNullChar valueHowever, the Migration Toolkit does not support importation of NULL character values (embedded binary zeros 0x00) with the JDBC connection protocol. If you are importing data that includes the NULL character, use the -replaceNullChar option to replace the NULL character with a single, non-NULL, replacement character. Do not enclose the replacement character in quotes or apostrophes.Once the data has been migrated, use a SQL statement to replace the character specified by -replaceNullChar with binary zeros.Include the -analyze option to invoke the Postgres ANALYZE operation against a target database. The optimizer consults the statistics collected by the ANALYZE operation, utilizing the information to construct efficient query plans.Include the -vacuumAnalyze option to invoke both the VACUUM and ANALYZE operations against a target database. The optimizer consults the statistics collected by the ANALYZE operation, utilizing the information to construct efficient query plans. The VACUUM operation reclaims any storage space occupied by dead tuples in the target database.Specify the batch size of bulk inserts. Valid values are 1-1000. The default batch size is 1000; reduce the value of -batchSize if Out of Memory exceptions occur.Specify the batch Size in MB, to be used in the COPY command. Any value greater than 0 is valid; the default batch size is 8 MB.Specify the number of rows to be loaded in a batch for LOB data types. The data migration for a table containing a large object type (LOB) column such as BYTEA, BLOB, or CLOB, etc., is performed one row at a time by default. This is to avoid an out of heap space error in case an individual LOB column holds hundreds of megabytes of data. In case the LOB column average data size is at a lower end, you can customize the LOB batch size by specifying the number of rows in each batch with any value greater than 0.Use the -fetchSize option to specify the number of rows fetched in a result set. If the designated -fetchSize is too large, you may encounter Out of Memory exceptions; include the -fetchSize option to avoid this pitfall when migrating large tables. The default fetch size is specific to the JDBC driver implementation, and varies by database.MySQL users note: By default, the MySQL JDBC driver will fetch all of the rows that reside in a table into the client application (Migration Toolkit) in a single network round-trip. This behavior can easily exceed available memory for large tables. If you encounter an 'out of heap space' error, specify -fetchSize 1 as a command line argument to force Migration Toolkit to load the table data one row at a time.-filterProp file_namefile_name specifies the name of a file that contains constraints in key=value pairs. Each record read from the database is evaluated against the constraints; those that satisfy the constraints are migrated. The left side of the pair lists a table name; please note that the table name should not be schema-qualified. The right side specifies a condition that must be true for each row migrated. For example, including the following constraints in the property file:migrates only those countries with a country_id value that is not equal to AR; this constraint applies to the countries table.-customColTypeMapping column_listUse custom type mapping to change the data type of migrated columns. The left side of each pair specifies the columns with a regular expression; the right side of each pair names the data type that column should assume. You can include multiple pairs in a semi-colon separated column_list. For example, to map any column whose name ends in ID to type INTEGER, use the following custom mapping entry:The '\\' characters act as an escape string; since '.' is a reserved character in regular expressions, on Linux use '\\.' to represent the '.' character. For example, to use custom mapping to select rows from the EMP_ID column in the EMP table, specify the following custom mapping entry:You can include multiple custom type mappings in a property_file; specify each entry in the file on a separate line, in a key=value pair. The left side of each pair selects the columns with a regular expression; the right side of each pair names the data type that column should assume.
Import the user-defined object types from the schema list specified at the end of the runMTK.sh command.Import all users and roles from the source database. Please note that the ‑allUsers option is only supported when migrating from an Oracle database to an Advanced Server database.-users user_listImport the selected users or roles from the source Oracle database. user_list is a comma-separated list (with no intervening space characters) of user/role names (e.g., -users MTK, SAMPLE, acctg). Please note that the -users option is only supported when migrating from an Oracle database to an Advanced Server database.Import all custom (that is, user-created) profiles from the source database. Other Oracle non-custom profiles such as DEFAULT and MONITORING_PROFILE are not imported.All other profile parameters such as the Oracle resource parameters are not imported. The Oracle database user specified by SRC_DB_USER must have SELECT privilege on the Oracle data dictionary view DBA_PROFILES.Please note that the ‑allProfiles option is only supported when migrating from an Oracle database to an Advanced Server database.-profiles profile_listImport the selected, custom (that is, user-created) profiles from the source Oracle database. profile_list is a comma-separated list (with no intervening space characters) of profile names (e.g., -profiles ADMIN_PROFILE,USER_PROFILE). Oracle non-custom profiles such as DEFAULT and MONITORING_PROFILE are not imported.As with the -allProfiles option, only the password parameters are imported. The Oracle database user specified by SRC_DB_USER must have SELECT privilege on the Oracle data dictionary view DBA_PROFILES.Please note that the -profiles option is only supported when migrating from an Oracle database to an Advanced Server database.-importPartitionAsTable table_listInclude the -importPartitionAsTable parameter to import the contents of a partitioned table that resides on an Oracle host into a single non-partitioned table. table_list is a comma-separated list (with no intervening space characters) of table names (e.g., -importPartitionAsTable emp,dept,acctg).The dblink_ora module provides Advanced Server-to-Oracle connectivity at the SQL level. dblink_ora is bundled and installed as part of the Advanced Server database installation. dblink_ora utilizes the COPY API method to transfer data between databases. This method is considerably faster than the JDBC COPY method.The target Advanced Server database must have dblink_ora installed and configured. For information about dblink_ora, please see Chapter 12 “dblink_ora” in the Database Compatibility for Oracle Developer's Guide, available at:Choose this option to migrate Oracle database links. The password information for each link connection in the source database is encrypted, so unless specified, a dummy password (edb) is substituted.To migrate all database links using edb as the dummy password for the connected user:You can alternatively specify the password for each of the database links through a comma-separated list (with no intervening space characters) of name=value pairs. Specify the link name on the left side of the pair and the password value on the right side.-allSynonymsInclude the -allSynonyms option to migrate all public and private synonyms from an Oracle database to an Advanced Server database. If a synonym with the same name already exists in the target database, the existing synonym will be replaced with the migrated version.-allPublicSynonymsInclude the -allPublicSynonyms option to migrate all public synonyms from an Oracle database to an Advanced Server database. If a synonym with the same name already exists in the target database, the existing synonym will be replaced with the migrated version.-allPrivateSynonymsInclude the -allPrivateSynonyms option to migrate all private synonyms from an Oracle database to an Advanced Server database. If a synonym with the same name already exists in the target database, the existing synonym will be replaced with the migrated version.-useOraCaseInclude the -useOraCase option to preserve the Oracle default, uppercase naming convention for all database objects when migrating from an Oracle database to an Advanced Server database.The uppercase naming convention is preserved for tables, views, sequences, procedures, functions, triggers, packages, etc. For these database objects, the uppercase naming convention is applied to a) the names of the database objects, b) the column names, key names, index names, constraint names, etc., of the tables and views, c) the SELECT column list for a view, and d) the parameter names that are part of the procedure or function header.Note: Within the procedural code body of a procedure, function, trigger or package, identifier references may have to be manually edited in order for the program to execute properly without an error. Such corrections are in regard to the proper case conversion of identifier references that may or may not have occurred.Note: When the -useOraCase option is specified, the -skipUserSchemaCreation option may need to be specified as well. For information, see the description of the -skipUserSchemaCreation option in this section.The default behavior of the Migration Toolkit (without using the -useOraCase option) is that database object names are extracted from Oracle without enclosing quotation marks (unless the database object was explicitly created in Oracle with enclosing quotation marks). The following is a sample portion of a table DDL generated by the Migration Toolkit with the -offlineMigration option:For such desired application usage, perform the migration with the -useOraCase option. The DDL then contains all database object names enclosed in quotes:-skipUserSchemaCreationSpecification of the -skipUserSchemaCreation option prevents this automatic, schema creation for a migrated Oracle user name. This option is particularly useful when the -useOraCase option is specified in order to prevent creation of two schemas with the same name except for one schema name in lowercase letters and the other in uppercase letters. Specifying the -useOraCase option results in the creation of a schema in the Oracle naming convention of uppercase letters for the source schema specified following the options list when Migration Toolkit is invoked.Thus, if the -useOraCase option is specified without the -skipUserSchemaCreation option, the target database results in having two identically named schemas with one in lowercase letters and the other in uppercase letters. If the -useOraCase option is specified along with the -skipUserSchemaCreation option, the target database results in having just the schema in uppercase letters.
-logDir log_pathInclude this option to specify where the log files will be written; log_path represents the path where application log files are saved. By default, on Linux log files are written to:Include this option to specify the number of files used in log file rotation. Specify a value of 0 to disable log file rotation and create a single log file (it will be truncated when it reaches the value specified using the logFileSize option). file_count must be greater than or equal to 0; the default is 20.Include this option to specify the maximum file size limit (in MB) before rotating to a new log file. file_size must be greater than 0; the default is 50 MB.Include this option to have the schema definition (DDL script) of any failed objects saved to a file. The file is saved under the same path that is used for the error logs and is named in the format mtk_bad_sql_schemaname_timestamp.sql where schemaname is the name of the schema and timestamp is the timestamp of the Migration Toolkit run.
7.8 ExampleThe following is the content of the toolkit.properties file.Note the omission of skipped and unsupported database objects. The migration information is summarized in the Migration Summary at the end of the run.
You can specify an alternate log file directory with the -logdir log_path option in Migration Toolkit.
Migration Toolkit uses information from the toolkit.properties file to connect to the source and target databases. Most of the connection errors that occur when using Migration Toolkit are related to the information specified in the toolkit.properties file. Use the following section to identify common connection errors, and learn how to resolve them.For information about editing the toolkit.properties file, see Section 5, Building the toolkit.properties file.The user name or password specified in the toolkit.properties file is not valid to use to connect to the Oracle source database.To resolve this error, edit the toolkit.properties file, specifying the name and password of a valid user with sufficient privileges to perform the migration in the SRC_DB_USER and SRC_DB_PASSWORD properties.The user name or password specified in the toolkit.properties file is not valid to use to connect to the Postgres database.To resolve this error, edit the toolkit.properties file, specifying the name and password of a valid user with sufficient privileges to perform the migration in the TARGET_DB_USER and TARGET_DB_PASSWORD properties.The Oracle account associated with the user name specified in the toolkit.properties file is locked.To resolve this error, you can either unlock the user account on the Oracle server or edit the toolkit.properties file, specifying the name and password of a valid user with sufficient privileges to perform the migration in the SRC_DB_USER and SRC_DB_PASSWORD parameters.Before using Migration Toolkit, you must download and install the appropriate JDBC driver for the database that you are migrating from. See Section 4.3, Installing Source-Specific Drivers for complete instructions.The JDBC URL for the source database specified in the toolkit.properties file contains invalid connection properties.To resolve this error, edit the toolkit.properties file, specifying valid connection information for the source database in the SRC_DB_URL property. For information about forming a JDBC URL for your specific database, see Sections 5.1 through 5.6 of this document.The JDBC URL for the target database (Advanced Server) specified in the toolkit.properties file contains invalid connection properties.To resolve this error, edit the toolkit.properties file, specifying valid connection information for the target database in the TARGET_DB_URL property. For information about forming a JDBC URL for Advanced Server, see section 5.1 of this document.
MTK-17001: Error Loading Data into Table: table_nameWhere: COPY table_name, line 5: "50|HR|LOS|ANGELES"This error occurs when the data in a column in table_name includes the delimiter character. To correct this error, change the delimiter character to a character not found in the table contents.Note: In this example, the pipe character (|) occurs in the text, LOS|ANGELES, intended for insertion into the last column, and the Migration Toolkit is run using the -copyDelimiter '|' option, which results in the error.8.2.2 Error Loading Data into Table: TABLE_NAMEMTK-17001: Error Loading Data into Table: TABLE_NAMETrying to reload table: TABLE_NAME through bulk inserts with a batch size of 100MTK-17001: Error Loading Data into Table: TABLE_NAMEYou must create a table to receive the data in the target database before you can migrate the data. Verify that a table (with a name of TABLE_NAME ) exists in the target database; create the table if necessary and re-try the data migration.8.2.3 Error Creating Constraint CONS_NAME_FKYou can avoid generating the error message by including the -skipFKConst option in the Migration Toolkit command.A column in the target database is not large enough to receive the migrated data; this problem could occur if the table definition is altered after migration. The column name (in our example, location_id) is identified in the line that begins with 'Where:'.To correct the problem, specify -fetchSize 1 as a command line argument when you re-try the migration.
For information about OPERATOR CLASS and OPERATOR FAMILY, see the PostgreSQL core documentation available at:
Migration Toolkit supports the migration of packages from an Oracle database into Advanced Server. See Section 3, Functionality Overview for information about the migration support offered by Advanced Server.Advanced Server does not currently support the enum data type, but will support them in future releases. Until then, you can use a check constraint to restrict the data added to an Advanced Server database. A check constraint defines a list of valid values that a column may take.The following code sample includes a simple example of a check constraint that restricts the value of a column to one of three dept types; sales, admin or technical.If we test the check constraint by entering a valid dept type, the INSERT statement works without error:If we try to insert a value not included in the constraint (support), Advanced Server throws an error:Postgres will have no problem storing TIME data types as long as the value of the hour component is not greater than 24.Unlike Postgres, the MySQL TIME data type will allow you to store a value that represents either a TIME or an INTERVAL value. A value stored in a MySQL TIME column that represents an INTERVAL value could potentially be out of the accepted range of a valid Postgres TIMESTAMP value. If, during the migration process, Postgres encounters a value stored in a TIME data column that it perceives as out of range, it will return an error.
9.1 OverviewEach error code begins with the prefix MTK- followed by five digits. The first two digits denote the error class, which is a general classification of the error. The last three digits represent the specific error condition.
The following sections summarize the Migration Toolkit error codes. In the following tables, column Error Code lists the Migration Toolkit error codes. The Message and Resolution column contains the message displayed with the error code. The message explains the cause of the error and how it is to be resolved.In the Message and Resolution column, $NAME is a placeholder for information that is substituted at run time with the appropriate value.
9.2.1 Class 02 - Warning
This class represents invalid configuration settings provided in the toolkit.properties file or in any other configuration file used by the Migration Toolkit.
9.2.9 Class 17 - Data Loading