日本語マニュアル
EDB Postgres Enterprise Manager®
Installation Guide
Version 7.8
Throughout this guide, the term Postgres refers to either a PostgreSQL or an Advanced Server installation, where either is appropriate.
•
PEM 7.8 allows you to set the enable_heartbeat_connection to true during PEM agent registration; this creates a dedicated heartbeat connection between the PEM Agent and Server to constantly update the PEM server.
In the following descriptions a term refers to any word or group of words that are language keywords, user-supplied values, literals, etc. A term’s exact meaning depends upon the context in which it is used.
•
Italic font introduces a new term, typically, in the sentence that defines it for the first time.
•
Fixed-width (mono-spaced) font is used for terms that must be given literally such as SQL commands, specific table and column names used in the examples, programming language keywords, etc. For example, SELECT * FROM emp;
•
Italic fixed-width font is used for terms for which the user must substitute values in actual usage. For example, DELETE FROM table_name;
•
Square brackets [ ] denote that one or none of the enclosed term(s) may be substituted. For example, [ a | b ], means choose one of “a” or “b” or neither of the two.
•
Braces {} denote that exactly one of the enclosed alternatives must be specified. For example, { a | b }, means exactly one of “a” or “b” must be specified.
•
Ellipses ... denote that the proceeding term may be repeated. For example, [ a | b ] ... means that you may have the sequence, “b a a b a”.
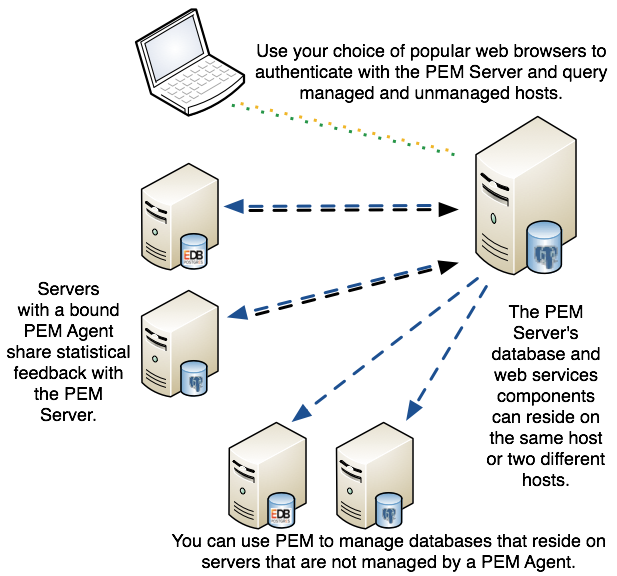
The PEM Agent installer creates two executables: the PEM worker (pemworker.exe) and the PEM agent (pemagent.exe). Each PEM worker has a corresponding PEM agent that you can use to start or stop the PEM worker. The PEM agent will also restart the PEM worker should it terminate unexpectedly.
C:\Users\susan\AppData\Local\Temp\vmware-susan\VMwareDnD\5ff9e582\pem-architecture.png
•
The pg_hba.conf file manages connections for the Postgres server. You must ensure that the pg_hba.conf file on each monitored server allows connections from the PEM server, the monitoring PEM agent, and the host of the PEM-HTTPD server.
For information about modifying the pg_hba.conf file, see the PEM Getting Started Guide, available at:
Before installing the PEM Server, set SELinux to permissive mode with the command:
Before installing the PEM agent on a CentOS 7.x host, you must ensure that the host contains the wxBase and epel-release packages. To install the packages, open a command line, assume root privileges, and invoke the commands:
If you are installing PEM components on Windows, you may be required to invoke the PEM installers with Administrative privileges. To invoke an installer using Administrator privileges, right click on the installer icon and select Run as Administrator from the context menu.
At this time, the PEM server and web interface support a locale of English(US) en_US and use of a period (.) as a language separator character. Using an alternate locale, or a separator character other than a period may result in errors.
•
If you would like to use an existing Postgres server to host the PEM server, the PEM server installer can create the pem database on the Postgres host. You must manually satisfy the software pre-requisites if you choose to use an existing server.
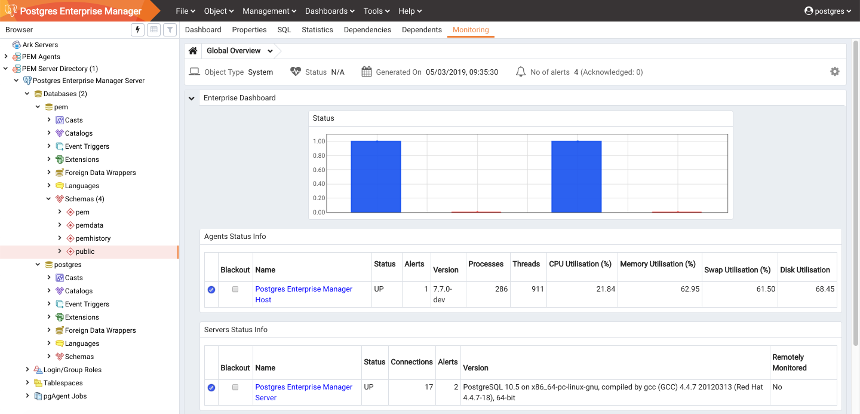
The PEM server installer will also install the software required to access the server via the PEM web interface (shown in Figure 3.1). You can access the web interface with a supported version of your browser of choice.
./pem_server-7.x.x-x-platform.ext
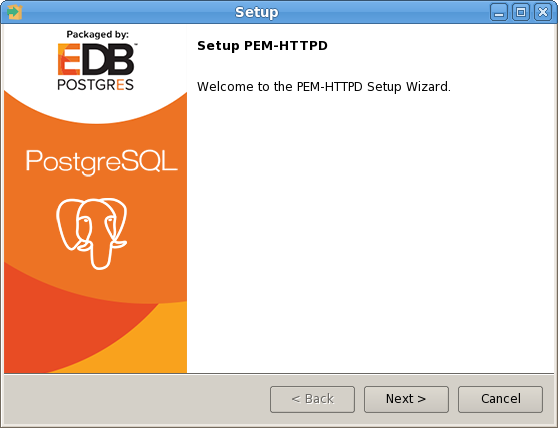
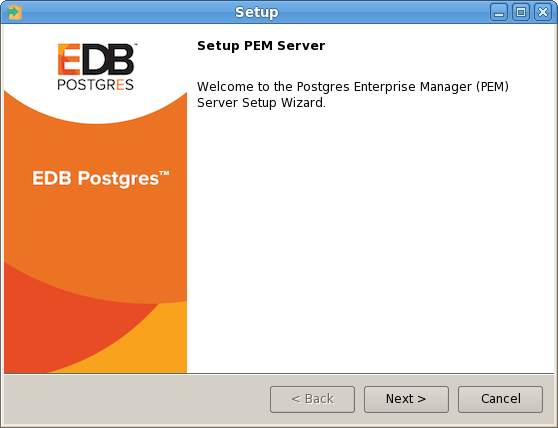
On a Windows system, right click the installer icon and select Run as Administrator. The installer displays a Welcome dialog (shown in Figure 3.2).
C:\Users\susan\AppData\Local\Temp\vmware-susan\VMwareDnD\021e5014\one.png
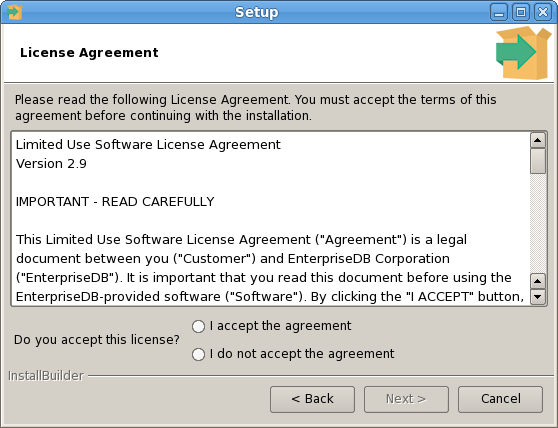
Click Next to continue to the License Agreement dialog.

C:\Users\susan\AppData\Local\Temp\vmware-susan\VMwareDnD\5f63fc1d\two.png

C:\Users\susan\AppData\Local\Temp\vmware-susan\VMwareDnD\5febf589\five.png
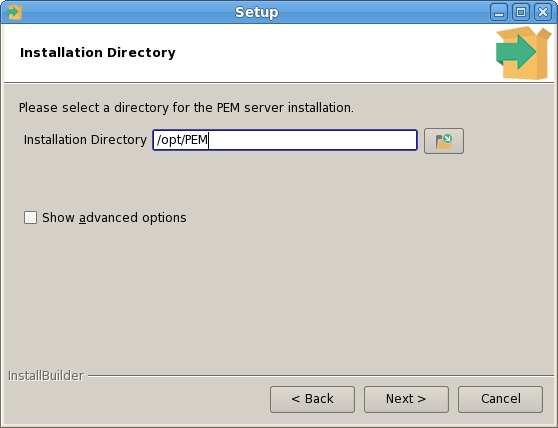
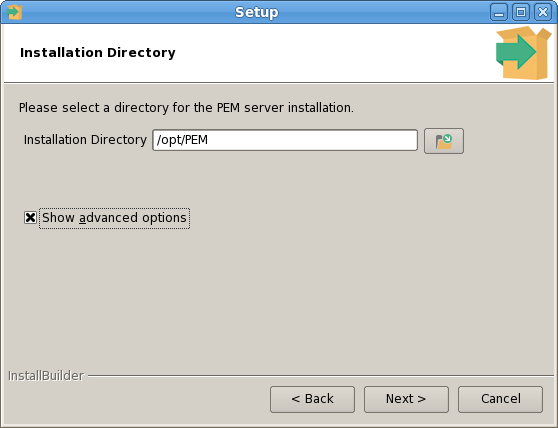
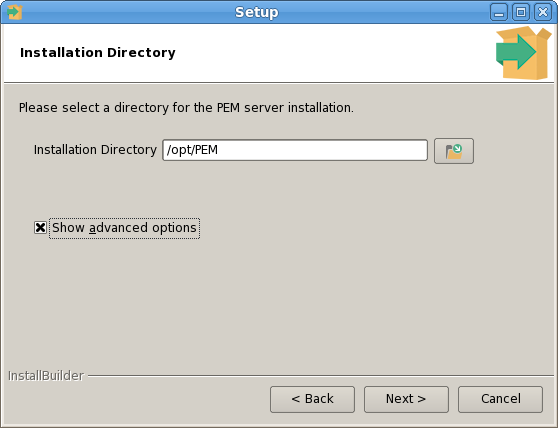
Use the Installation Directory dialog (shown in Figure 3.4) to specify the location of the PEM server:
•
By default, the PEM server is installed in the /opt/PEM directory on Linux or in C:\Program Files\PEM on Windows. Accept the default location, or use the Installation Directory button to open a browser dialog and select the directory in which the PEM server will be installed.
•
Use the Show advanced options check box to instruct the installer to open the Advanced options dialog.
Use the Advanced options dialog when installing the Postgres database server and the PEM-HTTPD on different hosts, or if you wish the PEM server to reside on an existing Postgres server installation.
C:\Users\susan\AppData\Local\Temp\vmware-susan\VMwareDnD\e9bc2184\one.png
C:\Users\susan\AppData\Local\Temp\vmware-susan\VMwareDnD\703bcffe\two.png
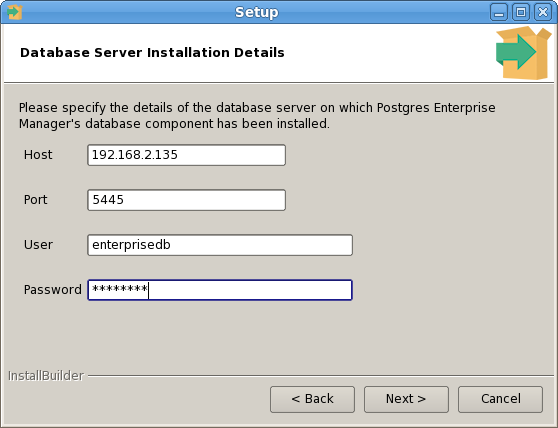
The information provided on the Database Server Installation Details dialog (see Figure 3.6) enables the installer to connect to the PostgreSQL server. Provide the User name and Password of a database superuser. After supplying the requested information, click Next to continue to the Network Details dialog.
C:\Users\susan\AppData\Local\Temp\vmware-susan\VMwareDnD\9194ec61\eight.png
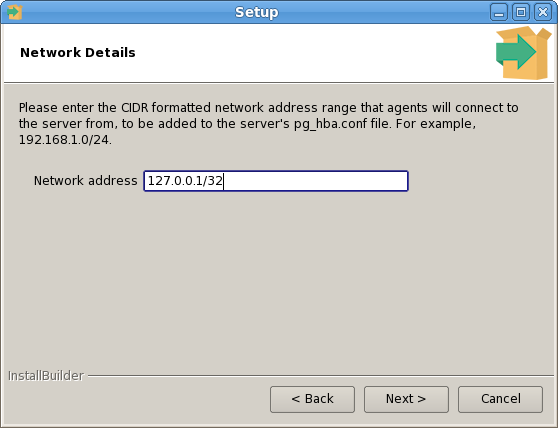
Use the Network Details dialog (see Figure 3.7) to specify the CIDR-style network address from which the PEM agents will connect to the server (the client-side address).
You may specify the address of a network host, or a network address range. For example, if you wish to monitor database servers with the addresses 192.168.10.23, 192.168.10.76 and 192.168.10.184, enter 192.168.10.0/24 to allow connections with hosts in that network.
The specified address will be added to the server's pg_hba.conf file. You can specify additional network addresses by manually adding entries to the pg_hba.conf file on the PostgreSQL server if required, using the initial entry as a template.
When you've added the Network address, click Next to continue to the Agent Details dialog.
C:\Users\susan\AppData\Local\Temp\vmware-susan\VMwareDnD\dce27015\nine.png
C:\Users\susan\AppData\Local\Temp\vmware-susan\VMwareDnD\dcea708d\ten.png
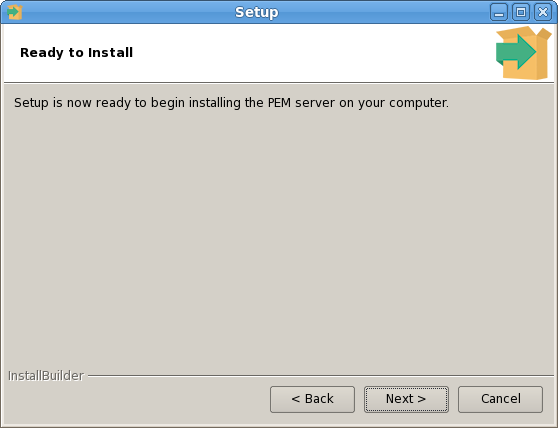
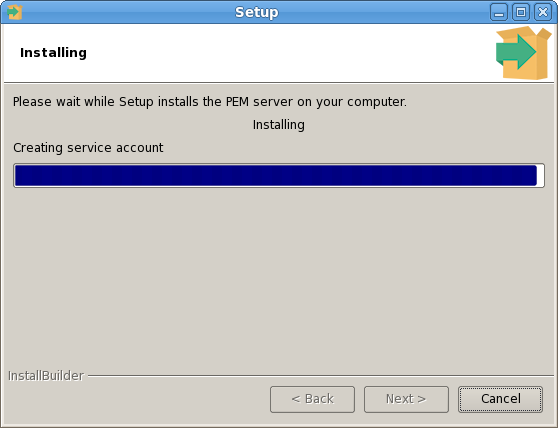
Click Back to modify any of the options previously selected, or Next to continue with the installation.

C:\Users\susan\AppData\Local\Temp\vmware-susan\VMwareDnD\ce694761\eleven.png
C:\Users\susan\AppData\Local\Temp\vmware-susan\VMwareDnD\811cdd18\thirteen.png
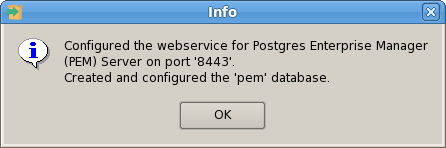
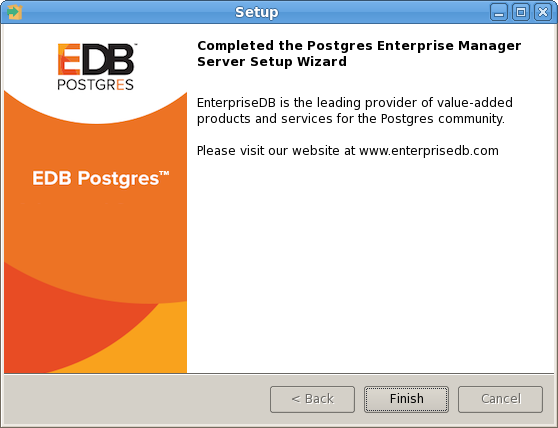
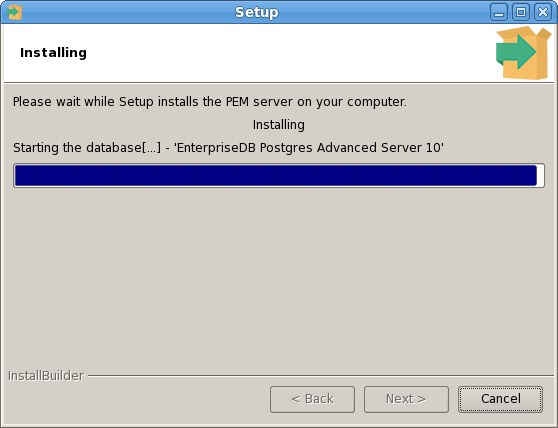
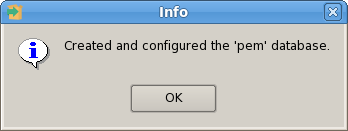
Click OK to acknowledge that the webservice has been configured, and that the pem database has been created, and continue to the Completed… dialog (shown in Figure 3.12).
C:\Users\susan\AppData\Local\Temp\vmware-susan\VMwareDnD\dce370b6\fourteen.png
1.
Invoke the PEM server installer on the host of the Postgres server that will contain the pem database. During the installation, select the Database option on the Advanced options dialog, and provide connection information for the Postgres server.
2.
Modify the pg_hba.conf file of the Postgres installation on which the PEM server (and pem database) resides, allowing connections from the host of the PEM-HTTPD server.
3.
./pem_server-7.x.x-x-platform.ext
On a Windows system, right click the installer icon and select Run as Administrator. The installer displays a Welcome dialog (shown in Figure 3.13).

C:\Users\susan\AppData\Local\Temp\vmware-susan\VMwareDnD\081e462d\one.png
Click Next to continue to the License Agreement dialog.

C:\Users\susan\AppData\Local\Temp\vmware-susan\VMwareDnD\5761ec2a\two.png

C:\Users\susan\AppData\Local\Temp\vmware-susan\VMwareDnD\4761dcea\five.png
Use fields on the Installation Directory dialog (see Figure 3.15) to specify the directory in which the PEM server will reside, and to access the Advanced options dialog:
•
By default, the PEM server is installed in the /opt/PEM directory on Linux or in C:\Program Files\PEM on Windows. Accept the default location, or use the Installation Directory field to open a browser dialog and select the directory in which the PEM server will be installed.
•
To install the PEM server and PEM-HTTPD on separate hosts, you must use the Advanced options dialog to specify the installation type (Web Services or Database). Select the Show advanced options check box to instruct the installer to include the Advanced options dialog in the installation process.
Click Next to continue to the Advanced Options dialog.

C:\Users\susan\AppData\Local\Temp\vmware-susan\VMwareDnD\c4e15861\six.png
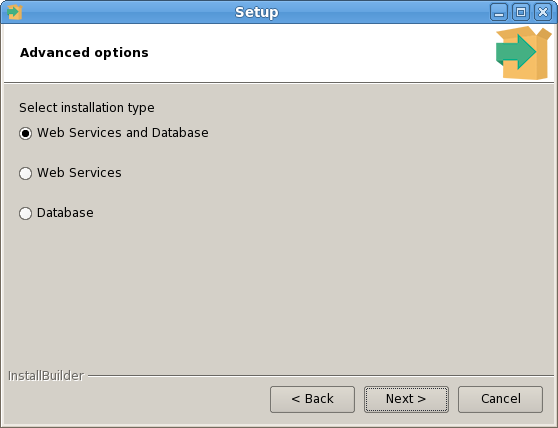
Use the radio buttons on the Advanced options dialog (see Figure 3.16) to specify the component or components that you would like to install:
•
Select Web Services and Database to indicate that the Postgres server and PEM-HTTPD will both reside on the current host. If you select the Web Services and Database option, the PEM server installer will allow you to specify which Postgres server you wish to use for the PEM server before checking for a PEM-HTTPD installation.
•
Select Web Services to install PEM-HTTPD on the current host, while using a Postgres database server that resides on another host to host the PEM server and pem database.
Please note: you must complete the PEM server installation process on the host of the PEM server (and pem backend database), selecting Database on the Advanced options dialog, and modifying the connection properties of the pg_hba.conf file on the PEM server before using the Web Services option to install PEM-HTTPD.
•
Select Database to use an existing Postgres server (version 9.4 or greater), or to install only the database server that is distributed with the PEM server installer.
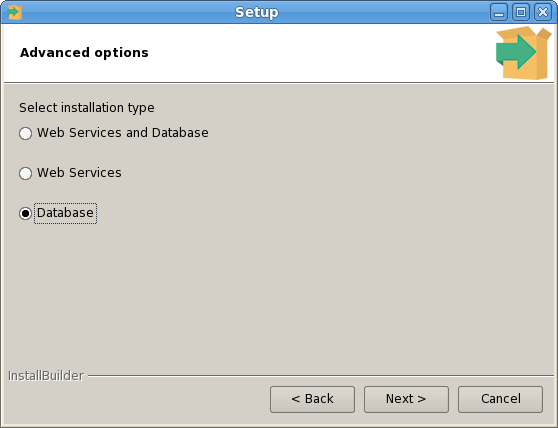
Selecting the Database option on the Advanced options dialog (Figure 3.17) allows you to specify connection information for the host on which the PEM server backend database (named pem) will reside.
C:\Users\susan\AppData\Local\Temp\vmware-susan\VMwareDnD\991cf5c8\seven.png
Click Next to continue to the Database Server Selection dialog.
C:\Users\susan\AppData\Local\Temp\vmware-susan\VMwareDnD\ac4fe0cf\three.png
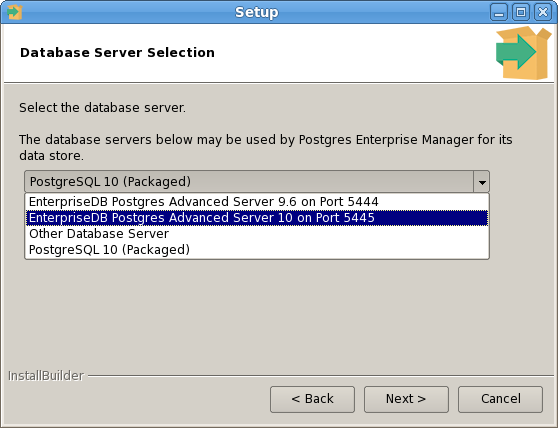
Use the drop-down listbox on the Database Server Selection dialog (see Figure 3.18) to select a host for the PEM server backend database. You can:
•
Select the PostgreSQL 9.6 option to install the Postgres server that is distributed with the PEM server installer. If you decide to use the version of PostgreSQL that is bundled with the PEM server installer, the EnterpriseDB one-click PostgreSQL installer will open and walk you through the installation.
•
Select Other Database Server to specify connection information for a Postgres server that was not installed using a one-click graphical installer from EnterpriseDB. For information about the software pre-requisites for the PEM server database host, please see Section 3.1.3.1, Preparing the Postgres Server.
Click Next to continue.
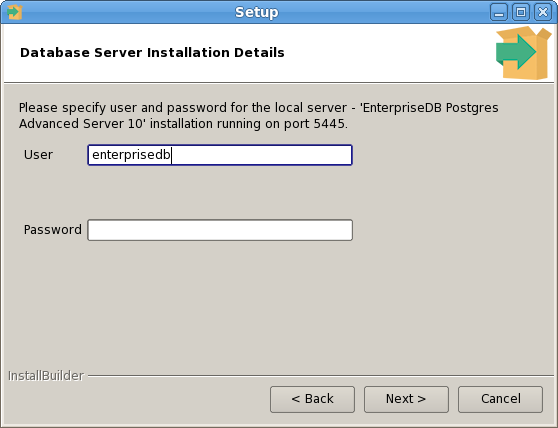
If the PEM server will reside on an existing Postgres server, the Database Server Installation Details dialog shown in Figure 3.19 opens.
C:\Users\susan\AppData\Local\Temp\vmware-susan\VMwareDnD\bcc5d19d\four.png
The information required on the Database Server Installation Details dialog may vary; the PEM server installer will ask you to provide only the information about the selected installation that it cannot locate:
Click Next to continue.

C:\Users\susan\AppData\Local\Temp\vmware-susan\VMwareDnD\9916f55a\three.png
Use the Network Details dialog (see Figure 3.20) to specify the CIDR-style network address from which PEM agents will connect to the server (the client-side address). The specified address will be added to the server's pg_hba.conf file.
Accept the default (specifying the localhost), or specify a Network address range, and click Next to continue to the Agent Details dialog.
C:\Users\susan\AppData\Local\Temp\vmware-susan\VMwareDnD\d6e16e05\four.png
C:\Users\susan\AppData\Local\Temp\vmware-susan\VMwareDnD\d6e36e23\five.png
The wizard is now ready to install the PEM server (see Figure 3.22). Click Back to modify any of the options previously selected, or Next to proceed with the installation.

C:\Users\susan\AppData\Local\Temp\vmware-susan\VMwareDnD\f3b84bdc\five.png
C:\Users\susan\AppData\Local\Temp\vmware-susan\VMwareDnD\57eaed1b\eight.png
Click OK to acknowledge that the pem database has been created, and continue to the Completed… dialog.

C:\Users\susan\AppData\Local\Temp\vmware-susan\VMwareDnD\1a157054\nine.png
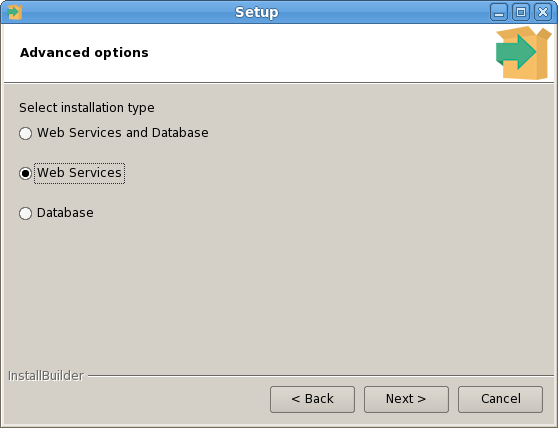
Selecting the Web Services radio button on the Advanced options dialog (Figure 3.26) instructs the PEM server installer to either install PEM-HTTPD on the current host or update an existing PEM-HTTPD installation.
C:\Users\susan\AppData\Local\Temp\vmware-susan\VMwareDnD\5d7cb525\thirty-two.png
•
Modified the pg_hba.conf file on the PEM server database host to allow connections from the PEM-HTTPD host, and restarted the database server.
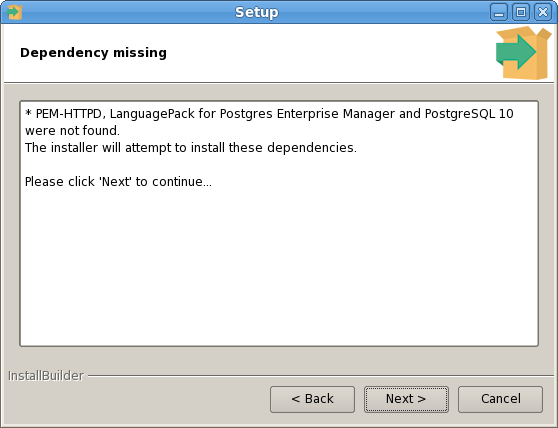
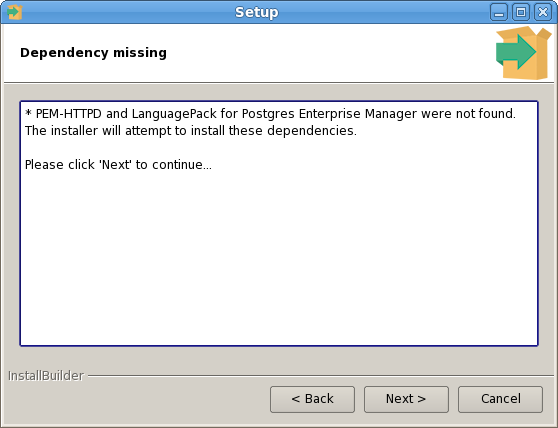
When you select the Web Services option and click Next, the PEM server installer will check the current host for existing PEM-HTTPD and LanguagePack installations.
C:\Users\susan\AppData\Local\Temp\vmware-susan\VMwareDnD\0e885a74\Screenshot-Setup-1.png
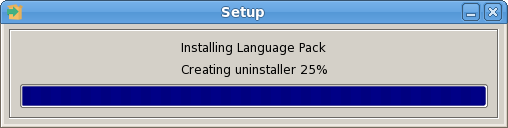
Click Next to instruct the server to instruct the server to install LanguagePack (see Figure 3.28).
C:\Users\susan\AppData\Local\Temp\vmware-susan\VMwareDnD\810b9a10\inst_lang_pack.png
C:\Users\susan\AppData\Local\Temp\vmware-susan\VMwareDnD\1c82642e\httpd.png
Follow the onscreen instructions of the PEM-HTTPD Setup Wizard. When the wizard completes the installation, click Finish to open the Database Server Installation Details dialog.

C:\Users\susan\AppData\Local\Temp\vmware-susan\VMwareDnD\de7c302f\thirty-four.png
Use the fields on the Database Server Installation Details dialog (see Figure 3.30) to provide connection information for the Postgres installation that is hosting the PEM server installation:
Click Next to continue. Before completing the PEM server installation, the installer will contact the database host. The pg_hba.conf file on the PEM database host must be configured to accept connections from the host of the httpd server and the firewall must allow a connection for the installation to continue. The PEM server installer will complete the PEM server installation, adding only those items that must reside on the host of the PEM-HTTPD server.
You can use an existing Postgres server (version 9.4 or later) to host the PEM server and the pem database. Postgres installers and pre-requisite software extensions are freely available from the EnterpriseDB website at:
The following versions of Postgres are pre-configured to contain the sslutils extension and a service script; no additional preparation is required to use the following Postgres versions as a PEM backend database server:
•
Ensure that the Postgres server contains an installation of the sslutils extension. For more information, see Section 3.1.3.1.1.
The Postgres server on which the PEM server will reside must contain the sslutils extension. The sslutils package is freely available for download from the EnterpriseDB website at:
When the web page opens, select the link for the SRC- SSL Utils 1.2 package. When the download completes, extract the file, and copy it into the Postgres installation directory.
2.
Set the value of PATH so it can locate the pg_config program:
export PATH=$PATH:/opt/postgres_inst_dir/9.x/bin/
3.
Then, use yum to install the sslutil dependencies:
4.
Move into the sslutils folder, and enter:
Remember: You are not required to manually add the sslutils extension when using the following Postgres installations:
sslutils must be built with the same compiler that was used to compile the backend Postgres installation. If you are using a backend Postgres database that was installed on a Windows platform using a PostgreSQL one-click installer (from EnterpriseDB) or an Advanced Server installer, you must use Visual Studio to build sslutils.
1.
Copy the sslutils package to the Postgres installation directory.
SET USE_PGXS=1
SET GETTEXTPATH=
path_to_gettext
SET OPENSSLPATH=
path_to_openssl
SET PGPATH=path_to_pg_installation_dir
SET ARCH=x86
REM Set ARCH x64 for 64 bit
msbuild sslutils.proj /p:Configuration=Release
path_to_gettext specifies the location of the GETTEXT library and header files.
path_to_openssl specifies the location of the openssl library and header files.
path_to_pg_installation_dir specifies the location of the Postgres installation.
4.
Copy the compiled sslutils files to the appropriate directory for your installation. The sslutils directory will contain the following files:
Copy the .dll libraries and .sql files into place:
On Linux, the service script must reside in the /etc/init.d directory. The service script must be able to start, stop and restart the database server. Service scripts are platform-specific; you can find a sample service script for Linux in Section 7 Linux Service Script (Sample). For information about customizing a Postgres service, visit:
pg_ctl register [-N service_name] [-U user_name]
[-P
password] [-D data_directory]
service_name specifies the name of the Postgres cluster.
user_name specifies the name of an operating system user with sufficient privileges to access the Postgres installation directory and start the Postgres service.
password specifies the operating system password associated with the user.
data_directory specifies the location of the Postgres data directory.
For more information about using the pg_ctl command and the available command options, see the Postgres core documentation, available at:
./pem_server-7.x.x-x-platform.ext
The installer displays a Welcome dialog (shown in Figure 3.31).
C:\Users\susan\AppData\Local\Temp\vmware-susan\VMwareDnD\57e3e521\one 11.18.38 AM.png
Click Next to continue to the License Agreement dialog.

C:\Users\susan\AppData\Local\Temp\vmware-susan\VMwareDnD\42dbd626\stwo.png

C:\Users\susan\AppData\Local\Temp\vmware-susan\VMwareDnD\d3d86560\five.png
Use the Installation Directory dialog (shown in Figure 3.33) to specify the location of the PEM server, and access the Advanced options dialog:
•
Use the Installation Directory field to open a browser dialog and select the directory in which the PEM server will be installed.
•
If you are installing the PEM server on an existing server, check the box next to Show advanced options to instruct the installer to include the Advanced options dialog in the installation process.
Click Next to continue.

C:\Users\susan\AppData\Local\Temp\vmware-susan\VMwareDnD\9cadff98\Screenshot-Setup.png
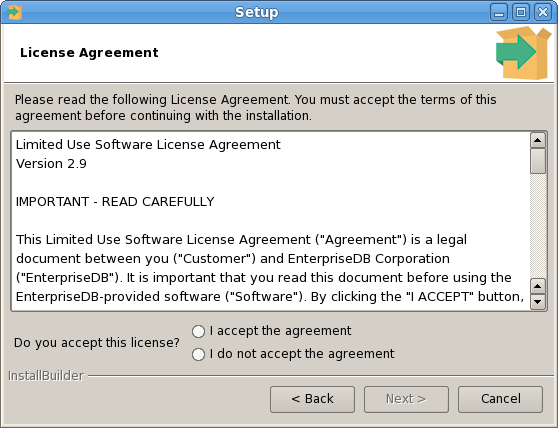
Use the radio buttons on the Advanced options dialog (shown in Figure 3.34) to specify an installation type. Select:
•
Web Services and Database if both the Postgres server and the PEM-HTTPD server will reside on the current host. This option is valid if you are using an existing Postgres server to host the PEM server, or using the PEM server installer to install the Postgres server on which the PEM server will reside.
If you select Web Services and Database, the PEM server installer will check the current host for a PEM-HTTPD installation, and upgrade or install PEM-HTTPD if necessary.
•
Web Services if only the PEM-HTTPD server will reside on the current host. See Section 3.1.2.2 for more information about invoking this option.
•
Database if you are installing only the PEM server (and creating the pem backend database) on the current host. This option is valid if you are using an existing Postgres server to host the PEM server, or using the PEM server installer to install the PostgreSQL server on which PEM will reside.
C:\Users\susan\AppData\Local\Temp\vmware-susan\VMwareDnD\62b1f884\three.png
Use the drop-down listbox on the Database Server Selection dialog (Figure 3.35) to select a backend database for the PEM server:
•
Select the PostgreSQL 9.6 (Packaged) option to instruct the installation wizard to install and use the PostgreSQL server that is packaged with the PEM server installer.
•
Select Other Database Server to instruct the PEM server installer to use a Postgres database that was installed from a source other than an EnterpriseDB installer (i.e. from an rpm, or built from source).
Note that the selected database server must include an installation of the sslutils contrib module, and have a startup script (on Linux) or a registered service (on Windows). For information about Preparing the Postgres Server, please see Section 3.1.3.1.
If you selected Web Services and Database on the Advanced options dialog, the installation wizard will check the current host for an existing PEM-HTTPD installation, and upgrade or install the service as needed.
If you selected Database on the Advanced options dialog, the Database Server Installation Details dialog opens (shown in Figure 3.36).
C:\Users\susan\AppData\Local\Temp\vmware-susan\VMwareDnD\0d274565\thirty-four.png
Use the fields on the Database Server Installation Details dialog to describe the connection to the Postgres server that will host the PEM server:
Click Next to continue.
C:\Users\susan\AppData\Local\Temp\vmware-susan\VMwareDnD\0da64466\snine.png
Use the Network Details dialog (Figure 3.37) to specify the CIDR-style network address from which the PEM agents will connect to the server (the client-side address). The specified address will be added to the server's pg_hba.conf file.
You can specify additional network addresses by manually adding entries to the pg_hba.conf file on the PostgreSQL server if required, using the initial entry as a template.
When you've added the Network address, click Next to continue to the Agent Details dialog.
C:\Users\susan\AppData\Local\Temp\vmware-susan\VMwareDnD\42d8de23\sten.png
C:\Users\susan\AppData\Local\Temp\vmware-susan\VMwareDnD\0f2d43f3\seleven.png
The wizard is now ready to install the PEM server (see Figure 3.39). Click Back to modify any of the options previously selected, or Next to continue with the installation.
C:\Users\susan\AppData\Local\Temp\vmware-susan\VMwareDnD\1f2f73b5\stwelve.png
C:\Users\susan\AppData\Local\Temp\vmware-susan\VMwareDnD\1dac7439\sthirteen.png
Click OK to acknowledge that the pem database has been created, and continue to the Completed… dialog (shown in Figure 3.42).
C:\Users\susan\AppData\Local\Temp\vmware-susan\VMwareDnD\1a9d79ec\nine 11.37.35 AM.png
•
Modify the pg_hba.conf file on the Postgres server host to allow connections between the hosts.
The pg_hba.conf file on the backing database must be configured to use trust authentication for connections. For information about modifying the pg_hba.conf file, visit:
You must also install the hstore contrib module; for more information, visit:
Before installing the PEM server, you must create the repository configuration file (edb.repo). The repository configuration file contains connection and authentication information for the EnterpriseDB repository. To prepare your system to perform an RPM installation, assume superuser privileges and use yum to create the repository configuration file:
Please note: If you are a Red Hat Network user you must also enable the rhel-x-server-optional-rpms repository to use EPEL packages, where x specifies the version of RHEL on the host. You can make the repository accessible by enabling the RHEL optional subchannel for RHN-Classic. If you have a certificate-based subscription, please see the Red Hat Subscription Management Guide. You must also enable the rhel-x-server-extras-rpms repository, where x specifies the version of RHEL on the host.
After creating the repository configuration file, use your choice of editor to enable the repository entries from which you will install packages. The repository configuration file is named edb.repo, and resides in /etc/yum.repos.d. To enable a repository, change the value of the enabled parameter to 1 and replace the username and password placeholders in the baseurl specification with your user name and the repository password.
yum install edb-asX-server-sslutils
yum install sslutils_X postgresqlX-contrib
The directory for the database server installation. For example, /usr/edb/as10 for Advanced Server or /usr/pgsql-10 for PostgreSQL.
The installation type: Specify 1 if the configuration is for web services and backing database, 2 if you are configuring web services, or 3 if you are configuring the backing database. If you specify 3, please note that the database must reside on the local host.
If you are using a RHEL or CentOS 6.x host, restart the httpd24 server after configuring the PEM server; use the command:
https://ip_address_of_PEM_server:8443
To install PEM on a Debian or Ubuntu host, you must have credentials that allow access to the EnterpriseDB repository. To request credentials for the repository, visit the EnterpriseDB Advanced Downloads page at:
1. Go to https://apt.enterprisedb.com/ and log in as root:
2. Configure the EnterpriseDB repository:
3. Add support to your system for secure APT repositories:
4. Add the EBD signing key:
5. Update the repository metadata:
6. Use the following command to install the Debian package:
•
For PEM Server and agent: apt-get install edb-pem-server
•
For PEM agent: apt-get install edb-pem-agent
pem_agent-7.x.x-x-platform.ext
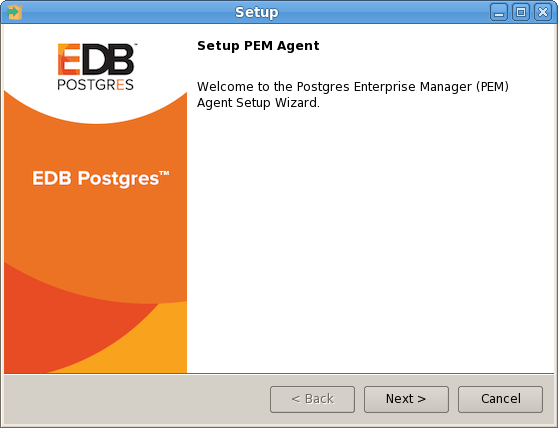
The Setup… page opens, welcoming you to the PEM Agent installer (as shown in Figure 3.43).
C:\Users\susan\AppData\Local\Temp\vmware-susan\VMwareDnD\4df2db57\one.png
Click Next to continue to the License Agreement.

C:\Users\susan\AppData\Local\Temp\vmware-susan\VMwareDnD\830cc330\two.png

C:\Users\susan\AppData\Local\Temp\vmware-susan\VMwareDnD\c27a0f2a\one.png
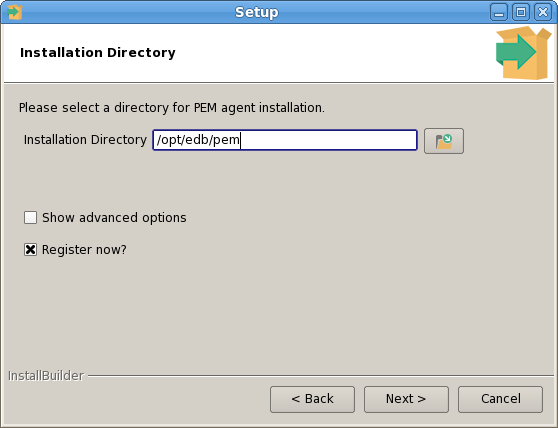
By default, the PEM agent is installed in the /home/opt/PEM directory. You can accept the default installation directory, or modify the contents of the Installation Directory field (see Figure 3.45), specifying an alternate installation directory for the PEM agent.
By default, the PEM agent installer places a certificate in ~root/.pem (on Linux) or in the Administrator’s %APPDATA%\pem directory (on Windows). Check the Show advanced options box to indicate that you would like the PEM agent installer to include a dialog that allows you to specify an alternate path for the certificate file.
Check the box next to Register now? to instruct the installer to register the newly installed PEM agent with the PEM server.
Click Next to continue to the PEM Server Installation Details dialog.

C:\Users\susan\AppData\Local\Temp\vmware-susan\VMwareDnD\9009a1db\pafour.png
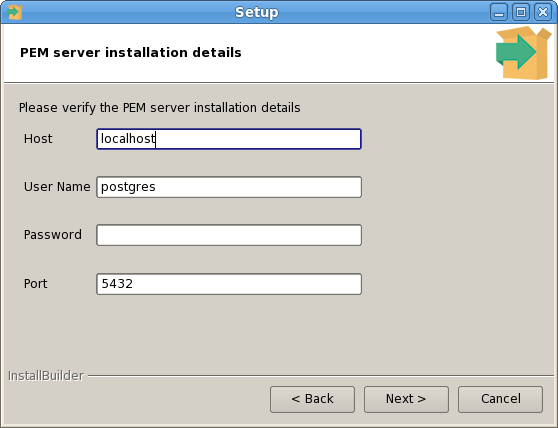
Enter the connection details for the PEM server on the PEM server installation details dialog (see Figure 3.46):
•
Specify the name or IP address of the system on which the PEM database server resides in the Host field. Please note: If the PEM-HTTPD web server and PEM database are hosted on different systems, you must specify the host of the PEM database.
Click Next to continue. The installer will attempt to connect to the server to verify that the details are correct.
Please Note: The PEM server must allow connections from the PEM agent installer. If you encounter a connection error, confirm the connection properties specified on the PEM Server Installation Details dialog are correct, and confirm that the pg_hba.conf file (on the PEM server) will allow a connection to the server described in the error message.
C:\Users\susan\AppData\Local\Temp\vmware-susan\VMwareDnD\dd7f3d0f\pafive.png
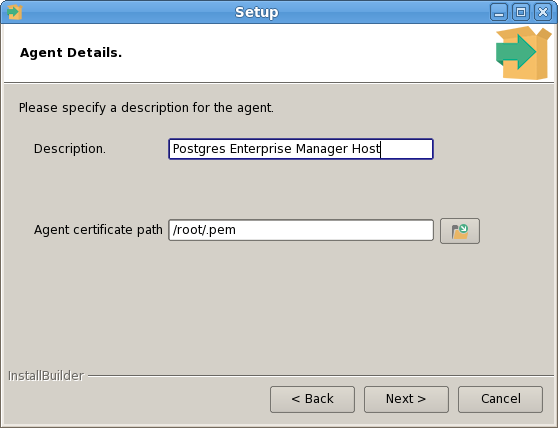
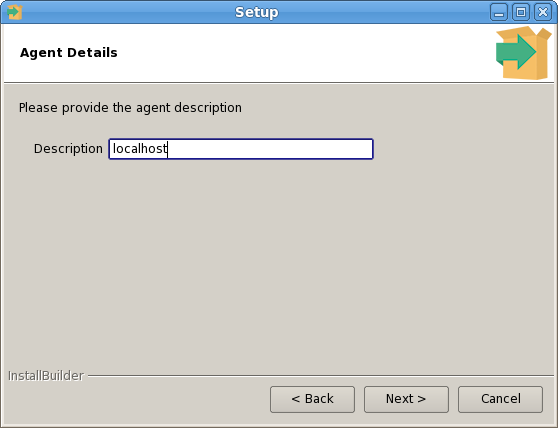
The tree control displayed in the Browser panel of the PEM web interface displays the value entered in the Description field (shown in Figure 3.47) to identify the PEM agent. Specify a descriptive name for the agent, such as the hostname of the machine the agent is installed on, or a name that reflects the host's functionality.
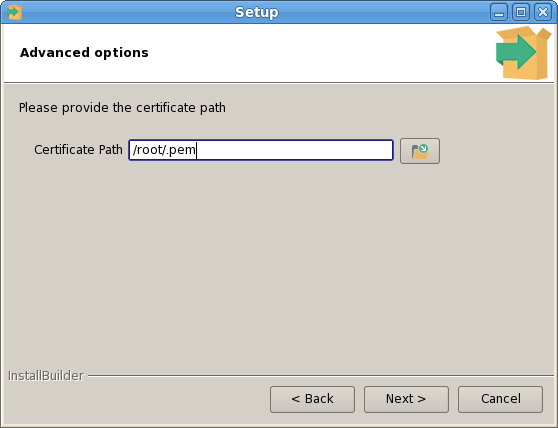
If you checked the Show advanced options checkbox shown in Figure 3.24, the Advanced options dialog opens (shown in Figure 3.48).
C:\Users\susan\AppData\Local\Temp\vmware-susan\VMwareDnD\82029723\painstadvopt.png
By default, the PEM agent installer places the certificate in the /root/.pem directory. Specify an alternate path for the certificate or accept the default and click Next.
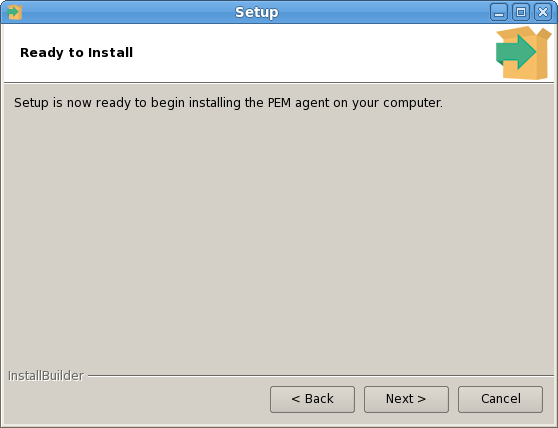
The wizard is now ready to install the PEM agent; click Back to amend the installation directory, or Next to continue.

C:\Users\susan\AppData\Local\Temp\vmware-susan\VMwareDnD\828b9618\pasix.png
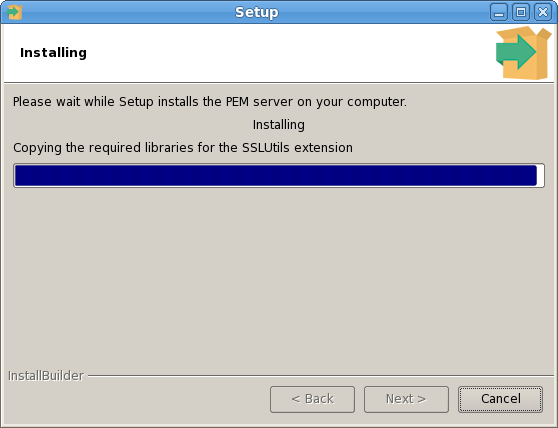
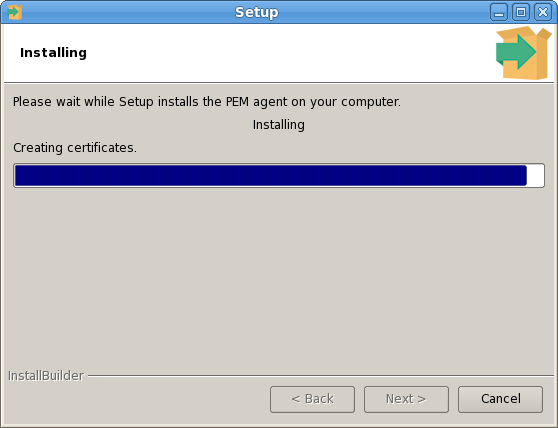
Click Next on the Ready to Install dialog (shown in Figure 3.49) to instruct the installer to copy files to the system and register the agent on the PEM server.

C:\Users\susan\AppData\Local\Temp\vmware-susan\VMwareDnD\82819606\paseven.png

C:\Users\susan\AppData\Local\Temp\vmware-susan\VMwareDnD\dcfa6880\three.png
On a Linux system, you can use the yum package manager to install a PEM agent. Please note that before using a package manager to install the PEM agent, the host must contain the following packages:
1.
Download the edb-repo installation package from:
The edb-repo package creates the repository configuration file (named edb.repo). The edb.repo file defines multiple repositories hosted at EnterpriseDB.com.
2.
Assume superuser privileges and use the following command to install the edb-repo package, and create the repository configuration file:
rpm -Uvh edb-repo-9.x-x.noarch.rpm
Where x specifies the version of the file.
Then, use your choice of editor to modify the configuration file, enabling the enterprisedb-tools and enterprisedb-dependencies repositories. The configuration file is named edb.repo; it resides in /etc/yum.repos.d.
To enable a repository, change the value of the enabled parameter to 1 and replace the user_name and password placeholders in the baseurl specification with your repository credentials. Contact EnterpriseDB for repository credentials.
baseurl=http://user_name:password@yum.enterprisedb.com/tools/redhat/rhel-$releasever-$basearch
baseurl=http://user_name:password@yum.enterprisedb.com/dependencies/redhat/rhel-$releasever-$basearch
baseurl=http://user_name:password@yum.enterprisedb.com/9.6/redhat/rhel-$releasever-$basearch
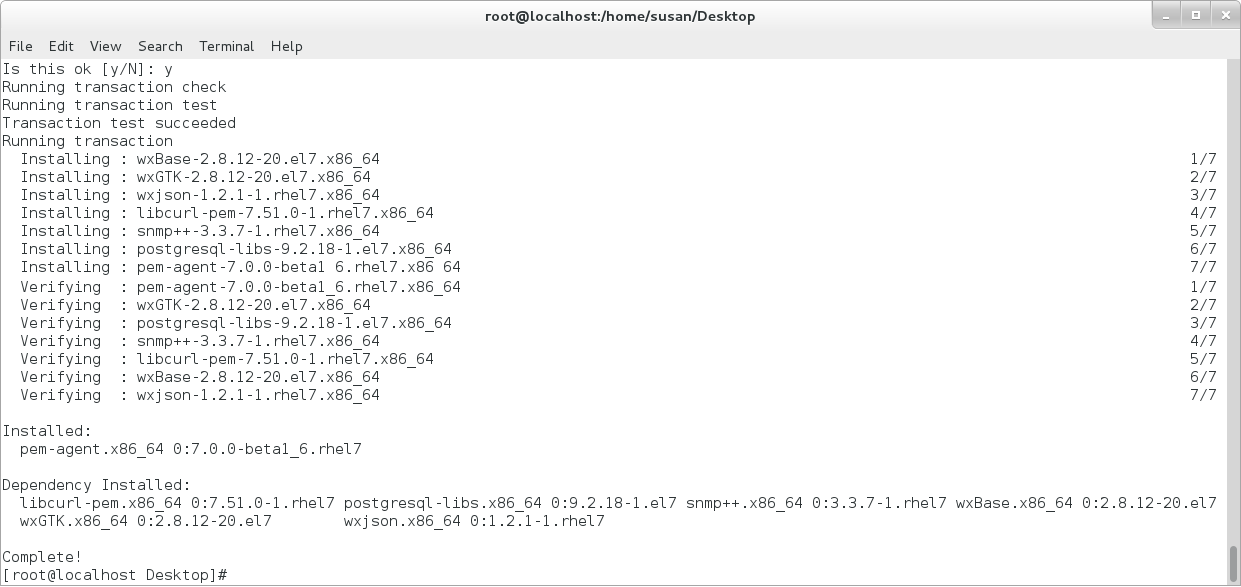
When the installation is complete, yum will display a list of the installed packages and dependencies (see Figure 3.52).
C:\Users\susan\Desktop\one.png
Each PEM agent must be registered with the PEM server. The registration process provides the PEM server with the information it needs to communicate with the agent. The PEM agent graphical installer supports agent self-registration, but you can use the pemworker utility to register the agent if you skip PEM agent registration during a graphical installation or use an RPM package to install a PEM agent.
The RPM installer places the PEM agent in the /usr/pem/agent/bin directory. To register an agent, include the --register-agent keywords along with registration details when invoking the pemworker utility:
•
set the PEM_MONITORED_SERVER_PASSWORD environment variable.
•
The PEM agent RPM installer creates a sample configuration file named agent.cfg.sample in the /usr/pem/agent/etc directory. When you register the PEM agent, the pemworker program creates the actual agent configuration file (named agent.cfg). You must modify the agent.cfg file, adding the following configuration parameter:
You must also add the location of the ca-bundle.crt file (the certificate authority). By default, the installer creates a ca-bundle.crt file in the location specified in your agent.cfg.sample file. You can copy the default parameter value from the sample file, or, if you use a ca-bundle.crt file that is stored in a different location, specify that value in the ca_file parameter:
Then, use a platform-specific command to start the PEM agent service; the service is named pemagent. For example, on a CentOS or RHEL 6.x system, you would use the command:
The service will confirm that it is starting the agent; when the agent is registered and started, it will be displayed on the Global Overview dashboard and in the Object browser tree control of the PEM web interface.
For information about using the pemworker utility to register a server, please see the PEM Getting Started Guide, available at:
•
Include the --mode unattended option when invoking the installer to perform an installation without additional user input.
•
Include the --mode text option when invoking the installer to perform an installation from the command line with an interactive installer.
•
./pem-server-7.x.x-linux-x64.run --extract-dependents /opt
./edb-languagepack-version-linux-x64.run --mode unattended
./pem-httpd-
version-linux-x64.run --mode unattended
./postgresql-
version-linux-x64.run --mode unattended
./pem-server-7.x.x-linux-x64.run --mode unattended
--existing-user
registered_edb_user --existing-password edb_user_password --pgport port --pguser postgres
--pgpassword postgres -–cidr-address
cidr_address_range
registered_edb_user specifies the name of a registered EnterpriseDB user. To register, visit the EDB website at: https://www.enterprisedb.com/user/register
edb_user_password specifies the password associated with the EDB user account.
port specifies the port used by the backing PostgreSQL database; by default, the PostgreSQL database uses port 5432.
cidr_address_range specifies the address range that will be added to the pg_hba.conf file of the PEM server's backing database to allow connections from the agents that will be monitored by the server. You may wish to specify a network range (for example, 192.168.2.0/24) to provide server access to agents that reside on the same network.
•
pem-server-7.x.x-windows-x64.exe --extract-dependents C:\
In our example, the files are extracted to the C:\ directory. After extracting the files, you must install each program. Navigate into the directory that contains the files (in our example, C:\), and enter:
edb-languagepack-version-windows-x64.exe --mode unattended
pem-httpd-
version-windows-x64.exe --mode unattended
postgresql-
version-windows-x64.exe --mode unattended
pem-server-7.x.x-windows-x64.exe --mode unattended
--existing-user
registered_edb_user --existing-password edb_user_password --pgport port --pguser postgres
--pgpassword postgres -–cidr-address
cidr_address_range
--agent_description pem-agent --systempassword windows_password
--agent-crt-path
C:\edb
registered_edb_user specifies the name of a registered EnterpriseDB user. To register, visit the EDB website at: https://www.enterprisedb.com/user/register
edb_user_password specifies the password associated with the EDB user account.
port specifies the port used by the backing PostgreSQL database; by default, the PostgreSQL database uses port 5432.
cidr_address_range specifies the address range that will be added to the pg_hba.conf file of the PEM server's backing database to allow connections from the agents that will be monitored by the server. You may wish to specify a network range (for example, 192.168.2.0/24) to provide server access to agents that reside on the same network.
windows_password specifies the password associated with the Windows Administrator's account.
•
install the PEM server; the pg_hba.conf file of the PEM server must allow connections from the host of the PEM agent.
./pem-agent-7.x.x-linux-x64.run --mode unattended
--pghost
pem_server_host_address --pgport pem_server_port
--pguser postgres --pgpassword
pguser_password
--agent_description
agent_name
pem_server_host_address specifies the IP address of the host of the PEM server.
pem_server_port specifies the port used by the backing PEM database; by default, the database uses port 5432.
pguser_password specifies the password associated with the PEM database superuser.
agent_name specifies a descriptive name for the PEM agent.
•
install the PEM server; the pg_hba.conf file of the PEM server must allow connections from the host of the PEM agent.
pem-agent-7.x.x-windows-x64.exe --mode unattended
--pghost
pem_server_host_address --pgport pem_server_port
--pguser postgres --pgpassword
pguser_password
--agent_description
agent_name
pem_server_host_address specifies the IP address of the host of the PEM server.
pem_server_port specifies the port used by the backing PEM database; by default, the database uses port 5432.
pguser_password specifies the password associated with the PEM database superuser.
agent_name specifies a descriptive name for the PEM agent.
•
./pem-server-7.x.x-linux-x64.run --extract-dependents /opt
./edb-languagepack-version-linux-x64.run --mode unattended
./pem-httpd-
version-1-linux-x64.run --mode unattended
./postgresql-
version-linux-x64.run --mode unattended
./pem-server-7.x.x-linux-x64.run --mode text
•
pem-server-7.x.x-windows-x64.exe --extract-dependents C:\
edb-languagepack-version-windows-x64.exe --mode unattended
pem-httpd-
version-windows-x64.exe --mode unattended
postgresql-
version-windows-x64.exe --mode unattended
pem-server-7.x.x-windows-x64.exe --mode text
Email address []:
Password :
----------------------------------------------------------------
Next, you will be prompted for an installation directory; you can use the default installation directory, or specify an alternate location.
Enter a Y after Show advanced options to access menu options that allow you to use a pre-existing Postgres server installation or PEM-HTTPD installation with the PEM server.
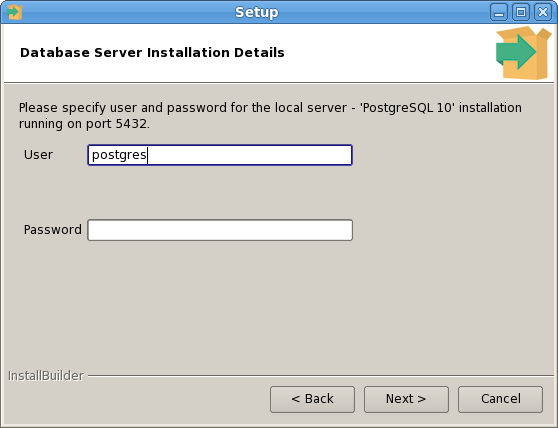
Please specify user and password for the local server - 'PostgreSQL 10' installation running on port 5432.
User [postgres]:
Password :
----------------------------------------------------------------
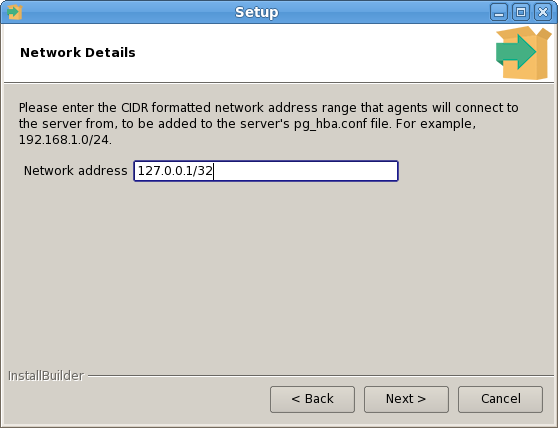
When prompted, provide the network address or range that will be added to the pg_hba.conf file of the PEM server host; this will allow PEM agents on monitored hosts to contact the server:
Network address [127.0.0.1/32]:
----------------------------------------------------------------
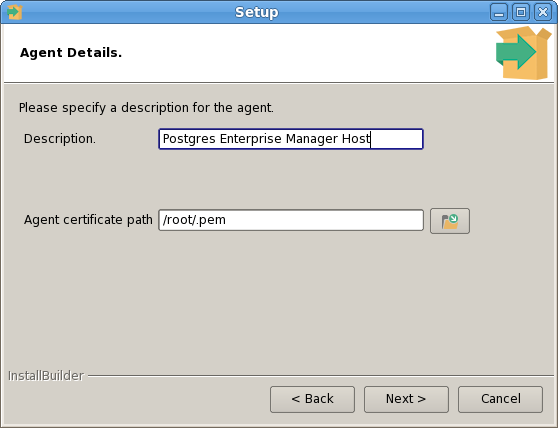
Use the Agent Details fields to specify a descriptive name for the agent and the location of the agent certificate:
./pem-agent-7.x.x-linux-x64.run --mode text
pem-server-7.x.x-windows-x64.exe --mode text
-----------------------------------------------------------------
Welcome to the Postgres Enterprise Manager (PEM) Agent Setup Wizard.
-----------------------------------------------------------------
By default, the PEM agent installer places a certificate in ~root/.pem (on Linux) or in the Administrator’s %APPDATA%\pem directory (on Windows). Enter a Y after Show advanced options to access menu options that allow you to specify an alternate path for the certificate file.
https://ip_address_of_PEM_host:8443/pem
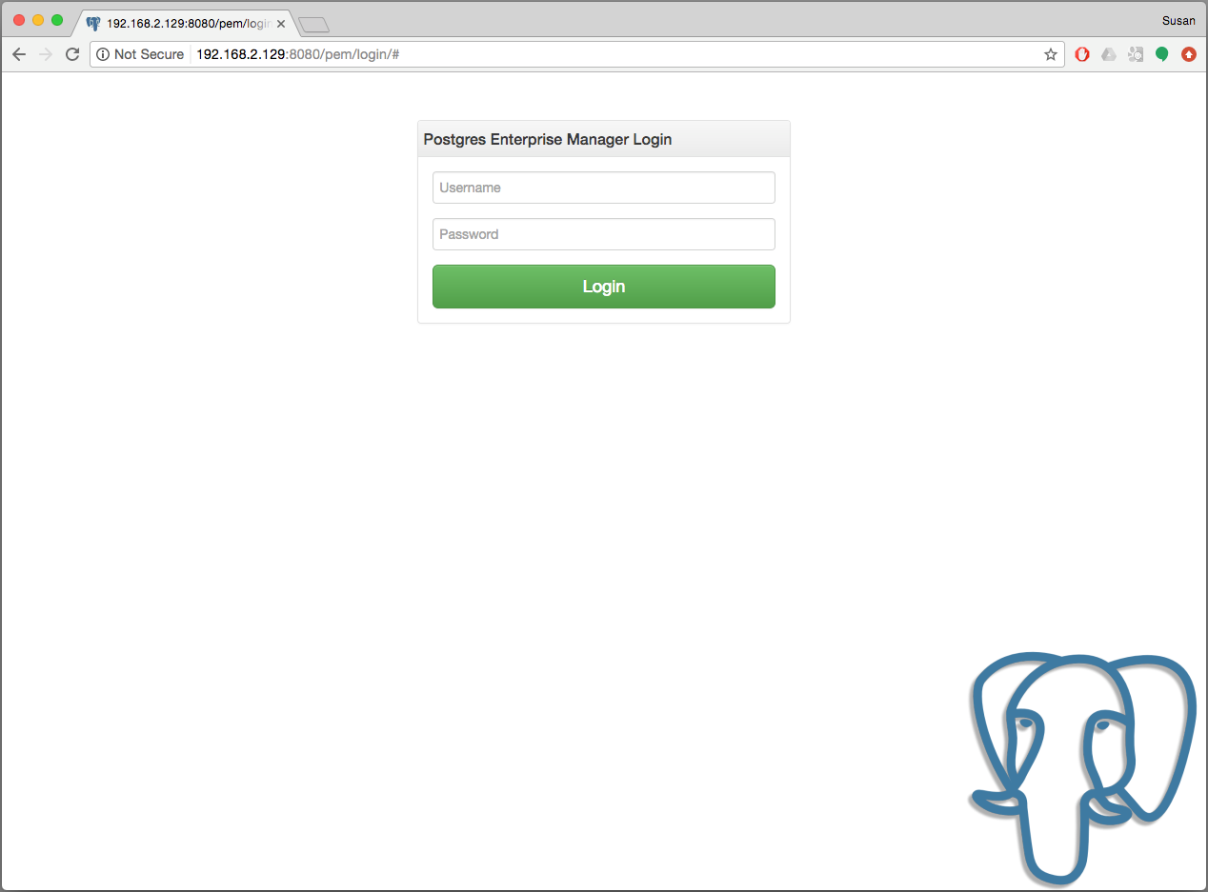
Where ip_address_of_PEM_host specifies the IP address of the host of the PEM server. The Postgres Enterprise Manager Web Login window (shown in Figure 4.1) opens:
C:\Users\susan\Desktop\Screen Shot 2017-03-07 at 2.22.08 PM.png
Use the fields on the Postgres Enterprise Manager Login window to authenticate yourself with the PEM server:
•
Provide the name of a pem database user in the Username field. For the first user connecting, this will be the name provided when installing the PEM server.
Click the Login button to connect to the PEM server.
C:\Users\susan\AppData\Local\Temp\vmware-susan\VMwareDnD\6410fec1\Screen Shot 2018-08-24 at 10.50.04 AM.png
Before you can use the PEM web interface to manage or monitor a database server, you must register the server with the PEM server. When you register a server, you describe the connection to the server, provide authentication information for the connection, and specify any management preferences (optionally binding an agent).
•
A managed server is bound to a PEM agent. The PEM agent will monitor the server to which it is bound, and perform tasks or report statistics for display on the PEM dashboards. A managed server has access to extended PEM functionality such as Package Management or Custom Alerting; when registering a server, you can also allow a managed server to be restarted by PEM as required.
•
An unmanaged server is not bound to a PEM agent; you can create database objects on an unmanaged server, but extended PEM functionality (such as Package Management or Custom Alerting) is not supported on an unmanaged server.
You must also ensure the pg_hba.conf file of the server that you are registering allows connections from the host of the PEM web interface.
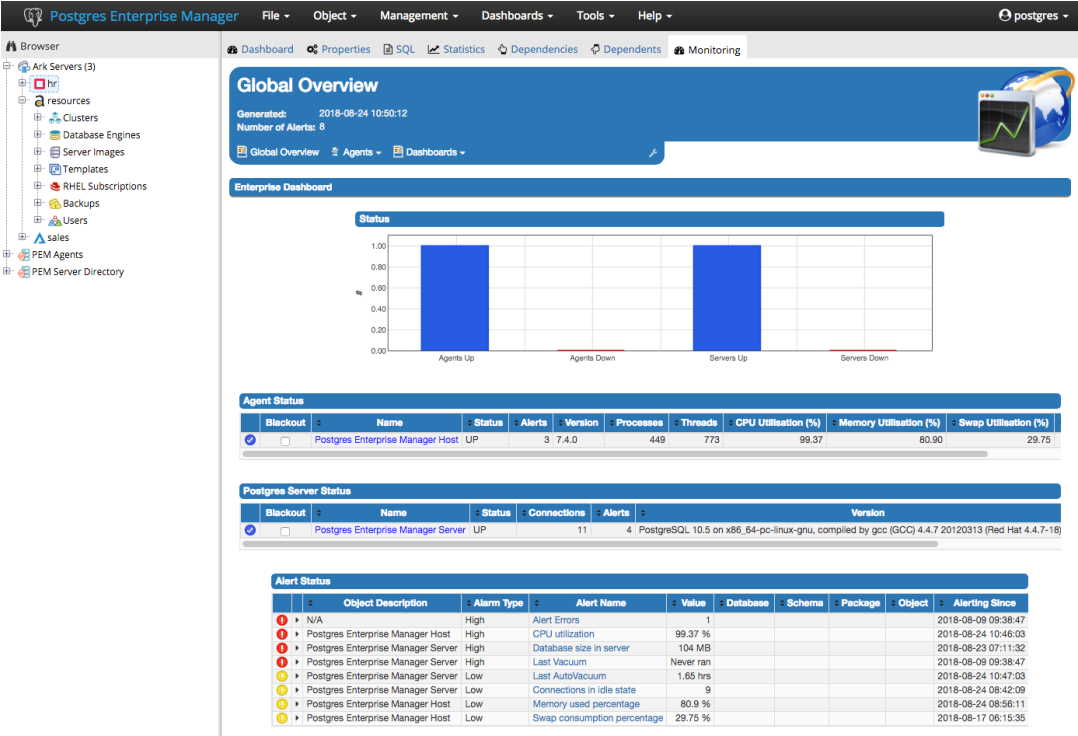
To access online help information about the PEM web interface, select Help from the menu bar (see Figure 4.2). Additional information is available in .pdf and .html format from the EnterpriseDB website at:
The PEM Getting Started Guide contains information about registering and managing servers, agents, and users.
The PEM Enterprise Features Guide contains information about using the tools and wizards that are part of the web interface.
The PEM EDB Ark Management Guide contains information about using PEM to manage cloud installations of Advanced Server and PostgreSQL.
The PEM Upgrade and Migration Guide contains information about upgrading to PEM 7.6 from a previous version.
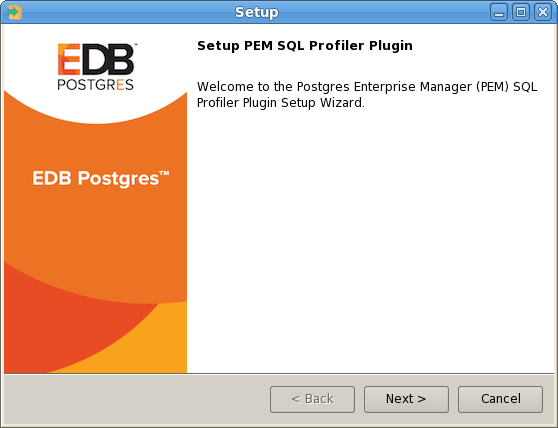
Follow the installation steps listed below to install the plugin for PostgreSQL before continuing to the Configuration section. If you are using Advanced Server, skip ahead to the Configuration section.
sqlprofiler-pg-x.x-6.0.x-platform.ext
C:\Users\susan\AppData\Local\Temp\vmware-susan\VMwareDnD\89a0d800\one.png
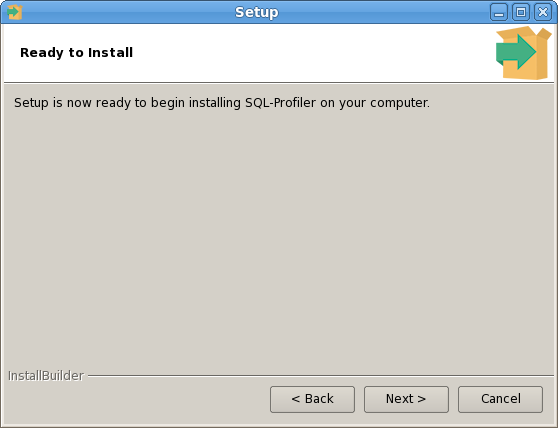
Click Next to continue to the License Agreement, shown in Figure 5.2.

C:\Users\susan\AppData\Local\Temp\vmware-susan\VMwareDnD\8ba2de0e\twp.png

C:\Users\susan\AppData\Local\Temp\vmware-susan\VMwareDnD\f3b94373\six.png
C:\Users\susan\AppData\Local\Temp\vmware-susan\VMwareDnD\d65d7381\four.png

C:\Users\susan\AppData\Local\Temp\vmware-susan\VMwareDnD\8093d075\installingsqlprof.png
C:\Users\susan\AppData\Local\Temp\vmware-susan\VMwareDnD\d6d6721d\six.png
1.
Edit the postgresql.conf file on the server you wish to profile, modifying the shared_preload_libraries parameter as shown below:
3.
Using the Query Tool or the psql command line interface, run the sql-profiler.sql script in the database specified as the Maintenance Database on the server you wish to profile. If you are using:
To use the PEM Query Tool to run the script, highlight the name of the maintenance database in the Browser tree control, and navigate through the Tools menu to select Query tool. When the Query Tool opens, use the Open option on the Files menu to open a web browser and navigate to the sql-profiler.sql script. By default, the sql-profiler.sql script is located in the contrib folder, under your Postgres installation.
When the script opens in the SQL Editor panel of the Query Tool, highlight the content of the script in the SQL Editor and select the Execute option from the Query menu (or click the Execute icon) to invoke the script and configure SQL Profiler.
To access SQL Profiler functionality, highlight the name of the database in the PEM Browser tree control; navigate through the Management menu to the SQL Profiler pull-aside menu. Menu options allow you to manage your SQL traces:
•
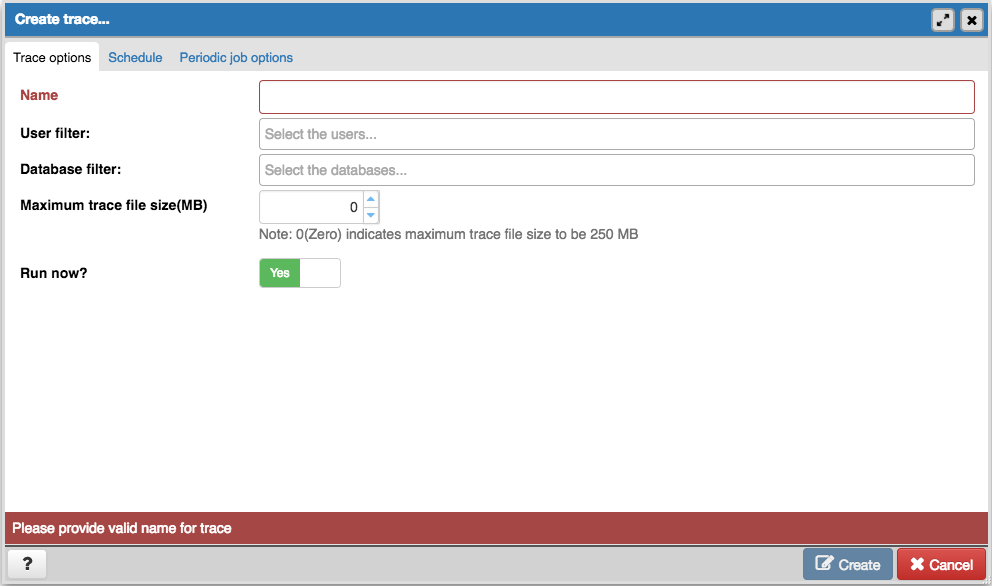
Select Create trace… to define a new trace (see Figure 5.7).
•
Select Open trace… to open an existing trace.
•
Select Delete trace(s)… to delete one or more traces.
•
Select View scheduled trace(s)… to review a list of scheduled traces.
C:\Users\susan\AppData\Local\Temp\vmware-susan\VMwareDnD\10287ac6\sp_create_new_trace.png
2.
Invoke the PEM server installer; this installer will upgrade both the PEM server and the PEM agent that resides on the PEM server node.
/opt/PostgresPlus/9.x/share/contrib
/opt/PostgreSQL/9.x/share/postgresql/contrib
Where x specifies the installed Postgres version.
To correct this error, you must replace the existing query set with a new query set. First, uninstall SQL Profiler by invoking the uninstall-sql-profiler.sql script, and then reinstall SQL Profiler by invoking the sql-profiler.sql script.
./uninstall-component_name
Where component_name is the name of the component that you wish to remove.
If the PEM installation resides on a Windows host, you can use the Windows Uninstall a Program applet to remove PEM components. To open the Uninstall a Program applet, navigate through the Programs submenu on the Windows Control Panel, selecting Programs and Features. When the Uninstall a Program window opens, highlight the name of the PEM component that you wish to remove, and click the Uninstall/Change button. A Windows popup will open, prompting you to confirm that you wish to remove the component; click Yes to remove the component.
#!/bin/bash
#
# chkconfig: 2345 85 15
# description: Starts and stops the PostgreSQL/Postgres Plus Advanced Server database server

# PostgreSQL/Postgres Plus Advanced Server Service script template for Linux
# Please modify the values accordingly

DB_DESC="Database Server - PostgreSQL 9.5"
DB_INSTALL_DIR=/opt/PostgreSQL/9.5
DB_BIN_DIR=${DB_INSTALL_DIR}/bin
DB_LIB_DIR=${DB_INSTALL_DIR}/lib
DB_DATA_DIR=${DB_INSTALL_DIR}/data
DB_HBA_FILE=${DB_DATA_DIR}/pg_hba.conf
DB_CONF_FILE=${DB_DATA_DIR}/postgresql.conf
DB_PID_FILE=${DB_DATA_DIR}/postmaster.pid
DB_STARTUP_LOG=${DB_DATA_DIR}/pg_log/startup.log
DB_SERVICE_USER=postgres

_die()
{
echo ""
echo "FATAL ERROR: $*"
echo ""
exit 1
}

if [ `id -u` != 0 ]; then
_die "You must run this script as the root."
fi

# Source function library.
if [ -f /etc/rc.d/functions ];
then
. /etc/init.d/functions
fi

start()
{
STARTDBSERVER=0
if [ -e "${DB_PID_FILE}" ]
then
PIDOFDB=`head -n 1 "${DB_PID_FILE}"`
PIDALIVEDB=""
if [ -n "${DB_PID_FILE}" ]; then
PIDALIVEDB=`ps -p "${PIDOFDB}" | grep "${PIDOFDB}"`
fi

if [ -n "${PIDALIVEDB}" ]
then
echo "The '${DB_DESC}' is already running. PID(${PIDALIVEDB})."
exit
else
STARTDBSERVER=1
fi
else
STARTDBSERVER=1
fi

if [ "${STARTDBSERVER}" != 0 ]
then
echo "Starting ${DB_DESC}..."
su - "${DB_SERVICE_USER}" -c "LD_LIBRARY_PATH=\"${DB_LIB_DIR}:\$LD_LIBRARY_PATH\" \"${DB_BIN_DIR}/pg_ctl\" -w start -D \"${DB_DATA_DIR}\" -l \"${DB_STARTUP_LOG}\" -o \"${DB_STARTUP_OPTIONS}\""

if [ $? -eq 0 ];
then
echo "${DB_DESC} started successfully."
exit 0
else
echo "${DB_DESC} did not start in a timely fashion, please see '${DB_STARTUP_LOG}' for details."
exit 1
fi
fi
}

stop()
{
if [ -e "${DB_PID_FILE}" ]
then
PIDOFDB=`head -n 1 "${DB_PID_FILE}"`
PIDALIVEDB=""
if [ -n "${DB_PID_FILE}" ]; then
PIDALIVEDB=`ps -p "${PIDOFDB}" | grep "${PIDOFDB}"`
fi

if [ -n "${PIDALIVEDB}" ]
then
echo "Stopping ${DB_DESC}..."
su - "${DB_SERVICE_USER}" -c "LD_LIBRARY_PATH=\"${DB_LIB_DIR}:\$LD_LIBRARY_PATH\" \"${DB_BIN_DIR}/pg_ctl\" stop -m fast -D \"${DB_DATA_DIR}\" -l \"${DB_STARTUP_LOG}\" -o \"${DB_STARTUP_OPTIONS}\""
else
echo "The '${DB_DESC}' is not running."
fi
else
echo "The '${DB_DESC}' is not running."
fi
}

reload()
{
echo "Reloading '${DB_DESC}'..."
su - "${DB_SERVICE_USER}" -c "LD_LIBRARY_PATH=\"${DB_LIB_DIR}:\$LD_LIBRARY_PATH\" \"${DB_BIN_DIR}/pg_ctl\" reload -D \"${DB_DATA_DIR}\" -l \"${DB_STARTUP_LOG}\" -o \"${DB_STARTUP_OPTIONS}\""
}

restart()
{
echo "Restarting '${DB_DESC}'..."
su - "${DB_SERVICE_USER}" -c "LD_LIBRARY_PATH=\"${DB_LIB_DIR}:\$LD_LIBRARY_PATH\" \"${DB_BIN_DIR}/pg_ctl\" restart -m fast -w -D \"${DB_DATA_DIR}\" -l \"${DB_STARTUP_LOG}\" -o \"${DB_STARTUP_OPTIONS}\""

if [ $? -eq 0 ];
then
echo "'${DB_DESC}' restarted successfully."
exit 0
else
echo "'${DB_DESC}' did not start in a timely fashion, please see '${DB_STARTUP_LOG}' for details."
exit 1
fi
}

_die_incomplete_requirement()
{
echo "One or more required configuration variables are not set:"
_die $*
}

_validate_script()
{
if [ -z "${DB_INSTALL_DIR}" ]; then
_die_incomplete_requirement "Missing installation directory";
fi
if [ ! -d "${DB_INSTALL_DIR}" ]; then
_die_incomplete_requirement "The specified - '${DB_INSTALL_DIR}' is not a valid installation directory. It is not present on the system.";
fi

if [ -z "${DB_BIN_DIR}" ]; then DB_BIN_DIR=${DB_INSTALL_DIR}/bin; fi
if [ ! -d "${DB_BIN_DIR}" ]; then
_die_incomplete_requirement "The specified - '${DB_BIN_DIR}' is not a valid bin directory. It is not present on the system.";
fi
if [ ! -f "${DB_BIN_DIR}/pg_config" -o ! -f "${DB_BIN_DIR}/pg_ctl" ]; then
_die_incomplete_requirement "The specified - '${DB_BIN_DIR}' does not contain the database server binaries.";
fi

if [ -z "${DB_LIB_DIR}" ]; then DB_LIB_DIR=${DB_INSTALL_DIR}/lib; fi
if [ -z "${DB_DESC}" ]; then DB_DESC=`${DB_BIN_DIR}/pg_config --version`; fi

if [ -z "${DB_DATA_DIR}" ]; then
_die_incomplete_requirement "Missing data directory settings in the script. Please set 'DB_DATA_DIR' variable in the script.";
fi

if [ ! -d "${DB_DATA_DIR}" ]; then
_die_incomplete_requirement "The specified - '${DB_DATA_DIR}' is not a valid. It is not present on the system.";
fi
if [ ! -f "${DB_DATA_DIR}/PG_VERSION" -o ! -d "${DB_DATA_DIR}/base" -o ! -d "${DB_DATA_DIR}/global" ]; then
_die_incomplete_requirement "The directory - '${DB_DATA_DIR}' does not look like a valid PostgreSQL/Postgres Plus Advanced Server data directory."
fi
if [ -z "${DB_SERVICE_USER}" ]; then
_die_incomplete_requirement "The service-user is not specified in the service script. Please set 'DB_SERVICE_USER' variable in the script."
fi
DB_VALID_SERVICE_USER=`cat /etc/passwd | grep "^${DB_SERVICE_USER}:"`
if [ -z "${DB_VALID_SERVICE_USER}" ]; then
_die_incomplete_requirement "The service-user '${DB_SERVICE_USER}' is not present on the system. Please specify the correct information."
fi
DB_DATA_DIR_OWNER=`ls -l ${DB_DATA_DIR}/PG_VERSION | awk '{print $3}'`
if [ x"${DB_DATA_DIR_OWNER}" != x"${DB_SERVICE_USER}" ]; then
_die_incomplete_requirement "The specified user - '${DB_SERVICE_USER}' does not own the data directory - '${DB_DATA_DIR}'. The data directory is owned by the user - '${DB_DATA_DIR_OWNER}'."
fi
if [ -z "${DB_HBA_FILE}" ]; then DB_HBA_FILE=${DB_DATA_DIR}/pg_hba.conf; fi
if [ ! -f "${DB_HBA_FILE}" ]; then
_die_incomplete_requirement "The hba-file - '${DB_HBA_FILE}' does not exist."
fi
if [ -z "${DB_CONF_FILE}" ]; then DB_CONF_FILE=${DB_DATA_DIR}/postgresql.conf; fi
if [ ! -f "${DB_CONF_FILE}" ]; then
_die_incomplete_requirement "The config-file - '${DB_CONF_FILE}' does not exist."
fi
if [ -z "${DB_PID_FILE}" ]; then DB_PID_FILE=${DB_DATA_DIR}/postmaster.pid; fi
if [ -z "${DB_STARTUP_LOG}" ]; then DB_STARTUP_LOG=${DB_DATA_DIR}/pg_log/startup.log; fi

DB_STARTUP_OPTIONS=""
if [ x"${DB_CONF_FILE}" != x"${DB_DATA_DIR}/postgresql.conf" ]; then
DB_STARTUP_OPTIONS="-c 'config_file=${DB_CONF_FILE}'"
fi
if [ x"${DB_HBA_FILE}" != x"${DB_DATA_DIR}/pg_hba.conf" ]; then
DB_STARTUP_OPTIONS="${DB_STARTUP_OPTIONS} -c 'hba_file=${DB_HBA_FILE}'"
DB_STARTUP_OPTIONS="${DB_STARTUP_OPTIONS} -c 'external_pid_file=${DB_PID_FILE}'"
fi

if [ x"${DEBUG_VALIDATION}" = x"1" ]; then
echo "Using these values in the scripts:"
echo ""
echo "DB_DESC : ${DB_DESC}"
echo ""
echo "DB_INSTALL_DIR : ${DB_INSTALL_DIR}"
echo "DB_BIN_DIR : ${DB_BIN_DIR}"
echo "DB_LIB_DIR : ${DB_LIB_DIR}"
echo ""
echo "DB_DATA_DIR : ${DB_DATA_DIR}"
echo "DB_HBA_FILE : ${DB_HBA_FILE}"
echo "DB_CONF_FILE : ${DB_CONF_FILE}"
echo "DB_PID_FILE : ${DB_PID_FILE}"
echo "DB_STARTUP_LOG : ${DB_STARTUP_LOG}"
echo ""
echo "DB_SERVICE_USER : ${DB_SERVICE_USER}"
echo "DB_STARTUP_OPTIONS : ${DB_STARTUP_OPTIONS}"
echo ""
fi
}

DEBUG_VALIDATION=0
# See how we were called.
case "$1" in
start)
_validate_script
start
;;
stop)
_validate_script
stop
;;
reload)
_validate_script
reload
;;
restart)
_validate_script
restart
;;
condrestart)
_validate_script
if [ -e "${DB_PID_FILE}" ]
then
PIDOFDB=`head -n 1 "${DB_PID_FILE}"`
PIDALIVEDB=""
if [ -n "${DB_PID_FILE}" ]; then
PIDALIVEDB=`ps -p "${PIDOFDB}" | grep "${PIDOFDB}"`
fi

if [ -n "${PIDALIVEDB}" ]
then
restart
else
echo "The '${DB_DESC}' is not running."
fi
else
echo "The '${DB_DESC}' is not running."
fi
;;
status)
_validate_script
su - "${DB_SERVICE_USER}" -c "LD_LIBRARY_PATH=\"${DB_LIB_DIR}:\$LD_LIBRARY_PATH\" \"${DB_BIN_DIR}/pg_ctl\" status -D \"${DB_DATA_DIR}\" -l \"${DB_STARTUP_LOG}\" -o \"${DB_STARTUP_OPTIONS}\""
;;
validate)
DEBUG_VALIDATION=1
_validate_script
exit 0
;;
*)
echo "Usage: $0 {start|stop|restart|condrestart|reload|status|validate}"
exit 1
esac