You are not required to manually add the
sslutils extension when using the Advanced Server as the new backing database. The process of configuring
sslutils is platform-specific.
|
•
|
PostgreSQL if you are upgrading to a PostgreSQL server.
|
|
•
|
PostgresPlus if you are upgrading to an Advanced Server server.
|
x.x specifies the version of Postgres to which you are migrating.
Then, use yum to install
sslutil dependencies:
sslutils must be compiled on the new backing database with the same compiler that was used to compile
sslutils on the original backing database. If you are moving to a Postgres database that was installed using a PostgreSQL one-click installer (from EnterpriseDB) or an Advanced Server installer, use Visual Studio to build
sslutils. If you are upgrading to:
Copy the unpacked sslutils utilities folder to the Postgres installation directory (i.e.
C:\Program Files\PostgreSQL\9.x).
SET USE_PGXS=1
SET GETTEXTPATH=path_to_gettext
SET OPENSSLPATH=path_to_openssl
SET PGPATH=path_to_pg_installation_dir
SET ARCH=x86
msbuild sslutils.proj /p:Configuration=Release
path_to_gettext specifies the location of the
GETTEXT library and header files.
path_to_openssl specifies the location of the
openssl library and header files.
Copy the compiled sslutils files to the appropriate directory for your installation; for example:
Where service_name specifies the name of the Postgres service.
On Windows, you can use the Services dialog to control the service. To open the
Services dialog, navigate through the
Control Panel to the
System and Security menu. Select
Administrative Tools, and then double-click the
Services icon. When the
Services dialog opens, highlight the service name in the list, and use the option provided on the dialog to
Stop the service.
path_to_pg_upgrade/pg_upgrade
-d old_data_dir_path
-D new_data_dir_path
-b old_bin_dir_path -B new_bin_dir_path
-p old_port -P new_port
-u user_name
path_to_pg_upgrade specifies the location of the pg_upgrade utility. By default, pg_upgrade is installed in the
bin directory under your Postgres directory.
old_data_dir_path specifies the complete path to the
data directory of the old backing database.
new_data_dir_path specifies the complete path to the
data directory of the new backing database.
old_bin_dir_path specifies the complete path to the
bin directory of the old backing database.
new_bin_dir_path specifies the complete path to the
bin directory of the old backing database.
old_port specifies the
port on which the old server is listening.
new_port specifies the
port on which the new server is listening.
user_name specifies the name of the cluster owner.
Where file_name specifies the name of the certificate file.
The server.
crt file may only be modified by the owner of the file, but may be read by any user. You can use the following command to set the file permissions for the
server.
crt file:
Where file_name specifies the name of the file.
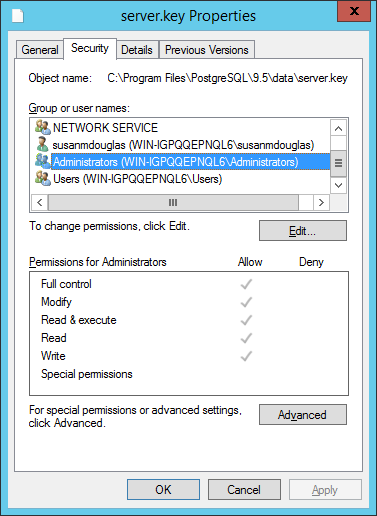
Navigate to the Security tab (see Figure 3.3) and highlight a
Group or user name to view the assigned permissions. Select
Edit or
Advanced to access dialogs that allow you to modify the permissions associated with the selected user.
The postgresql.
conf file contains parameter settings that specify server behavior. You will need to modify the
postgresql.
conf file on the new server to match the configuration specified in the
postgresql.
conf file of the old server.
The port parameter to listen on the port monitored by your original backing database (typically,
5432).
The ssl parameter should be set to
on.
The pg_hba.
conf file contains parameter settings that specify how the server will enforce host-based authentication. When you install the PEM server, the installer modifies the
pg_
hba.
conf file, adding entries to the top of the file:
Where service_name is the name of the backing database server.
If you are using Windows, you can use the Services dialog to control the service. To open the
Services dialog, navigate through the
Control Panel to the
System and Security menu. Select
Administrative Tools, and then double-click the
Services icon. When the
Services dialog opens, highlight the service name in the list, and use the option provided on the dialog to
Start the service.
The migration process re-creates the pem,
pemdata, and
pemhistory schemas from the source PEM server on the target PEM server. In preparation for the move, use the
psql client to delete these schemas from the
pem database on the target host. You can open the
psql client at the command line, or by selecting
SQL Shell (psql) from the
Postgres Enterprise Manager menu.
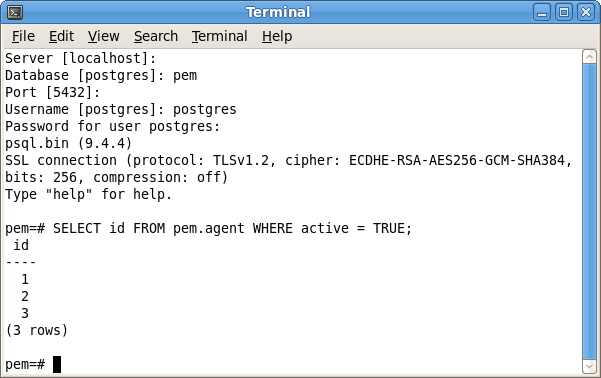
When the psql client opens, connect to the
pem backing database as the database superuser. After connecting to the
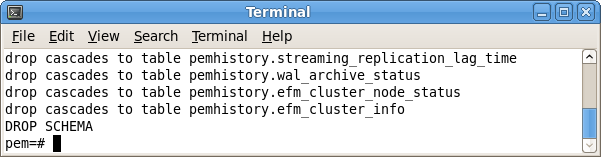
pem database on the target host, use the following commands to drop the schemas:
When dropping the schemas, you must include the CASCADE keyword, instructing the server to delete all dependent objects. When executing the command, the
psql client displays a list of the dependent objects; the client confirms each the schema is removed by displaying
DROP SCHEMA (as shown in Figure 4.1).
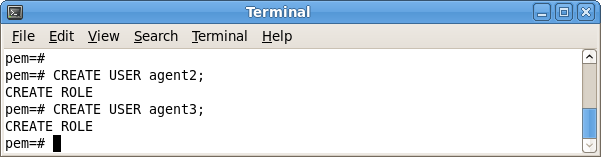
Where x specifies an agent number (see Figure 4.3). Remember,
agent1 is created on the target host by the PEM server installer.
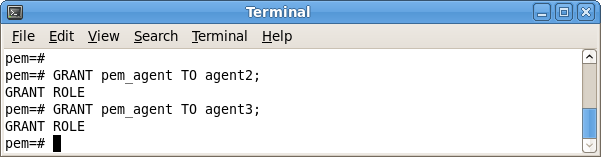
Then, use the GRANT command to assign each agent that resides on the target PEM server
pem_agent permissions:
Where x specifies an agent number (see Figure 4.4).
You can use the pg_dump utility to generate a script that contains the commands required to recreate the
pem database on the target host. By default,
pg_dump is installed in the
bin directory under your Postgres installation. To invoke
pg_dump, open a command line, navigate to the
bin directory, and enter:
user_name specifies the name of the database superuser for the PEM backing database.
file_name specifies the name of the script generated by
pg_dump.
The command shown in Figure 4.5 instructs pg_dump to generate a script that (when executed) will re-create the
pem database. The script will be named
backup.
sql, and will be created in the
tmp directory.
pg_
dump is connecting to the server using the credentials of the user,
postgres.
psql -U user_name -d pem -f file_name
user_name specifies the name of the database superuser. The user specified must have connection privileges for the backing database.
file_name specifies the complete path to the backup script generated by
pg_
dump.
The example shown in Figure 4.6 uses the psql client to invoke a script named
backup.
sql to recreate the
pem database. The script is invoked using the privileges associated with the database superuser,
postgres.
service_name specifies the name of the backing database server. For a PostgreSQL backing database, the service name is
postgresql-x.x, and for an Advanced Server backing database, the service name is
ppas-x.x, where
x specifies the version number.
If you are using Windows, you can use the Services dialog to control the service. To open the
Services dialog, navigate through the
Control Panel to the
System and Security menu. Select
Administrative Tools, and then double-click the
Services icon. When the
Services dialog opens, highlight the service name in the list, and use the option provided on the dialog to
Stop the service.
Copy the files to the data directory under the Postgres installation that provides the backing database for the target cluster. On Linux, by default, the files reside in:
Where file_name specifies the name of the certificate file.
The server.
crt file may only be modified by the owner of the file, but may be read by any user. You can use the following command to set the file permissions for the
server.
crt file:
Where file_name specifies the name of the file.
Navigate to the Security tab (see Figure 4.7) and highlight a
Group or user name to view the assigned permissions. Select
Edit or
Advanced to access dialogs that allow you to modify the permissions associated with the selected user.
Copy the agent1.key and
agent1.crt files from the source host to the target host. By default, on Linux, the files are installed in /
root/.
pem; copy the files to the same directory on the target host.
If necessary, navigate to /root/.pem, and use the following commands to modify the permissions and ownership of the
agent1.key file:
Copy the agent1.key and
agent1.crt files from the source host to the target host. On Windows, the files are located in:
Where user_name is the name of the user that invoked the PEM installer.
Modify the pg_hba.conf file on the target host to allow connections from each PEM agent. By default, the
pg_hba.conf file is located in the
data directory under your Postgres installation.
After modifying the pg_hba.conf file, you must restart the server for the changes to take effect.
Where service_name is the name of the backing database server.
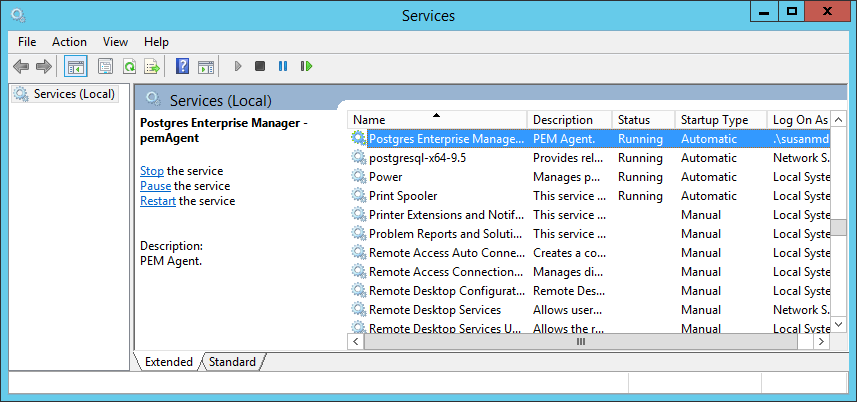
If you are using Windows, you can use the Services dialog to control the service. To open the
Services dialog, navigate through the
Control Panel to the
System and Security menu. Select
Administrative Tools, and then double-click the
Services icon. When the
Services dialog opens, highlight the service name in the list, and use the option provided on the dialog to
Start the service.
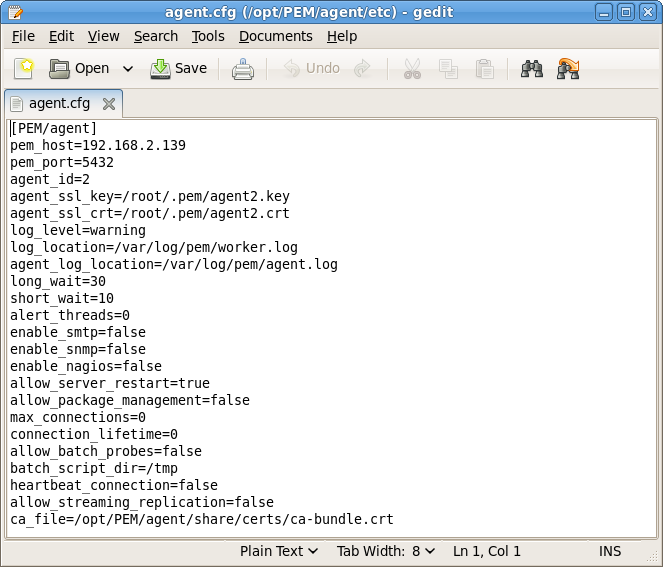
Use your choice of editor to modify the
agent.cfg file (shown in Figure 4.8), specifying the new IP address and port number of the PEM server in the
pem_host and
pem_port parameters.
After modifying the agent.cfg file, you must restart the PEM agent service; you can use the pemagent service script on the Linux command line to restart the service:
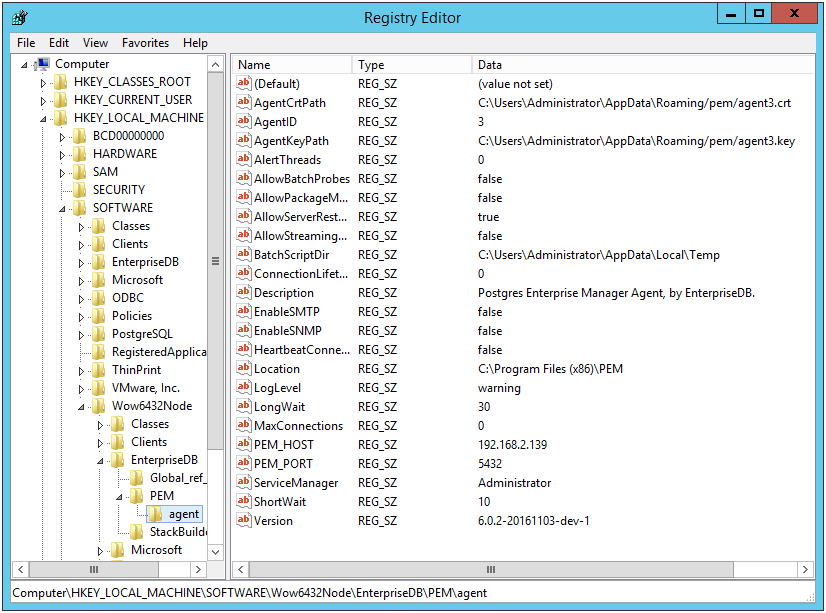
The PEM_HOST and
PEM_PORT entries must specify the address and port number of the new PEM server on the target host. To modify a registry entry, right click on the entry
Name, and select
Modify from the context menu to open the
Edit String dialog.
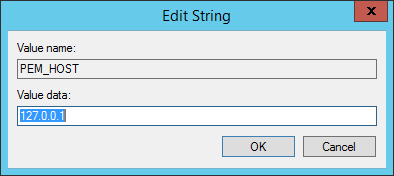
Use the Edit String dialog to make any changes to the value of the entry (see Figure 4.10). When you're finished, click
OK to save your changes, or
Cancel to exit without saving.