PEM 8.1 -Administrator’s Guide
EnterpriseDB
PEM Administrator’s Guide
This document provides an introduction to Postgres Enterprise Manager (PEM). Postgres Enterprise Manager (PEM) is an enterprise management tool designed to assist database administrators, system architects, and performance analysts in administering, monitoring, and tuning PostgreSQL and EDB Advanced Server database servers. PEM is architected to manage and monitor anywhere from a handful, to hundreds of servers from a single console, allowing complete and remote control over all aspects of your databases.
For information about the platforms and versions supported by PEM, visit the EDB website at:
https://www.enterprisedb.com/services-support/edb-supported-products-and-platforms#pem
This document uses Postgres to mean either the PostgreSQL or EDB Postgres Advanced Server database.
overview registering_server pem_define_aws_instance_connection managing_certificates managing_configuration_settings managing_pem_server managing_pem_agent conclusion
PEM Overview
PEM provides a number of benefits not found in any other PostgreSQL management tool:
Management en Masse Design - PEM is designed for enterprise database management and is built to tackle the management of large numbers of servers across geographical boundaries. Global dashboards keep you up to date on the up/down/performance status of all your servers in an at-a-glance fashion.
Distributed Architecture - PEM is architected in a way that maximizes its ability to gather statistical information and to perform operations remotely on machines regardless of operating system platform.
Graphical Administration - All aspects of database administration can be carried out in the PEM client via a graphical interface. Server startup and shutdown, configuration management, storage and security control, object creation, performance management, and more can be handled from a single console.
Full SQL IDE - PEM contains a robust SQL integrated development environment (IDE) that provides ad-hoc SQL querying, stored procedure/function development and a graphical debugger.
Enterprise Performance Monitoring - PEM provides enterprise-class performance monitoring for all managed database servers. Lightweight and efficient agents monitor all aspects of each database server’s operations as well as each machine’s underlying operating system and provide detailed statistics back to easily navigated performance pages within the interface.
Proactive Alert Management - PEM ships out-of-the-box with the ability to create performance thresholds for each key metric (e.g. memory, storage, etc.) that are monitored around the clock. Any threshold violation results in an alert being sent to a centralized dashboard that communicates the nature of the problem and what actions are necessary to prevent the situation from jeopardizing the overall performance of the server.
Simplified Capacity Planning - All key performance-related statistics are automatically collected and retained for a specified period of time in the PEM’s repository. The Capacity Manager utility allows you to select various statistics and perform trend analysis over time to understand things such as peak load periods, storage consumption trends, and much more. A forecasting mechanism in the tool allows you to also forecast resource usage in the future and plan/budget accordingly.
Audit Manager - The Audit Manager configures audit logging on Advanced Server instances. Activities such as connections to a database, disconnections from a database, and the SQL statements run against a database can be logged. The Audit Log dashboard can then be used to filter and view the log.
Log Manager - The Log Manager wizard configures server logging parameters with (optional) log collection into a central table. Use the wizard to specify your preference for logging behaviors such as log file rotation, log destination, and the error message severity. Use the Server Log dashboard to filter and review the collected server log entries.
SQL Workload Profiling - PEM contains a SQL profiling utility that allows you to trace the SQL statements that are executed against one or more servers. SQL profiling can either be done in an ad-hoc or scheduled manner. Captured SQL statements can then be filtered so you can easily identify and tune poorly running SQL statements. SQL statements can also be fed into an Index Advisor on Advanced Server that analyzes each statement and makes recommendations on new indexes that should be created to help performance.
Expert Database Analysis - PEM includes the Postgres Expert utility. Postgres Expert analyzes selected databases for best practice enforcement purposes. Areas such as general configuration, security setup, and much more are examined. Any deviations from recommended best practices are reported back to you, along with an explanation of each particular issue, and expert help on what to do about making things right.
Streaming Replication Monitoring - You can monitor the Streaming Replication dashboard or use options on the PEM client to promote a replica node to the primary node.
Secure Client Connectivity - PEM supports secure client connections through an encrypted SSH tunnel. The full-featured PEM client includes an SSH Tunnel definition dialog that allows you to provide connection information for a secure connection.
Wide Platform Support - PEM supports most major Linux and Windows platforms.
pem_architecture installing_pem_overview using_pem_web_interface
PEM Architecture
Postgres Enterprise Manager (PEM) is a tool designed to monitor and manage multiple Postgres servers through a single GUI interface. PEM is capable of monitoring the following areas of the infrastructure:
Note The term Postgres refers to either PostgreSQL or EDB Postgres Advanced Server or EDB Postgres Extended.
- Hosts - One or more servers (physical or virtual) and their operating systems.
- Servers - One or more instances of PostgreSQL or EDB Postgres Advanced Server or EDB Postgres Extended (formerly known as 2ndQPostgres) running on a host.
- Databases - One or more databases and the schema objects (tables, indexes, etc.) within them.
PEM consists of a number of individual software components; the individual components are described below.
- PEM Server - The PEM Server is used as the data repository for monitoring data and as a server to which both Agents and Clients connect. The PEM server consists of an instance of PostgreSQL and an associated database for storage of monitoring data, and a server that provides web services.
- PEM Agent - The PEM Agent is responsible for executing tasks and reporting statistics from the Agent host and the monitored Postgres instances to the PEM server. A single PEM Agent can monitor multiple installed instances of Postgres that reside on one or many hosts.
- PEM Web Client - The PEM web interface allows you to manage and monitor Postgres servers and utilize PEM extended functionality. The web interface software is installed with the PEM server and is accessed via any supported web browser.
- SQL Profiler - SQL Profiler is a Postgres server plugin to record the monitoring data and query plans to be analyzed by the SQL Profiler tool in PEM. This is an optional component of PEM, but the plugin must be installed into each instance of Postgres with which you wish to use the SQL Profiler tool. The SQL Profiler may be used with any supported version of an EDB distribution of a PostgreSQL server or Advanced Server (not just those managed through the PEM server). See the PEM SQL Profiler Configuration Guide for details and supported versions.
PEM architecture
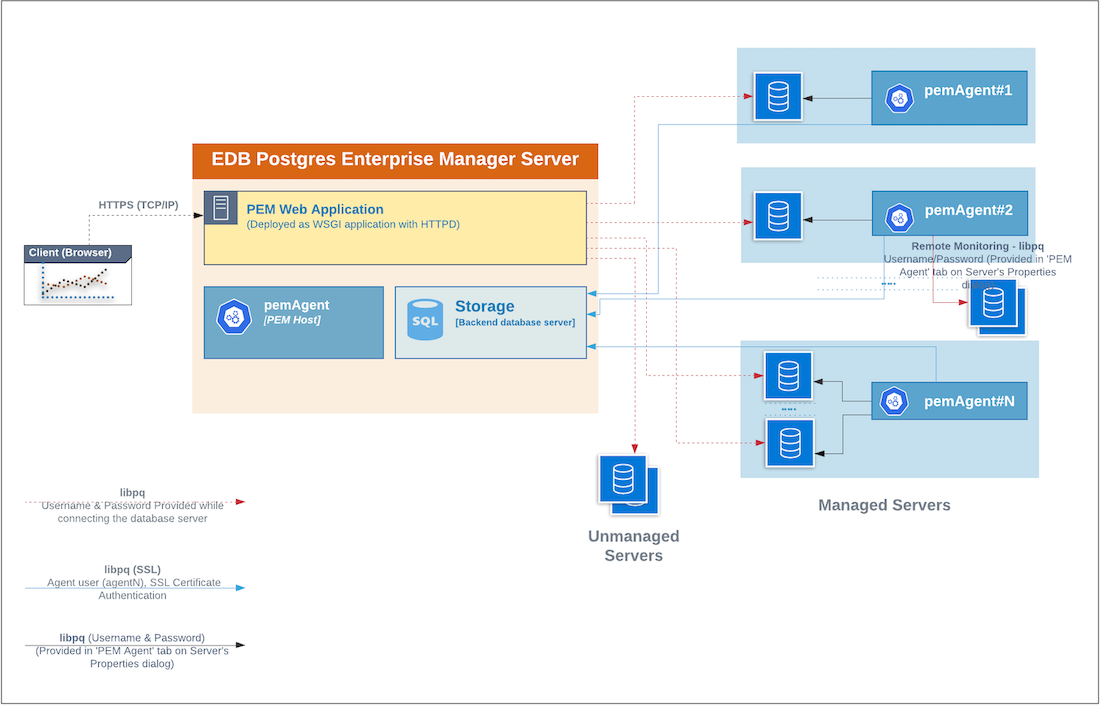
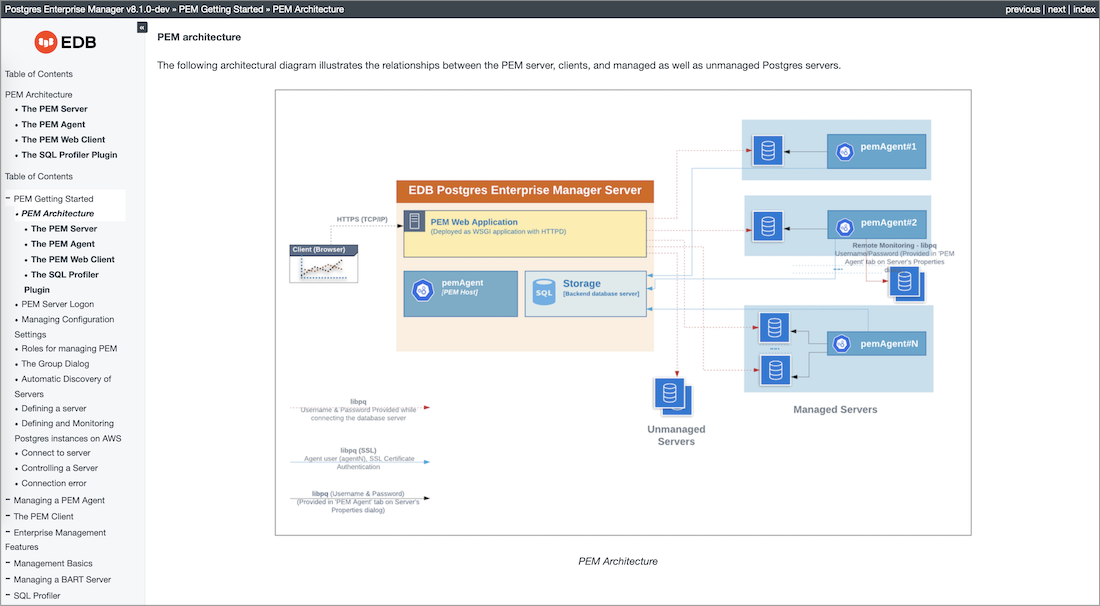
The following architectural diagram illustrates the relationships between the PEM server, clients, and managed as well as unmanaged Postgres servers.
The PEM Server
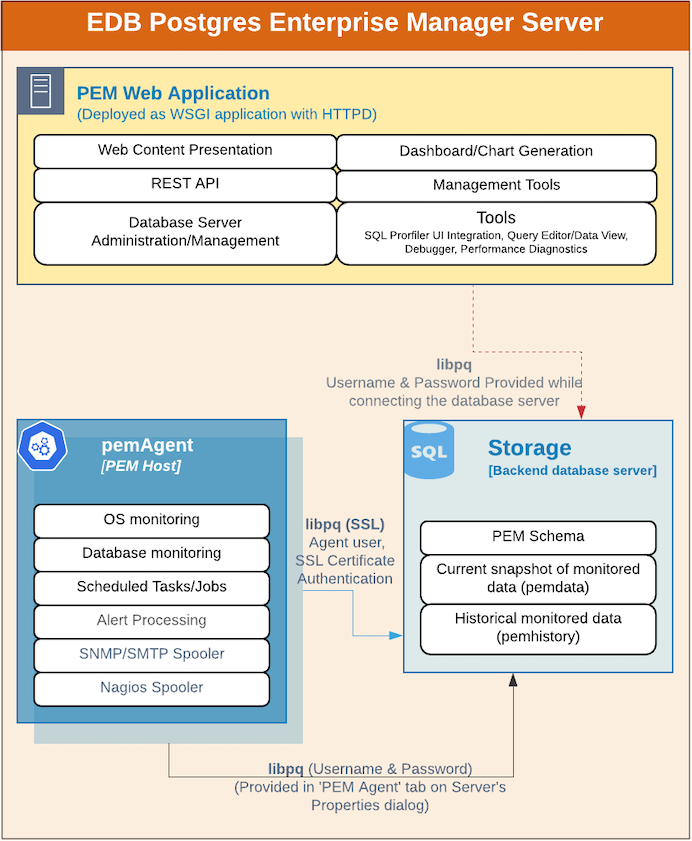
The PEM server consists of an instance of Postgres, an instance of the Apache web-server providing web services to the client, and a PEM Agent. PEM utilizes a server-side cryptographic plugin to generate authentication certificates.
The instance of Postgres (a database server) and an instance of the Apache web-server ( HTTPD) can be on the same host or on separate hosts.
- Postgres Instance (Database server) - This is the backend database server. It hosts a database named pem which acts as the repository for PEM Server. The pem database contains several schemas that store metric data collected from each monitored host, server, and database.
- pem - This schema is the core of the PEM application. It contains the definitions of configuration functions, tables, or views required by the application.
- pemdata - This schema stores the current snapshot of the monitored data.
- pemhistory - This schema stores the historical monitored data.
- Apache Web Server (httpd) - The PEM Web Application is deployed as a WSGI application with HTTPD to provide web services to the client. It is comprised of the following:
- Web content presentation - The presentation layer is created by the Web Application (for example Browser, login page,..).
- Rest API - The REST API allows integration with other apps and services.
- Database Server Administration/Management - Database server administration and management activities like CREATE, ALTER, DROP, etc. can be performed for managed as well as unmanaged servers.
- Dashboard/Chart generation - Internally, the web application includes functionality that generates Dashboards and Charts.
- Management Tools - The Audit Manager, Capacity Manager, Log Manager, Postgres Expert, Postgres Log Analysis Expert, and the Tuning Wizard are made available in the Web Application.
- Other tools provide functionality on managed or unmanaged servers:
- SQL Profiler UI Integration - SQL Profiler generates easily analyzed traces of session content.
- Query Editor/Data View - The Query editor allows you to query, edit, and view data.
- Debugger - The Debugger helps you debug queries.
- Performance Diagnostics - Performance Diagnostics helps you analyze the performance of Advanced Server.
We recommend that you use a dedicated machine to host production instances of the PEM backend database. The host may be subject to high levels of data throughput, depending on the number of database servers that are being monitored and the workloads the servers are processing.
The PEM Agent
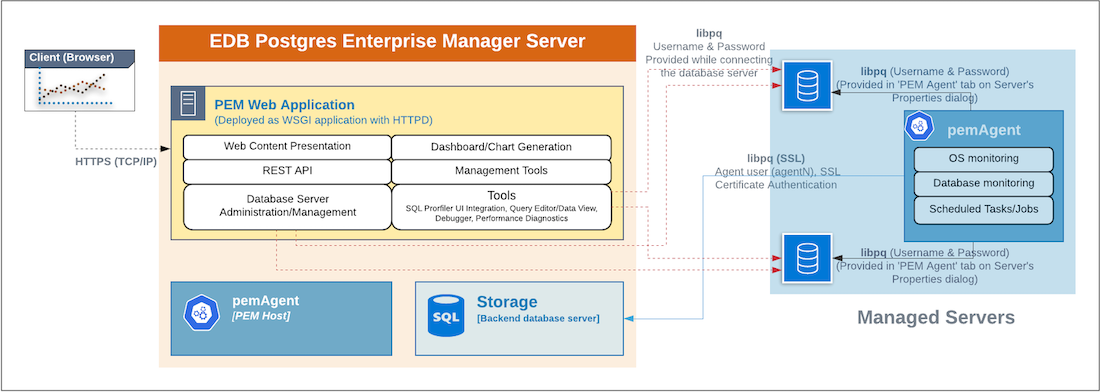
The PEM Agent is responsible for the collection of monitoring data from the machine and operating system, as well as from each of the Postgres instances to which they are bound. Each PEM Agent can monitor one physical or virtual machine and is capable of monitoring multiple database servers locally - installed on the same system, or remotely - installed on other systems. It is also responsible for executing other tasks that may be scheduled by the user (for example, server shutdowns, SQL Profiler traces, user-defined jobs).
A PEM Agent is installed by default on the PEM Server along with the installation of the PEM Server. It is generally referred to as a PEM Agent on the PEM Host. Separately, the PEM Agent can also be installed on the other servers hosting the Postgres instances to be monitored using PEM.
Whether monitoring locally or remotely, the PEM Agent connects to the PEM Server using PostgreSQL’s libpq, using SSL certificate-based authentication. The PEM Agent installer in Windows and pemworker CLI in Linux is responsible for registering each agent with the PEM Server, and generating and installing the required certificates.
Please note that there is only one-way traffic between the PEM Agent and PEM Server; the PEM Agent always connects to the PEM Server.
The PEM Agent must be able to connect to each database server that it monitors. This connection is made over a TCP/IP connection (or optionally a Unix Domain Socket on Unix hosts), and may optionally use SSL. The user must configure the connection and authentication to the monitored server.
Once configured, each agent collects statistics and other information on the host and each database server and database that it monitors. Each piece of information is known as a metric and is collected by a probe. Most probes will collect multiple metrics at once for efficiency. Examples of the metrics collected include:
- Disk I/O statistics
- Network statistics
- Database server version string
- Database server configuration option (GUC) values
- Table access statistics
- Table and index sizes
A list of PEM probes can be found here.
By default, the PEM Agent bound to the database server collects the OS/Database monitoring statistics and also runs any scheduled tasks/jobs for that particular database server, storing data in the pem database on the PEM server.
The Alert processing, SNMP/SMTP spoolers, and Nagios Spooler data is stored in the pem database on the PEM server and is then processed by the PEM Agent on the PEM Host by default. However, processing by other PEM Agents can be enabled by adjusting the SNMP/SMTP and Nagios parameters of the PEM Agents.
To see more information about these parameters see Server Configuration.
The PEM Web Client
The PEM client is a web-based application that runs in supported browsers. The client’s web interface connects to the PEM server and allows direct management of managed or unmanaged servers, and the databases and schemas that reside on them.
The client allows you to use PEM functionality that makes use of the data logged on the server through features such as the dashboards, the Postgres Log Analysis Expert, and Capacity Manager.
The SQL Profiler Plugin
You are not required to install the SQL Profiler plugin on every server, but you must install and configure the plugin on each server on which you wish to use the SQL Profiler. You may also want to install and configure SQL Profiler on un-monitored development servers. For ad-hoc use also, you may temporarily install the SQL Profiler plugin.
The plugin is installed with the EDB Postgres Advanced Server distribution but must be installed separately for use with PostgreSQL. The SQL Profiler installer is available from the EDB website.
SQL Profiler may be used on servers that are not managed through PEM, but to perform scheduled traces, a server must have the plugin installed, and must be managed by an installed and configured PEM agent.
For more information about using SQL Profiler, see the PEM SQL Profiler Guide.
Installing PEM - Overview
For detailed instructions about installing PEM, please consult the PEM Installation Guides, available at:
https://www.enterprisedb.com/docs/
The basic steps involved in the PEM installation process are:
Install the PEM server components. The PEM server software and backend database (named pem) may reside on the same host as the supporting httpd server, or may reside on a separate host. The PEM server installer installs a PEM agent and the PEM Web client on the host of the PEM server.
Register each additional physical or virtual machine that you would like to manage with PEM. For convenience, PEM supports remote monitoring (an agent is not required to reside on the same host as the server that it monitors). Please note that a remote agent cannot retrieve all of the information available from a monitored server; you may wish to install an agent on each server host.
Install the SQL Profiler component into each Postgres instance on which you want to perform SQL capture and analysis. The SQL Profiler installer will prompt you for the location of your Postgres installation, and place the required software into that directory. The SQL Profiler plugin is already installed on Advanced Server instances, and requires only configuration to enable profiling.
Using the PEM Web Interface
The PEM web interface is installed with the PEM server. When the server installation completes, you can open the PEM interface in your choice of browser by navigating to:
https://<ip_address_of_PEM_host>:8443/pem
Where ip_address_of_PEM_host specifies the IP address of the host of the PEM server. The Postgres Enterprise Manager Login window opens:
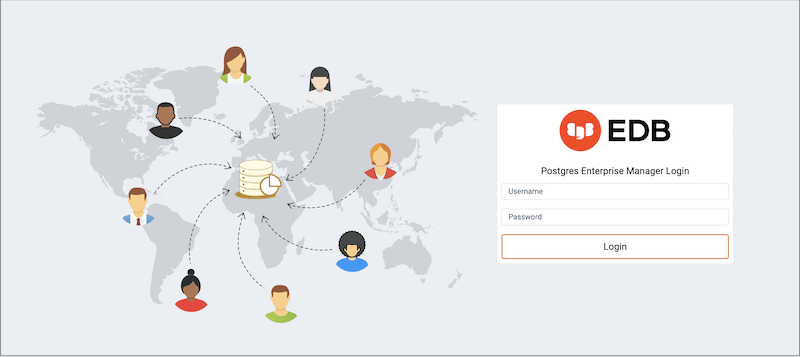
Use the fields on the Postgres Enterprise Manager Login window to authenticate yourself with the PEM server:
Provide the name of a pem database user in the
Usernamefield. For the first user connecting, this will be the name provided when installing the PEM server.Provide the password associated with the user in the
Passwordfield.
After providing your credentials, click Login to connect to PEM.
The PEM web interface opens, displaying the Global Overview Dashboard.
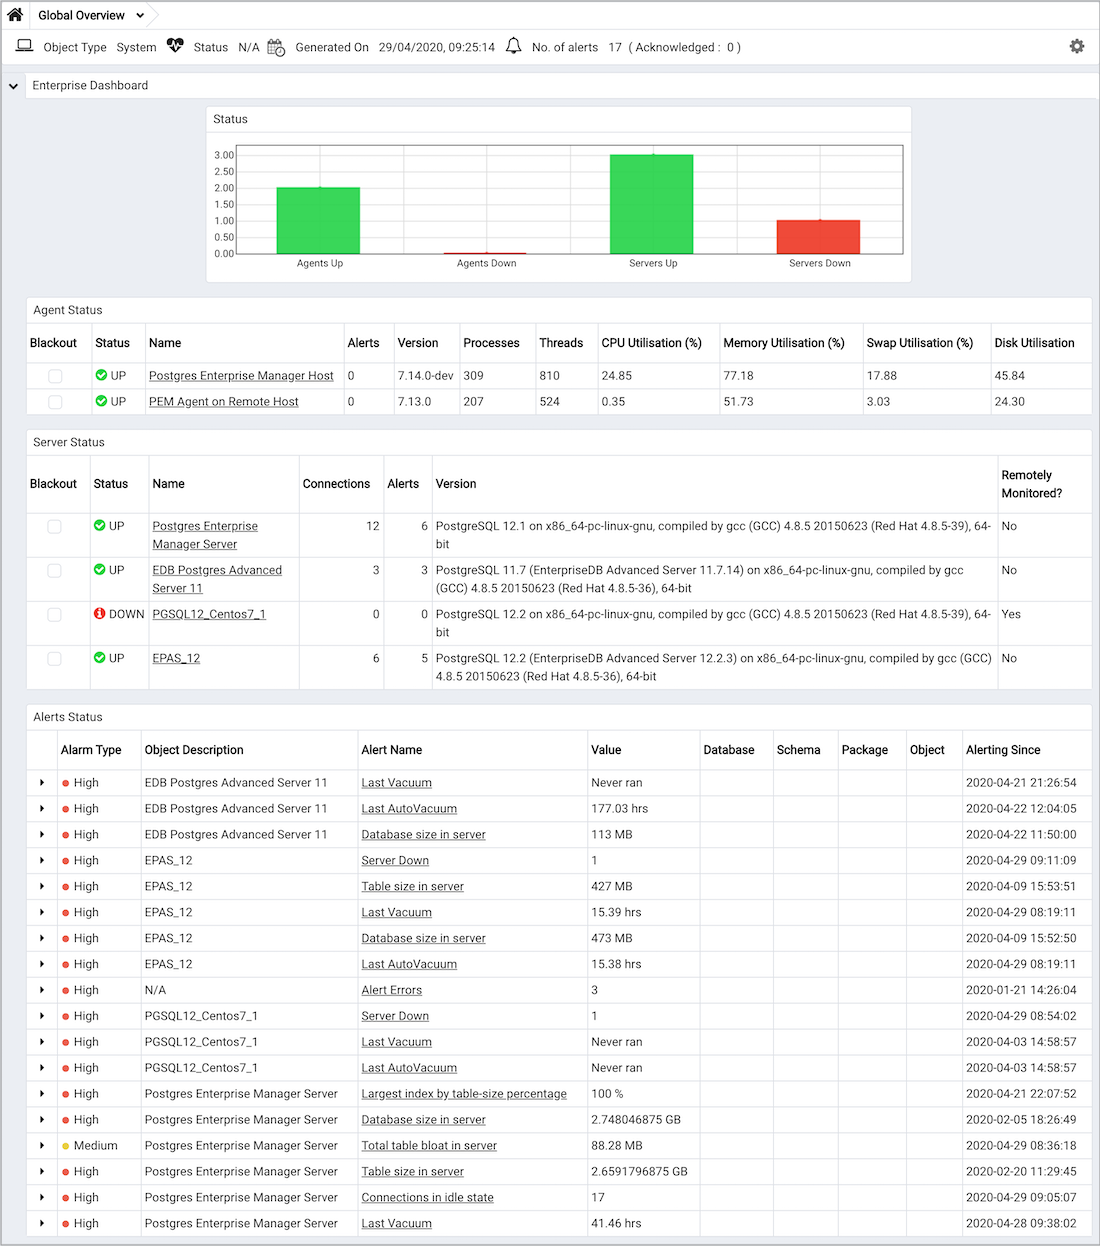
The Browser pane displays a tree control that provides access to information about the database objects that reside on each server. The tree control expands to display a hierarchical view of the servers and objects that are monitored by the PEM server.
The PEM Menu Bar
The PEM menu bar provides access to commands and features that you can use to manage your database servers and the objects that reside on those servers. If an option is disabled:
The database server to which you are currently connected may not support the selected feature.
The selected menu option may not be valid for the current object (by design).
The role that you have used to connect to the server may have insufficient privileges to change the selected object.
Context-sensitive menus across the top of the PEM web interface allow you to customize your environment and provide access to the enterprise management features of PEM.
The File Menu
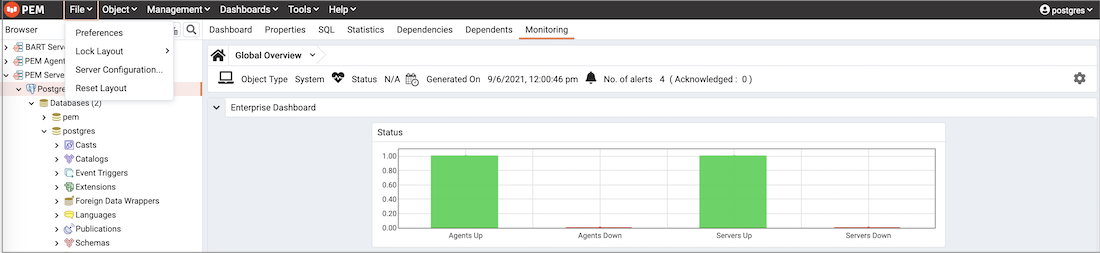
Use the File menu to access the following options:
| Menu Option | Action |
|---|---|
| Preferences | Click to open the Preferences dialog to customize your PEM client settings. |
| Lock Layout | Click to open a sub-menu to select the level for locking the UI layout. |
| Server Configuration | Click to open the Server Configuration dialog and update your PEM server configuration settings. |
| Reset Layout | If a workspace panel is popped out by mistake or intentionally it can be reset back to default using Reset Layout. |
The Object Menu
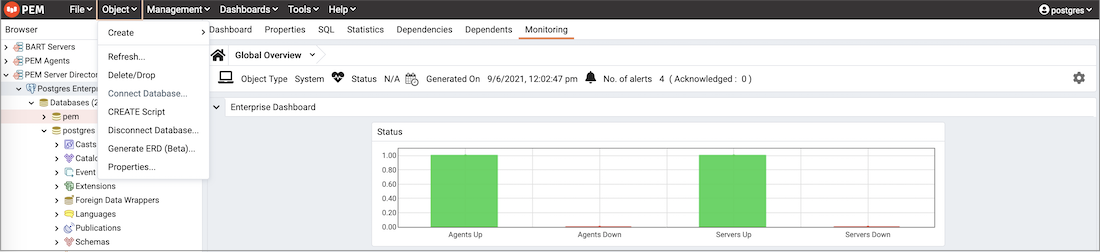
The Object menu is context-sensitive. Use the Object menu to access the following options:
| Menu Option | Action |
|---|---|
| Create | Click Create to access a context menu that provides context-sensitive selections. |
| Refresh… | Click to refresh the currently selected object. |
| Delete/Drop | Click to delete the currently selected object from the server. |
| Connect Server | Click to open the Connect to Server dialog to establish a connection with a server. |
| CREATE Script | Click to open the Query tool to edit or view the selected script. |
| Disconnect Server | Click to refresh the currently selected object. |
| BART | Click to access a context menu that provides options for removing BART configuration, taking a BART backup, or revalidate the BART configuration. |
| Clear Saved Password | If you have saved the database server password, click to clear the saved password. Enabled only after password is saved. |
| Clear SSH Tunnel Password | If you have saved the ssh tunnel password, click to clear the saved password. Enabled only after password is saved. |
| Drop Cascade | Click to delete the currently selected object and all dependent objects from the server. |
| Hide | Click to hide the currently selected group; to view hidden groups, enable the Show hidden groups option in Preferences. |
| Properties… | Click to review or modify the currently selected object’s properties. |
| Trigger(s) | Click to Disable or Enable trigger(s) for the currently selected table. |
| Truncate | Click to remove all rows from a table (Truncate) or to remove all rows from a table and its child tables (Truncate Cascade). |
| View Data | Click to access a context menu that provides several options for viewing data. |
The Management Menu
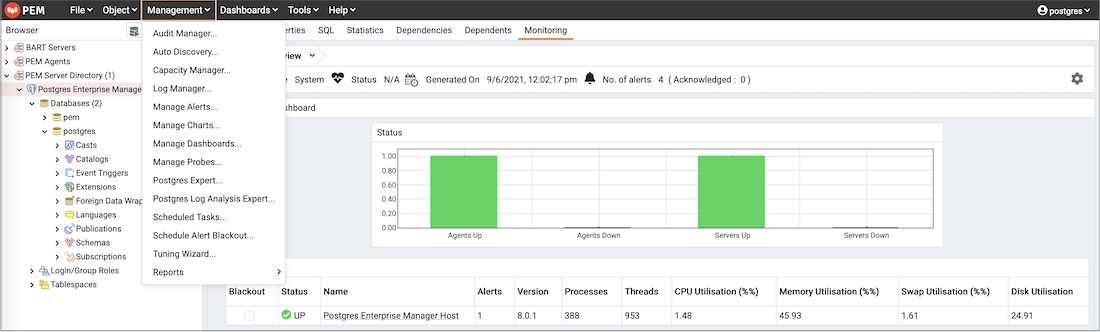
Use the Management menu to access the following PEM features:
| Menu Option | Action |
|---|---|
| Audit Manager… | Click to open the Audit Manager and configure auditing on your monitored servers. |
| Auto Discovery… | Click to open the Auto Discovery dialog to instruct a PEM agent to locate and bind monitored database servers. |
| Capacity Manager… | Click to open the Capacity Manager dialog and analyze historical or project future resource usage. |
| Log Manager… | Click to open the Log Manager dialog and configure log collection for a server. |
| Manage Alerts… | Click to access the Manage Alerts tab and create or modify alerting behavior. |
| Manage Charts… | Click to open the Manage Charts tab to create or modify PEM charts. |
| Manage Dashboards… | Click to open the Manage Dashboards dialog to VACUUM, ANALYZE, REINDEX, or CLUSTER. |
| Manage Probes… | Click to open the Manage Probes dialog to VACUUM, ANALYZE, REINDEX, or CLUSTER. |
| Postgres Expert… | Click to open the Postgres Expert wizard and perform a static analysis of your servers and databases. |
| Postgres Log Analysis Expert… | Click to access the Postgres Log Analysis Expert dialog analyze log file contents for usage trends. |
| Scheduled Tasks | Click to open the Scheduled Tasks tab and review tasks that are pending or recently completed. |
| Tuning Wizard… | Click to open the Tuning Wizard dialog to generate a set of tuning recommendations for your server. |
| Reports | Click to open the Reports dialog to generate the system configuration report and core usage report for your server. |
The Dashboards Menu
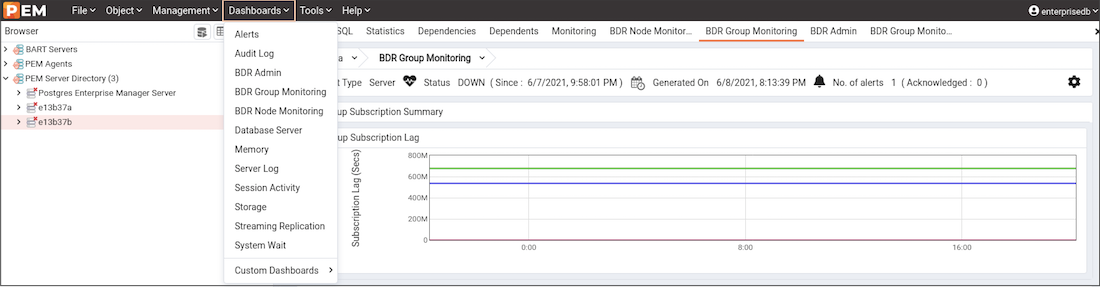
Use the context-sensitive Dashboards menu to access dashboards:
| Option | Action |
|---|---|
| Alerts | Click to open the Alerts Dashboard for the selected node. |
| Audit Log | Click to open the Audit Log Analysis Dashboard for the selected node. |
| BDR Admin | Click to open the BDR Admin Dashboard for the selected node. |
| BDR Group Monitoring | Click to open the BDR Group Monitoring Dashboard for the selected node. |
| BDR Node Monitoring | Click to open the BDR Node Monitoring Dashboard for the selected node. |
| Database Server | Click to open the Database Analysis Dashboard for the selected node. |
| I/O Analysis | Click to open the I/O Analysis Dashboard for the selected node. |
| Memory | Click to open the Memory Analysis Dashboard for the selected node. |
| Object Activity | Click to open the Object Activity Analysis Dashboard for the selected node. |
| Operating System | Click to open the Operating System Analysis Dashboard for the selected node. |
| Probe Log | Click to open the Probe Log Analysis Dashboard for the selected node. |
| Server Log | Click to open the Server Log Analysis Dashboard for the selected node. |
| Session Activity | Click to open the Session Activity Analysis Dashboard for the selected node. |
| Storage | Click to open the Storage Analysis Dashboard for the selected node. |
| Streaming Replication | Click to open the Streaming Replication Analysis Dashboard for the selected node. |
| System Wait | Click to open the System Wait Analysis Dashboard for the selected node. |
The Tools Menu
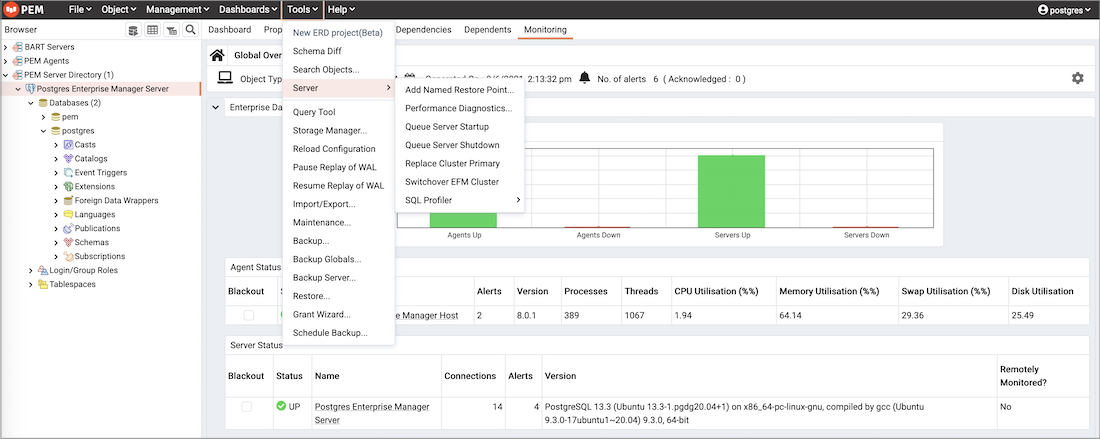
Use the options on the Tools menu to access the following features:
| Option | Action |
|---|---|
| Schema Diff | Click to open the Schema Diff dialog to compare the schema objects between two database schemas. |
| Search objects | Click to open the Search Objects dialog to search the database objects within a database. |
| Server | Click to access the various server related tools such as Add Named Restore Point, Performance Diagnostics, Queue Server Startup, Queue Server Shutdown, Replace Cluster Primary, Switchover EFM Cluster and SQL Profiler. |
| Query Tool | Click to open the Query tool for the currently selected object. |
| Reload Configuration | Click to update configuration files without restarting the server. |
| Pause replay of WAL | Click to pause the replay of the WAL log. |
| Resume replay of WAL | Click to resume the replay of the WAL log. |
| Import/Export… | Click to open the Import/Export data… dialog to import or export data from a table. |
| Maintenance… | Click to open the Maintenance… dialog to VACUUM, ANALYZE, REINDEX, or CLUSTER. |
| Backup… | Click to open the Backup… dialog to backup database objects. |
| Backup Globals… | Click to open the Backup Globals… dialog to backup cluster objects. |
| Backup Server… | Click to open the Backup Server… dialog to backup a server. |
| Restore… | Click to access the Restore dialog to restore database files from a backup. |
| Grant Wizard… | Click to access the Grant Wizard tool. |
| Schedule Backup | Click to access the Schedule Backup dialog for BART backups. |
The Help Menu
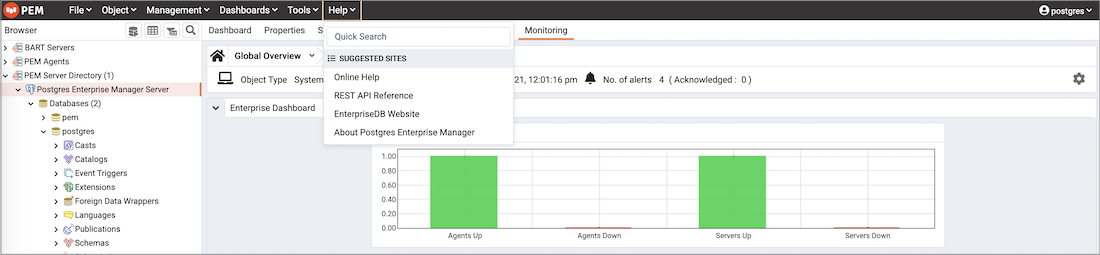
Use the options on the Help menu to access the online help documents or to review information about the PEM installation:
| Option | Action |
|---|---|
| Online Help | Click to open documentation for Postgres Enterprise Manager. |
| REST API Reference | Click to open the REST API Reference. |
| EDB Website | Click to open the EDB website in a browser window. |
| About Postgres Enterprise Manager | Click to locate versioning and user information for Postgres Enterprise Manager. |
Controlling and Customizing Charts, Graphs and Tables
Use the icons in the upper-right corner of each graphic on a dashboard to control and customize the charts, graphs and tables displayed in the PEM client for your current user session.
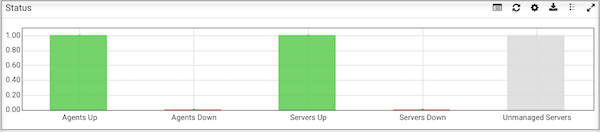
The following table gives the information about icons:
| Icons | Information |
|---|---|
 |
View information about the chart, graph, or table. |
 |
Refresh the content of a chart, graph or table. |
 |
Personalize the chart, graph, or table settings for the current user. |
 |
Download an image of the chart or graph. |
|
View the legends that are used in the chart, graph, or table. |
 |
Expand the chart or graph to full-screen. |
For more information about customizing the graphics displayed on the PEM dashboards, please see the PEM client online help.
Online Help and Documentation
PEM contains built-in help that provides assistance in using the tool. To access the online help for PEM, select Online Help from the Help option on the Help menu.
The Help menu also provides quick access to the EDB website.
Registering a Server
Before you can manage or monitor a server with PEM, you must register the server with PEM, and bind an agent. A server may be bound to a remote agent (an agent that resides on a different host), but if the agent does not reside on the same host, it will not have access to all of the statistical information about the instance.
Manually Registering a Server
To manage or monitor a server with PEM, you must:
- Register your Advanced Server or PostgreSQL server with the PEM server.
- Bind the server to a PEM agent.
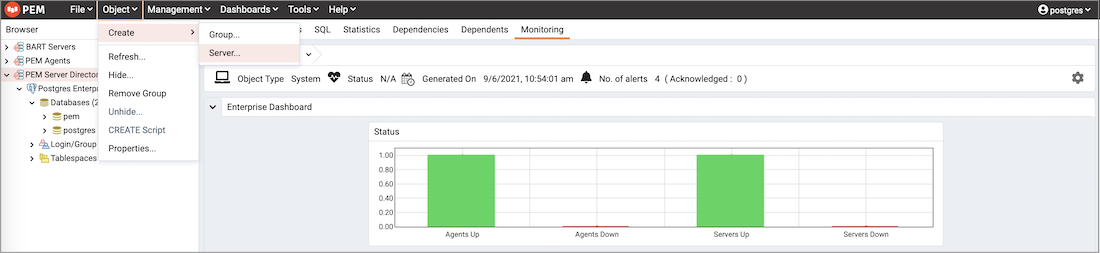
You can use the Create - Server dialog to provide registration information for a server, bind a PEM agent, and display the server in PEM client tree control. To open the Create - Server dialog, navigate through the Create option on the Object menu (or the context menu of a server group) and select Server….
Note You must ensure the
pg_hba.conffile of the Postgres server that you are registering allows connections from the host of the PEM client before attempting to connect.
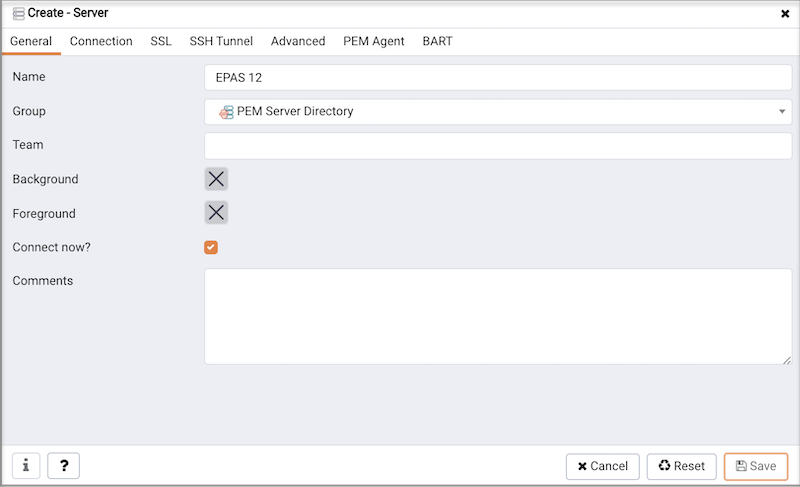
Use the fields on the General tab to describe the general properties of the server:
- Use the
Namefield to specify a user-friendly name for the server. The name specified will identify the server in the PEMBrowsertree control. - You can use groups to organize your servers and agents in the tree control. Using groups can help you manage large numbers of servers more easily. For example, you may want to have a production group, a test group, or LAN specific groups. Use the
Groupdrop-down listbox to select the server group in which the new server will be displayed. - Use the
Teamfield to specify a Postgres role name. Only PEM users who are members of this role, who created the server initially, or have superuser privileges on the PEM server will see this server when they logon to PEM. If this field is left blank, all PEM users will see the server. - Use the
Backgroundcolor selector to select the color that will be displayed in the PEM tree control behind database objects that are stored on the server. - Use the
Foregroundcolor selector to select the font color of labels in the PEM tree control for objects stored on the server. - Check the box next to
Connect now?to instruct PEM to attempt a server connection when you click the Save button. LeaveConnect now?unchecked if you do not want the PEM client to validate the specified connection parameters until a later connection attempt. - Provide notes about the server in the
Commentsfield.
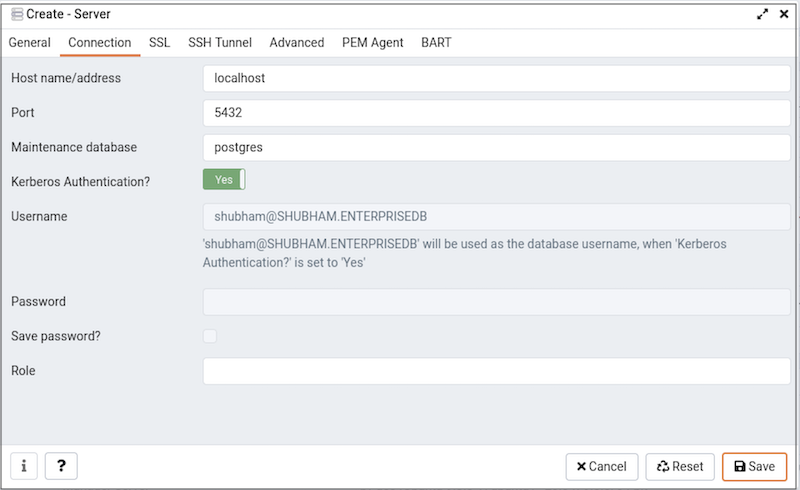
Use fields on the Connection tab to specify connection details for the server:
- Specify the IP address of the server host, or the fully qualified domain name in the
Host name/addressfield. On Unix based systems, the address field may be left blank to use the default PostgreSQL Unix Domain Socket on the local machine, or may be set to an alternate path containing a PostgreSQL socket. If you enter a path, the path must begin with a “/”. - Specify the port number of the host in the
Portfield. - Use the
Maintenance databasefield to specify the name of the initial database that PEM will connect to, and that will be expected to containpgAgentschema andadminpackobjects installed (both optional). On PostgreSQL 8.1 and above, the maintenance DB is normally calledpostgres; on earlier versionstemplate1is often used, though it is preferrable to create apostgresdatabase to avoid cluttering the template database. - Set the
Kerberos AuthenticationtoYesto use the Kerberos Authentication for a monitored server. By default, the monitored server uses the same authentication method as the PEM Server. If the monitored server does not want to use Kerberos Authentication thenALLOW_DATABASE_CONNECTION_WITHOUT_KERBEROSmust be set toTRUEinconfig_local.pyfile. - Specify the name that will be used when authenticating with the server in the
Usernamefield. - Provide the password associated with the specified user in the
Passwordfield. - Check the box next to
Save password?to instruct PEM to store passwords in encrypted format in PEM backend database for later reuse. Each password is stored on a per user, per server basis, and won’t be shared with other team members. PEM will use the saved password to connect the database server next time. To remove a saved password, disconnect the database server first, and then use theClear Saved Passwordmenu item from theObject/Contextmenu. - Use the
Rolefield to specify the name of the role that is assigned the privileges that the client should use after connecting to the server. This allows you to connect as one role, and then assume the permissions of another role when the connection is established (the one you specified in this field). The connecting role must be a member of the role specified.
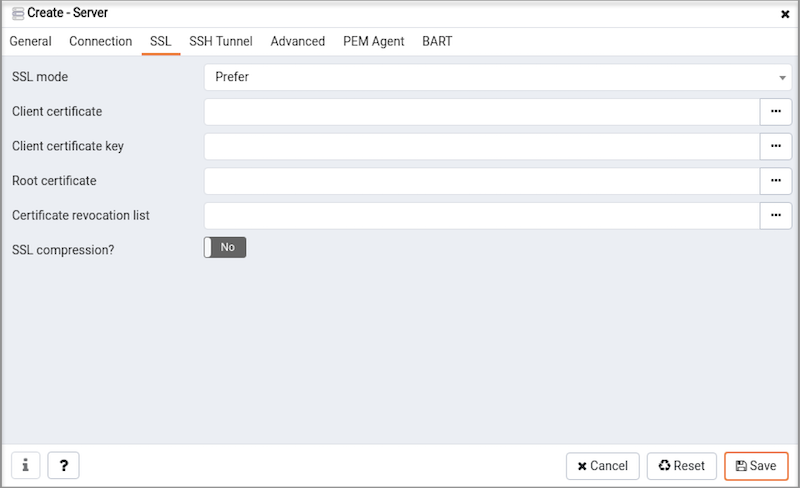
Use the fields on the SSL tab to configure SSL:
Use the drop-down list box in the
SSL modefield to select the type of SSL connection the server should use. For more information about using SSL encryption, see the PostgreSQL documentation at:https://www.postgresql.org/docs/current/static/libpq-ssl.html
You can use the platform-specific file manager dialog to upload files that support SSL encryption to the server. To access the file manager, click the icon that is located to the right of each of the following fields:
- Use the
Client certificatefield to specify the file containing the client SSL certificate. This file will replace the default~/.postgresql/postgresql.crtfile if PEM is installed in Desktop mode, and<STORAGE_DIR>/<USERNAME>/.postgresql/postgresql.crtif PEM is installed in Web mode. This parameter is ignored if an SSL connection is not made. - Use the
Client certificatekey field to specify the file containing the secret key used for the client certificate. This file will replace the default~/.postgresql/postgresql.keyif PEM is installed in Desktop mode, and<STORAGE_DIR>/<USERNAME>/.postgresql/postgresql.keyif PEM is installed in Web mode. This parameter is ignored if an SSL connection is not made. - Use the
Root certificatefield to specify the file containing the SSL certificate authority. This file will replace the default~/.postgresql/root.crtfile. This parameter is ignored if an SSL connection is not made. - Use the
Certificate revocation listfield to specify the file containing the SSL certificate revocation list. This list will replace the default list, found in~/.postgresql/root.crl. This parameter is ignored if an SSL connection is not made. - When
SSL compression?is set toTrue, data sent over SSL connections will be compressed. The default value isFalse(compression is disabled). This parameter is ignored if an SSL connection is not made.
Warning: Certificates, private keys, and the revocation list are stored in the per-user file storage area on the server, which is owned by the user account under which the PEM server process is run. This means that administrators of the server may be able to access those files; appropriate caution should be taken before choosing to use this feature.
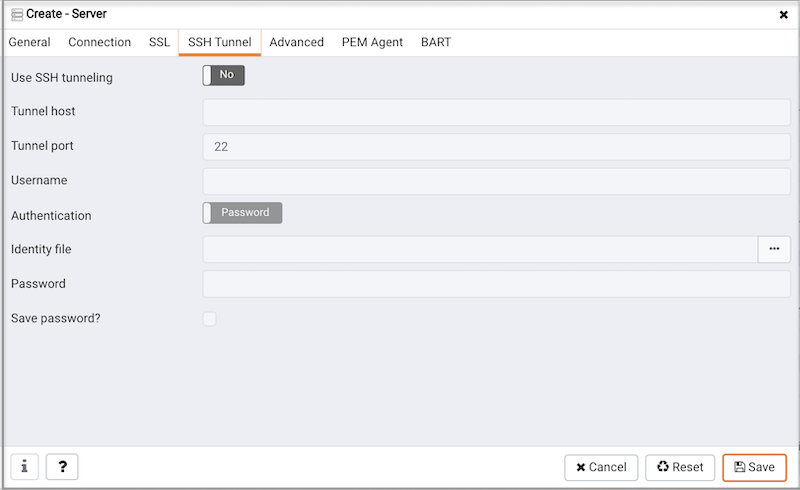
Use the fields on the SSH Tunnel tab to configure SSH Tunneling. You can use a tunnel to connect a database server (through an intermediary proxy host) to a server that resides on a network to which the client may not be able to connect directly.
- Set
Use SSH tunnelingtoYesto specify that PEM should use an SSH tunnel when connecting to the specified server. - Specify the name or IP address of the SSH host (through which client connections will be forwarded) in the
Tunnel hostfield. - Specify the port of the SSH host (through which client connections will be forwarded) in the
Tunnel portfield. - Specify the name of a user with login privileges for the SSH host in the
Usernamefield. - Specify the type of authentication that will be used when connecting to the SSH host in the
Authenticationfield. - Select
Passwordto specify that PEM will use a password for authentication to the SSH host. This is the default. - Select
Identity fileto specify that PEM will use a private key file when connecting. - If the SSH host is expecting a private key file for authentication, use the
Identity filefield to specify the location of the key file. - If the SSH host is expecting a password, use the
Passwordfield to specify the password, or if an identity file is being used, the passphrase.
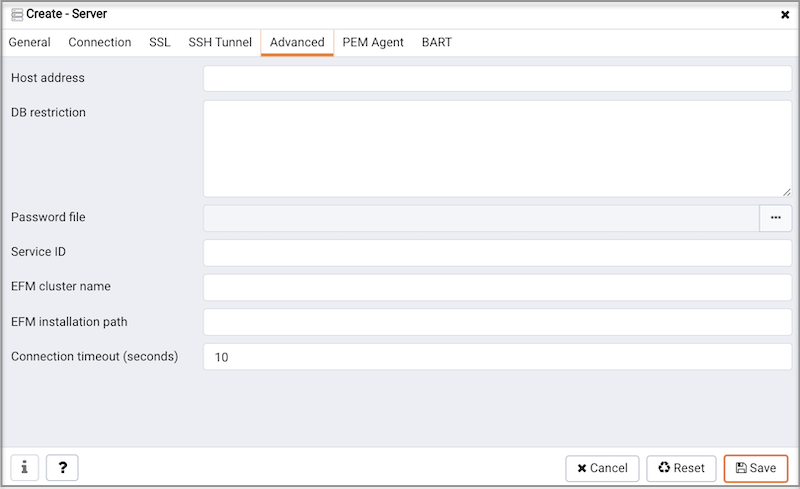
Use fields on the Advanced tab to specify details that are used to manage the server:
Specify the IP address of the server host in the
Host Address1field.Use the
DB restrictionfield to specify a SQL restriction that will be used against the pg_database table to limit the databases displayed in the tree control. For example, you might enter:'live_db','test_db'to instruct the PEM browser to display only thelive_dbandtest_dbdatabases. Note that you can also limit the schemas shown in the database from the database properties dialog by entering a restriction against pg_namespace.Use the
Password filefield to specify the location of a password file (.pgpass). The.pgpassfile allows a user to login without providing a password when they connect. It must be present on the PEM Server. For more information, see the Postgres documentation at:http://www.postgresql.org/docs/current/static/libpq-pgpass.html
Use the
Service IDfield to specify parameters to control the database service process. For servers that are stored in the Enterprise Manager directory, enter the service ID. On Windows machines, this is the identifier for the Windows service. On Linux machines, the name of the init script used to start the server is/etc/init.dand the name of the systemd script to start the server is systemctl. For example, the name of the Advanced Server 11 service isedb-as-11. For local servers, the setting is operating system dependent:If the PEM client is running on a Windows machine, it can control the postmaster service if you have sufficient access rights. Enter the name of the service. In case of a remote server, it must be prepended by the machine name (e.g.
PSE1\pgsql-8.0). PEM will automatically discover services running on your local machine.If the PEM client is running on a Linux machine, it can control processes running on the local machine if you have enough access rights. Provide a full path and needed options to access the
pg_ctlprogram. When executing service control functions, PEM will append status/start/stop keywords to this. For example:sudo /usr/pgsql-x/bin/pg_ctl -D /var/lib/pgsql/x/datawherexis the version of the PostgreSQL database server.
If the server is a member of a Failover Manager cluster, you can use PEM to monitor the health of the cluster and to replace the primary node if necessary. To enable PEM to monitor Failover Manager, use the
EFM cluster namefield to specify the cluster name. The cluster name is the prefix of the name of the Failover Manager cluster properties file. For example, if the cluster properties file is namedefm.properties, the cluster name isefm.If you are using PEM to monitor the status of a Failover Manager cluster, use the
EFM installation pathfield to specify the location of the Failover Manager binary file. By default, the Failover Manager binary file is installed in/usr/edb/efm-x.x/bin, wherex.xspecifies the Failover Manager version.
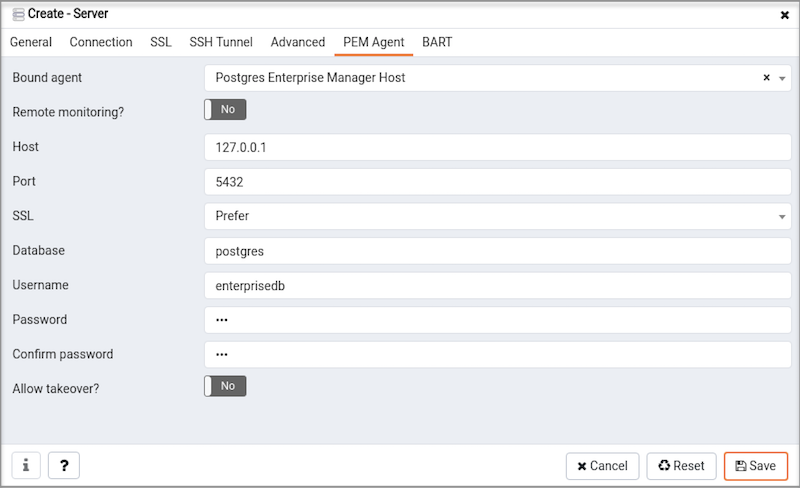
Use fields on the PEM Agent tab to specify connection details for the PEM agent:
Move the
Remote monitoring?slider toYesto indicate that the PEM agent does not reside on the same host as the monitored server. When remote monitoring is enabled, agent level statistics for the monitored server will not be available for custom charts and dashboards, and the remote server will not be accessible by some PEM utilities (such as Audit Manager, Capacity Manager, Log Manager, Postgres Expert and Tuning Wizard).Use the drop-down listbox to the right of the
Bound agentlabel to select a PEM agent . One agent can monitor multiple Postgres servers.Enter the IP address or socket path that the agent should use when connecting to the database server in the
Hostfield. By default, the agent will use the host address shown on theGeneraltab. On a Unix server, you may wish to specify a socket path, e.g./tmp.Enter the
Portnumber that the agent will use when connecting to the server. By default, the agent will use the port defined on thePropertiestab.Use the drop-down listbox in the
SSLfield to specify an SSL operational mode; specify require, prefer, allow, disable, verify-ca or verify-full.
| Mode | Description |
|---|---|
| require | To require SSL encryption for transactions between the server and the agent. |
| prefer | To use SSL encryption between the server and the agent if SSL encryption is available. |
| allow | To allow the connection to use SSL if required by the server. |
| disable | To disable SSL encryption between the agent and the server. |
| verify-ca | To require SSL encryption, and to require the server to authenticate using a certificate registered by a certificate authority. |
| verify-full | To require SSL encryption, and to require the server to authenticate using a certificate registered by a trusted certificate authority. |
For more information about using SSL encryption, see the PostgreSQL documentation.
Use the
Databasefield to specify the name of the Postgres database to which the agent will initially connect. If you are registering a BDR Node then specify the BDR-enabled database name in this field.Specify the name of the role that agent should use when connecting to the server in the
User namefield. Note that if the specified role is not a database superuser, then some of the features will not work as expected. For the list of features that do not work if the specified role is not a database superuser, see Agent privileges. If you are using Kerberos Authentication method then specify the user havingbdr_monitororbdr_superuserrole in this field.
If you are using Postgres version 10 or above, you can use the pg_monitor role to grant the required privileges to a non-superuser. For information about pg_monitor role, see Default Roles.
Specify the name of the user that agent should use when connecting to the server in the
User namefield. Note that if the specified user is not a database superuser, then some of the features will not work as expected. If you are using Postgres version 10 or above, you can use thepg_monitorrole to grant the required privileges to a non-superuser. For information aboutpg_monitorrole, see Default Roles.Specify the password that the agent should use when connecting to the server in the
Passwordfield, and verify it by typing it again in theConfirm passwordfield. If you do not specify a password, you will need to configure the authentication for the agent manually; for example, you can use a.pgpassfile, and it must be present and accessible on the system, where agent is installed.Set the
Allow takeover?slider toYesto specify that the server may be taken over by another agent. This feature allows an agent to take responsibility for the monitoring of the database server if, for example, the server has been moved to another host as part of a high availability failover process.
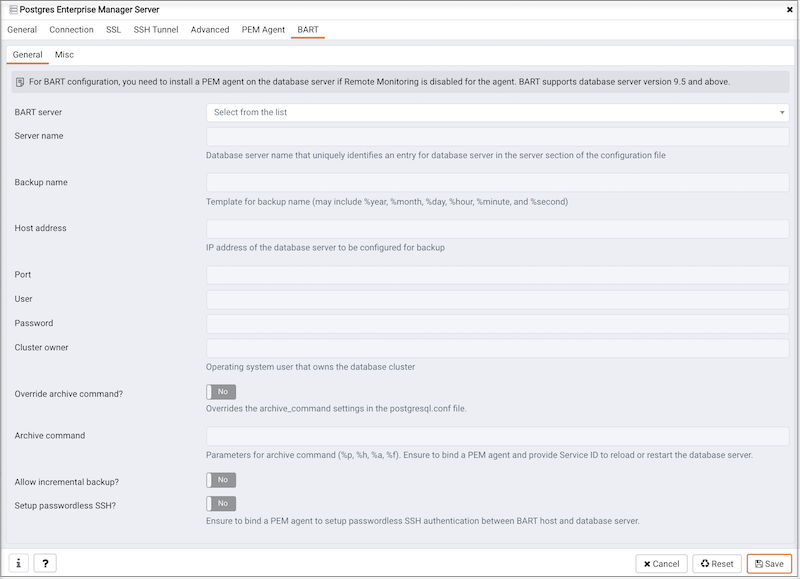
Use the fields on the General tab under BART tab to describe the general properties of the BART Server that will map to the PEM server:
- Use the
BART serverfield to select the BART server name. All the BART servers configured in the PEM console will be listed in this drop down list. - Use the
Server namefield to specify a name for the database server that you want to backup using the BART server. This name gets stored in the BART configuration file. - Use the
Backup namefield to specify a template for user-defined names to be assigned to the backups of the database server. If you do not specify a backup name template, then the backup can only be referenced in BART sub-commands by the BART-assigned integer backup identifier. - Use the
Host addressfield to specify the IP address of the database server that you want to configure for backup. - Use the
Portfield to specify the port to be used for the database that you want to backup. - Use the
Userfield to specify the user of the database that you want to backup using BART through PEM console. If you want to enable incremental backups for this database server, then the user must be a superuser. - Use the
Passwordfield to specify the password for the user of the database that you want to backup. - Use the
Cluster Ownerfield to specify the Linux operating system user account that owns the database cluster. This is typicallyenterprisedbfor Advanced Server database clusters installed in the Oracle databases compatible mode, orpostgresfor PostgreSQL database clusters and for Advanced Server database clusters installed in the PostgreSQL databases compatible mode. - Use the
Archive commandfield to specify the desired format of the archive command string to be used in thebart.cfgfile. Inputs provided for the Archive command will overwrite the database server’sPostgresql.conffile. Once the server gets added, the database server will be restarted or database configurations will be reloaded. - Use the
Allow incremental backup?switch to specify if incremental backup should be enabled for this database server. - Use the
Setup passwordless SSH?switch to specify if you want to create SSH certificates to allow passwordess logins between the Database Server and the BART server. Ensure to bind a PEM agent before setting up the passwordless SSH authentication. Passwordless SSH will not work for a database server being remotely monitored by a PEM agent.
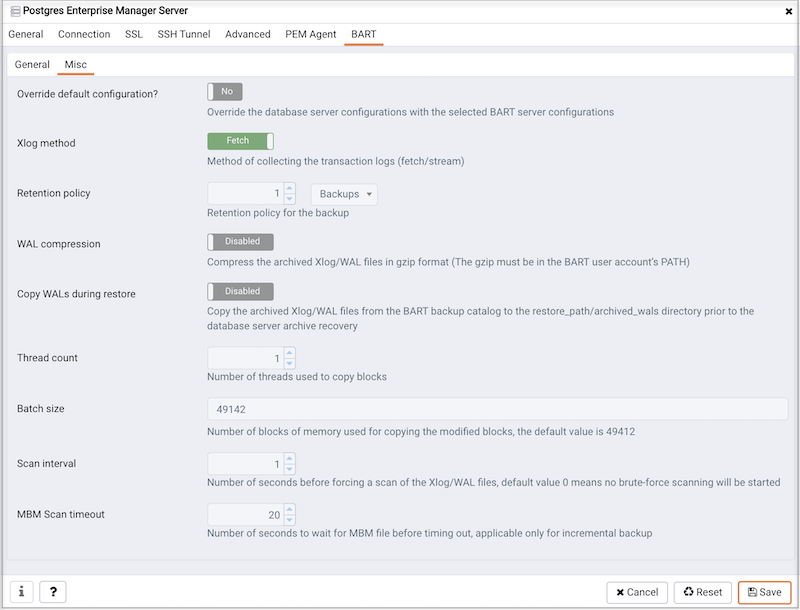
Use the fields on the Misc tab under BART tab to describe the miscellaneous properties of the BART Server:
- Use the
Override default configuration?Switch to specify if you want to override the BART server configurations with the specific database server configurations. - Use the
Xlogmethod to specify how the transaction log should be collected during the execution ofpg_basebackup. - Use the
Retention policyfield to specify the retention policy for the backup. This determines when an active backup should be marked as obsolete, and hence, be a candidate for deletion. You can specify the retention policy in terms of number of backup or in terms of duration (days, weeks, or months). - Use the
WAL compressionswitch to specify if you want to compress the archived Xlog/WAL files in Gzip format. To enable WAL compression, the gzip compression program must be present in the BART user account’s PATH. The wal_compression setting must not be enabled for those database servers where you need to take incremental backups. - Use the
Copy WALs during restorefield to specify how the archived WAL files are collected when invoking the RESTORE operation. Set to enabled to copy the archived WAL files from the BART backup catalog to the <restore_path>/archived_wals directory prior to the database server archive recovery. Set to disabled to retrieve the archived WAL files directly from the BART backup catalog during the database server archive recovery. - Use the
Thread countfield to specify the number of threads to copy the blocks. You must setthread countto1if you want to take a backup with thepg_basebackuputility. - Use the
Batch sizefield to specify the number of blocks of memory used for copying modified blocks, applicable only for incremental backups. - Use the
Scan intervalfield to specify the number of seconds after which the WAL scanner should scan the new WAL files. - Use the
MBM scan timeoutfield to specify the number of seconds to wait for MBM files before timing out, applicable only for incremental backups.
To view the properties of a server, right-click on the server name in the PEM client tree control, and select the Properties… option from the context menu. To modify a server’s properties, disconnect from the server before opening the Properties dialog.
Automatic Server Discovery
If the server you wish to monitor resides on the same host as the monitoring agent, you can use the Auto Discovery dialog to simplify the registration and binding process.
To enable auto discovery for a specific agent, you must enable the Server Auto Discovery probe. To access the Manage Probes tab, highlight the name of a PEM agent in the PEM client tree control, and select Manage Probes... from the Management menu. When the Manage Probes tab opens, confirm that the slider control in the Enabled? column is set to Yes.
To open the Auto Discovery dialog, highlight the name of a PEM agent in the PEM client tree control, and select Auto Discovery... from the Management menu.
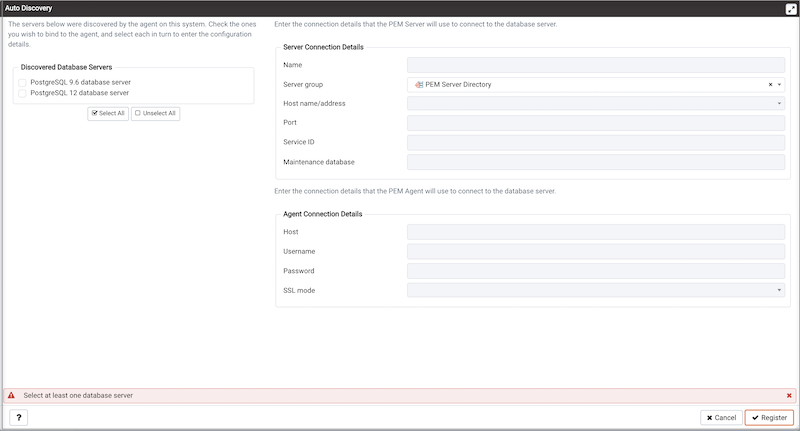
When the Auto Discovery dialog opens, the Discovered Database Servers box will display a list of servers that are currently not being monitored by a PEM agent. Check the box next to a server name to display information about the server in the Server Connection Details box, and connection properties for the agent in the Agent Connection Details box.
Use the Check All button to select the box next to all of the displayed servers, or Uncheck All to deselect all of the boxes to the left of the server names.
The fields in the Server Connection Details box provide information about the server that PEM will monitor:
- Accept or modify the name of the monitored server in the
Namefield. The specified name will be displayed in the tree control of the PEM client. - Use the
Server groupdrop-down listbox to select the server group under which the server will be displayed in the PEM client tree control. - Use the
Host name/addressfield to specify the IP address of the monitored server. - The
Portfield displays the port that is monitored by the server; this field may not be modified. - Provide the name of the service in the
Service IDfield. Please note that the service name must be provided to enable some PEM functionality. - By default, the
Maintenance databasefield indicates that the selected server uses a Postgres maintenance database. Customize the content of theMaintenance databasefield for your installation.
The fields in the Agent Connection Details box specify the properties that the PEM agent will use when connecting to the server:
- The
Hostfield displays the IP address that will be used for the PEM agent binding. - The
User namefield displays the name that will be used by the PEM agent when connecting to the selected server. - The
Passwordfield displays the password associated with the specified user name. - Use the drop-down listbox in the
SSL modefield to specify your SSL connection preferences.
When you’ve finished specifying the connection properties for the servers that you are binding for monitoring, click the OK button to register the servers. Click Cancel to exit without preserving any changes.
After clicking the OK button, the newly registered server is displayed in the PEM tree control and is monitored by the PEM server.
Using the pemworker Utility to Register a Server
You can use the pemworker utility to register a server for monitoring by the PEM server or to unregister a database server. During registration, the pemworker utility will bind the new server to the agent that resides on the system from which you invoked the registration command. To register a server:
On a Linux host, use the command:
pemworker --register-server
On a Windows host, use the command:
pemworker.exe REGISTER-SERVICE
Append command line options to the command string when invoking the pemworker utility. Each option should be followed by a corresponding value:
| Option | Description |
|---|---|
--pem-user |
Specifies the name of the PEM administrative user. Required. |
--server-addr |
Specifies the IP address of the server host, or the fully qualified domain name. On Unix based systems, the address field may be left blank to use the default PostgreSQL Unix Domain Socket on the local machine, or may be set to an alternate path containing a PostgreSQL socket. If you enter a path, the path must begin with a /. Required. |
--server-port |
Specifies the port number of the host. Required. |
--server-database |
Specifies the name of the database to which the server will connect. Required. |
--server-user |
Specify the name of the user that will be used by the agent when monitoring the server. Required. |
--server-service-name |
Specifies the name of the database service that controls operations on the server that is being registered (STOP, START, RESTART, etc.). Optional. |
--remote-monitoring |
Include the –remote-monitoring clause and a value of no (the default) to indicate that the server is installed on the same machine as the PEM agent. When remote monitoring is enabled (yes), agent level statistics for the monitored server will not be available for custom charts and dashboards, and the remote server will not be accessible by some PEM utilities (such as Audit Manager, Capacity Manager, Log Manager, Postgres Expert and Tuning Wizard). Required. |
--efm-cluster-name |
Specifies the name of the Failover Manager cluster that monitors the server (if applicable). Optional. |
--efm-install-path |
Specifies the complete path to the installation directory of Failover Manager (if applicable). Optional. |
--asb-host-name |
Specifies the name of the host to which the agent is connecting. |
--asb-host-port |
Specifies the port number that the agent will use when connecting to the database. |
--asb-host-db |
Specifies the name of the database to which the agent will connect. |
--asb-host-user |
Specifies the database user name that the agent will supply when authenticating with the database. |
--asb-ssl-mode |
Specifies the type of SSL authentication that will be used for connections. Supported values include: prefer, require, disable, verify-CA, verify-full. |
--group |
Specifies the name of the group in which the server will be displayed. |
--team |
Specifies the name of the group role that will be allowed to access the server. |
--owner |
Specifies the name of the role that will own the monitored server. |
Set the environment variable PEM_SERVER_PASSWORD to provide the password for the PEM server to allow the pemworker to connect as a PEM admin user.
Set the environment variable PEM_MONITORED_SERVER_PASSWORD to provide the password of the database server being registered and monitored by pemagent.
Failure to provide the password will result in a password authentication error. The PEM server will acknowledge that the server has been registered properly.
Using the pemworker Utility to Unregister a Server
You can use the pemworker utility to unregister a database server; to unregister a server, invoke the pemworker utility:
On a Linux host, use the command:
pemworker --unregister-server
On a Windows host, use the command:
pemworker.exe UNREGISTER-SERVICE
Append command line options to the command string when invoking the pemworker utility. Each option should be followed by a corresponding value:
| Option | Description |
|---|---|
--pem-user |
Specifies the name of the PEM administrative user. Required. |
--server-addr |
Specifies the IP address of the server host, or the fully qualified domain name. On Unix based systems, the address field may be left blank to use the default PostgreSQL Unix Domain Socket on the local machine, or may be set to an alternate path containing a PostgreSQL socket. If you enter a path, the path must begin with a /. Required. |
--server-port |
Specifies the port number of the host. Required. |
Use the PEM_SERVER_PASSWORD environment variable to provide the password for the PEM server to allow the pemworker to connect as a PEM admin user.
Failure to provide the password will result in a password authentication error. The PEM server will acknowledge that the server has been unregistered.
Verifying the Connection and Binding
Once registered, the new server will be added to the PEM Browser tree control, and be displayed on the Global Overview.
When initially connecting to a newly bound server, the Global Overview dashboard may display the new server with a status of “unknown” in the server list; before recognizing the server, the bound agent must execute a number of probes to examine the server, which may take a few minutes to complete depending on network availability.
Within a few minutes, bar graphs on the Global Overview dashboard should show that the agent has now connected successfully, and the new server is included in the Postgres Server Status list.
If after five minutes, the Global Overview dashboard still does not list the new server, you should review the logfiles for the monitoring agent, checking for errors. Right-click the agent’s name in the tree control, and select the Probe Log Analysis option from the Dashboards sub-menu of the context menu.
Defining and Monitoring Postgres instances on AWS
There are two scenarios in which you can monitor a Postgres instance on an AWS host with PEM. You can monitor a:
- Postgres Instance running on AWS EC2
- Postgres Instance running on AWS RDS
Monitoring a Postgres Instance Running on AWS EC2
After creating a Postgres instance on AWS EC2, you can use the PEM server to register and monitor your instance. The following scenarios are currently supported:
- Postgres instance and PEM Agent running on the same AWS EC2 and a PEM Server running on your local machine.
- Postgres instance and PEM Agent running on the same local machine and a PEM Server running on AWS EC2.
- Postgres instance and PEM Agent running on the same AWS EC2 and a PEM Server running in different AWS EC2.
Note In the first two scenarios, you must configure the VPN on AWS EC2 , so the AWS EC2 instance can access the
pemdatabase. Please contact your network administrator to setup the VPN if needed.
The PEM Agent running on AWS EC2 or on your local machine should be registered to the PEM Server. Please note that when registering the PEM Agent with the PEM Server you should use the hostname of AWS EC2 instance. For more details on registering the PEM Agent see, PEM Self Registration.
You can register the Postgres instance running on AWS EC2 on PEM Server using the Create - Server dialog. For more details on registering the server using Create - Server dialog see, Registering a Server. Use the PEM Agent tab on the Create - Server dialog to bind the registered PEM Agent with the Postgres instance.
When the PEM Agent is registered to the PEM Server and your Postgres instance that is running on AWS EC2 is registered to the PEM Server, you can monitor your instance with PEM.
Monitoring a Postgres Instance Running on AWS RDS
While creating an AWS RDS database, choose PostgreSQL when prompted for Engine options. After creating a Postgres(RDS) instance on AWS, use Create - Server dialog to add the Postgres(RDS) instance to the PEM Server. Using this dialog you can describe a new server connection, bind the server to a PEM Agent, and display the server to the PEM browser tree control.
For detailed information on the Create - Server dialog and configuration details for each tab, see Registering a Server.
The PEM Agent tab in the Create - Server dialog must have the Remote Monitoring field set to Yes to monitor the Postgres(RDS) instance on AWS instance using PEM Server.
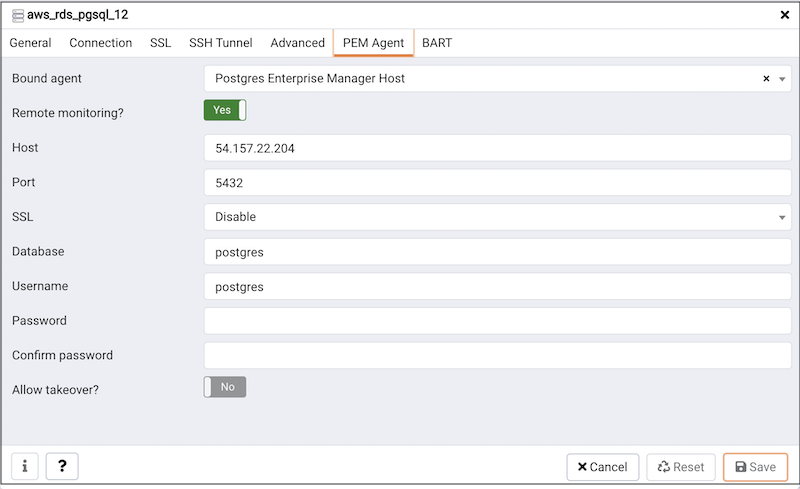
As the PEM Agent will be monitoring the Postgres(RDS) AWS instance remotely, the functionality will be limited as described below:
| Feature Name | Works with remote PEM Agent | Comments |
|---|---|---|
| Audit Manager | No | |
| Capacity Manager | Limited | There will be no correlation between the database server and operating system metrices. |
| Log Manager | No | |
| Manage Alerts | Limited | When you run an alert script on the database server, it will run on the machine where the bound PEM Agent is running, and not on the actual database server machine. |
| Manage Charts | Yes | |
| Manage Dashboards | Limited | Some dashboards may not be able to show complete data. For example, the operating system information of the database server will not be displayed as it is not available. |
| Manage Probes | Limited | Some of the PEM probes will not return information, and some of the functionalities may be affected. For details about probe functionality, see the PEM Agent Guide. |
| Postgres Expert | Limited | The Postgres Expert will provide partial information as operating system information is not available. |
| Postgres Log Analysis Expert | No | The Postgres Log Analysis Expert will not be able to perform an analysis as it is dependent on the logs imported by log manager, which will not work as required. |
| Scheduled Tasks | Limited | Scheduled tasks will work only for database server; scripts will run on a remote Agent. |
| Tuning Wizard | No | |
| System Reports | Yes | |
| Core Usage Reports | Limited | The Core Usage report will not show complete information. For example, the platform, number of cores, and total RAM will not be displayed. |
| Managing BART | No | BART requires password less authentication between two machines, where database server and BART are installed. An AWS RDS instance doesn’t allow to use host access. |
Managing Certificates
Files stored in the data directory of the PEM server backing database contain information that helps the PEM server utilize secure connections:
ca_certificate.crtca_key.keyserver.crtserver.keyroot.crlroot.crt
The PEM agent that is installed with the PEM server monitors the expiration date of the ca_certificate.crt file. When the certificate is about to expire, PEM will:
- Make a backup of the existing certificate files.
- Create new certificate files, appending the new CA certificate file to the root.crt file on the PEM server.
- Create a job that renews the certificate file of any active agents.
- Restart the PEM server.
When you uninstall an agent, the certificate associated with that agent will be added to the certificate revocation list (maintained in the root.crl file) to ensure that the certificate cannot be used to connect to the PEM server.
The following sections contain detailed information about manually replacing certificate files.
Replacing SSL Certificates
The following steps detail replacing the SSL certificates on an existing PEM installation. If you plan to upgrade your server to a new version at the same time, invoke all of the PEM installers (first the server installer, then agent installers) before replacing the SSL certificates. Then:
Stop all running PEM agents, first on the server host, and then on any monitored node.
To stop a PEM agent on a Linux host, open a terminal window, assume superuser privileges, and enter the command:
On Linux with systemd, for eg: Centos 7 or 8
systemctl stop pemagentOn a Windows host, you can use the Services applet to stop the PEM agent. The PEM agent service is named Postgres Enterprise Manager Agent; highlight the service name in the Services dialog, and click Stop the service.
Take a backup of the existing SSL keys and certificates. The SSL keys and certificates are stored in the
datadirectory under your PEM installation. For example, the default location on a Linux system is:/var/lib/pgsql/x/datawherexis the PostgreSQL database version.Make a copy of the following files, adding an extension to each file to make the name unique:
ca_certificate.crtca_key.keyroot.crtroot.crlserver.keyserver.crt
For example, the command:
# cp ca_certificate.crt ca_certificate_old.crtCreates a backup of the ca_certificate file with the word old appended to the entry.
- Use the
openssl_rsa_generate_key()function to generate theca_key.keyfile:
/usr/pgsql-x.x/bin/psql -U postgres -d pem --no-psqlrc -t -A -c "SELECT public.openssl_rsa_generate_key(1024)" > /var/lib/pgsql/x/data/ca_key.keyAfter creating the ca_key.key file, cat the contents to the variable CA_KEY for use when generating the ca_certificate.crt file and modify the privileges on the ca_key.key file:
CA_KEY=$(cat /var/lib/pgsql/x/data/ca_key.key)

chmod 600 /var/lib/pgsql/x/data/ca_key.key- Use the key to generate the
ca_certificate.crtfile. For simplicity, place the SQL query into a temporary file with a unique name:
echo "SELECT openssl_csr_to_crt(openssl_rsa_key_to_csr('${CA_KEY}',
'PEM','US', 'MA', 'Bedford', 'Postgres Enterprise Manager',
'support@enterprisedb.com'), NULL,
'/var/lib/pgsql/x/data/ca_key.key')" > /tmp/_random.$$
Then use the variable to execute the query, placing the content into the ca_certificate.crt file.
/usr/pgsql-x/bin/psql -U postgres -d pem --no-psqlrc -t -A -f /tmp/_random.$$ > /var/lib/pgsql/x/data/ca_certificate.crtModify the permissions of the ca_certificate.crt file, and remove the temporary file that contained the SQL command:
chmod 600 /var/lib/pgsql/x/data/ca_certificate.crt

rm -f /tmp/_random.$$- Re-use the
ca_certificate.crtfile as theroot.crtfile:
cp /var/lib/pgsql/x/data/ca_certificate.crt /var/lib/pgsql/x/data/root.crtModify the permissions of the root.crt file:
chmod 600 /var/lib/pgsql/x/data/root.crt- Use the
openssl_rsa_generate_crl()function to create the certificate revocation list (root.crl) :
/usr/pgsql-x/bin/psql -U postgres -d pem --no-psqlrc -t -A -c
 "SELECT openssl_rsa_generate_crl('/var/lib/pgsql/x/data/ca_certificate.crt', '/var/lib/pgsql/x/data/ca_key.key')" > /var/lib/pgsql/x/data/root.crl
Modify the permissions of the root.crl file:
chmod 600 /var/lib/pgsql/x/data/root.crl- Use the
openssl_rsa_generate_key()function to generate theserver.keyfile:
/usr/pgsql-x/bin/psql -U postgres -d pem --no-psqlrc -t -A -c "SELECT public.openssl_rsa_generate_key(1024)" >> /var/lib/pgsql/x/data/server.keyAfter creating the server.key file, cat the contents to the variable SSL_KEY for use when generating the server.crt file and modify the privileges on the server.key file:
SSL_KEY=$(cat /var/lib/pgsql/x/data/server.key)

chmod 600 /var/lib/pgsql/x/data/server.key- Use the
SSL_KEYto generate the server certificate. Save the certificate in theserver.crtfile. For simplicity, first place the SQL query into a temporary file with a unique name:
echo "SELECT openssl_csr_to_crt(openssl_rsa_key_to_csr('${SSL_KEY}',
'PEM','US', 'MA', 'Bedford', 'Postgres Enterprise Manager',
'support@enterprisedb.com'),
'/var/lib/pgsql/x/data/ca_certificate.crt',
'/var/lib/pgsql/x/data/ca_key.key')" > /tmp/_random.$$

/usr/pgsql-x/bin/psql -U postgres -d pem --no-psqlrc -t -A -f /tmp/_random.$$ >> /var/lib/pgsql/x/data/server.crt- Modify the privileges on the
server.crtfile, and delete the temporary file:
chmod 600 /var/lib/pgsql/x/data/server.crt

rm -f /tmp/_random.$$
Restart the Postgres server:
On Linux with
init.d; for example, on a Centos6 host:
/etc/init.d/postgresql-x restartOn Linux with systemd; for example, on a Centos7 host:
systemctl restart postgresql-xUpdating Agent SSL Certificates
For each agent that interacts with the PEM server, you must:
- generate an rsa key and a certificate.
- copy the key and certificate to the agent.
- restart the agent.
Each agent has a unique identifier that is stored in the pem.agent table in the pem database. You must replace the key and certificate files with the key or certificate that corresponds to the agent’s identifier. Please note that you must move the agent.key and agent.crt files (generated in Steps 2 and 3 into place on their respective PEM agent host before generating the next key file pair; subsequent commands will overwrite the previously generated file.
To generate a PEM agent key file pair:
- Use psql to find the number of agents and their corresponding identifiers:
/usr/pgsql-x/bin/psql -U postgres -d pem --no-psqlrc -t -A -c "SELECT ID FROM pem.agent"On Linux, you can also find the agent identifier and location of the keys and certificates in the
PEMagentsection of the/etc/postgres-reg.inifile.On Windows, the information is stored in the registry:
- On a 64-bit Windows installation, check:
HKEY_LOCAL_MACHINE\SOFTWARE\Wow6432Node\EnterpriseDB\PEM\agent- On a 32-bit Windows installation, check:
HKEY_LOCAL_MACHINE\SOFTWARE\EnterpriseDB\PEM\agent- After identifying the agents that will need key files, generate an
agent.keyfor each agent. To generate the key, execute the following command, capturing the output in a file:
/usr/pgsql-x/bin/psql -U postgres -d pem --no-psqlrc -t -A -c "SELECT openssl_rsa_generate_key(1024)" > agent.keyModify the privileges of the agent.key file:
chmod 600 agent.key- Generate a certificate for each agent. To generate a certificate, execute the following command, capturing the output in a certificate file:
/usr/pgsql-x/bin/psql -U postgres -d pem --no-psqlrc -t -A -c
"SELECT openssl_csr_to_crt(openssl_rsa_key_to_csr('$(cat agent.key)',
'agent<$ID>', 'US', 'MA', 'Bedford', 'Postgres Enterprise Manager',
'support@enterprisedb.com'),
'/var/lib/pgsql/x/data/ca_certificate.crt',
'/var/lib/pgsql/x/data/ca_key.key')" > agent.crt
Where $ID is the agent number of the agent (retrieved via the psql command line).
- Modify the privileges of the
agent.crtfile:
chmod 600 agent.crtReplace each agent’s key and certificate file with the newly generated files before restarting the PEM agent service:
On Linux with
init.d, restart the service with the command:
/etc/init.d/pemagent startOn Linux with systemd, restart the service with the command:
systemctl start pemagentOn a Windows host, you can use the Services applet to start the PEM agent. The PEM agent service is named Postgres Enterprise Manager Agent; highlight the service name in the Services dialog, and click Start the service.
Managing Configuration Settings
Multiple configuration files are read at startup by Postgres Enterprise Manager. The files are as follows:
config.py: This is the main configuration file, and should not be modified. It can be used as a reference for configuration settings, that may be overridden in one of the following files.config_distro.py: This file is read afterconfig.pyand is intended for packagers to change any settings that are required for their Postgres Enterprise Manager distribution. This may typically include certain paths and file locations. This file is optional, and may be created by packagers in the same directory asconfig.pyif needed.config_local.py: This file is read afterconfig_distro.pyand is intended for end users to change any default or packaging specific settings that they may wish to adjust to meet local preferences or standards.This file is optional, and may be created by users in the same directory asconfig.pyif needed.
A copy of the default config.py file is included in the PEM online help for reference.
Managing a PEM Server
The sections that follow provide information about tasks related to PEM server such as restarting the PEM server and agent, controlling the PEM server or PEM agent, controlling the HTTPD service on Linux and Windows, controlling the HTTPD server, managing PEM authentication and security, modifying the pg_hba.conf file, modifying PEM to use a proxy server etc.
Starting and Stopping the PEM Server and Agents
The PEM server starts, stops and restarts when the Postgres server instance on which it resides starts, stops or restarts; use the same commands to control the PEM server that you would use to control the Postgres server. On Linux platforms, the command that stops and starts the service script will vary by platform and OS version.
The PEM agent is controlled by a service named pemagent.
The Windows operating system includes a graphical service controller that displays the server status, and offers point-and-click server control. The Services utility can be accessed through the Windows Control Panel. When the utility opens, use the scroll bar to navigate through the listed services to highlight the service name.
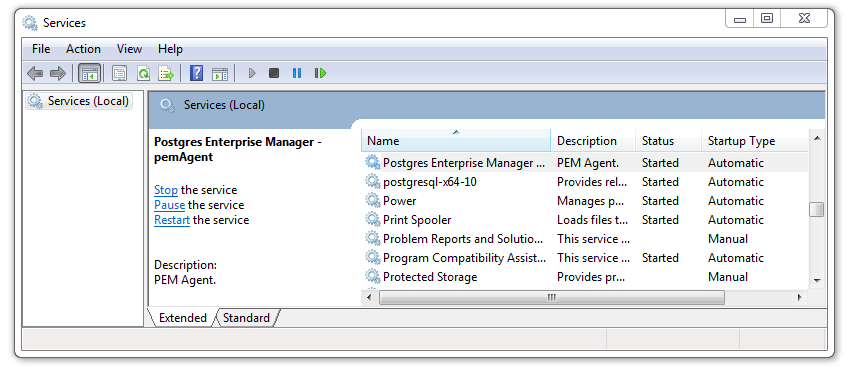
Use the Stop, Pause, Start, or Restart buttons to control the state of the service.
Please note that any user (or client application) connected to the Postgres server will be abruptly disconnected if you stop the service. For more information about controlling a service, please consult the EDB Postgres Advanced Server Installation Guide, available from the EDB website.
Remotely Starting and Stopping Monitored Servers
PEM allows you to startup and shutdown managed server instances with the PEM client. To configure a server to allow PEM to manage the service, complete the Server registration dialog, registering the database server with a PEM agent and:
specify the
Store on PEM Serveroption on thePropertiesdialog.specify the name of a service script in the
Service IDfield on theAdvancedtab:- For Advanced Server, the service name is
edb-as-<x>orppas-<x>. - For PostgreSQL, the service name is
postgresql-<x>.
Where
xindicates the server version number.- For Advanced Server, the service name is
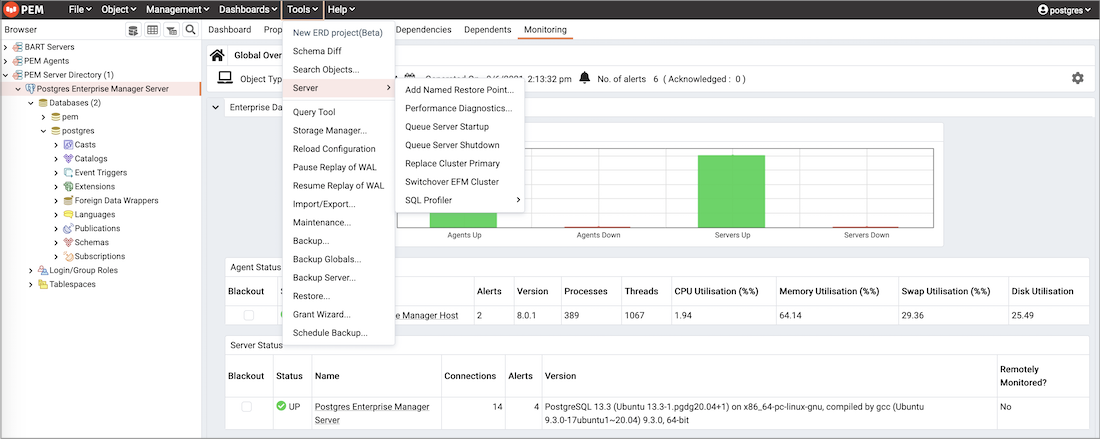
After connecting to the server, you can start or stop the server by highlighting the server name in the tree control, and selecting Queue Server Startup or Queue Server Shutdown from the Tools menu.
Controlling the PEM Server or PEM Agent on Linux
On Linux platforms, the name of the service script that controls:
- a PEM server on Advanced Server is
edb-as-<x>orppas-<x> - a PEM server on PostgreSQL is
postgresql-<x> - a PEM agent is
pemagent
Where x indicates the server version number.
You can use the service script to control the service.
- To control a service on RHEL or CentOS version 7.x or 8.x open a command line, assume superuser privileges, and issue the command:
systemctl <service_name> <action>Where:
service_name is the name of the service.
action specifies the action taken by the service. Specify:
startto start the service.stopto stop the service.restartto stop and then start the service.statusto check the status of the service.
Controlling the PEM Server or PEM Agent on Windows
The Windows operating system includes a graphical service controller that displays the server status, and offers point-and-click server control. The registered name of the service that controls:
- a PEM server host on PostgreSQL is
postgresql-<x> - a PEM server host on Advanced Server is
edb-as-<x>, orppas-<x> - a PEM agent is
Postgres Enterprise Manager - pemAgent
Where x indicates the server version number.
Navigate through the Windows Control Panel to open the Services utility. When the utility opens, use the scroll bar to browse the list of services.
Use the Stop the service option to stop a service. Any user (or client application) connected to the server will be abruptly disconnected if you stop the service.
Use the Pause the service option to instruct Postgres to reload a service’s configuration parameters. The Pause the service option is an effective way to reset parameters without disrupting user sessions for many of the configuration parameters.
Use the Start the service option to start a service.
Controlling the HTTPD Server
On Linux, you can confirm the status of the PEM-HTTPD service by opening a command line, and entering the following command:
ps -ef | grep httpdIf Linux responds with an answer that is similar to the following example, httpd is not running:
user 13321 13267 0 07:37 pts/1 00:00:00 grep httpdTo start the service on a CentOS or RHEL 7.x or 8.x system, use the command:
systemctl start httpdOn Windows, you can use the Services applet to check the status of the PEM HTTPD service. After opening the Services applet, scroll through the list to locate the PEM HTTPD service.
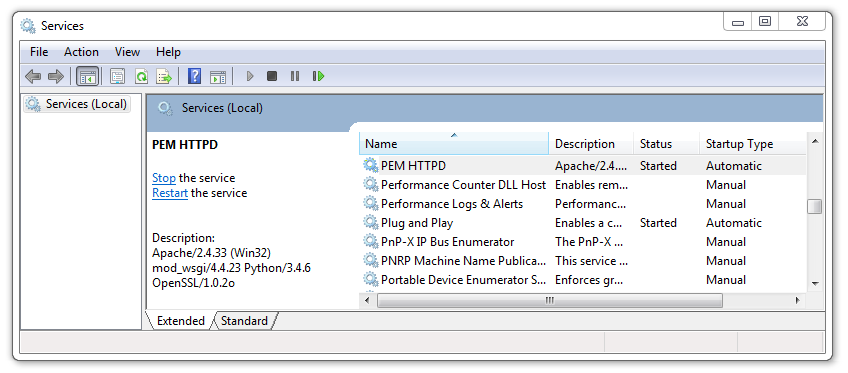
The Status column displays the current state of the server. Click the Start link to start PEM HTTPD if the service is not running.
Modifying the pg_hba.conf File
Entries in the pg_hba.conf file control network authentication and authorization. The pg_hba.conf file on the PEM server host must allow connections between the PEM server and PEM-HTTPD, the PEM agent, and the monitored servers.
During the PEM server installation process, you are prompted for the IP address and connection information for hosts that will be monitored by PEM; this information is added to the top of the pg_hba.conf file of the PEM backing database.
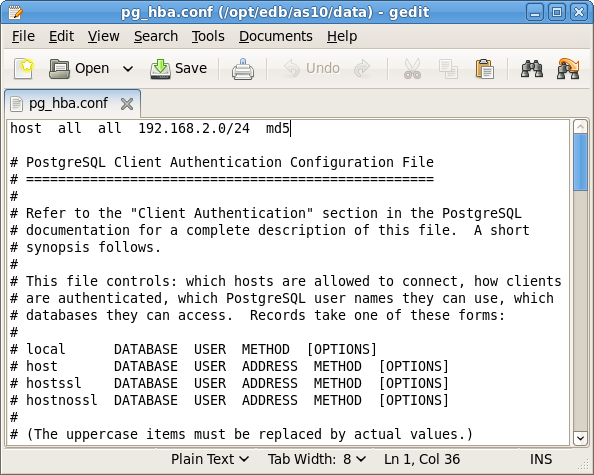
You may also need to manually modify the pg_hba.conf file to allow connections between the PEM server and other components. For example, if your PEM-HTTPD installation does not reside on the same host as the PEM server, you must modify the pg_hba.conf file on the PEM server host to allow PEM-HTTPD to connect to the server.
By default, the pg_hba.conf file resides in the data directory, under your Postgres installation; for example, on an Advanced Server 10 host, the default location of the pg_hba.conf is:
/var/lib/edb/as10/data/pg_hba.conf
You can modify the pg_hba.conf file with your editor of choice. After modifying the file, restart the server for changes to take effect.
The following example shows a pg_hba.conf entry that allows an md5 password authenticated connection from a user named postgres, to the postgres database on the host on which the pg_hba.conf file resides. The connection is coming from an IP address of 192.168.10.102:
# TYPE     DATABASE        USER        CIDR-ADDRESS         METHOD
# IPv4 local connections:
 host     postgres       postgres    192.168.10.102/32       md5
You may specify the address of a network host, or a network address range. For example, if you wish to allow connections from servers with the addresses 192.168.10.23, 192.168.10.76 and 192.168.10.184, enter a CIDR-ADDRESS of 192.168.10.0/24 to allow connections from all of the hosts in that network:
# TYPE     DATABASE        USER        CIDR-ADDRESS       METHOD
# IPv4 local connections:
  host      postgres         all       192.168.10.0/24       md5
For more information about formatting a pg_hba.conf file entry, please see the PostgreSQL core documentation.
Before you can connect to a Postgres server with PEM, you must ensure that the pg_hba.conf file on both servers allows the connection.
If you receive this error when connecting to the database server, modify the pg_hba.conf file, adding an entry that allows the connection.
Creating and Maintaining Databases and Objects
Each instance of a Postgres server manages one or more databases; each user must provide authentication information to connect to the database before accessing the information contained within it. The PEM client provides dialogs that allow you to create and manage databases, and all of the various objects that comprise a database (e.g. tables, indexes, stored procedures, etc.).
Creating a database is easy in PEM: simply right click on any managed server’s Databases node and select Database… from the Create menu. After defining a database, you can create objects within the new database.
For example, to create a new table, right click on a Tables node, and select Table… from the Create menu. When the New Table dialog opens, specify the attributes of the new table.
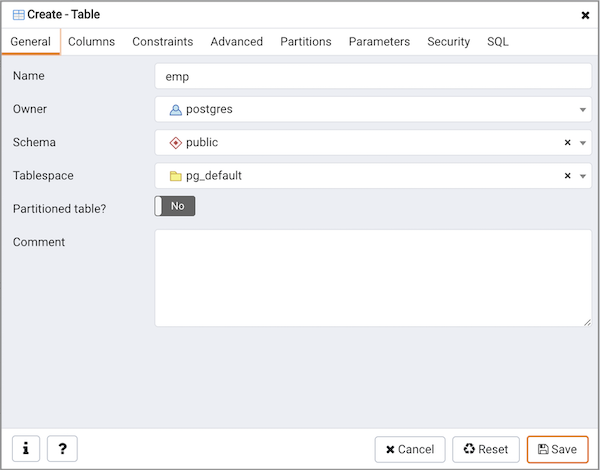
PEM provides similar dialogs for the creation and management of other database objects:
- tables
- indexes
- stored procedures
- functions
- triggers
- views
- constraints, etc.
Each object type is displayed in the tree control; right click on the node that corresponds to an object type to access the Create menu and create a new object, or select Properties from the context menu of a named node to perform administrative tasks for the highlighted object.
Managing PEM Authentication
Postgres supports a number of authentication methods:
- Secure password (md5)
- GSSAPI
- SSPI
- Kerberos
- Ident
- LDAP
- RADIUS
- Certificate (SSL)
- PAM
Postgres (and PEM) authentication is controlled by the pg_hba.conf configuration file. Entries within the configuration file specify who may connect to a specific database, and the type of authentication required before that user is allowed to connect.
A typical entry in the pg_hba.conf file that allows a user named postgres to connect to all databases from the local host (127.0.0.1/32) using secure password (md5) authentication connections would take the form:
host all postgres 127.0.0.1/32 md5
Depending on your system’s configuration, you may also need to create a password file for the user account that the PEM agent uses to connect to the server, to allow the agent to properly respond to the server’s authentication request. An entry in the password file for a user named postgres, with a password of 1safepwd would take the form:
localhost:5432:*:postgres:1safepwd
The password file is usually named ~root/.pgpass on Linux systems, or %APPDATA%\postgresql\pgpass.conf (on Windows). For more information about configuring a password file, visit the PostgreSQL website.
For more information about the authentication methods supported by Postgres, see the PostgreSQL core documentation.
Editing the PEM Server Configuration
You can use the PEM client to graphically manage the configuration parameters of the PEM server to enable features or modify default settings. To open the Server Configuration dialog, select Server Configuration… from the Management menu.
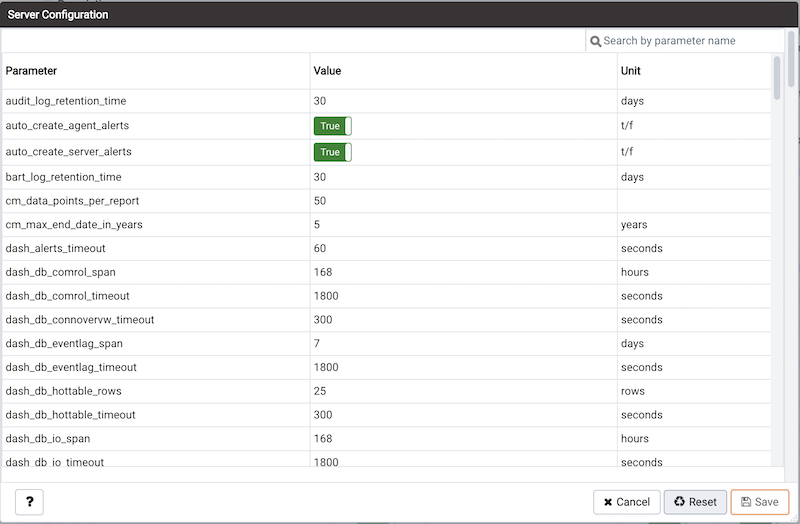
To modify a parameter value, edit the content displayed in the Value field to the right of a parameter name. Click the Save button to preserve your changes, or click the Close button to exit the dialog without applying the changes. Use the Reset button to return the parameters to their original value.
Managing Security
PEM provides a graphical way to manage your Postgres roles and servers.
Login Roles
When you connect to the PEM server, you must provide role credentials that allow access to the database on which the PEM server stores data. By default, the postgres superuser account is used to initially connect to the server, but it is strongly recommended (for both security and auditing purposes) that individual roles are created for each connecting user. You can use the PEM Query Tool, the PEM web interface Create – Login/Group Role dialog, or a command line client (such as psql) to create a role.
To use the Create – Login/Group Role dialog to create a role, expand the node for the server on which the role will reside in the PEM tree control, and right-click on the Login/Group Roles node to access the context menu. Then, select Login/Group Role… from the Create menu.
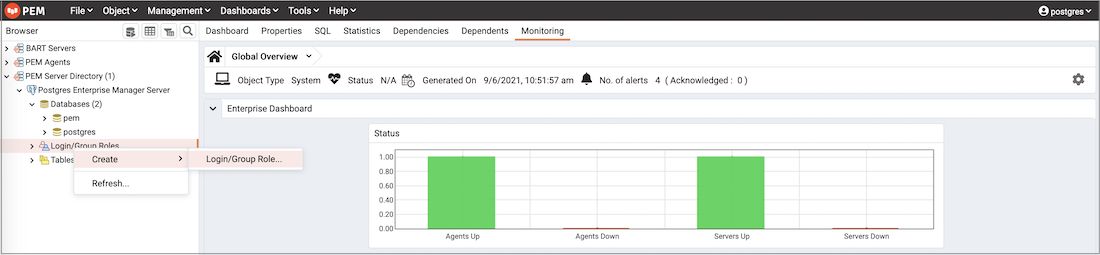
Use fields on the tabs of the Create – Login/Group Role dialog to define the role. To display the PEM online help in a browser tab, click the help (?) button located in the lower-left corner of the dialog.
When you’ve finished defining the new role, click Save to create the role.
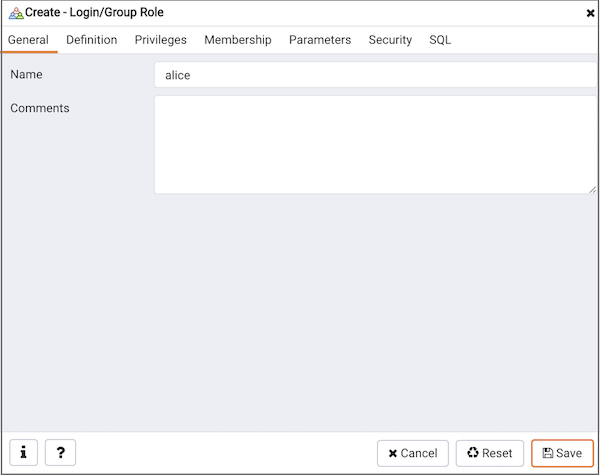
To modify the properties of an existing login role, right click on the name of a login role in the tree control, and select Properties from the context menu. To delete a login role, right click on the name of the role, and select Delete/Drop from the context menu.
For more complete information about creating and managing a role, see the PostgreSQL online documentation.
Group Roles
Group roles can serve as containers, used to dispense system privileges (such as creating databases) and object privileges (e.g. inserting data into a particular table). The primary purpose of a group role is to make the mass management of system and object permissions much easier for a DBA. Rather than assigning or modifying privileges individually across many different login accounts, you can assign or change privileges for a single role and then grant that role to many login roles at once.
Use the Group Roles node (located beneath the name of each registered server in the PEM tree control) to create and manage group roles. Options on the context menu provide access to a dialog that allows you to create a new role or modify the properties of an existing role. You can find more information about creating roles here.
Using PEM Pre-Defined Roles to Manage Access to PEM Functionality
You can use the Login/Group Role dialog to allow a role with limited privileges to access PEM features such as the Audit Manager, Capacity Manager, or SQL Profiler. PEM pre-defined roles allow access to PEM functionality; roles that are assigned membership in these roles can access the associated feature.
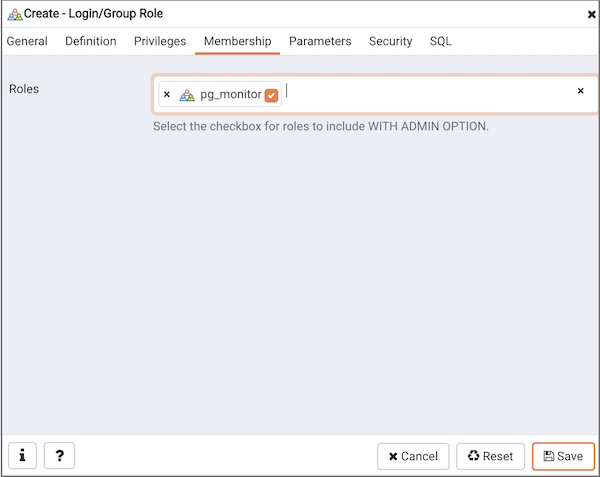
When defining a user, use the Membership tab to specify the roles in which the new user is a member. The new user will share the privileges associated with each role in which it is a member. For a user to have access to PEM extended functionality, the role must be a member of the pem_user role and the pre-defined role that grants access to the feature. Use the Roles field to select pre-defined role names from a drop down list.
The SQL tab displays the SQL command that the server will execute when you click Save.
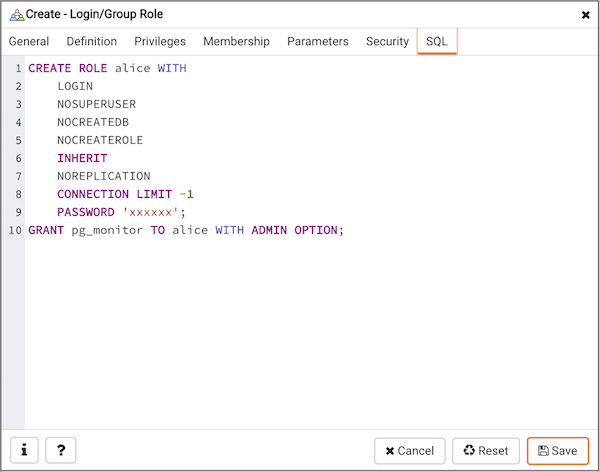
The example shown above creates a login role named acctg_clerk that will have access to the Audit Manager; the role can make unlimited connections to the server at any given time.
You can use PEM pre-defined roles to allow access to the functionality listed in the table below:
| Value | Parent Role | Description |
|---|---|---|
| pem_super_admin | Role to manage/configure everything on Postgres Enteprise Manager. | |
| pem_admin | pem_super_admin | Role for administration/management/configuration of all visible agents/servers, and monitored objects. |
| pem_config | pem_admin | Role for configuration management of Postgres Enterprise Manager. |
| pem_component | pem_admin | Role to run/execute all wizard/dialog based components. |
| pem_rest_api | pem_admin | Role to access the REST API. |
| pem_server_service_manager | pem_admin | Role for allowing to restart/reload the monitored database server (if server-id provided). |
| pem_manage_schedule_task | pem_admin | Role to configure the schedule tasks. |
| pem_manage_alert | pem_admin | Role for managing/configuring alerts, and its templates. |
| pem_config_alert | pem_config, pem_manage_alert | Role for configuring the alerts on any monitored objects. |
| pem_manage_probe | pem_admin | Role to create, update, delete the custom probes, and change custom probe configuration. |
| pem_config_probe | pem_config, pem_manage_probe | Role for probe configuration (history retention, execution frequency, enable/disable the probe) on all visible monitored objects. |
| pem_database_server_registration | pem_admin | Role to register a database server. |
| pem_comp_postgres_expert | pem_component | Role to run the Postgres Expert. |
| pem_comp_auto_discovery | pem_component | Role to run the Auto discovery of a database server dialog. |
| pem_comp_log_analysis_expert | pem_component | Role to run the Log Analysis Expert |
| pem_comp_sqlprofiler | pem_component | Role to run the SQL Profiler. |
| pem_manage_efm | pem_admin | Role to manage Failover Manager functionality. |
| pem_comp_capacity_manager | pem_component | Role to run the Capacity Manager. |
| pem_comp_log_manager | pem_component | Role to run the Log Manager. |
| pem_comp_audit_manager | pem_component | Role to run the Audit Manager. |
| pem_comp_tuning_wizard | pem_component | Role to run the Tuning Wizard. |
Using a Team Role
When you register a server for monitoring by PEM, you can specify a Team that will be associated with the server. A Team is a group role that can be used to allow or restrict access to one or more monitored servers to a limited group of role members. The PEM client will only display a server with a specified Team to those users who are:
- a member of the Team role
- the role that created the server
- a role with superuser privileges on the PEM server.
To create a team role, expand the node for the server on which the role will reside in the PEM tree control, and right-click on the Login/Group Roles node to access the context menu. Then, select Login/Group Role… from the Create menu; when the Create - Login/Group Role dialog opens, use the fields provided to specify the properties of the team role.
Object Permissions
A role must be granted sufficient privileges before accessing, executing, or creating any database object. PEM allows you to assign (GRANT) and remove (REVOKE) object permissions to group roles or login accounts using the graphical interface of the PEM client.
Object permissions are managed via the graphical object editor for each particular object. For example, to assign privileges to access a database table, right click on the table name in the tree control, and select the Properties option from the context menu. Use the options displayed on the Privileges tab to assign privileges for the table.
The PEM client also contains a Grant Wizard (accessed through the Tools menu) that allows you to manage many object permissions at once.
Managing Job Notifications
You can configure the settings in PEM console for sending the SMTP trap on success or failure of a system-generated job (listed under scheduled tasks) or a custom-defined agent job. These email notification settings can be configured at following three levels (in order of precedence) to send email notifications to the specified user group:
- Job level
- Agent level
- PEM server level (default level)
Configuring Job Notifications at Job Level
You can configure email notification settings at job level only for a custom-defined agent job in one of the following ways:
- For a new agent job, you can configure the email notification settings in the
Notificationtab ofCreate-Agent Jobwizard while creating the job itself. - For an existing custom-defined job, you can edit the properties of the job and configure the notification settings.
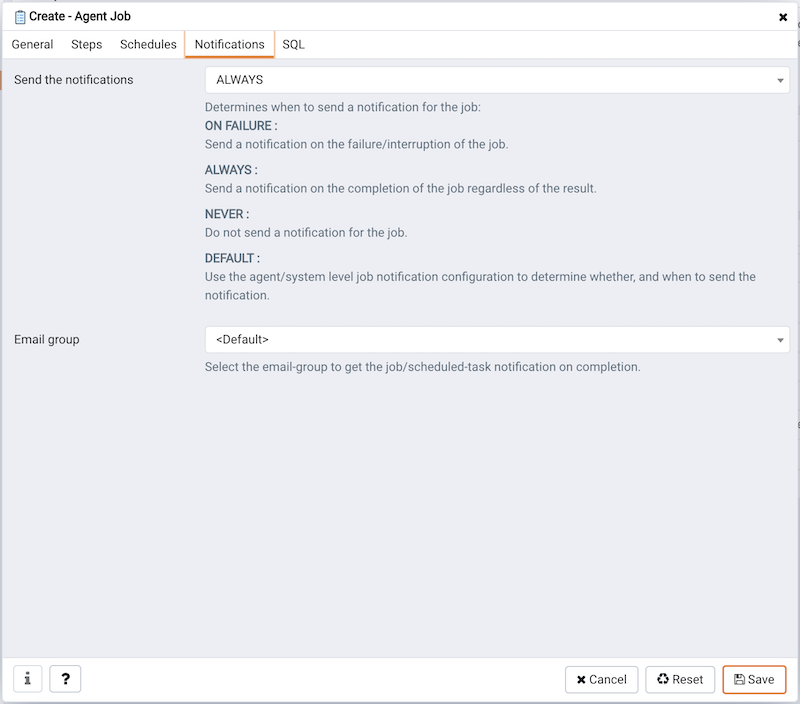
Use the fields on the Notifications tab to configure the email notification settings on job level:
- Use the
Send the notificationsfield to specify when you want the email notifications to be sent. - Use the
Email groupfield to specify the email group that should receive the email notification.
Configuring Job Notifications at Agent Level
Select the agent in the tree view, right click and select Properties. In the Properties dialog, select the Job notifications tab.
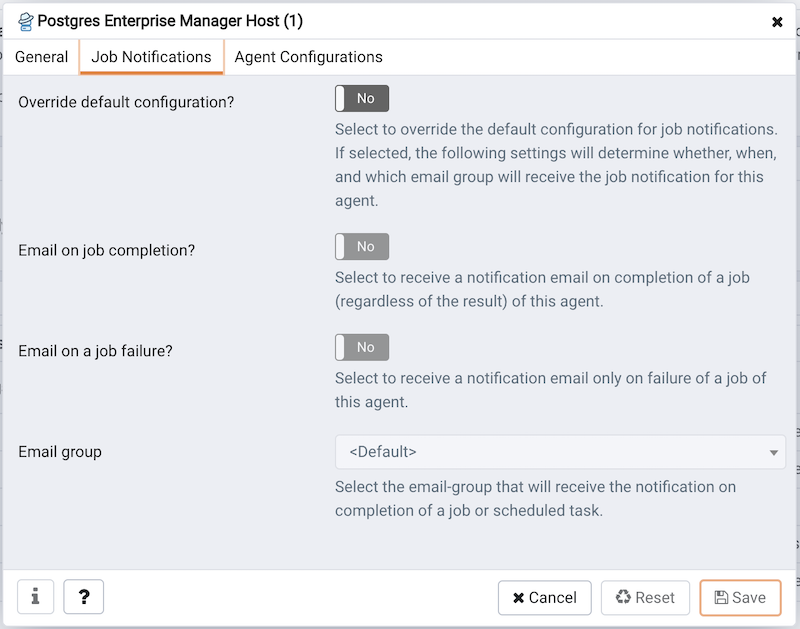
Use the fields on the Job notifications tab to configure the email notification settings on agent level:
- Use the
Override default configuration?switch to specify if you want the agent level job notification settings to override the default job notification settings. If you select Yes for this switch, you can use the rest of the settings on this dialog to define when and to whom the job notifications should be sent. Please note that the rest of the settings on this dialog work only if you enable theOverride default configuration?switch. - Use the
Email on job completion?switch to specify if the job notification should be sent on the successful job completion. - Use the
Email on a job failure?switch to specify if the job notification should be sent on the failure of a job. - Use the
Email groupfield to specify the email group to whom the job notification should be sent.
Configuring Job Notifications at Server Level
You can use the Server Configuration dialog to provide information about your email notification configuration at PEM server level. To open the Server Configuration dialog, select Server Configuration… from the PEM client’s Management menu.
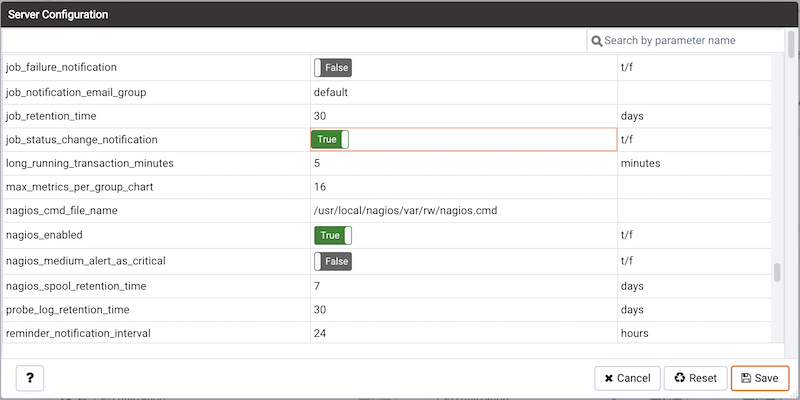
Four server configuration parameters specify information about your job notification preferences at PEM server level:
- Use the
job_failure_notificationswitch to specify if you want to send email notification after each job failure. - Use the
job_notification_email_groupparameter to specify the email group that should receive the email notification. - Use the
job_retention_time parameterto specify the number of days that non-recurring scheduled tasks should be retained in the system. - Use the
job_status_change_notificationswitch to specify if you want to send email notification after each job status change, irrespective of its status being a failure, success, or interrupted.
Managing PEM Scheduled Jobs
You can create a PEM scheduled job to perform a set of custom-defined steps in the specified sequence. These steps may contain SQL code or a batch/shell script that you may run on a server that is bound with the agent. You can schedule these jobs to suit your business requirements. For example, you can create a job for taking a backup of a particular database server and schedule it to run on a specific date and time of every month.
To create or manage a PEM scheduled job, use the PEM tree control to browse to the PEM agent for which you want to create the job. The tree control will display a Jobs node, under which currently defined jobs are displayed. To add a new job, right click on the Jobs node, and select Create Job... from the context menu.
When the Create - Agent Job dialog opens, use the tabs on the Create - Agent Job dialog to define the steps and schedule that make up a PEM scheduled job.
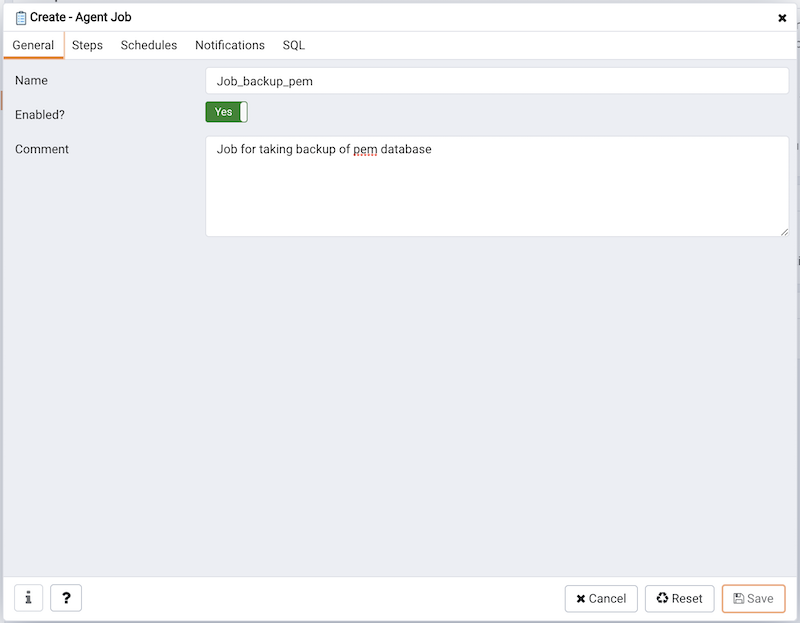
Use the fields on the General tab to provide general information about a job:
- Provide a name for the job in the
Namefield. - Move the
Enabledswitch to theYesposition to enable a job, orNoto disable a job. - Use the
Commentfield to store notes about the job.
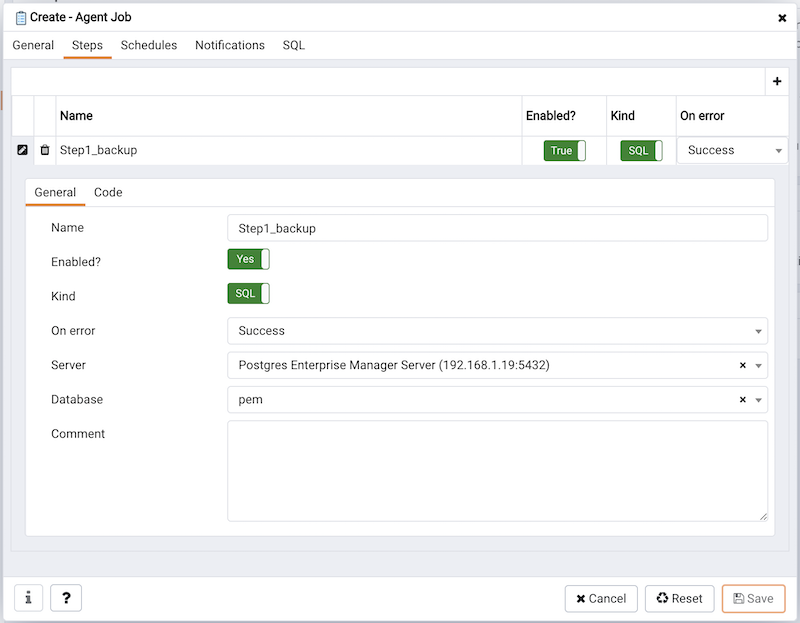
Use the Steps tab to define and manage the steps that the job will perform. Click the Add icon (+) to add a new step; then click the compose icon (located at the left side of the header) to open the step definition dialog:
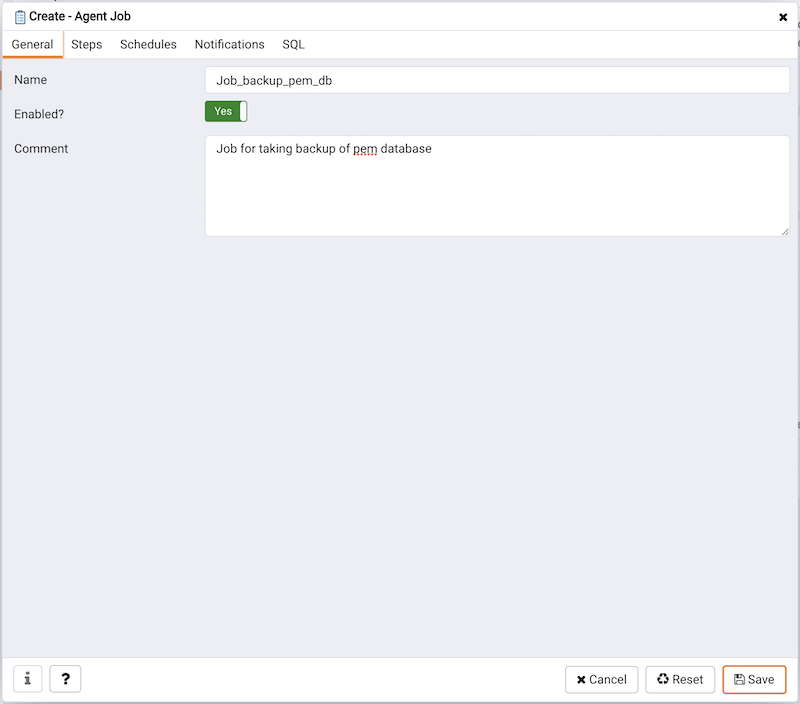
Use fields on the step definition dialog to define the step:
Provide a name for the step in the
Namefield; please note that steps will be performed in alphanumeric order by name.Use the
Enabledswitch to include the step when executing the job (True) or to disable the step (False).Use the
Kindswitch to indicate if the job step invokes SQL code (SQL) or a batch script (Batch).- If you select
SQL, use theCodetab to provide SQL code for the step. - If you select
Batch, use theCodetab to provide the batch script that will be executed during the step.
- If you select
Use the
On errordrop-down to specify the behavior of pgAgent if it encounters an error while executing the step. Select from:- Fail - Stop the job if you encounter an error while processing this step.
- Success - Mark the step as completing successfully, and continue.
- Ignore - Ignore the error, and continue.
If you have selected SQL as your input for
Kindswitch, provide the following additional information:- Use the
Serverfield to specify the server that is bound with the agent for which you are creating the PEM scheduled job. - Use the
Databasefield to specify the database that is associated with the server that you have selected.
- Use the
Use the
Commentfield to provide a comment about the step.
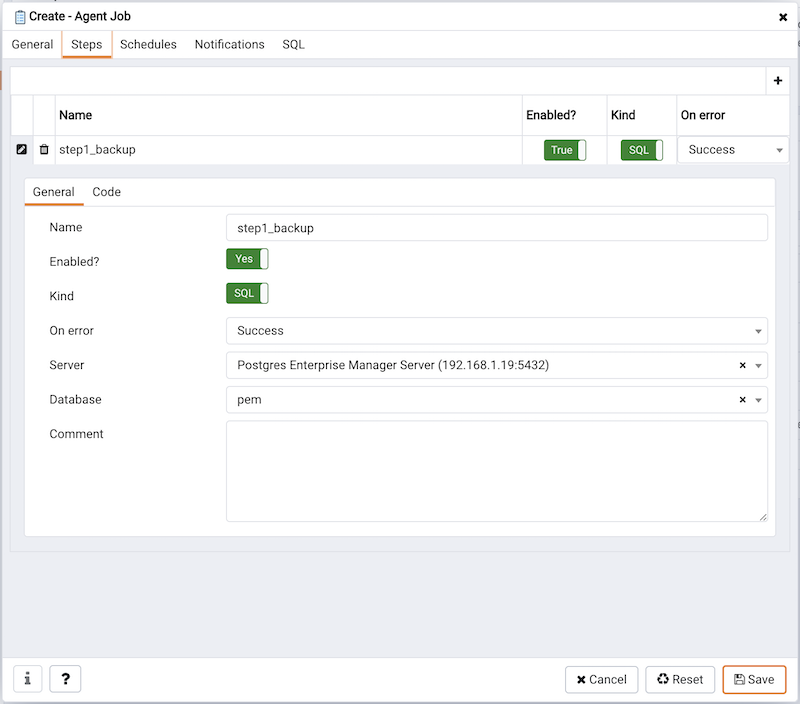
Use the context-sensitive field on the step definition dialog’s
Codetab to provide the SQL code or batch script that will be executed during the step:If the step invokes SQL code, provide one or more SQL statements in the
SQL queryfield.If the step invokes a batch script, provide the script in the
Codefield. If you are running on a Windows server, standard batch file syntax must be used. When running on a Linux server, any shell script may be used, provided that a suitable interpreter is specified on the first line (e.g. #!/bin/sh). Along with the defined inline code, you can also provide the path of any batch script, shell script, or SQL file on the filesystem.To invoke a script on a Linux system, you must modify the entry for
batch_script_userparameter in theagent.cfgfile and specify the user that should be used to run the script. You can either specify a non-root user or root for this parameter. If you do not specify a user, or the specified user does not exist, then the script will not be executed. Restart the agent after modifying the file.To invoke a script on a Windows system, set the registry entry for
AllowBatchJobStepstotrueand restart the PEM agent. PEM registry entries are located inHKEY_LOCAL_MACHINE\Software\Wow6432Node\EnterpriseDB\PEM\agent.
After providing all the information required by the step, click the Save button to save and close the step definition dialog.
Click the add icon (+) to add each additional step, or select the Schedules tab to define the job schedule.
Click the add icon (+) to add a schedule for the job; then click the compose icon (located at the left side of the header) to open the schedule definition dialog:
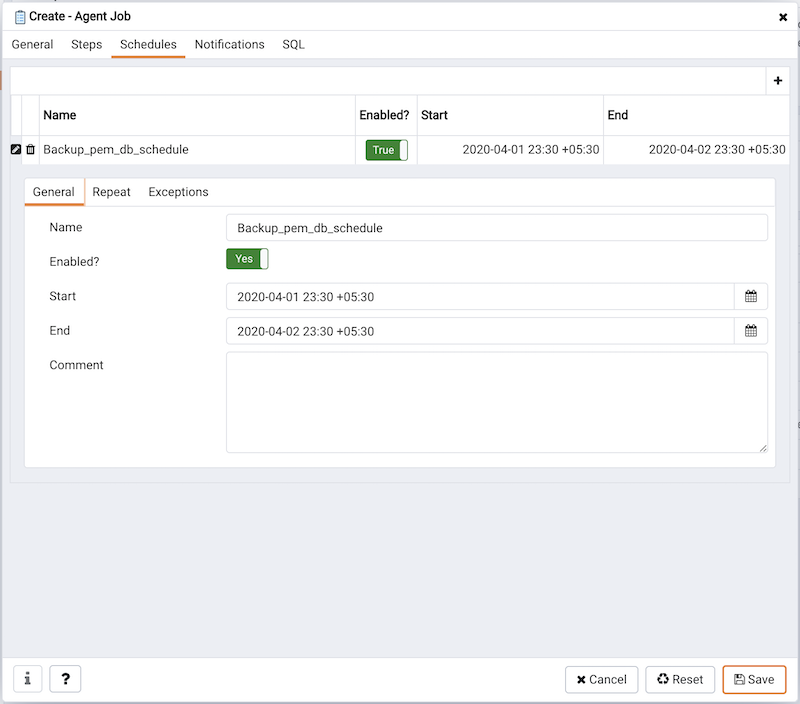
Use the fields on the Schedules definition tab to specify the days and times at which the job will execute.
- Provide a name for the schedule in the
Namefield. - Use the
Enabledswitch to indicate that pgAgent should use the schedule (Yes) or to disable the schedule (No). - Use the calendar selector in the
Startfield to specify the starting date and time for the schedule. - Use the calendar selector in the
Endfield to specify the ending date and time for the schedule. - Use the
Commentfield to provide a comment about the schedule.
Select the Repeat tab to define the days on which the schedule will execute.
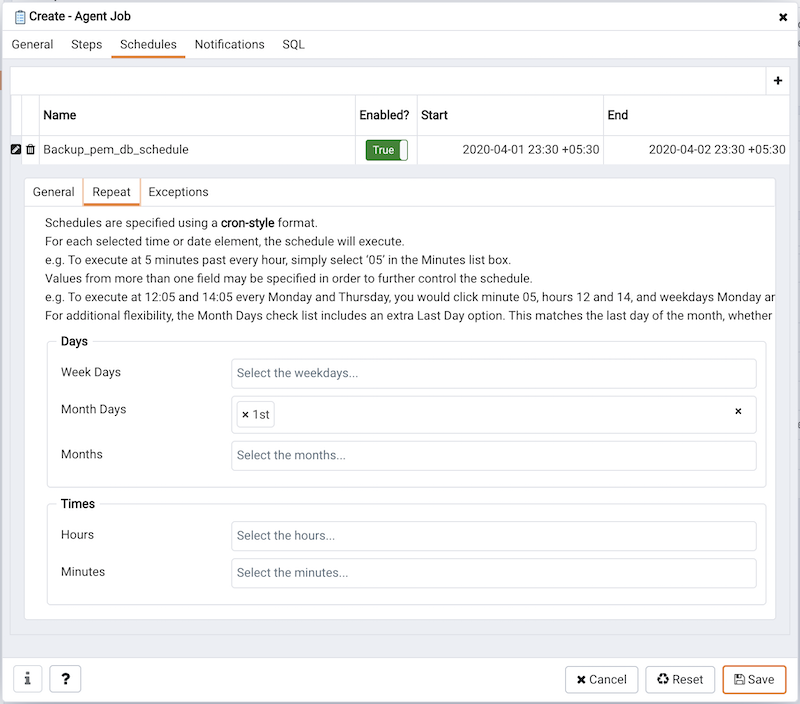
Use the fields on the Repeat tab to specify the details about the schedule in a cron-style format. The job will execute on each date or time element selected on the Repeat tab.
Click within a field to open a list of valid values for that field; click on a specific value to add that value to the list of selected values for the field. To clear the values from a field, click the X located at the right-side of the field.
- Use the fields within the
Daysbox to specify the days on which the job will execute:- Use the
Week Daysfield to select the days on which the job will execute. - Use the
Month Daysfield to select the numeric days on which the job will execute. Specify theLast Dayto indicate that the job should be performed on the last day of the month, irregardless of the date. - Use the
Monthsfield to select the months in which the job will execute.
- Use the
- Use the fields within the
Timesbox to specify the times at which the job will execute:- Use the
Hoursfield to select the hour at which the job will execute. - Use the
Minutesfield to select the minute at which the job will execute.
- Use the
Select the Exceptions tab to specify any days on which the schedule will not execute.
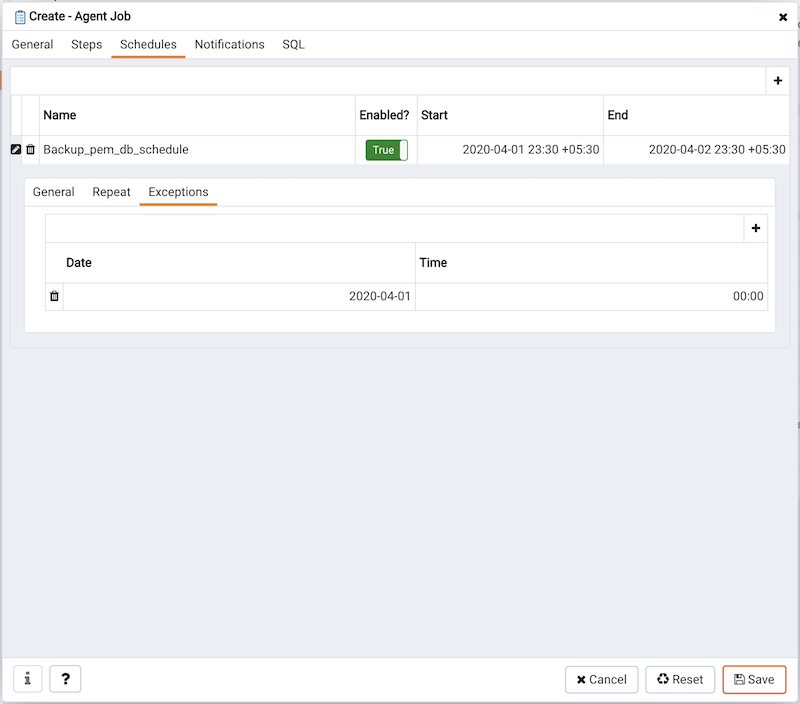
Use the fields on the Exceptions tab to specify days on which you wish the job to not execute; for example, you may wish for jobs to not execute on national holidays.
Click the Add icon (+) to add a row to the exception table, then:
- Click within the
Datecolumn to open a calendar selector, and select a date on which the job will not execute. Specify<Any>in theDatecolumn to indicate that the job should not execute on any day at the time selected. - Click within the
Timecolumn to open a time selector, and specify a time on which the job will not execute. Specify<Any>in theTimecolumn to indicate that the job should not execute at any time on the day selected.
Select the Notifications tab to configure the email notification settings on job level:
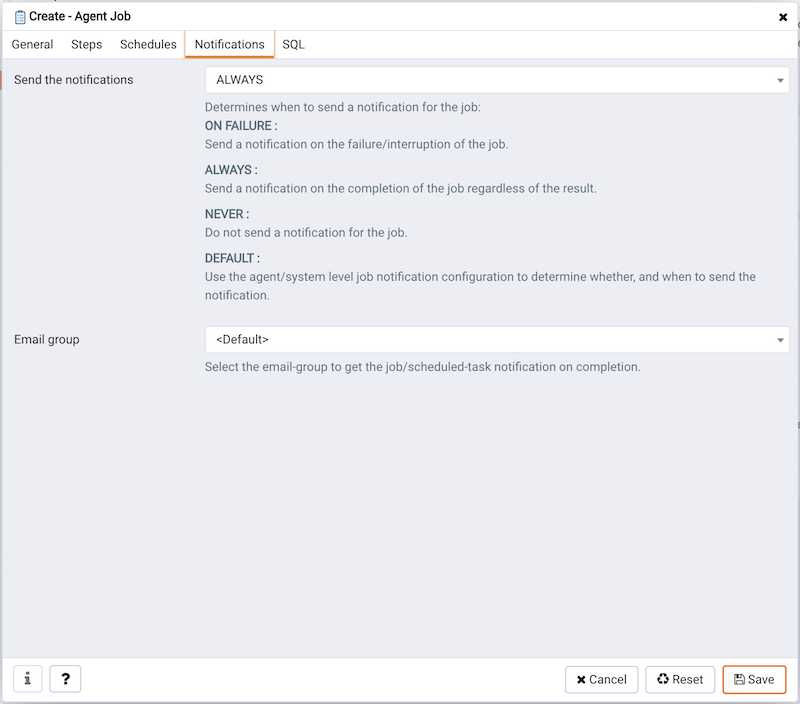
Use the fields on the Notifications tab to configure the email notification settings for a job:
- Use the
Send the notificationsfield to specify when you want the email notifications to be sent. - Use the
Email groupfield to specify the email group that should receive the email notification.
When you’ve finished defining the schedule, you can use the SQL tab to review the code that will create or modify your job.
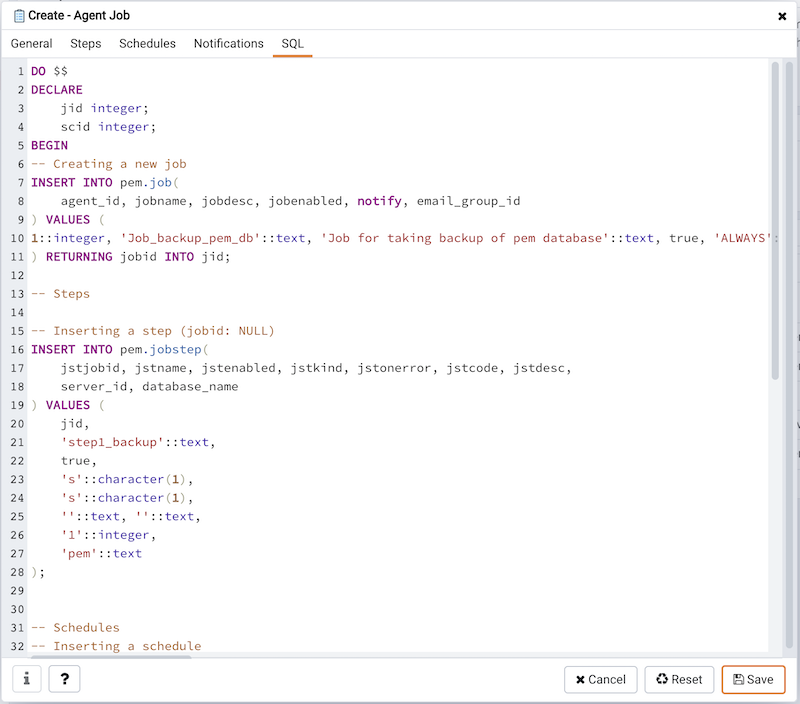
Click the Save button to save the job definition, or Cancel to exit the job without saving. Use the Reset button to remove your unsaved entries from the dialog.
After saving a job, the job will be listed under the Jobs node of the PEM tree control of the server on which it was defined. The Properties tab in the PEM console will display a high-level overview of the selected job, and the Statistics tab will show the details of each run of the job. To modify an existing job or to review detailed information about a job, right-click on a job name, and select Properties from the context menu.
Managing a PEM Agent
The sections that follow provide information about the behavior and management of a PEM agent.
Agent Privileges
By default, the PEM agent is installed with root privileges for the operating system host and superuser privileges for the database server. These privileges allow the PEM agent to invoke unrestricted probes on the monitored host and database server about system usage, retrieving and returning the information to the PEM server.
Please note that PEM functionality diminishes as the privileges of the PEM agent decrease. For complete functionality, the PEM agent should run as root. If the PEM agent is run under the database server’s service account, PEM probes will not have complete access to the statistical information used to generate reports, and functionality will be limited to the capabilities of that account. If the PEM agent is run under another lesser-privileged account, functionality will be limited even further.
If you limit the operating system privileges of the PEM agent, some of the PEM probes will not return information, and the following functionality may be affected:
| Probe or Action | Operating System | PEM Functionality Affected |
|---|---|---|
| Data And Logfile Analysis | Linux/ Windows | The Postgres Expert will be unable to access complete information. |
| Session Information | Linux | The per-process statistics will be incomplete. |
| PG HBA | Linux/ Windows | The Postgres Expert will be unable to access complete information. |
| Service restart functionality | Linux/ Windows | The Audit Log Manager, Server Log Manager Log Analysis Expert and PEM may be unable to apply requested modifications. |
| Package Deployment | Linux/ Windows | PEM will be unable to run downloaded installation modules. |
| Batch Task | Windows | PEM will be unable to run scheduled batch jobs in Windows. |
| Collect data from server (root access required) | Linux/ Windows | Columns such as swap usage, CPU usage, IO read, IO write will be displayed as 0 in the session activity dashboard. |
Note The above-mentioned list is not comprehensive, but should provide an overview of the type of functionality that will be limited.
If you restrict the database privileges of the PEM agent, the following PEM functionality may be affected:
| Probe | Operating System | PEM Functionality Affected |
|---|---|---|
| Audit Log Collection | Linux/Windows | PEM will receive empty data from the PEM database. |
| Server Log Collection | Linux/Windows | PEM will be unable to collect server log information. |
| Database Statistics | Linux/Windows | The Database/Server Analysis dashboards will contain incomplete information. |
| Session Waits/System Waits | Linux/Windows | The Session/System Waits dashboards will contain incomplete information. |
| Locks Information | Linux/Windows | The Database/Server Analysis dashboards will contain incomplete information. |
| Streaming Replication | Linux/Windows | The Streaming Replication dashboard will not display information. |
| Slony Replication | Linux/Windows | Slony-related charts on the Database Analysis dashboard will not display information. |
| Tablespace Size | Linux/Windows | The Server Analysis dashboard will not display complete information. |
| xDB Replication | Linux/Windows | PEM will be unable to send xDB alerts and traps. |
If the probe is querying the operating system with insufficient privileges, the probe may return a permission denied error.
If the probe is querying the database with insufficient privileges, the probe may return a permission denied error or display the returned data in a PEM chart or graph as an empty value.
When a probe fails, an entry will be written to the log file that contains the name of the probe, the reason the probe failed, and a hint that will help you resolve the problem.
You can view probe-related errors that occurred on the server in the Probe Log dashboard, or review error messages in the PEM worker log files. On Linux, the default location of the log file is:
/var/log/pem/worker.log
On Windows, log information is available on the Event Viewer.
Agent Configuration
A number of user-configurable parameters and registry entries control the behavior of the PEM agent. You may be required to modify the PEM agent’s parameter settings to enable some PEM functionality. After modifying values in the PEM agent configuration file, you must restart the PEM agent to apply any changes.
With the exception of the PEM_MAXCONN parameter, we strongly recommend against modifying any of the configuration parameters or registry entries listed below without first consulting EDB support experts unless the modifications are required to enable PEM functionality.
On Linux systems, PEM configuration options are stored in the agent.cfg file, located in /usr/edb/pem/agent/etc. The agent.cfg file contains the following entries:
| Parameter Name | Description | Default Value |
|---|---|---|
| pem_host | The IP address or hostname of the PEM server. | 127.0.0.1. |
| pem_port | The database server port to which the agent connects to communicate with the PEM server. | Port 5432. |
| pem_agent | A unique identifier assigned to the PEM agent. | The first agent is ‘1’, the second agent is ‘2’, and so on. |
| agent_ssl_key | The complete path to the PEM agent’s key file. | /root/.pem/agent.key |
| agent_ssl_crt | The complete path to the PEM agent’s certificate | /root/.pem/agent.crt |
| agent_flag_dir | Used for HA support. Specifies the directory path checked for requests to take over monitoring another server. Requests are made in the form of a file in the specified flag directory. | Not set by default. |
| log_level | Log level specifies the type of event that will be written to the PEM log files. | warning |
| log_location | Specifies the location of the PEM worker log file. | 127.0.0.1. |
| agent_log_location | Specifies the location of the PEM agent log file. | /var/log/pem/agent.log |
| long_wait | The maximum length of time (in seconds) that the PEM agent will wait before attempting to connect to the PEM server if an initial connection attempt fails. | 30 seconds |
| short_wait | The minimum length of time (in seconds) that the PEM agent will wait before checking which probes are next in the queue (waiting to run). | 10 seconds |
| alert_threads | The number of alert threads to be spawned by the agent. | Set to 1 for the agent that resides on the host of the PEM server; 0 for all other agents. |
| enable_smtp | When set to true for multiple PEM Agents (7.13 or lesser) it may send more duplicate emails. Whereas for PEM Agents (7.14 or higher) it may send lesser duplicate emails. | true for PEM server host; false for all others. |
| enable_snmp | When set to true for multiple PEM Agents (7.13 or lesser) it may send more duplicate traps. Whereas for PEM Agents (7.14 or higher) it may send lesser duplicate traps. | true for PEM server host; false for all others. |
| enable_nagios | When set to true, Nagios alerting is enabled. | true for PEM server host; false for all others. |
| enable_webhook | When set to true, Webhook alerting is enabled. | true for PEM server host; false for all others. |
| max_webhook_retries | Set maximum number of times pemAgent should retry to call webhooks on failure. | Default 3. |
| connect_timeout | The max time in seconds (a decimal integer string) that the agent will wait for a connection. | Not set by default; set to 0 to indicate the agent should wait indefinitely. |
| allow_server_restart | If set to TRUE, the agent can restart the database server that it monitors. Some PEM features may be enabled/disabled, depending on the value of this parameter. | |
| max_connections | The maximum number of probe connections used by the connection throttler. | 0 (an unlimited number) |
| connection_lifetime | Use ConnectionLifetime (or connection_lifetime) to specify the minimum number of seconds an open but idle connection is retained. This parameter is ignored if the value specified in MaxConnections is reached and a new connection (to a different database) is required to satisfy a waiting request. | By default, set to 0 (a connection is dropped when the connection is idle after the agent’s processing loop). |
| allow_batch_probes | If set to TRUE, the user will be able to create batch probes using the custom probes feature. | false |
| heartbeat_connection | When set to TRUE, a dedicated connection is used for sending the heartbeats. | false |
| batch_script_dir | Provide the path where script file (for alerting) will be stored. | /tmp |
| connection_custom_setup | Use to provide SQL code that will be invoked when a new connection with a monitored server is made. | Not set by default. |
| ca_file | Provide the path where the CA certificate resides. | Not set by default. |
| batch_script_user | Provide the name of the user that should be used for executing the batch/shell scripts. | None |
| webhook_ssl_key | The complete path to the webhook’s SSL client key file. | |
| webhook_ssl_crt | The complete path to the webhook’s SSL client certificate file. | |
| webhook_ssl_crl | The complete path of the CRL file to validate webhook server certificate. | |
| webhook_ssl_ca_crt | The complete path to the webhook’s SSL ca certificate file. | |
| allow_insecure_webhooks | When set to true, allow webhooks to call with insecure flag. | false |
On 64 bit Windows systems, PEM registry entries are located in:
HKEY_LOCAL_MACHINE\Software\Wow6432Node\EnterpriseDB\PEM\agent
The registry contains the following entries:
| Parameter Name | Description | Default Value |
|---|---|---|
| PEM_HOST | The IP address or hostname of the PEM server. | 127.0.0.1. |
| PEM_PORT | The database server port to which the agent connects to communicate with the PEM server. | Port 5432. |
| AgentID | A unique identifier assigned to the PEM agent. | The first agent is ‘1’, the second agent is ‘2’, and so on. |
| AgentKeyPath | The complete path to the PEM agent’s key file. | %APPDATA%\Roaming\pem\ agent.key. |
| AgentCrtPath | The complete path to the PEM agent’s certificate file. | %APPDATA%\Roaming\pem\ agent.crt |
| AgentFlagDir | Used for HA support. Specifies the directory path checked for requests to take over monitoring another server. Requests are made in the form of a file in the specified flag directory. | Not set by default. |
| LogLevel | Log level specifies the type of event that will be written to the PEM log files. | warning |
| LongWait | The maximum length of time (in seconds) that the PEM agent will wait before attempting to connect to the PEM server if an initial connection attempt fails. | 30 seconds |
| shortWait | The minimum length of time (in seconds) that the PEM agent will wait before checking which probes are next in the queue (waiting to run). | 10 seconds |
| AlertThreads | The number of alert threads to be spawned by the agent. | Set to 1 for the agent that resides on the host of the PEM server; 0 for all other agents. |
| EnableSMTP | When set to true, the SMTP email feature is enabled. | true for PEM server host; false for all others. |
| EnableSNMP | When set to true, the SNMP trap feature is enabled. | true for PEM server host; false for all others. |
| EnableWebhook | When set to true, Webhook alerting is enabled. | true for PEM server host; false for all others. |
| MaxWebhookRetries | Set maximum number of times pemAgent should retry to call webhooks on failure. | Default 3. |
| ConnectTimeout | The max time in seconds (a decimal integer string) that the agent will wait for a connection. | Not set by default; if set to 0, the agent will wait indefinitely. |
| AllowServerRestart | If set to TRUE, the agent can restart the database server that it monitors. Some PEM features may be enabled/disabled, depending on the value of this parameter. | true |
| MaxConnections | The maximum number of probe connections used by the connection throttler. | 0 (an unlimited number) |
| ConnectionLifetime | Use ConnectionLifetime (or connection_lifetime) to specify the minimum number of seconds an open but idle connection is retained. This parameter is ignored if the value specified in MaxConnections is reached and a new connection (to a different database) is required to satisfy a waiting request. | By default, set to 0 (a connection is dropped when the connection is idle after the agent’s processing loop). |
| AllowBatchProbes | If set to TRUE, the user will be able to create batch probes using the custom probes feature. | false |
| HeartbeatConnection | When set to TRUE, a dedicated connection is used for sending the heartbeats. | false |
| BatchScriptDir | Provide the path where script file (for alerting) will be stored. | /tmp |
| ConnectionCustomSetup | Use to provide SQL code that will be invoked when a new connection with a monitored server is made. | Not set by default. |
| ca_file | Provide the path where the CA certificate resides. | Not set by default. |
| AllowBatchJobSteps | If set to true,the batch/shell scripts will be executed using Administrator user account. | None |
| WebhookSSLKey | The complete path to the webhook’s SSL client key file. | |
| WebhookSSLCrt | The complete path to the webhook’s SSL client certificate file. | |
| WebhookSSLCrl | The complete path of the CRL file to validate webhook server certificate. | |
| WebhookSSLCaCrt | The complete path to the webhook’s SSL ca certificate file. | |
| AllowInsecureWebhooks | When set to true, allow webhooks to call with insecure flag. | false |
Agent Properties
The PEM Agent Properties dialog provides information about the PEM agent from which the dialog was opened; to open the dialog, right-click on an agent name in the PEM client tree control, and select Properties from the context menu.
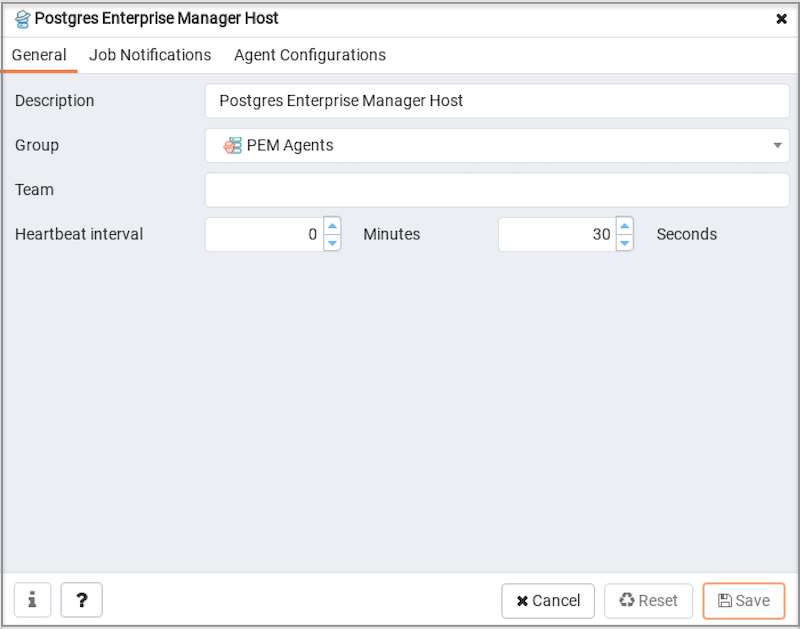
Use fields on the PEM Agent Properties dialog to review or modify information about the PEM agent:
The
Descriptionfield displays a modifiable description of the PEM agent. This description is displayed in the tree control of the PEM client.You can use groups to organize your servers and agents in the PEM client tree control. Use the
Groupdrop-down listbox to select the group in which the agent will be displayed.Use the
Teamfield to specify the name of the group role that should be able to access servers monitored by the agent; the servers monitored by this agent will be displayed in the PEM client tree control to connected team members. Please note that this is a convenience feature. The Team field does not provide true isolation, and should not be used for security purposes.The
Heartbeat intervalfields display the length of time that will elapse between reports from the PEM agent to the PEM server. Use the selectors next to theMinutesorSecondsfields to modify the interval.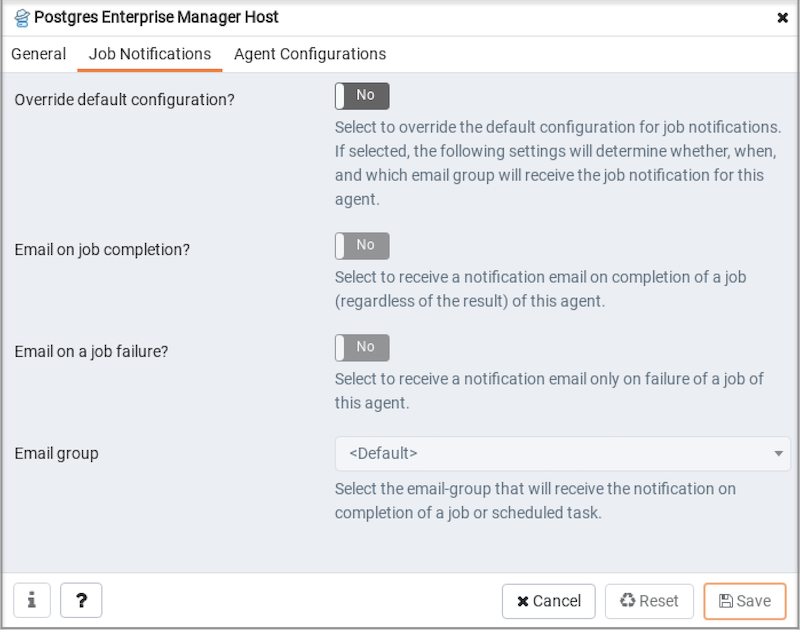
Use the fields on the
Job Notificationstab to configure the email notification settings on agent level:- Use the
Override default configuration?switch to specify if you want the agent level job notification settings to override the default job notification settings. If you selectYesfor this switch, you can use the rest of the settings on this dialog to define when and to whom the job notifications should be sent. Please note that the rest of the settings on this dialog work only if you enable theOverride default configuration?switch. - Use the
Email on job completion?switch to specify if the job notification should be sent on the successful job completion. - Use the
Email on a job failure?switch to specify if the job notification should be sent on the failure of a job. - Use the
Email groupfield to specify the email group to whom the job notification should be sent.
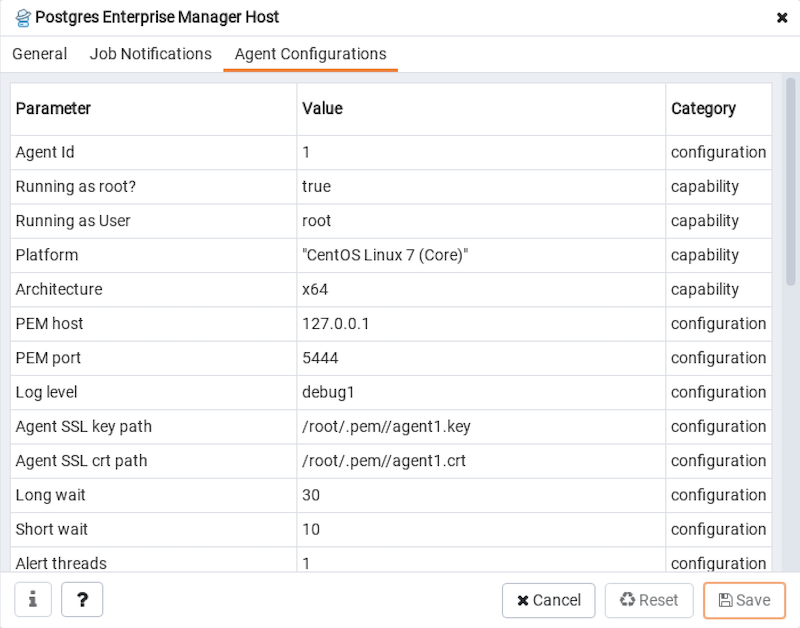
The
Agent Configurationstab displays all the current configurations and capabilities of a agent.- The
Parametercolumn displays a list of parameters. - The
Valuecolumn displays the current value of the corresponding parameter. - The
Categorycolumn displays the category of the corresponding parameter; it can be eitherconfigurationorcapability.
- Use the