PEM 8.1 -Window Installation Guide
EnterpriseDB
PEM Installation Guide on Windows
Postgres Enterprise Manager (PEM) is designed to assist database administrators, system architects, and performance analysts when administering, monitoring, and tuning PostgreSQL and Advanced Server database servers. PEM has been designed to manage and monitor a single server or multiple servers from a single console, allowing complete control over monitored databases.
This document provides step-by-step instructions to guide you through the installation of Postgres Enterprise Manager.
Throughout this guide, the term Postgres refers to either a PostgreSQL or an Advanced Server installation, where either is appropriate.
Language pack installers contain supported languages that may be used with EDB Postgres Advanced Server and EDB PostgreSQL database installers. The language pack installer allows you to install Perl, TCL/TK, and Python without installing supporting software from third party vendors. For more information about installing and using Language Pack, please see the EDB Postgres Language Pack Guide, available from the EDB Website.
whats_new pem_hardware_software_requirements pem_architecture installing_postgres_enterprise_manager the_pem_web_interface uninstalling_pem_components conclusion
What’s New
The following changes have been made to Postgres Enterprise Manager to create version 8.1.0:
- Added ability to monitor a BDR (Bi-Replication Replication) server using the PEM console.
- Added support for Kerberos (GSSAPI) authentication for the PEM Server on Linux Platforms Web Console.
- Added support of EDB Postgres Extended (formerly known as 2nQPostgres) for Administration and Monitoring.
- Added Entity-Relationship Diagram (ERD) design tool to create ER diagrams of the databases.
- Added support for adding Publishers and Subscribers of Logical Replication via PEM Console.
- Added Quick Search option to locate features and relevant help articles quickly.
- Added ability to configure the parameters through the following PEM tools without restarting the database server:
- Log Manager
- Audit Manager
- Tuning Wizard
PEM - Hardware and Software Requirements
Hardware Prerequisites
For optimum performance when monitoring servers and rendering dashboards, we recommend installing PEM on a system with at least:
- 4 CPU cores
- 8 GB of RAM
- 100 GB of Storage
Additional disk space is required for data storage. Please note that resource usage will vary based on which probes are defined and enabled, and the activity level on the monitored databases. Monitoring server resources (as you use PEM) will let you know when you need to expand your initial system configuration.
Software Prerequisites
Supported Platforms and Versions
For information about the platforms and versions supported by PEM, visit the EnterpriseDB website at:
https://www.enterprisedb.com/services-support/edb-supported-products-and-platforms#pem
Modifying the pg_hba.conf File
The pg_hba.conf file manages connections for the Postgres server. You must ensure that the pg_hba.conf file on each monitored server allows connections from the PEM server, the monitoring PEM agent, and the host of the PEM-HTTPD server.
For information about modifying the pg_hba.conf file, see the PEM Administrator’s Guide.
Information about managing authentication is also available in the PostgreSQL core documentation.
Firewall Restrictions
Please note that you must adjust your firewall to allow communication between PEM components.
Supported Locales
Currently, the PEM server and web interface support a locale of English(US) en_US and use of a period (.) as a language separator character. Using an alternate locale, or a separator character other than a period may result in errors.
PEM Architecture
Postgres Enterprise Manager (PEM) is a tool designed to monitor and manage multiple Postgres servers through a single GUI interface. PEM is capable of monitoring the following areas of the infrastructure:
Note The term Postgres refers to either PostgreSQL or EDB Postgres Advanced Server or EDB Postgres Extended.
- Hosts - One or more servers (physical or virtual) and their operating systems.
- Servers - One or more instances of PostgreSQL or EDB Postgres Advanced Server or EDB Postgres Extended (formerly known as 2nQPostgres) running on a host.
- Databases - One or more databases and the schema objects (tables, indexes, etc.) within them.
PEM consists of a number of individual software components; the individual components are described below.
- PEM Server - The PEM Server is used as the data repository for monitoring data and as a server to which both Agents and Clients connect. The PEM server consists of an instance of PostgreSQL and an associated database for storage of monitoring data, and a server that provides web services.
- PEM Agent - The PEM Agent is responsible for executing tasks and reporting statistics from the Agent host and monitored Postgres instances to the PEM server. A single PEM Agent can monitor multiple installed instances of Postgres that reside on one or many hosts.
- PEM Web Client - The PEM web interface allows you to manage and monitor Postgres servers and utilize PEM extended functionality. The web interface software is installed with the PEM server and is accessed via any supported web browser.
- SQL Profiler - SQL Profiler is a Postgres server plugin to record the monitoring data and query plans to be analysed by the SQL Profiler tool in PEM. This is an optional component of PEM, but the plugin must be installed into each instance of Postgres with which you wish to use the SQL Profiler tool. The SQL Profiler may be used with any supported version of an EDB distribution of a PostgreSQL server or Advanced Server (not just those managed through the PEM server). See the PEM SQL Profiler Guide for details and supported versions.
PEM architecture
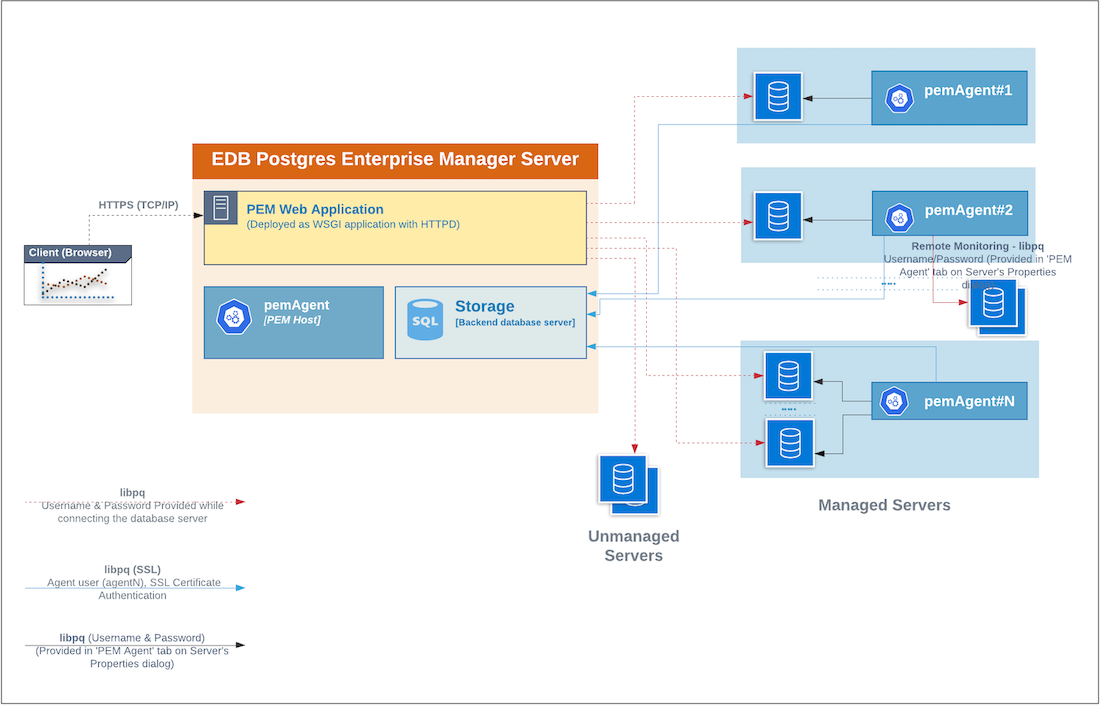
The following architectural diagram illustrates the relationships between the PEM server, clients, and managed as well as unmanaged Postgres servers.
The PEM Server
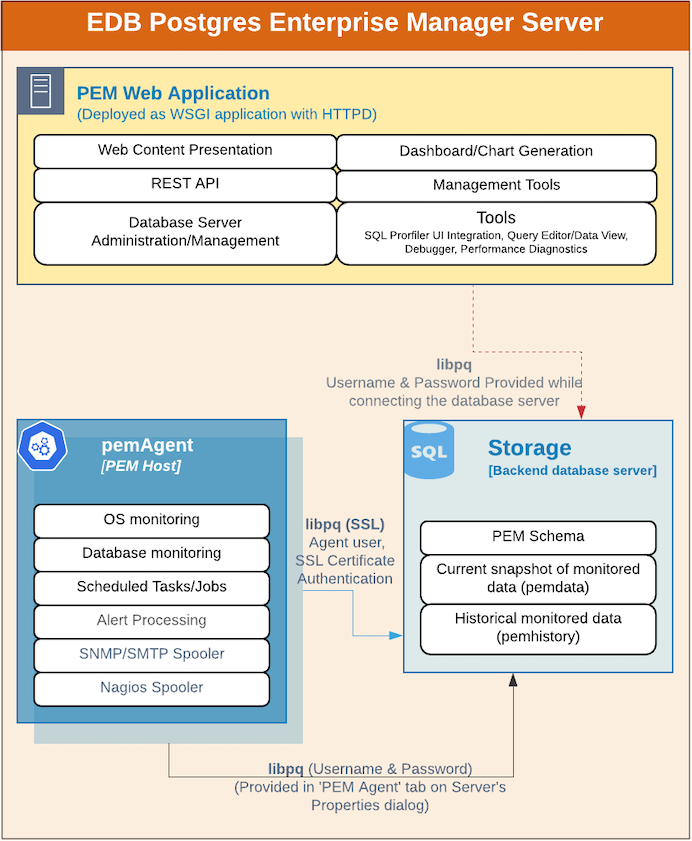
The PEM server consists of an instance of Postgres, an instance of the Apache web-server providing web services to the client, and a PEM Agent. PEM utilizes a server-side cryptographic plugin to generate authentication certificates.
The instance of Postgres (a database server) and an instance of the Apache web-server ( HTTPD) can be on the same host or on separate hosts.
- Postgres Instance (Database server) - This is the backend database server. It hosts a database named pem which acts as the repository for PEM Server. The pem database contains several schemas that store metric data collected from each monitored host, server, and database.
- pem - This schema is the core of the PEM application. It contains the definitions of configuration functions, tables, or views required by the application.
- pemdata - This schema stores the current snapshot of the monitored data.
- pemhistory - This schema stores the historical monitored data.
- Apache Web Server (HTTPD) - The PEM Web Application is deployed as a WSGI application with HTTPD to provide web services to the client. It is comprised of the following:
- Web content presentation - The presentation layer is created by the Web Application (for example Browser, login page,..).
- Rest API - The REST API allows integration with other apps and services.
- Database Server Administration/Management - Database server administration and management activities like CREATE, ALTER, DROP, etc. can be performed for managed as well as unmanaged servers.
- Dashboard/Chart generation - Internally, the web application includes functionality that generates Dashboards and Charts.
- Management Tools - The Audit Manager, Capacity Manager, Log Manager, Postgres Expert, Postgres Log Analysis Expert, and the Tuning Wizard are made available in the Web Application.
- Other tools provide functionality on managed or unmanaged servers:
- SQL Profiler UI Integration - SQL Profiler generates easily analyzed traces of session content.
- Query Editor/Data View - The Query editor allows you to query, edit, and view data.
- Debugger - The Debugger helps you debug queries.
- Performance Diagnostics - Performance Diagnostics help you analyze the performance of Postgres instances.
We recommend that you use a dedicated machine to host production instances of the PEM backend database. The host may be subject to high levels of data throughput, depending on the number of database servers that are being monitored and the workloads the servers are processing.
The PEM Agent
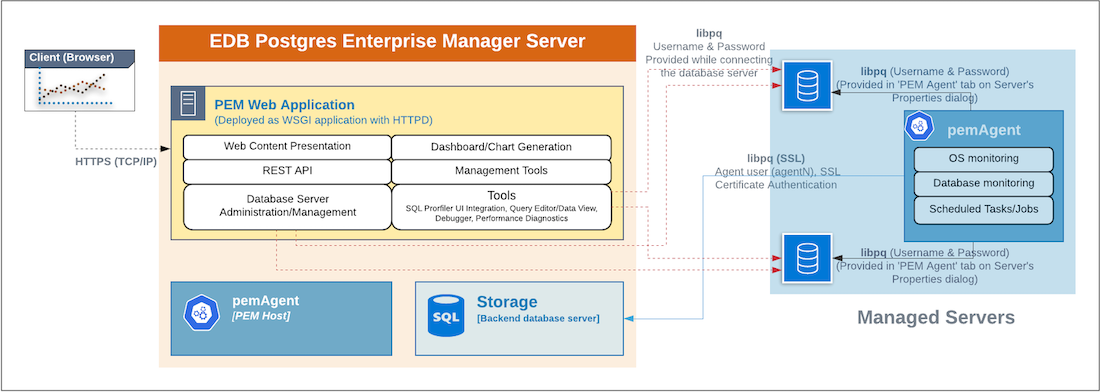
The PEM Agent is responsible for the collection of monitoring data from the machine and operating system, as well as from each of the Postgres instances to which they are bound. Each PEM Agent can monitor one physical or virtual machine and is capable of monitoring multiple database servers locally - installed on the same system, or remotely - installed on other systems. It is also responsible for executing other tasks that may be scheduled by the user (for example, server shutdowns, SQL Profiler traces, user-defined jobs).
A PEM Agent is installed by default on the PEM Server along with the installation of the PEM Server. It is generally referred to as a PEM Agent on the PEM Host. Separately, the PEM Agent can also be installed on the other servers hosting the Postgres instances to be monitored using PEM.
Whether monitoring locally or remotely, the PEM Agent connects to the PEM Server using PostgreSQL’s libpq, using SSL certificate-based authentication. The PEM Agent installer in Windows and pemworker CLI in Linux is responsible for registering each agent with the PEM Server, and generating and installing the required certificates.
Please note that there is only one-way traffic between the PEM Agent and PEM Server; the PEM Agent always connects to the PEM Server.
The PEM Agent must be able to connect to each database server that it monitors. This connection is made over a TCP/IP connection (or optionally a Unix Domain Socket on Unix hosts), and may optionally use SSL. The user must configure the connection and authentication to the monitored server.
Once configured, each agent collects statistics and other information on the host and each database server and database that it monitors. Each piece of information is known as a metric and is collected by a probe. Most probes will collect multiple metrics at once for efficiency. Examples of the metrics collected include:
- Disk I/O statistics
- Network statistics
- Database server version string
- Database server configuration option (GUC) values
- Table access statistics
- Table and index sizes
A list of PEM probes can be found here.
By default, the PEM Agent bound to the database server collects the OS/Database monitoring statistics and also runs any scheduled tasks/jobs for that particular database server, storing data in the pem database on the PEM server.
The Alert processing, SNMP/SMTP spoolers, and Nagios Spooler data is stored in the pem database on the PEM server and is then processed by the PEM Agent on the PEM Host by default. However, processing by other PEM Agents can be enabled by adjusting the SNMP/SMTP and Nagios parameters of the PEM Agents.
To see more information about these parameters see Server Configuration.
The PEM Web Client
The PEM client is a web-based application that runs in supported browsers. The client’s web interface connects to the PEM server and allows direct management of managed or unmanaged servers, and the databases and schemas that reside on them.
The client allows you to use PEM functionality that makes use of the data logged on the server through features such as the dashboards, the Postgres Log Analysis Expert, and Capacity Manager.
The SQL Profiler Plugin
You are not required to install the SQL Profiler plugin on every server, but you must install and configure the plugin on each server on which you wish to use the SQL Profiler. You may also want to install and configure SQL Profiler on un-monitored development servers. For ad-hoc use also, you may temporarily install the SQL Profiler plugin.
The plugin is installed with the EDB Postgres Advanced Server distribution but must be installed separately for use with PostgreSQL. The SQL Profiler installer is available from the EDB website.
SQL Profiler may be used on servers that are not managed through PEM, but to perform scheduled traces, a server must have the plugin installed, and must be managed by an installed and configured PEM agent.
For more information about using SQL Profiler, see the PEM SQL Profiler Guide
Installing Postgres Enterprise Manager
The PEM server graphical installer for Windows installs and configures the PEM server, a PEM agent, and the software required to connect to the PEM web interface with your choice of browser.
The PEM server uses a Postgres installation and backing database to manage data. The pem backing database gets created while installing the PEM Server through installer.
For detailed information about using the PEM server graphical installer, see Installing the PEM Server on Windows.
The PEM agent graphical installer for Windows installs and registers the PEM agent. The PEM agent that is installed with the PEM server is capable of monitoring multiple servers that reside on the same host, or on remote hosts. Please note that the PEM functionality on servers monitored by a remote agent may be limited.
For detailed information about using the PEM agent graphical installer, see Installing a PEM Agent on Windows.
installing_pem_server_on_windows installing_pem_agent_on_windows
Installing the PEM Server on Windows
At the heart of each PEM installation is the server. In a production environment, the server will typically be a dedicated machine, monitoring a large number of Postgres servers or a smaller number of busy servers.
The PEM server backend database may be an EnterpriseDB distribution of the PostgreSQL or Advanced Server database server, or an existing Postgres server installed from another source. The Postgres backend database server must be version 11 or later, and will contain a database named pem, which is used by the PEM server as a repository.
If you would like to use an existing Postgres server to host the PEM server, the PEM server installer can create the
pemdatabase on the Postgres host. You must manually satisfy the software pre-requisites if you choose to use an existing server.For more information about using an existing Postgres server to host the PEM server backend database, see Installing the PEM Server on an Existing Postgres Server section.
If you do not wish to use an existing installation of Postgres as the PEM server host, the PEM server installer can install PostgreSQL, satisfy the server host’s software pre-requisites, and create an instance (a PostgreSQL database cluster) that contains the
pemdatabase. This is the simplest PEM server installation option.PEM-HTTPD is made available for Postgres installations through the PEM server installer or the StackBuilder utility. If PEM-HTTPD is already installed on the host, the PEM server installer will review and update the existing installation if required. If the PEM server host does not contain an existing PEM-HTTPD installation, the PEM server installer will add it.
Before installing the PEM server, you must decide if you wish to run PostgreSQL and PEM-HTTPD on the same host or on separate hosts. If you intend to run the PostgreSQL database server and PEM-HTTPD on different hosts, then you must run the PEM server installer twice – once on each host, as detailed in Installing the PEM Server and PEM-HTTPD on Separate Hosts section.
The PEM server installer will also install the software required to access the server via the PEM web interface. You can access the web interface with a supported version of your browser.
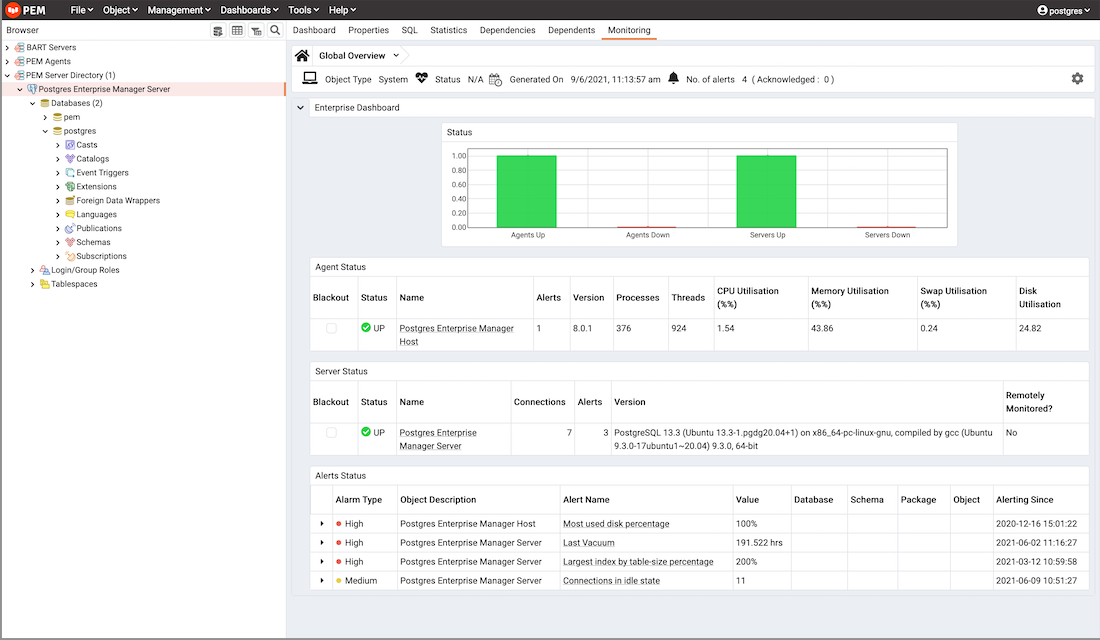
You can use the web interface to review information about objects that reside on monitored servers, manage databases and database objects that reside on monitored servers, or review statistical information gathered by the PEM server.
Note If you are using the SSL certificates then make sure that all the SSL certificates are inside the data directory the backend database server. If the certificates are not inside the data directory then the PEM Server’s configuration may fail as it looks in to the data directory while configuring the PEM Server.
Installing the PEM Server and PEM-HTTPD on the Same Host
The easiest PEM server installation configuration consists of a PEM backend database server (hosted on a PostgreSQL database installed with the PEM server installer) and a PEM-HTTPD service that reside on the same host. In this configuration, the PEM server installer will provide the pre-requisite software for the backend host register the service (on Windows).
To invoke the PEM server installer on a Windows system, right click the installer icon and select Run as Administrator. The installer displays a Welcome dialog.
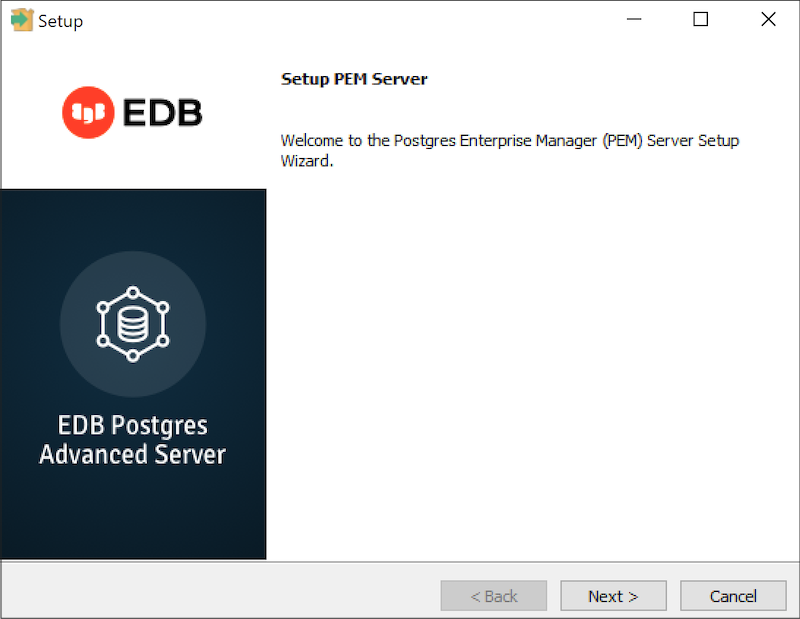
Click Next to continue to the License Agreement dialog.
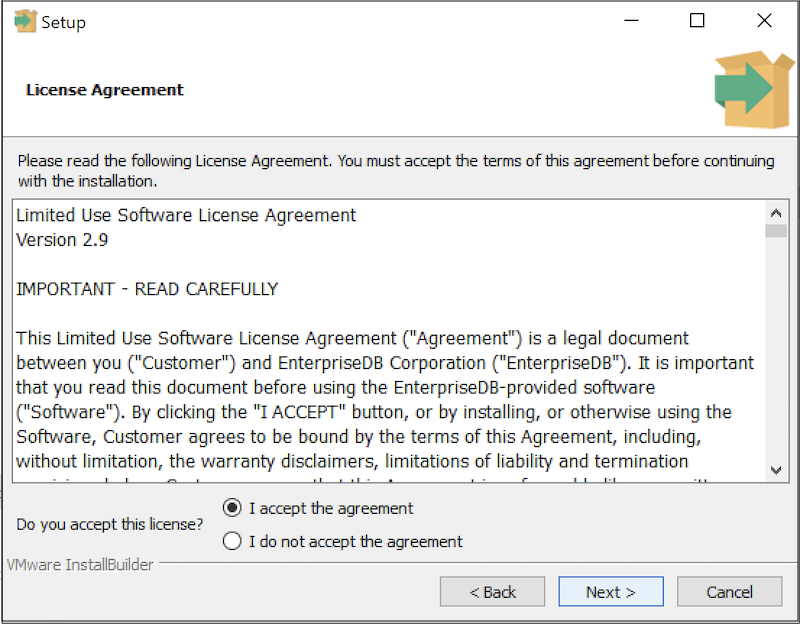
Carefully review the license agreement before highlighting the appropriate radio button and accepting the agreement. Click Next to continue to the Installation Directory dialog.
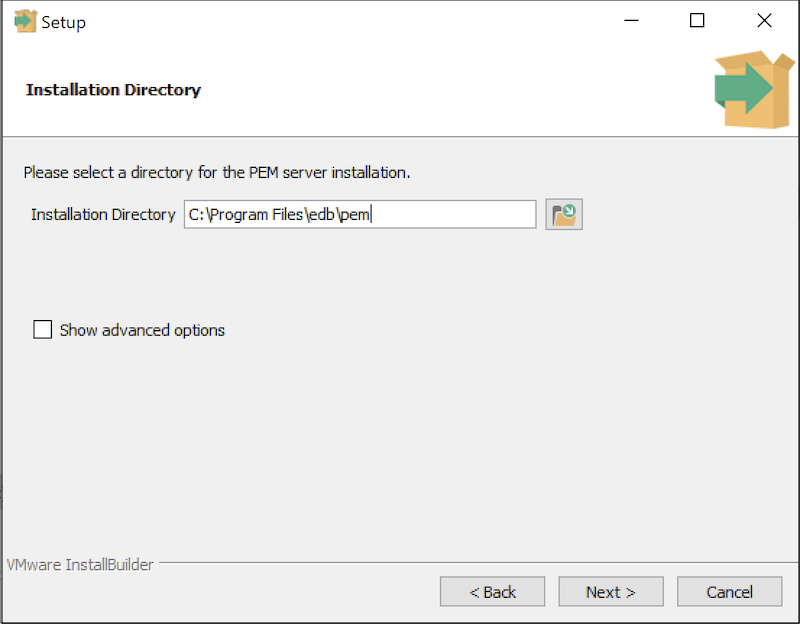
Use the Installation Directory dialog to specify the location of the PEM server:
- By default, the PEM server is installed in
C:\Program Files\edb\pemon Windows. Accept the default location, or use theInstallation Directorybutton to open a browser dialog and select the directory in which the PEM server will be installed. - Use the
Show advanced optionscheck box to instruct the installer to open theAdvanced optionsdialog. - Use the
Advanced optionsdialog when installing the Postgres database server and the PEM-HTTPD on different hosts, or if you wish the PEM server to reside on an existing Postgres server installation.
To install the PostgreSQL server packaged with the installer and PEM-HTTPD on the same host, leave the Show advanced options box unchecked and click Next.
The PEM server installer will perform a pre-installation check for PEM-HTTPD, Language Pack, and PostgreSQL 13. If the installer does not locate these packages, it will inform you in the Dependency missing dialog.
Note By default EDB Language Pack is installed in
C:\edb\languagepack\v1.
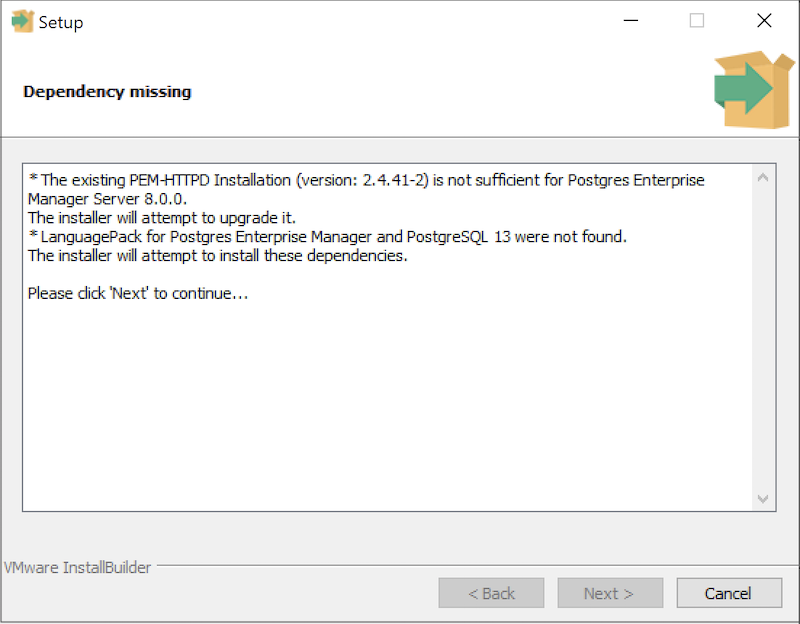
If the dependencies are missing, the PEM server installer will launch the respective installation wizards; follow the onscreen directions presented by the installation wizards for each package.
After installing any missing dependencies, the installation process continues by displaying the Database Server Installation Details dialog.
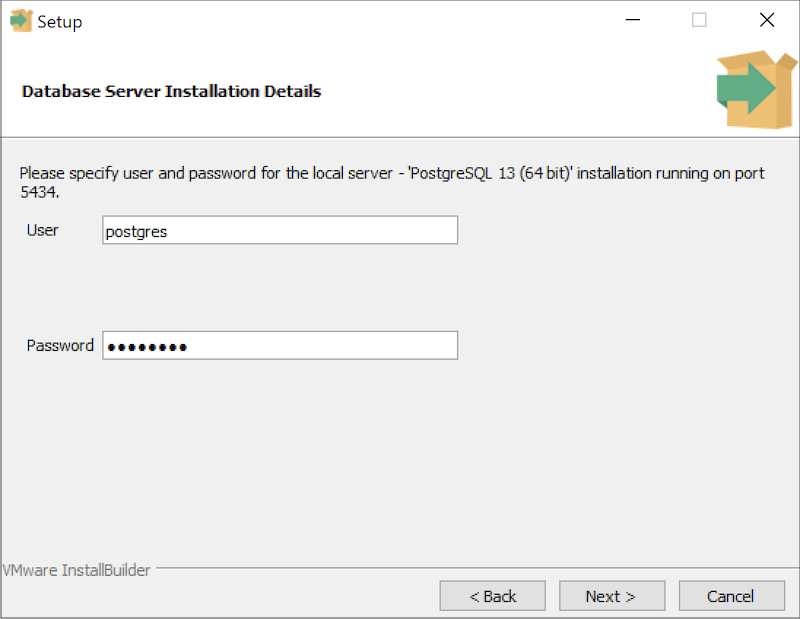
The information provided on the Database Server Installation Details dialog enables the installer to connect to the PostgreSQL server. Provide the User name and Password of a database superuser. After supplying the requested information, click Next to continue to the pemAgent Service Account dialog.

After providing the name and password of the Postgres database superuser, you may be prompted for the password to the user account under which the PEM agent will run. If prompted, provide the password, and press Next to continue to the Network Details dialog.
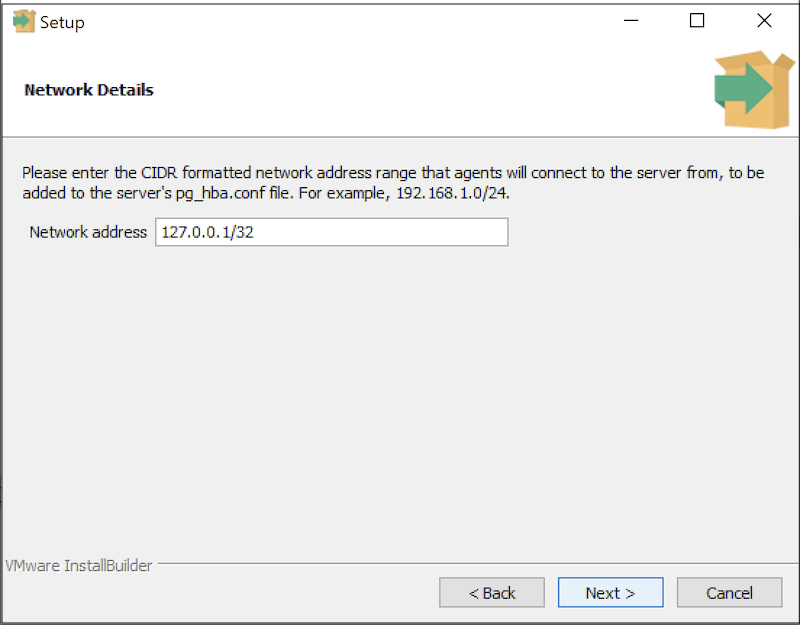
Use the Network Details dialog to specify the CIDR-style network address from which the PEM agents will connect to the server (the client-side address).
You may specify the address of a network host, or a network address range. For example, if you wish to monitor database servers with the addresses 192.168.10.23, 192.168.10.76 and 192.168.10.184, enter 192.168.10.0/24 to allow connections with hosts in that network.
The specified address will be added to the server’s pg_hba.conf file. You can specify additional network addresses by manually adding entries to the pg_hba.conf file on the PostgreSQL server if required, using the initial entry as a template.
When you’ve added the Network address, click Next to continue to the Agent Details dialog.
The PEM server installer will install a PEM agent on the host on which the server resides, to monitor the server and provide alert processing and garbage collection services. A certificate will also be installed in the location specified in the Agent certificate path field.
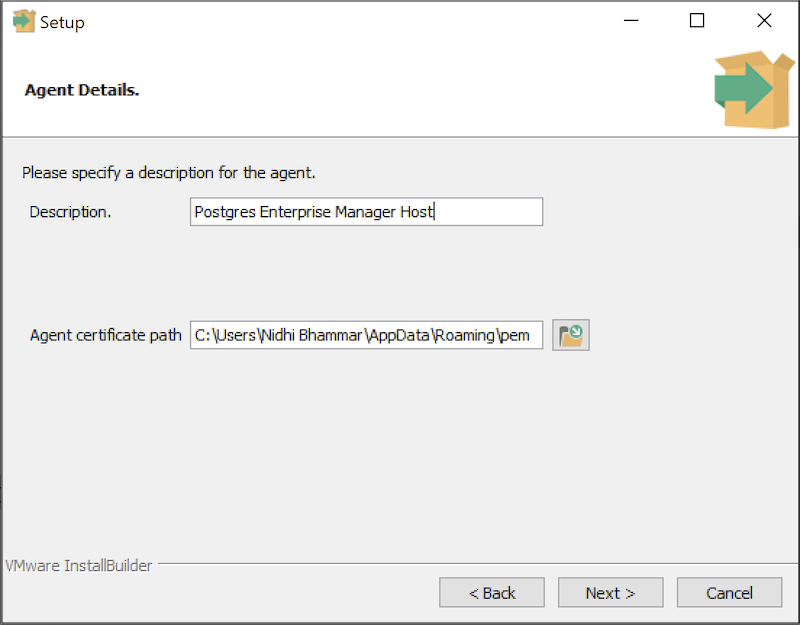
Enter an alternate description or select an alternate agent certificate path for the PEM agent, or accept the defaults. Click Next to continue to the Ready to Install dialog.
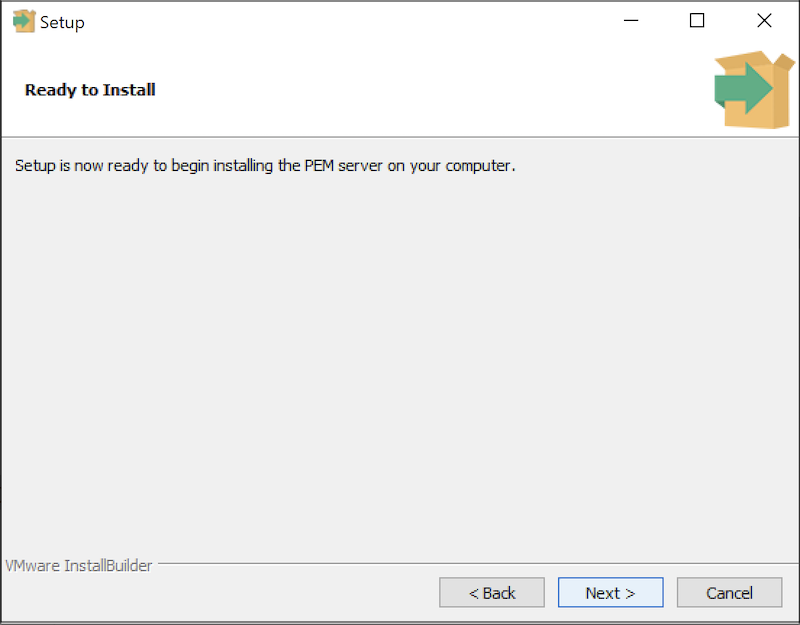
The wizard is now ready to install the PEM server.
Click Back to modify any of the options previously selected, or Next to continue with the installation.

During the installation process, the installer will copy files to the system, and set up the database and web services required to run PEM. When the installation completes, a popup dialog opens confirming that the webservice has been configured, and is listening on port 8443, and that the pem database has been created and configured.
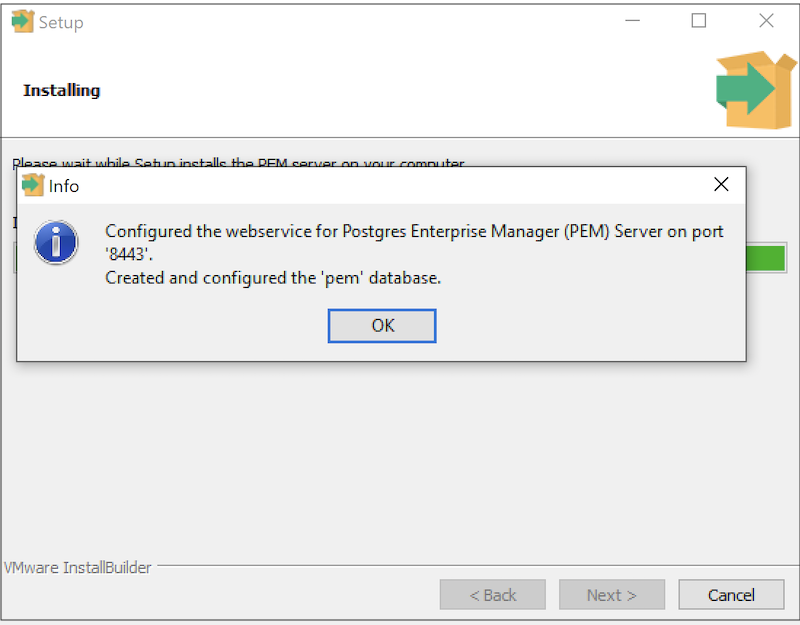
Click OK to acknowledge that the webservice has been configured, and that the pem database has been created, and continue to the Completed… dialog.
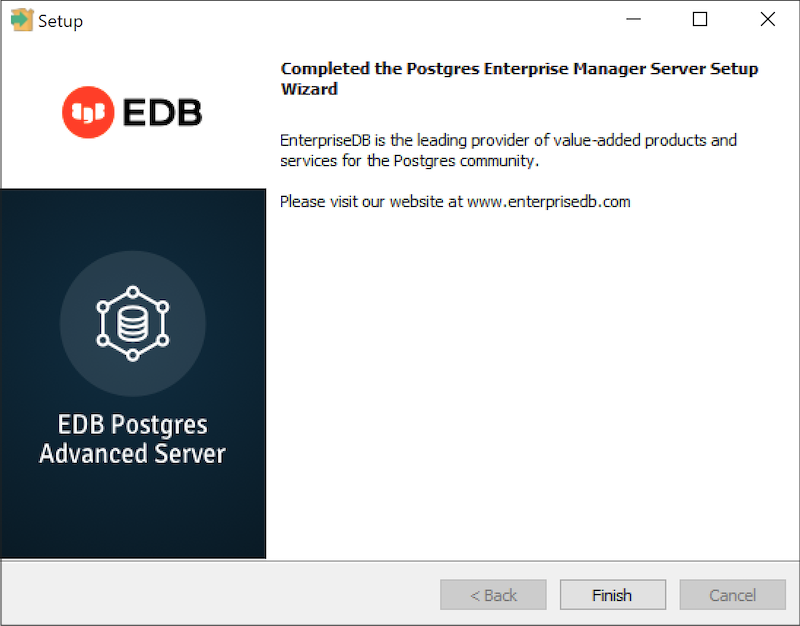
Installing the PEM Server and PEM-HTTPD on Separate Hosts
To use separate hosts for the PEM server backend database and PEM-HTTPD, you must:
- Invoke the PEM server installer on the host of the Postgres server that will contain the
pemdatabase. During the installation, select theDatabaseoption on theAdvanced optionsdialog, and provide connection information for the Postgres server. - Modify the
pg_hba.conffile of the Postgres installation on which the PEM server (andpemdatabase) resides, allowing connections from the host of the PEM-HTTPD server. - Invoke the PEM server installer on the host of the PEM-HTTPD server, selecting the
Web Servicesoption on theInstallation Typedialog.
To invoke the PEM server installer on a Windows system, right click the installer icon and select Run as Administrator. The installer displays a Welcome dialog.
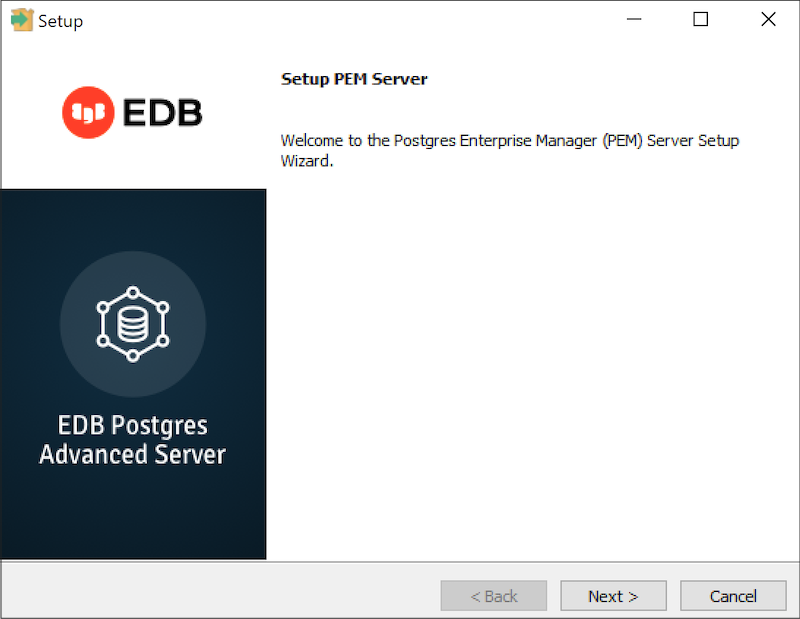
Click Next to continue to the License Agreement dialog.
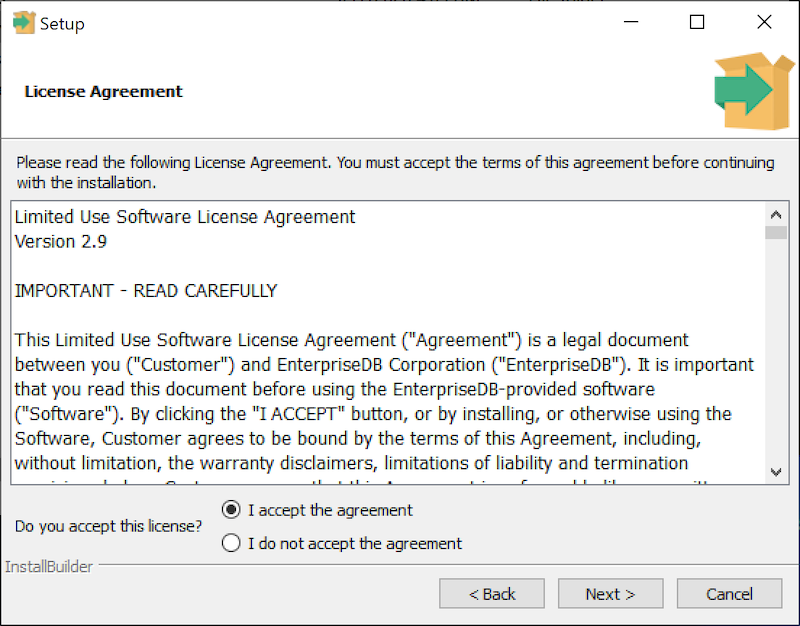
Carefully review the license agreement before highlighting the appropriate radio button and accepting the agreement; click Next to continue.
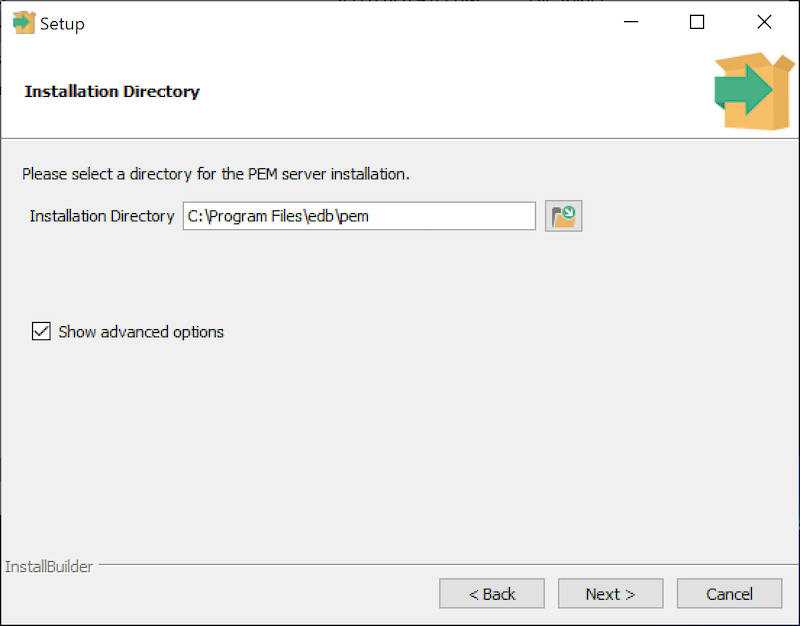
Use fields on the Installation Directory dialog to specify the directory in which the PEM server will reside, and to access the Advanced options dialog:
- By default, the PEM server is installed in the
C:\Program Files\edb\pemon Windows. Accept the default location, or use theInstallation Directoryfield to open a browser dialog and select the directory in which the PEM server will be installed. - To install the PEM server and PEM-HTTPD on separate hosts, you must use the
Advanced optionsdialog to specify the installation type (Web ServicesorDatabase). Select theShow advanced optionscheck box to instruct the installer to include theAdvanced optionsdialog in the installation process.
Click Next to continue to the Advanced Options dialog.
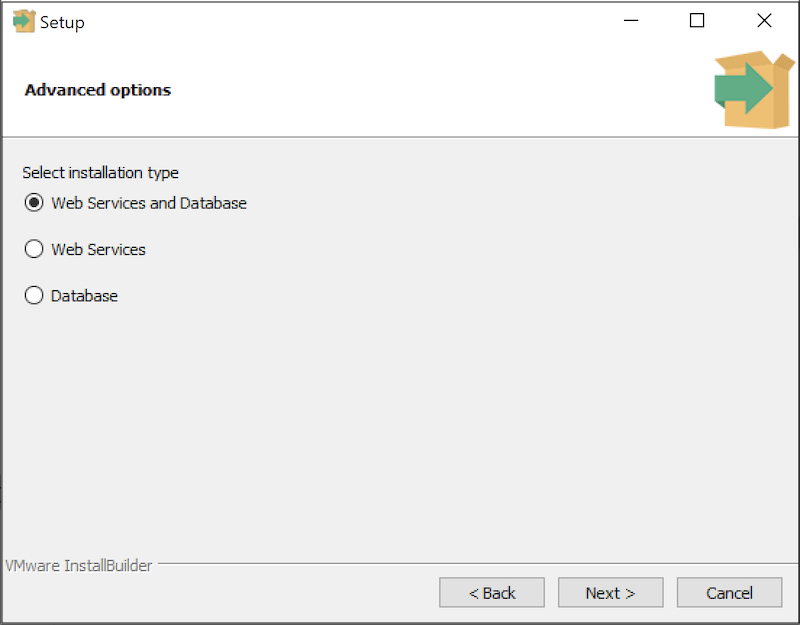
Use the radio buttons on the Advanced options dialog to specify the component or components that you would like to install:
- Select
Web Services and Databaseto indicate that the Postgres server and PEM-HTTPD will both reside on the current host. If you select theWeb Services and Databaseoption, the PEM server installer will allow you to specify which Postgres server you wish to use for the PEM server before checking for a PEM-HTTPD installation. - Select
Web Servicesto install PEM-HTTPD on the current host, while using a Postgres database server that resides on another host to host the PEM server andpemdatabase.
Note You must complete the PEM server installation process on the host of the PEM server (and
pembackend database), selectingDatabaseon theAdvanced optionsdialog, and modifying the connection properties of thepg_hba.conffile on the PEM server before using theWeb Servicesoption to install PEM-HTTPD.
This option invokes the installation steps documented in Installing Web Services section.
- Select
Databaseto use an existing Postgres server (version 11 or greater), or to install only the database server that is distributed with the PEM server installer. This option invokes the installation steps documented in Specifying a Database Host.
After selecting an installation option, click Next to continue.
Specifying a Database Host
Selecting the Database option on the Advanced options dialog allows you to specify connection information for the host on which the PEM server backend database (named pem) will reside.

Click Next to continue to the Database Server Selection dialog.
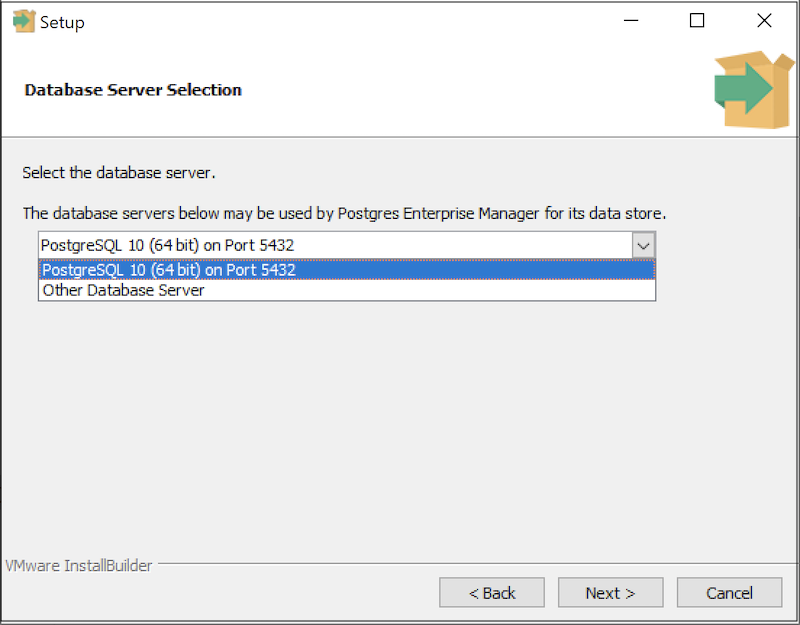
Use the drop-down listbox on the Database Server Selection dialog to select a host for the PEM server backend database. You can:
- Select a host from existing Postgres installations that reside on the current host.
Note You may be required to add the
sslutilspackage to your installation.
- Select the
PostgreSQL xoption to install the Postgres server that is distributed with the PEM server installer wherexis the PostgreSQL database server version. If you decide to use the version of PostgreSQL that is bundled with the PEM server installer, the EnterpriseDB one-click PostgreSQL installer will open and walk you through the installation. - Select
Other Database Serverto specify connection information for a Postgres server that was not installed using a one-click graphical installer from EnterpriseDB. For information about the software pre-requisites for the PEM server database host, please see Preparing the Postgres Server section.
Click Next to continue.
If the PEM server will reside on an existing Postgres server, the Database Server Installation Details dialog shown in opens.
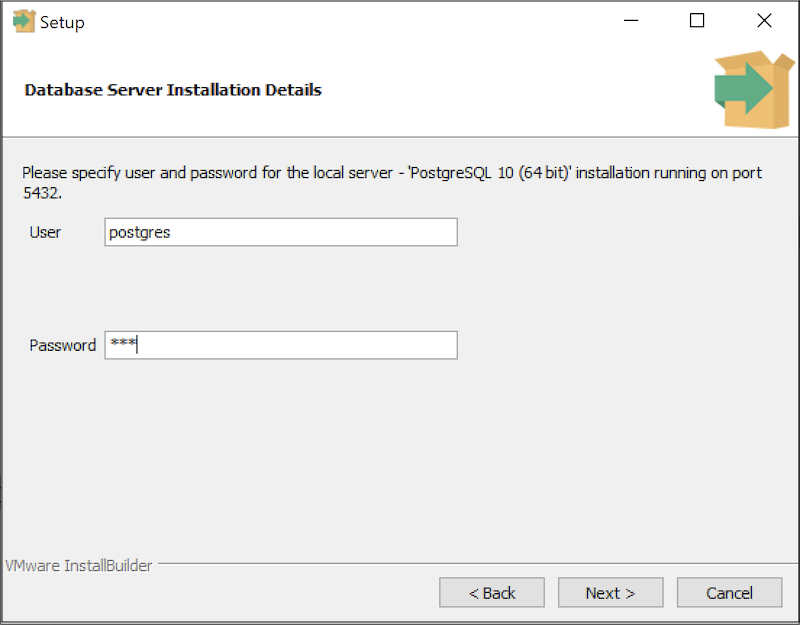
The information required on the Database Server Installation Details dialog may vary; the PEM server installer will ask you to provide only the information about the selected installation that it cannot locate:
- Specify the name of a Postgres database superuser in the
Userfield. - Specify the password associated with that user in the
Passwordfield.
Click Next to continue.
If prompted, provide the system password for the service account under which the PEM agent will run.
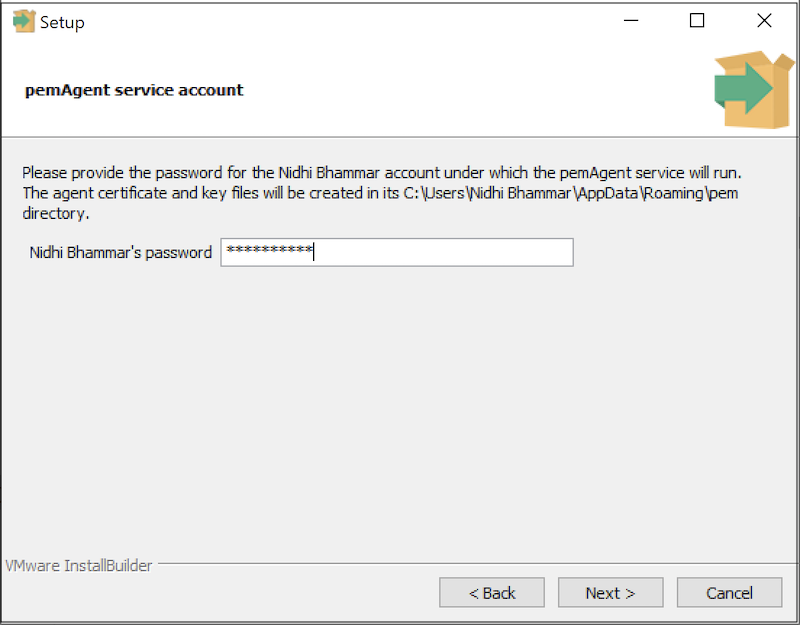
click Next to continue to the Network Details dialog.
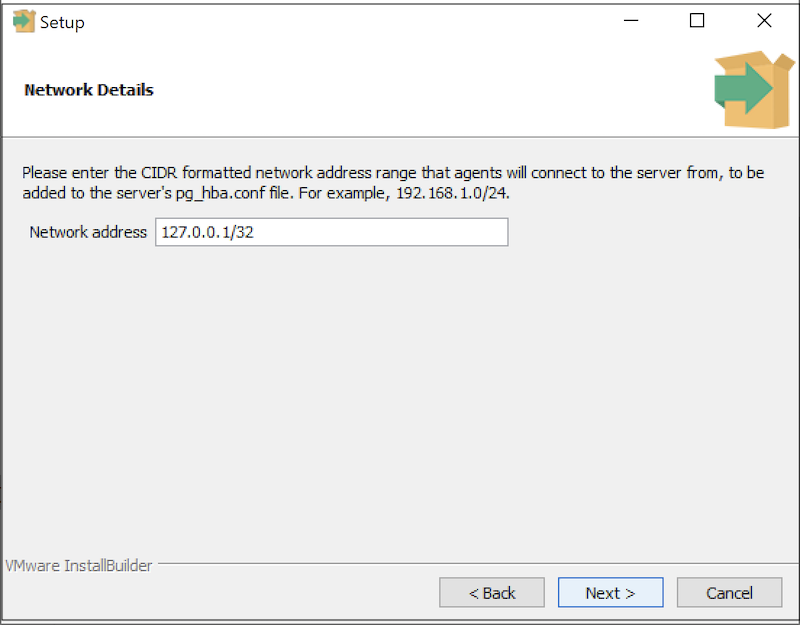
Use the Network Details dialog to specify the CIDR-style network address from which PEM agents will connect to the server (the client-side address). The specified address will be added to the server’s pg_hba.conf file.
Note You can specify additional network addresses by manually adding entries to the
pg_hba.conffile on the PostgreSQL server.
Accept the default (specifying the localhost), or specify a Network address range, and click Next to continue to the Agent Details dialog.
The PEM server installer will install a PEM agent on the host on which the server resides, to monitor the server and provide alert processing and garbage collection services. A certificate will also be installed in the location specified in the Agent certificate path field.
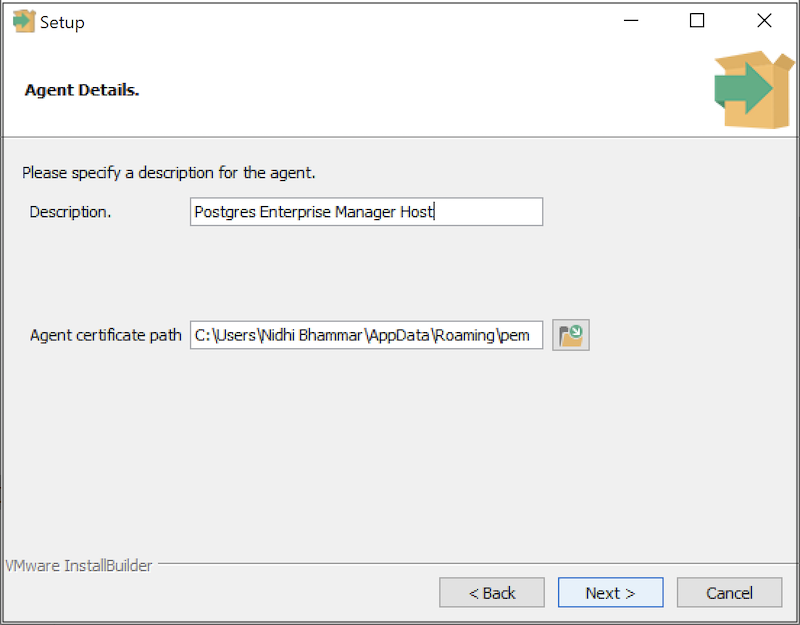
You can enter an alternate description or an alternate agent certificate path for the PEM agent, or accept the defaults. Click Next to continue.
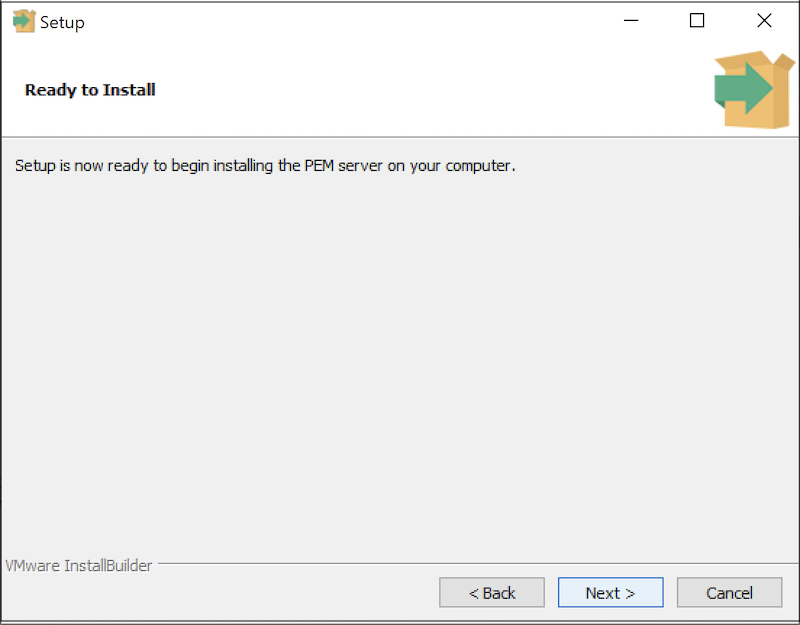
The wizard is now ready to install the PEM server. Click Back to modify any of the options previously selected, or Next to proceed with the installation.

During the installation process, the installer will copy files to the system, and set up the PEM server’s backend database. A popup dialog opens confirming that the pem database has been created and configured.
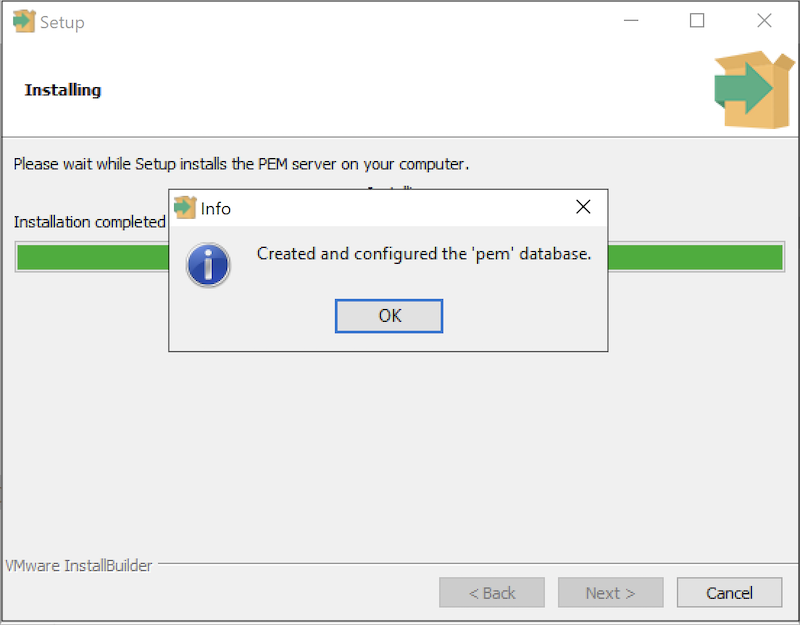
Click OK to acknowledge that the pem database has been created, and continue to the Completed… dialog.
When the database portion of the PEM server installation is complete, you can invoke the PEM server on another host to install (or upgrade) PEM-HTTPD.
Installing Web Services
Selecting the Web Services radio button on the Advanced options dialog instructs the PEM server installer to either install PEM-HTTPD on the current host or update an existing PEM-HTTPD installation.
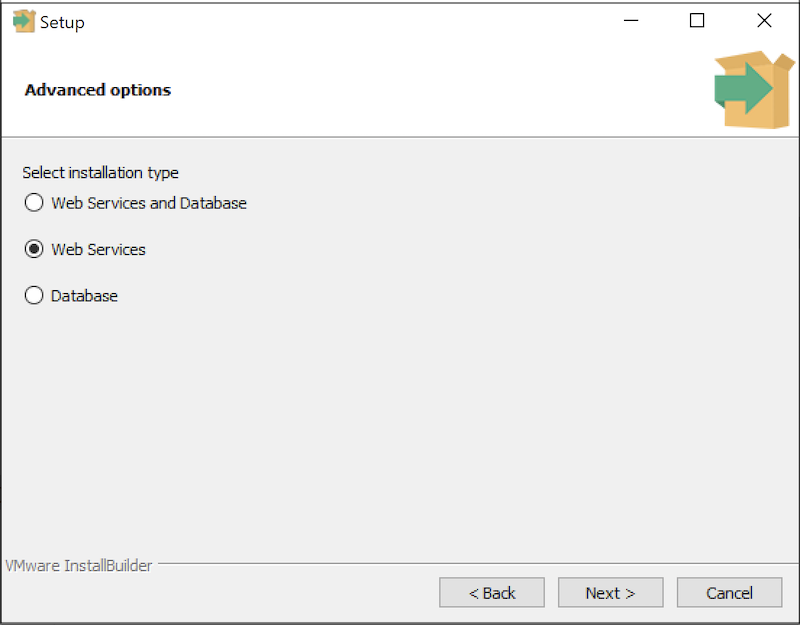
Note The current host may not be the host of the PEM backing database.
Before selecting this option, you must have:
- Completed an installation of the PEM server installer on a host system, during which you specified a backing database for the PEM server.
- Modified the
pg_hba.conffile on the PEM server database host to allow connections from the PEM-HTTPD host, and restarted the database server.
When you select the Web Services option and click Next, the PEM server installer will check the current host for existing PEM-HTTPD and LanguagePack installations.
If the installer does not locate the components, the installer will inform you that one or more dependencies are missing.
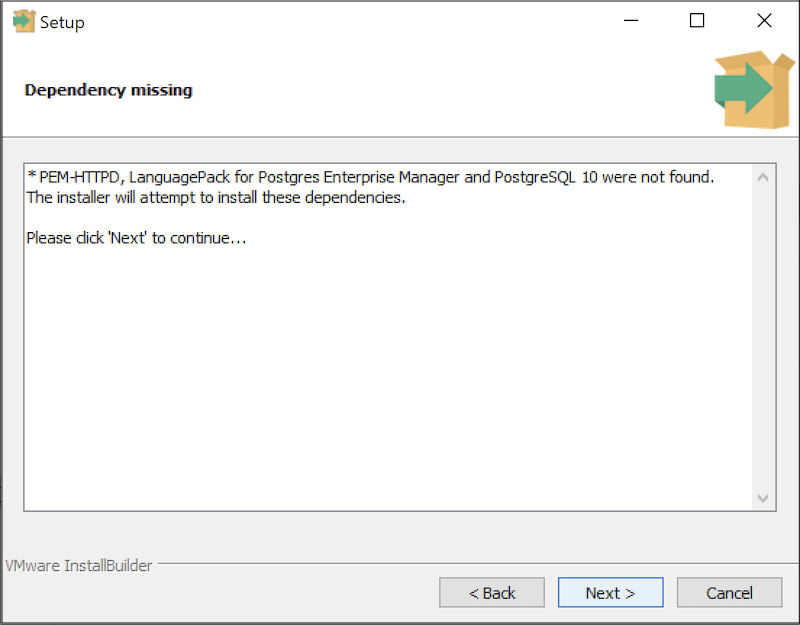
Click Next to instruct the server to install LanguagePack
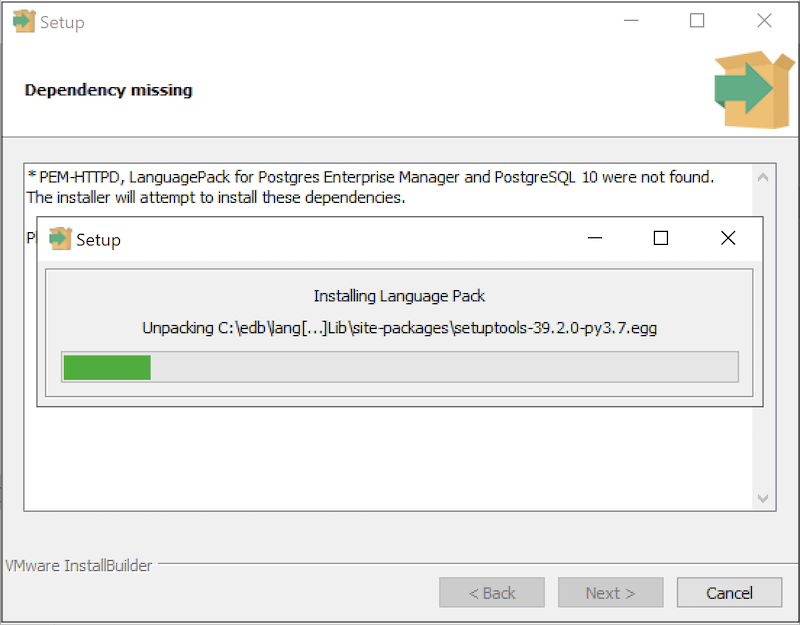
After installing language pack, the installer will invoke the PEM-HTTPD setup wizard.

Follow the onscreen instructions of the PEM-HTTPD Setup Wizard. When the wizard completes the installation, click Finish to open the Database Server Installation Details dialog.
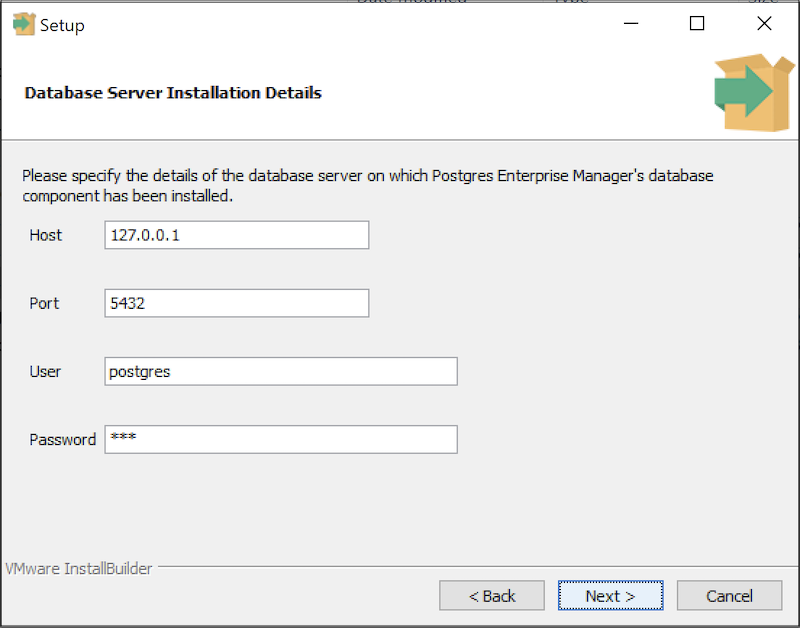
Use the fields on the Database Server Installation Details dialog to provide connection information for the Postgres installation that is hosting the PEM server installation:
- Enter the name or IP address of the PEM server host in the
Hostfield. - Enter the port number on which the Postgres server is listening in the
Portfield. - Enter the name of a Postgres database superuser in the
Userfield. - Enter the password associated with the Postgres superuser in the
Passwordfield.
Click Next to continue. Before completing the PEM server installation, the installer will contact the database host. The pg_hba.conf file on the PEM database host must be configured to accept connections from the host of the httpd server and the firewall must allow a connection for the installation to continue. The PEM server installer will complete the PEM server installation, adding only those items that must reside on the host of the PEM-HTTPD server.
Installing the PEM Server on an Existing Postgres Server
You can use an existing Postgres server (version 11 or later) to host the PEM server and the pem database. Postgres installers and pre-requisite software extensions are freely available on the EnterpriseDB website.
This section provides information about configuring an existing Postgres server for a PEM server installation.
Note The steps that follow should be considered guidelines only; the actual steps required to configure your Postgres installation will vary depending on the configuration of your Postgres server.
The following versions of Postgres are pre-configured to contain the sslutils extension and a service script; no additional preparation is required to use the following Postgres versions as a PEM backend database server:
- PostgreSQL 11 or later (as bundled with the PEM Server installer)
- Advanced Server 11 or later
Preparing the Postgres Server
Before installing the PEM server on an existing Postgres server, you must:
- Ensure that the Postgres server contains an installation of the
sslutilsextension. For more information, see Installing the sslutils Extension section. - Register the server with the Windows service manager. For more information, see the Registering the Service section.
After preparing the server, you can use the PEM server installer to install PEM on the existing Postgres server.
Installing the sslutils Extension
The Postgres server on which the PEM server will reside must contain the sslutils extension. The sslutils package is freely available for download from the EDB website
When the web page opens, select the link for the SRC- SSL Utils 1.3 package. When the download completes, extract the file, and copy it into the Postgres installation directory.
Remember: You are not required to manually add the sslutils extension when using the following Postgres installations:
- PostgreSQL 9.6 or later (as distributed with the PEM server installer)
- Advanced Server 9.6 or later
sslutils must be built with the same compiler that was used to compile the backend Postgres installation. If you are using a backend Postgres database that was installed on a Windows platform using a PostgreSQL one-click installer (from EnterpriseDB) or an Advanced Server installer, you must use Visual Studio to build sslutils.
While specific details of the installation process will vary by platform and compiler, the basic steps are the same. You must:
Copy the
sslutilspackage to the Postgres installation directory.Open the command line of the appropriate compiler, and navigate into the
sslutilsdirectory.Use the following commands to build
sslutils:
SET USE_PGXS=1

SET GETTEXTPATH=<path_to_gettext>

SET OPENSSLPATH=<path_to_openssl>

SET PGPATH=<path_to_pg_installation_dir>

SET ARCH=x86

REM Set ARCH x64 for 64 bit

msbuild sslutils.proj /p:Configuration=Release
Where:
path_to_gettext specifies the location of the GETTEXT library and header files.
path_to_openssl specifies the location of the openssl library and header files.
path_to_pg_installation_dir specifies the location of the Postgres installation.
- Copy the compiled
sslutilsfiles to the appropriate directory for your installation. Thesslutilsdirectory will contain the following files:
sslutils--1.3.sql

sslutils--unpackaged--1.3.sql

sslutils--pemagent.sql.in

sslutils.dll
Copy the .dll libraries and .sql files into place:
COPY sslutils*.sql* "%PGPATH%\share\extension\"

COPY sslutils.dll "%PGPATH%\lib\"
Registering the Service
When you install a PostgreSQL or an Advanced Server database using an installer from EnterpriseDB, the installer will register the service for you.
If you are using Windows to host the PEM backend database, you must register the name of the Postgres server with the Windows service manager. If you are using a Postgres server that was created using an EnterpriseDB installer, the service will be registered automatically. If you are manually building the installation, you can use the register clause of the Postgres pg_ctl command to register the service. The syntax of the command is:
pg_ctl register [-N <service_name>] [-U <user_name>]
 | [-P <password>] [-D <data_directory>]
Where:
service name specifies the name of the Postgres cluster.
user_name specifies the name of an operating system user with sufficient privileges to access the Postgres installation directory and start the Postgres service.
password specifies the operating system password associated with the user.
data_directory specifies the location of the Postgres data directory.
For more information about using the pg_ctl command and the available command options, see the
Invoking the PEM Server Installer
After preparing the existing Postgres server, invoke the PEM server installer. Assume Administrative privileges and navigate into the directory that contains the installer. Then, invoke the installer with the command:
pem_server-7.<x>.<x>-<x>-<platform>Where x is the major and minor versions of PEM and platform is the platform.
The installer displays a Welcome dialog.
Click Next to continue to the License Agreement dialog.
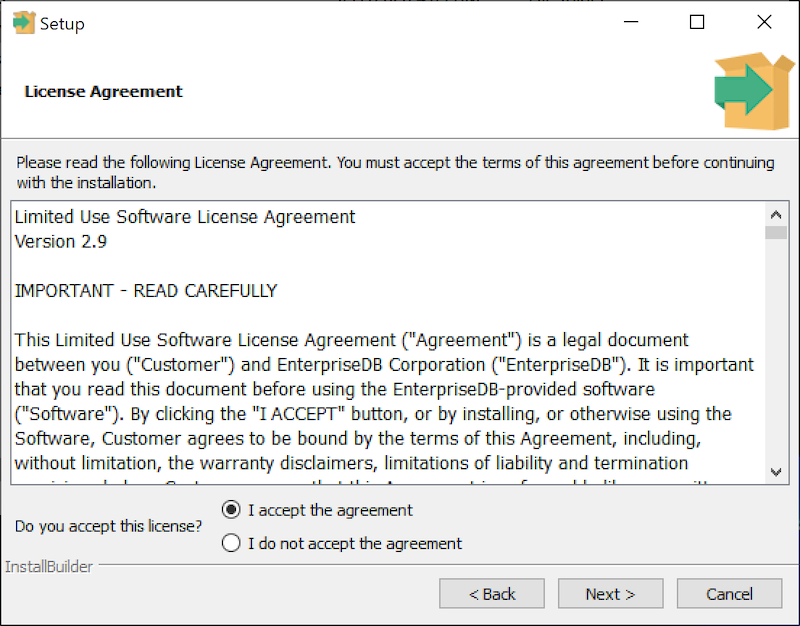
Carefully review the license agreement before highlighting the appropriate radio button and accepting the agreement; click Next to continue to the Installation Directory dialog.
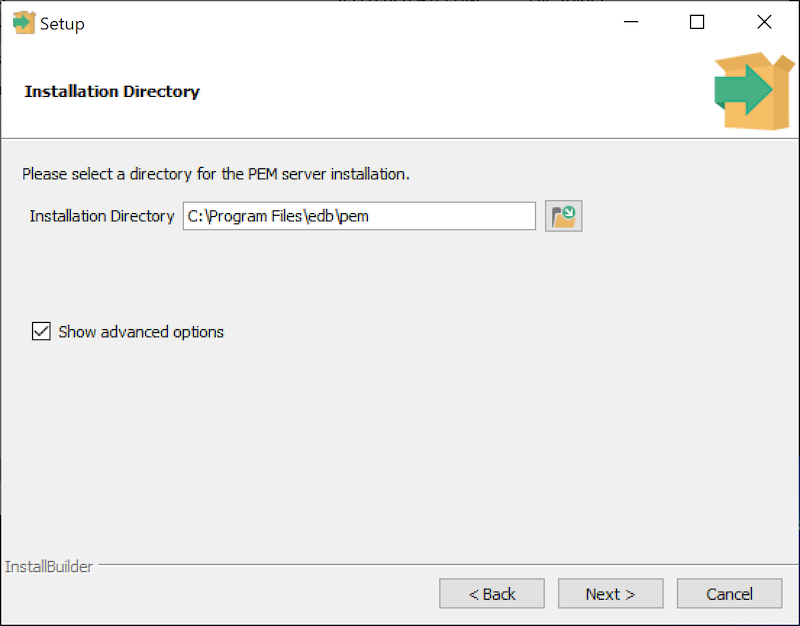
Use the Installation Directory dialog to specify the location of the PEM server and access the Advanced options dialog:
- Use the
Installation Directoryfield to open a browser dialog and select the directory in which the PEM server will be installed. - If you are installing the PEM server on an existing server, check the box next to
Show advanced optionsto instruct the installer to include theAdvanced optionsdialog in the installation process.
Click Next to continue.
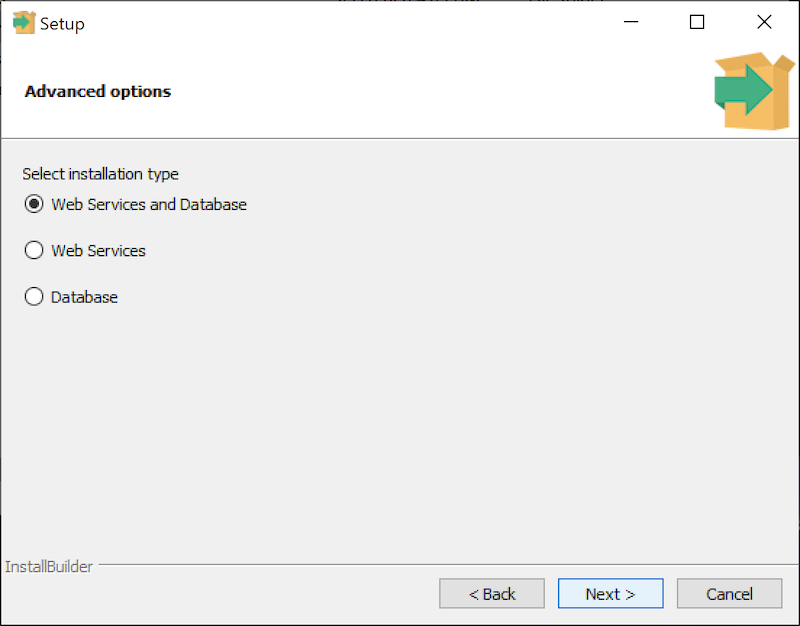
Use the radio buttons on the Advanced options dialog to specify an installation type. Select:
Web Services and Databaseif both the Postgres server and the PEM-HTTPD server will reside on the current host. This option is valid if you are using an existing Postgres server to host the PEM server, or using the PEM server installer to install the Postgres server on which the PEM server will reside.If you select
Web Services and Database, the PEM server installer will check the current host for a PEM-HTTPD installation, and upgrade or install PEM-HTTPD if necessary.Web Servicesif only the PEM-HTTPD server will reside on the current host. See Installing Web Services section for more information about invoking this option.Databaseif you are installing only the PEM server (and creating thepembackend database) on the current host. This option is valid if you are using an existing Postgres server to host the PEM server, or using the PEM server installer to install the PostgreSQL server on which PEM will reside.
After selecting an installation option, click Next to continue.
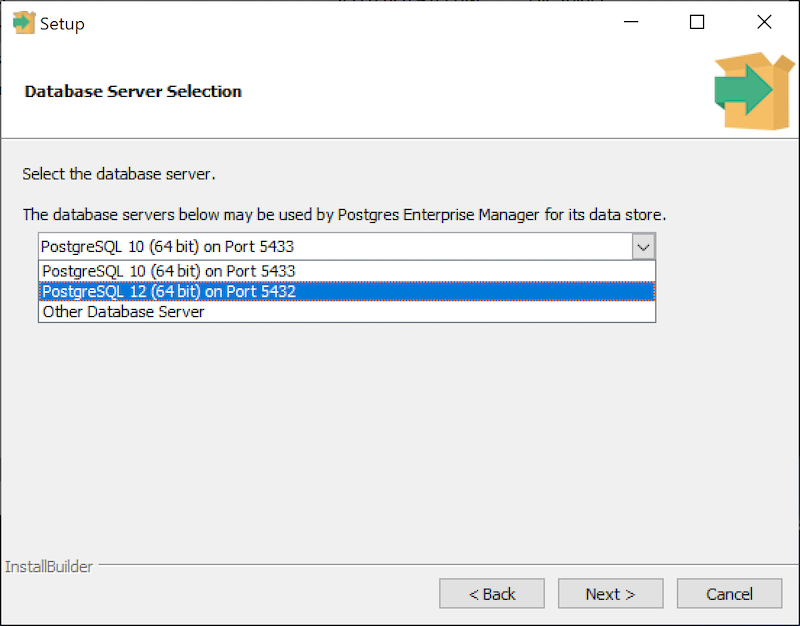
Use the drop-down listbox on the Database Server Selection dialog to select a backend database for the PEM server:
- Select the name of a Postgres server on the current host that was installed using a Postgres one-click installer or Advanced Server installer.
- Select the
PostgreSQL x (Packaged)option to instruct the installation wizard to install and use the PostgreSQL server that is packaged with the PEM server installer. Wherexis the version of the PostgreSQL database server. - Select
Other Database Serverto instruct the PEM server installer to use a Postgres database that was installed from a source other than an EnterpriseDB installer (i.e. from an rpm, or built from source).
Note The selected database server must include an installation of the
sslutilscontrib module, and a registered service (on Windows).
For information about Preparing the Postgres Server, please see this section.
If you selected Web Services and Database on the Advanced options dialog, the installation wizard will check the current host for an existing PEM-HTTPD installation, and upgrade or install the service as needed.
If you selected Database on the Advanced options dialog, the Database Server Installation Details dialog opens.

Use the fields on the Database Server Installation Details dialog to describe the connection to the Postgres server that will host the PEM server:
- Enter the name of a database superuser in the
Userfield. - Enter the password associated with the superuser in the
Passwordfield.
Click Next to continue.
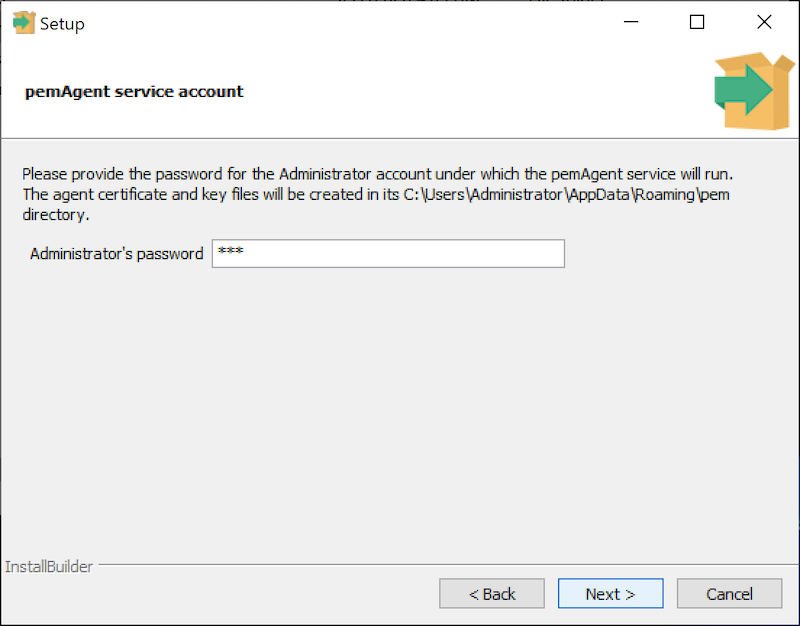
Provide the administrators password under which PEM Agent service will run.
Click Next to continue.
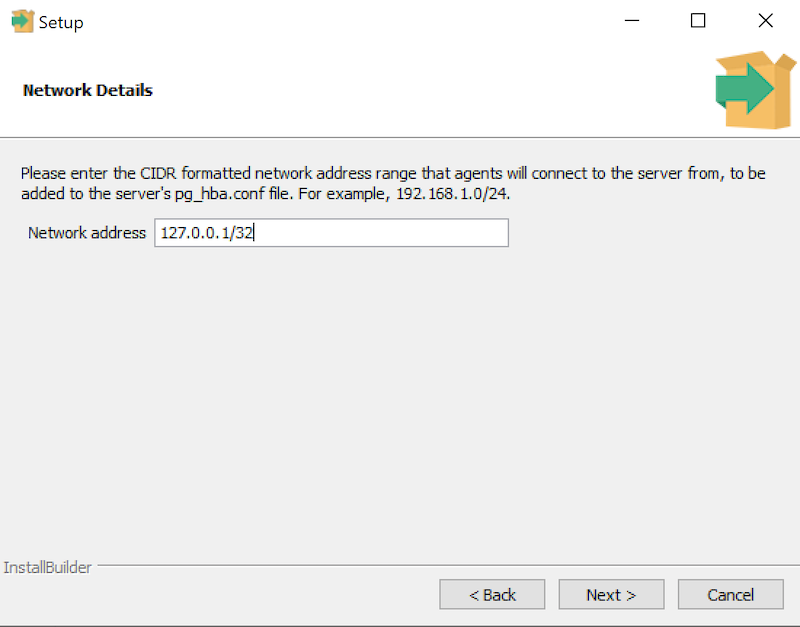
Use the Network Details dialog to specify the CIDR-style network address from which the PEM agents will connect to the server (the client-side address). The specified address will be added to the server’s pg_hba.conf file.
You can specify additional network addresses by manually adding entries to the pg_hba.conf file on the PostgreSQL server if required, using the initial entry as a template.
When you’ve added the Network address, click Next to continue to the Agent Details dialog.
The PEM server installer will install a PEM agent to the host on which the server resides, to monitor the server and provide alert processing and garbage collection services. A certificate will also be installed in the location specified in the Agent certificate path field.
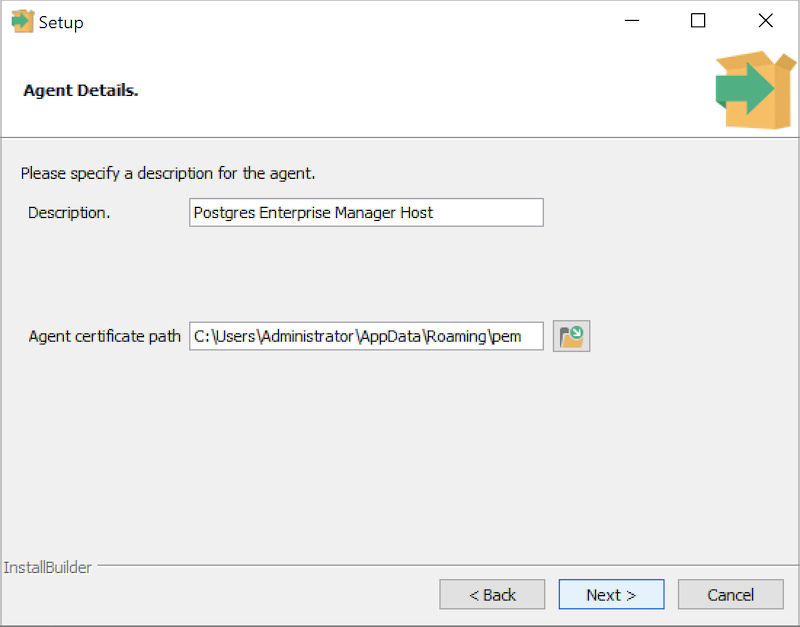
You can enter an alternate description or an alternate agent certificate path for the PEM agent, or accept the defaults. Click Next to continue to the Ready to Install dialog.
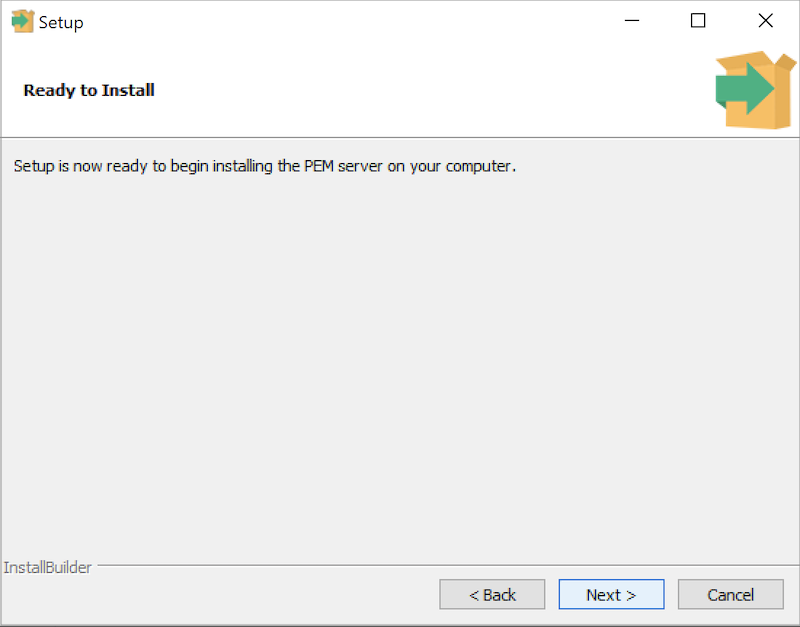
The wizard is now ready to install the PEM server. Click Back to modify any of the options previously selected, or Next to continue with the installation.
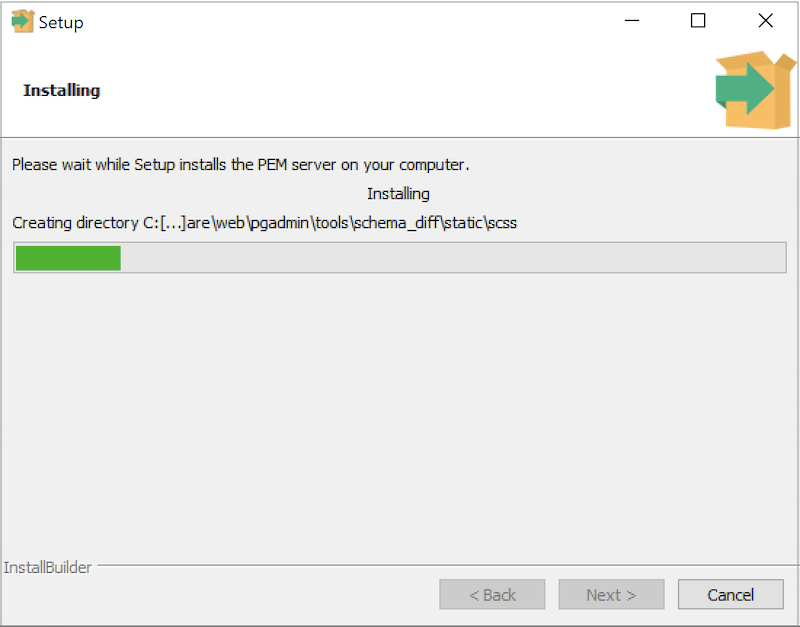
During the installation process, the installer will copy files to the system, and set up the PEM server’s backend database. A popup dialog opens confirming that the pem database has been created and configured.
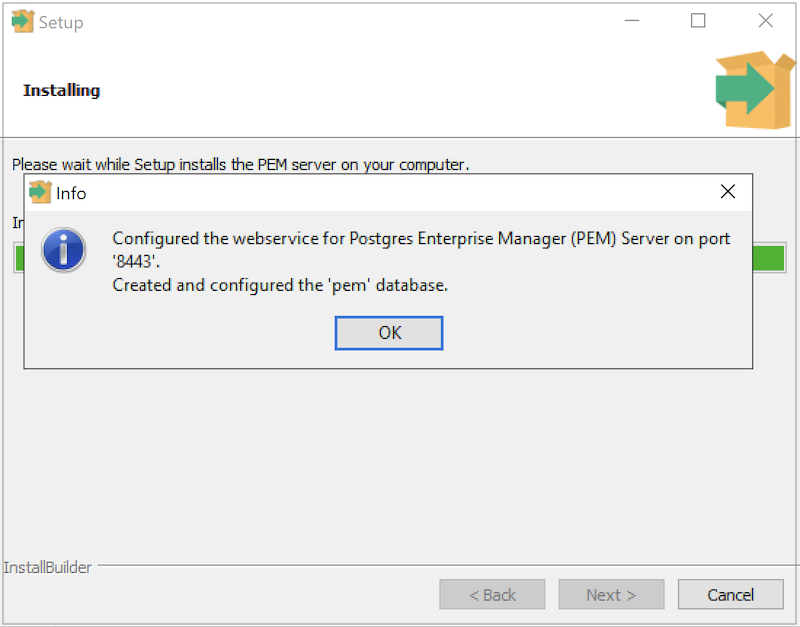
Click OK to acknowledge that the pem database has been created, and continue to the Completed… dialog.
If you are using a PEM-HTTPD service that resides on a separate host, you must:
- Modify the
pg_hba.conffile on the Postgres server host to allow connections between the hosts. - Invoke the PEM server installer on the host of the PEM-HTTPD server. See Installing Web Services section for more information about installing PEM-HTTPD.
Invoking the Server Installer from Command Line
The command line options of the PEM server and PEM agent installers offer functionality in situations where a graphical installation may not work because of limited resources or system configuration. You can:
- Include the
--mode unattendedoption when invoking the installer to perform an installation without additional user input.
Not all command line options are suitable for all platforms. For a complete reference guide to the command line options, include the --help option when you invoke the installer.
Invoking the PEM Server Installer in Unattended Mode
You can perform an unattended PEM server installation by providing installation preferences on the command line when invoking the installer. Please note that the system on which you are installing the PEM server must have internet access.
You must have Administrative privileges to install the PEM server. Before invoking the PEM server installer, you must install the following dependencies:
- PostgreSQL
- pem-httpd
- Language Pack
You can use the PEM server installer to satisfy the dependencies of the PEM server; use the following command to extract the dependencies. Navigate to the location of the installer, and use the following command to extract the dependencies:
pem-server-7.<x>.<x>-windows-x64.exe --extract-dependents C:\In our example, the files are extracted to the C:\ directory. After extracting the files, you must install each program. Navigate into the directory that contains the files (in our example, C:\), and enter:
edb-languagepack-<version>-windows-x64.exe --mode unattended
pem-httpd-<version>-windows-x64.exe --mode unattended
postgresql-<version>-windows-x64.exe --mode unattended
Then, you can invoke the PEM server installer:
pem-server-7.<x>.<x>-windows-x64.exe --mode unattended
--existing-user <registered_edb_user> --existing-password
<edb_user_password> --pgport <port> --pguser postgres
--agent_description pem-agent --systempassword <windows_password>
--agent-crt-path C:\edb``
Where:
registered_edb_userspecifies the name of a registered EnterpriseDB user. To register, visit the EDB websiteedb_user_passwordspecifies the password associated with the EDB user account.portspecifies the port used by the backing PostgreSQL database; by default, the PostgreSQL database uses port5432.cidr_address_rangespecifies the address range that will be added to thepg_hba.conffile of the PEM server’s backing database to allow connections from the agents that will be monitored by the server. You may wish to specify a network range (for example, 192.168.2.0/24) to provide server access to agents that reside on the same network.windows_passwordspecifies the password associated with the Windows Administrator’s account.
Note when invoked in unattended mode, the PostgreSQL installer creates a user named
postgres, with a password ofpostgres.
Installing a PEM Agent on Windows
To invoke the PEM Agent installer, assume Administrative privileges and navigate into the directory that contains the installer. Then, invoke the installer with the command:
pem_agent-7.<x>.<x>-<x>-platform.exeThe Setup… page opens, welcoming you to the PEM Agent installer.
Click Next to continue to the License Agreement.
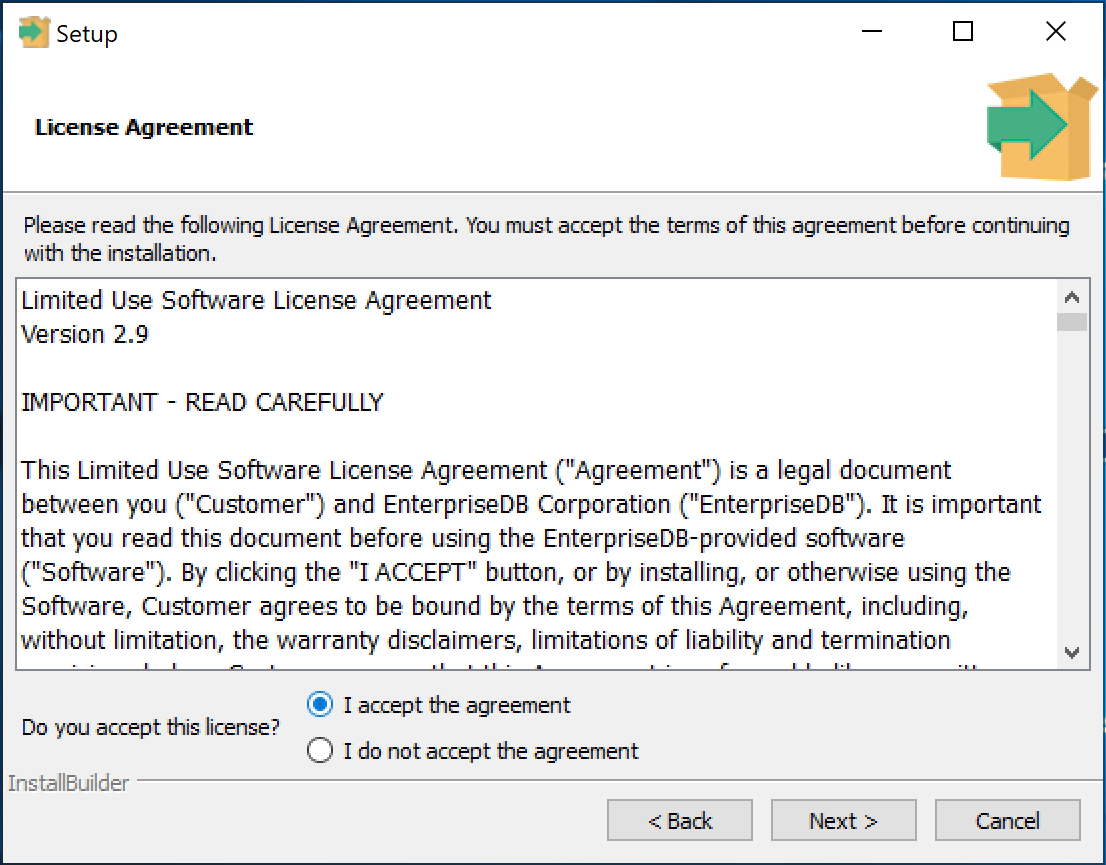
Carefully review the license agreement before highlighting the appropriate radio button and accepting the agreement; click Next to continue to the Installation Directory dialog.
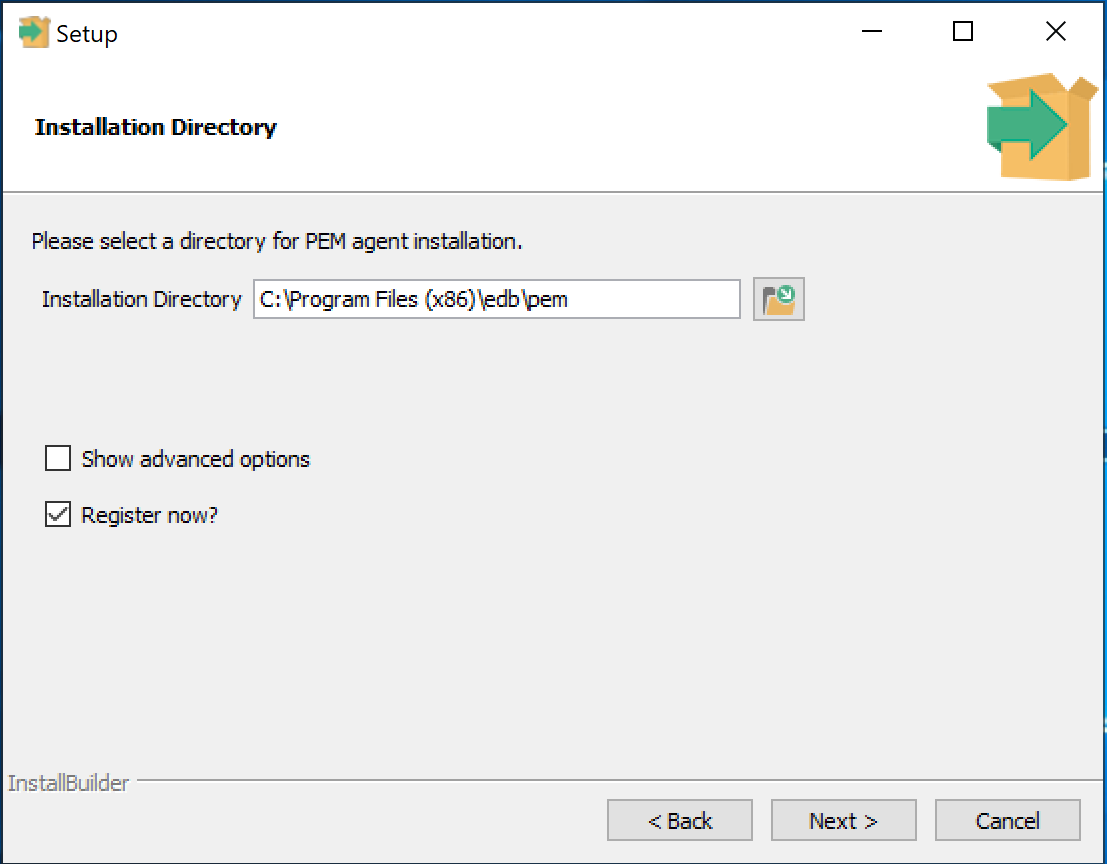
By default, the PEM Agent is installed in the C:\Program Files (x86)\edb\pem directory.You can accept the default installation directory, or modify the contents of the Installation Directory field, specifying an alternate installation directory for the PEM agent.
By default, the PEM Agent installer places a certificate in the Administrator’s %APPDATA%\pem directory. Check the Show advanced options box to indicate that you would like the PEM agent installer to include a dialog that allows you to specify an alternate path for the certificate file.
Check the box next to Register now? to instruct the installer to register the newly installed PEM Agent with the PEM server.
Click Next to continue to the PEM Server Installation Details dialog.
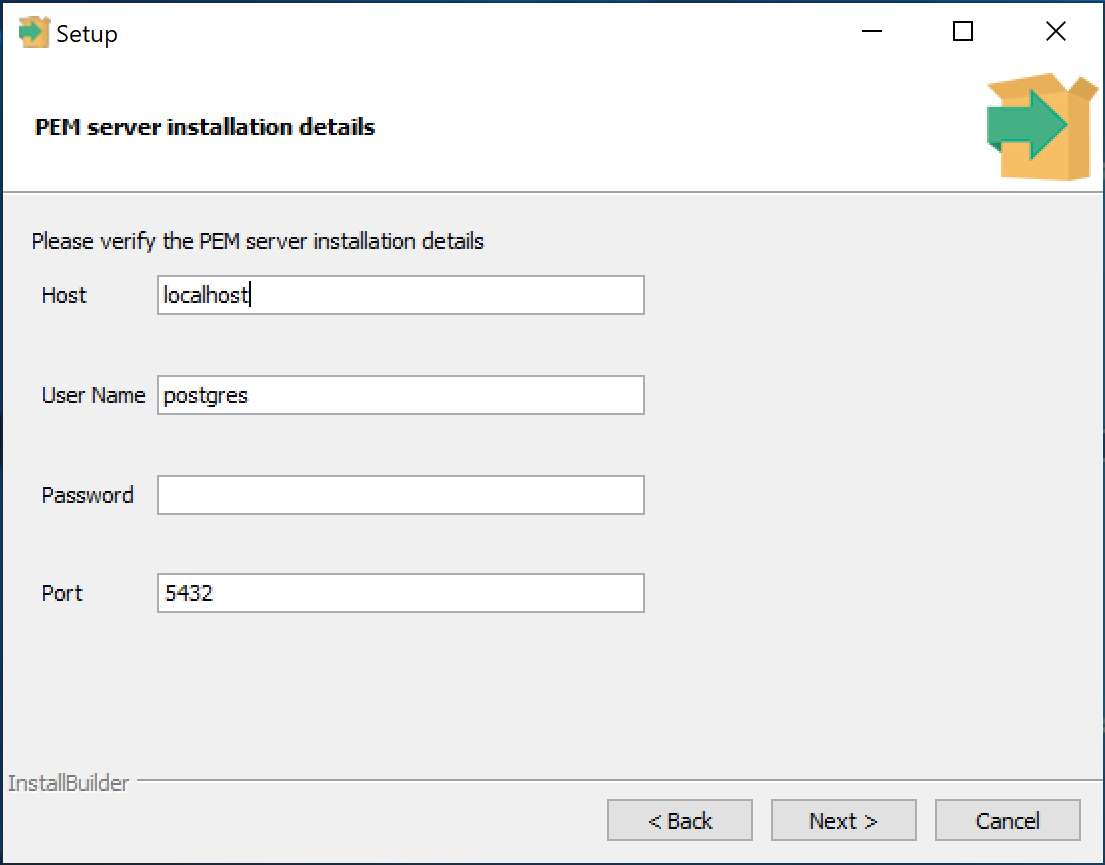
Enter the connection details for the PEM server on the PEM server installation details dialog:
- Specify the name or IP address of the system on which the PEM database server resides in the
Hostfield. Please note: If the PEM-HTTPD web server and PEM database are hosted on different systems, you must specify the host of the PEM database. - Specify the name of the database superuser in the
User Namefield. - Specify the password associated with the database superuser in the
Passwordfield. - Specify the port that PostgreSQL is monitoring in the
Portfield.
Click Next to continue to pemAgent Service Account. The installer will attempt to connect to the server to verify that the details are correct.
Note The PEM server must allow connections from the PEM Agent installer. If you encounter a connection error, confirm the connection properties specified on the
PEM Server Installation Detailsdialog are correct, and confirm that thepg_hba.conffile (on the PEM server) will allow a connection to the server described in the error message.
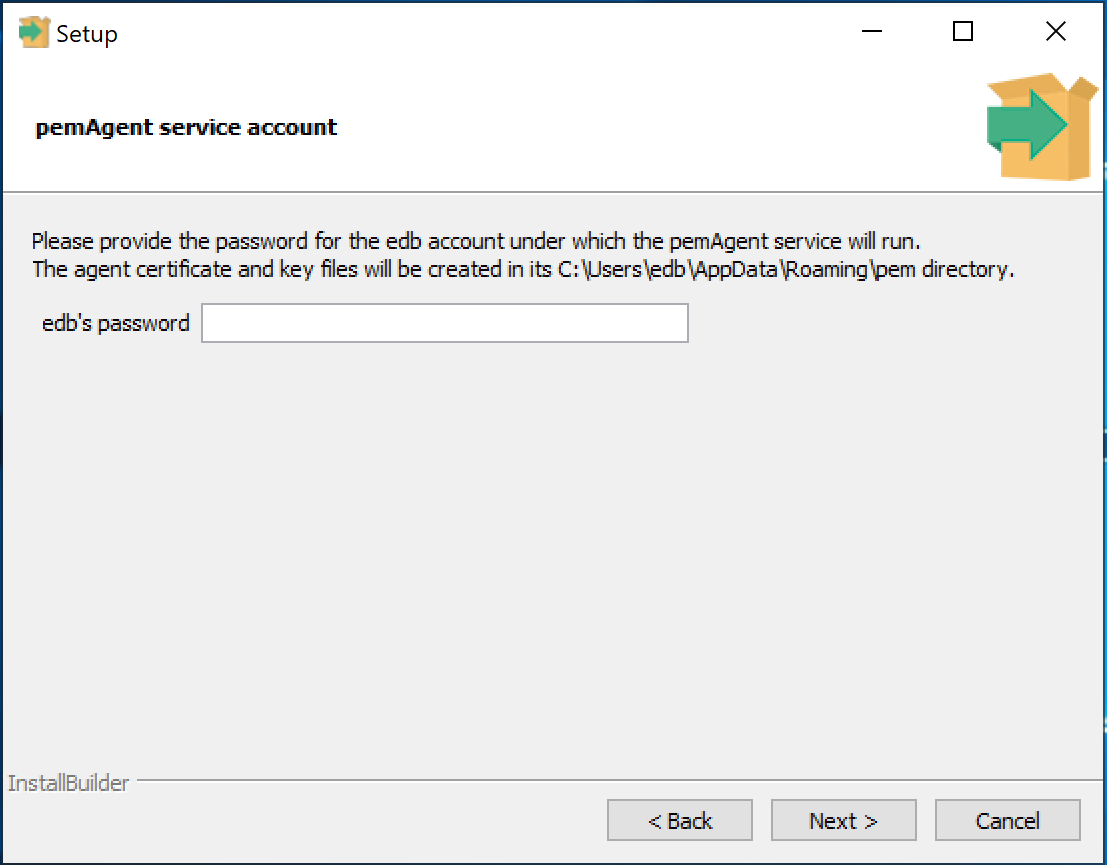
Provide the password for the edb account under which the pemAgent service will run. The Agent certificate and key files will be created in C:\Users\edb\AppData\Roaming\pem directory. Click Next to continue to Agent Details dialog.
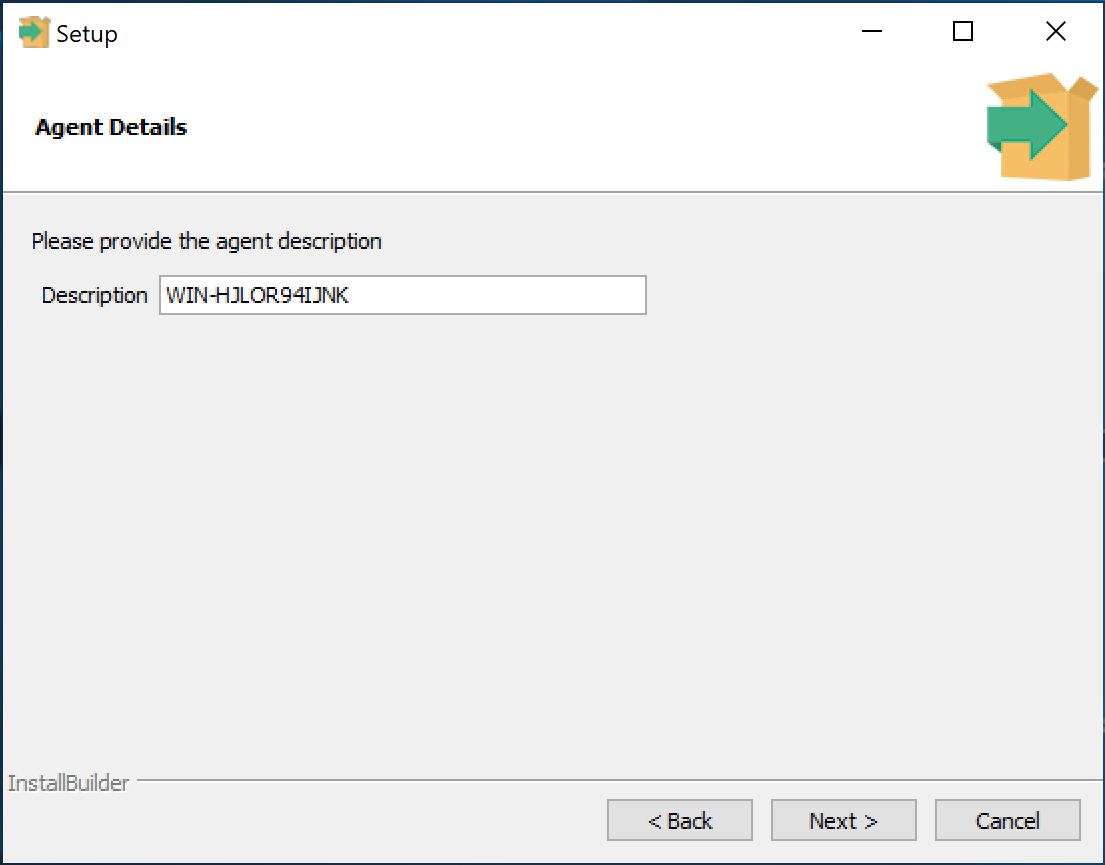
The tree control displayed in the Browser panel of the PEM web interface displays the value entered in the Description field to identify the PEM agent. Specify a descriptive name for the agent, such as the hostname of the machine the agent is installed on, or a name that reflects the host’s functionality.
Provide a descriptive name, or accept the default provided by the PEM Agent host, and click Next to continue.
If you checked the Show advanced options checkbox, the Advanced options dialog opens.
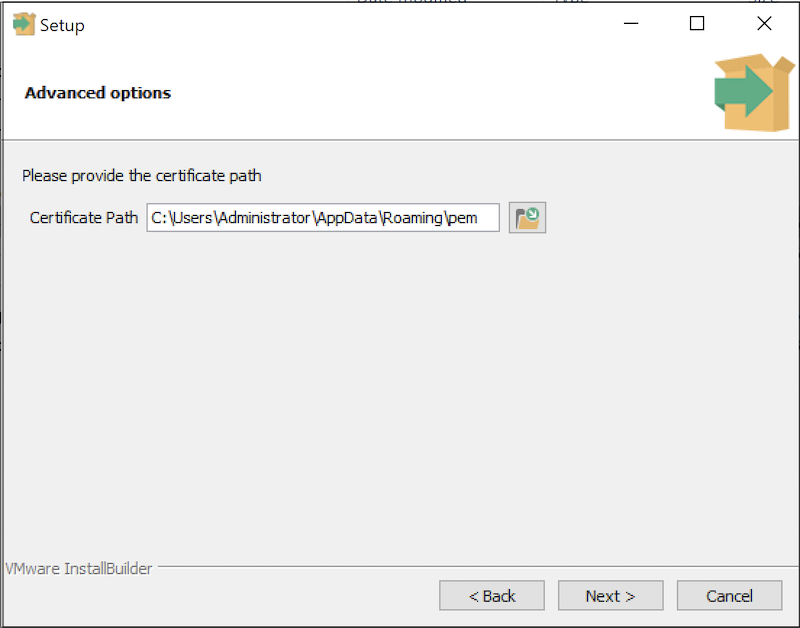
By default, the PEM Agent installer places the certificate in the C:\Program Files (x86)\edb\pem directory. Specify an alternate path for the certificate or accept the default and click Next.
The wizard is now ready to install the PEM Agent; click Back to amend the installation directory, or Next to continue.
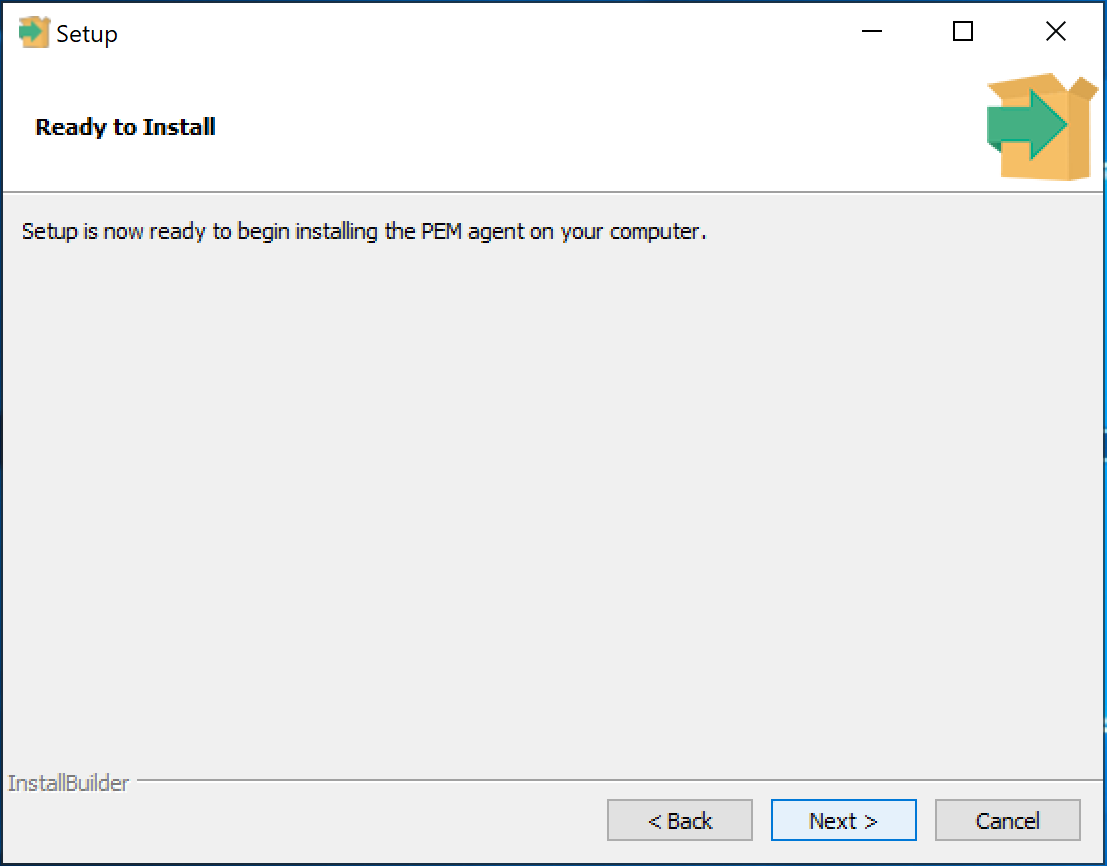
Click Next on the Ready to Install dialog to instruct the installer to copy files to the system and register the Agent on the PEM server.
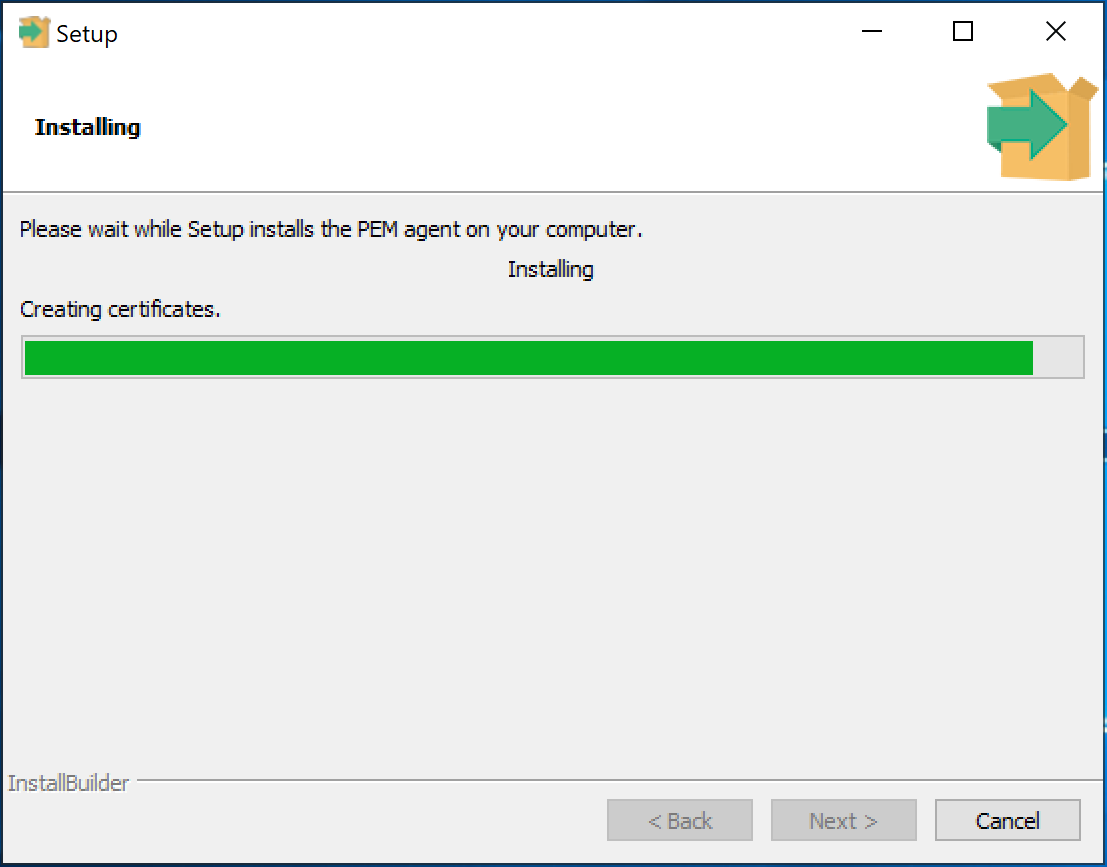
The PEM Agent installer displays progress bars to mark the PEM Agent’s installation progress.
When the installation has completed, the PEM Agent will be running and reporting operating system and host data to the PEM server. To start monitoring Postgres instances on the host of the PEM agent, they must now be added to PEM’s enterprise directory and bound to the agent.
Invoking the Agent Installer from the Command Line
The command line options of the PEM Agent installers offer functionality in situations where a graphical installation may not work because of limited resources or system configuration. You can:
- Include the
--mode unattendedoption when invoking the installer to perform an installation without additional user input.
Not all command line options are suitable for all platforms. For a complete reference guide to the command line options, include the --help option when you invoke the installer.
Invoking the PEM Agent Installer in Unattended Mode
You can perform an unattended PEM server installation by providing installation preferences on the command line when invoking the installer. Please note that the system on which you are installing the PEM server must have internet access.
Before invoking the PEM Agent installer in unattended mode, you must:
- Install the PEM server; the
pg_hba.conffile of the PEM server must allow connections from the host of the PEM Agent. - Ensure that the monitored Postgres database has SSL enabled, and is accepting connections.
You must have Administrator privileges to install the PEM Agent. Use the following command to invoke the PEM Agent installer in unattended mode:
pem-agent-7.<x>.<x>-windows-x64.exe --mode unattended
--pghost <pem_server_host_address> --pgport <pem_server_port>
--pguser postgres --pgpassword <pguser_password>
--agent_description <agent_name>
Where:
pem_server_host_addressspecifies the IP address of the host of the PEM server.pem_server_portspecifies the port used by the backing PEM database; by default, the database uses port5432.pguser_passwordspecifies the password associated with the PEM database superuser.agent_namespecifies a descriptive name for the PEM Agent.
EnterpriseDB is the leading provider of value-added products and services for the Postgres community. Please visit our website at www.enterprisedb.com.Note When configuring a shell/batch script run by a Windows Agent that has PEM 7.11 or later version installed, the
AllowBatchJobStepsparameter must be set toTruein theagent.cfgfile. The PEM agent will not execute any batch/shell script by default.
The PEM Web Interface
After installing a PEM Server and Agent, you can configure PEM to start monitoring and managing PostgreSQL or Advanced Server instances. The PEM Server installer installs the PEM web interface. You can use the interface to review information about objects that reside on monitored servers, or to review statistical information gathered by the PEM Server.
After installing and configuring PEM, you can use any supported browser to access the PEM web interface. Open your browser, and navigate to:
https://<ip_address_of_PEM_host>:8443/pem
Where ip_address_of_PEM_host specifies the IP address of the host of the PEM Server. The Postgres Enterprise Manager Web Login window opens:
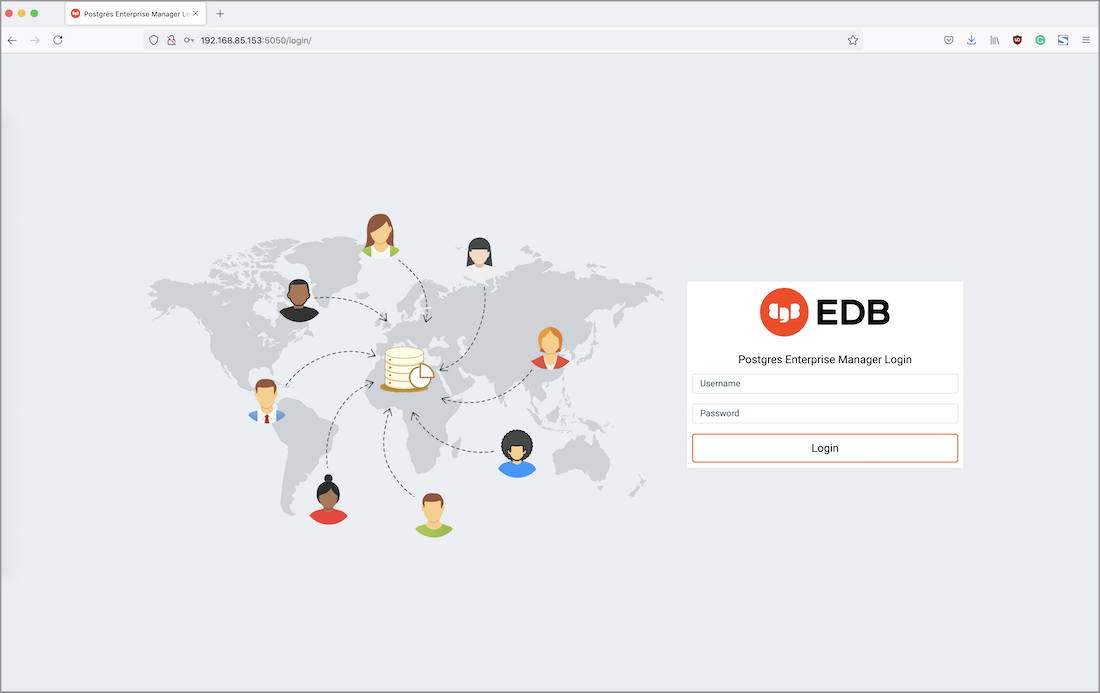
Use the fields on the Postgres Enterprise Manager Login window to authenticate yourself with the PEM Server:
- Provide the name of a
pemdatabase user in theUsernamefield. For the first user connecting, this will be the name provided when installing the PEM server. - Provide the password associated with the user in the
Passwordfield.
Click the Login button to connect to the PEM Server.
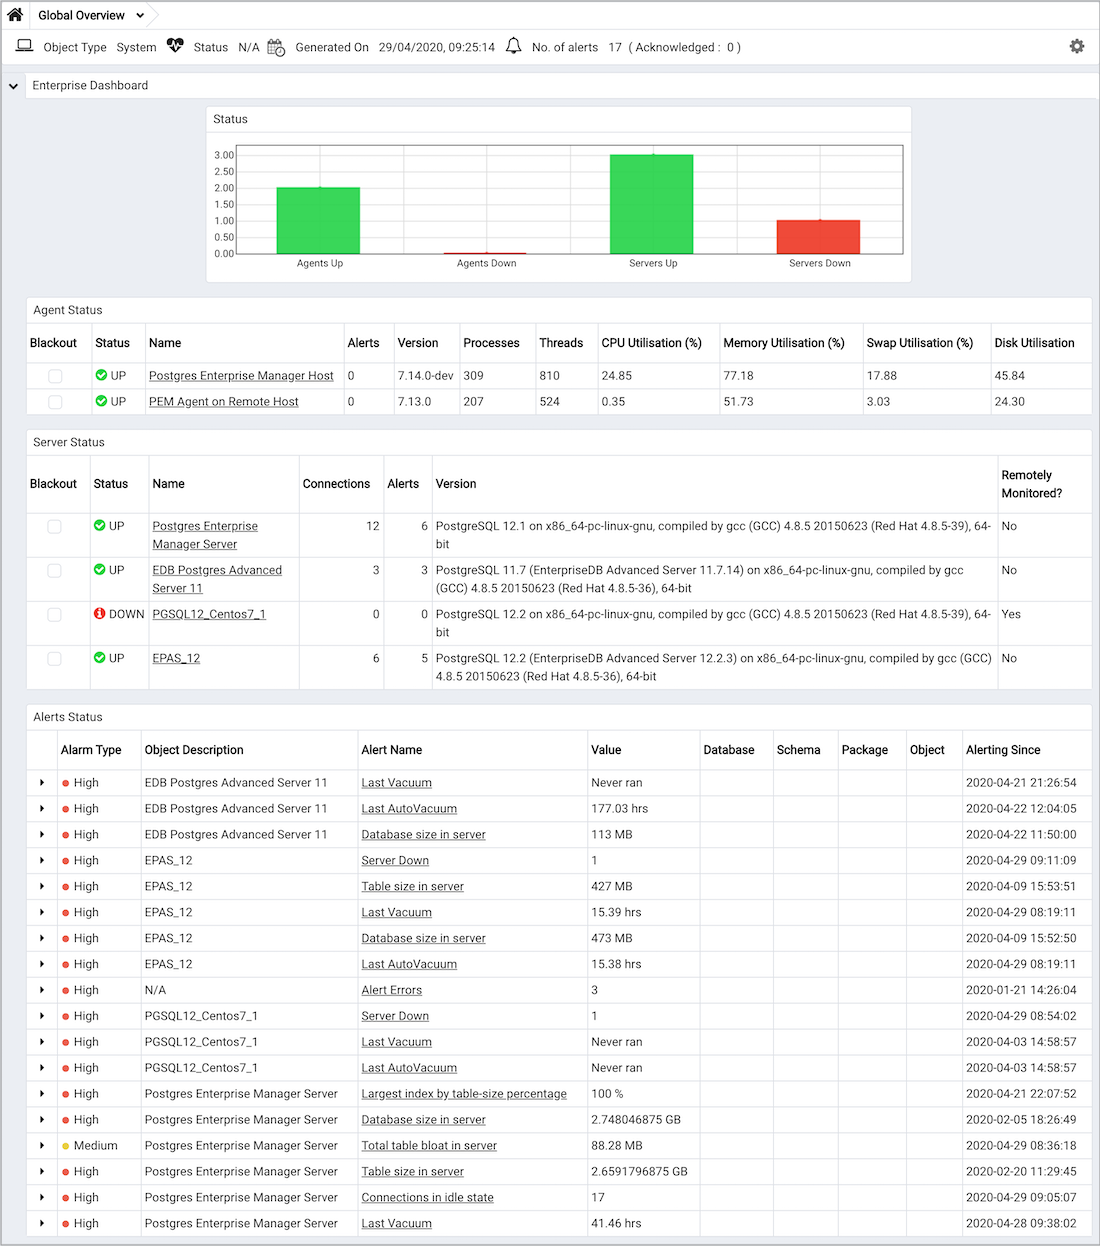
Before you can use the PEM web interface to manage or monitor a database server, you must register the server with the PEM Server. When you register a server, you describe the connection to the server, provide authentication information for the connection, and specify any management preferences (optionally binding an agent).
A server may be managed or unmanaged:
- A
managedserver is bound to a PEM Agent. The PEM Agent will monitor the server to which it is bound, and perform tasks or report statistics for display on the PEM dashboards. A managed server has access to extended PEM functionality such as Package Management or Custom Alerting; when registering a server, you can also allow a managed server to be restarted by PEM as required. - An
unmanagedserver is not bound to a PEM Agent; you can create database objects on an unmanaged server, but extended PEM functionality (such as Package Management or Custom Alerting) is not supported on an unmanaged server.
You must also ensure the pg_hba.conf file of the server that you are registering allows connections from the host of the PEM web interface.
To access online help information about the PEM web interface, select Help from the menu bar. Additional information is available in .pdf and .html format from the EDB website
- The
PEM Administrator's Guidecontains information about registering and managing servers, agents, and users. - The
PEM Enterprise Features Guidecontains information about using the tools and wizards that are part of the web interface. - The
PEM Agent User Guidecontains helpful information about managing your PEM Agents. - The
PEM Upgrade and Migration Guidecontains information about upgrading PEM to its latest version from a previous version. - The
PEM PgBouncer Configuration Guidecontains information about using PgBouncer with your PEM installation.
Uninstalling Postgres Enterprise Manager Components
If you uninstall the PEM server from a host, the PEM agent installed on the same host is uninstalled. But if you uninstall the PEM agent, then the PEM server installed on the same host will not be uninstalled.
You can use the Windows Add/Remove Programs application to remove PEM components from a Windows host. Select the Add/Remove Programs option from the Windows Control Panel. When the control panel opens, locate the name of the PEM component in the program list. Click the Remove button to remove the component.
You can also invoke the uninstaller that resides at the following location:
For the PEM Server, C:\Program Files\edb\pem\server\uninstall-pemserver
For the PEM Agent, C:\Program Files\edb\pem\agent\uninstall-pemagent