PEM 8.1 -PEM Upgrade Guide
EnterpriseDB
PEM Upgrade and Migration
This guide provides detailed information about upgrading the Postgres Enterprise Manager (PEM) Components:
- Upgrading a PEM Installation - This section provides information about upgrading your PEM Server, PEM Agent and SQL Profiler from one major version to another (i.e. from 6.0 to 7.14).
- Upgrading the Backend Database - This section provides detailed information about upgrading the backend database, while maintaining the same version of the PEM Server.
- Moving a PEM Server –This section provides detailed information about moving the PEM Server from one host to another host.
- Troubleshooting –This section provides detailed information about troubleshooting the errors that you may encounter during PEM upgrade.
This document uses the term Postgres to mean either the PostgreSQL or the Advanced Server database or EDB Postgres Extended (formerly known as 2ndQPostgres).
upgrading_pem_installation upgrading_backend_database moving_pem_server troubleshooting conclusion
Upgrading a PEM Installation
The process of upgrading a PEM installation is platform-specific. You can update a PEM Agent or Server on a Windows host by using the PEM graphical installer available for Windows. Prior to PEM 7.8 release, PEM Agent or Server could be installed on Linux either by using the graphical installer or by using the RPMs. From PEM version 7.8 onwards, PEM graphical installers for Linux are discontinued. To update a PEM Agent or Server on a Linux host from any lower version to PEM 7.9 or higher versions, you must use native packages.
Links to PEM and SQL Profiler installers and RPMs are available at the EDB website.
upgrading_pem_installation_windows upgrading_pem_installation_linux_rpm creating_pem_repository_in_isolated_network upgrading_pem_installation_linux_graphical configuring_the_pem_server_on_linux_platforms
Upgrading a PEM Installation on Windows Host
To upgrade PEM component software on Windows hosts, simply invoke a newer version of the PEM component installers in the following order:
- Invoke the PEM agent installer on each monitored node
exceptthe PEM Server host. - Invoke the PEM Server installer; this installer will upgrade
boththe PEM Server and the PEM Agent that resides on the PEM Server host.
During an installation, the component installer will automatically detect an existing installation, and perform an upgrade. After upgrading the PEM Agent and Server, you can upgrade SQL Profiler if required; this step is platform-specific.
The following sections will walk you through the upgrade process on a Windows host, step-by-step.
Upgrading a PEM Agent on a Windows Host
To upgrade a system that is currently monitored by a PEM agent to a more-recent PEM agent, simply download and invoke a newer version of the PEM Agent installer on the system that the agent is monitoring.
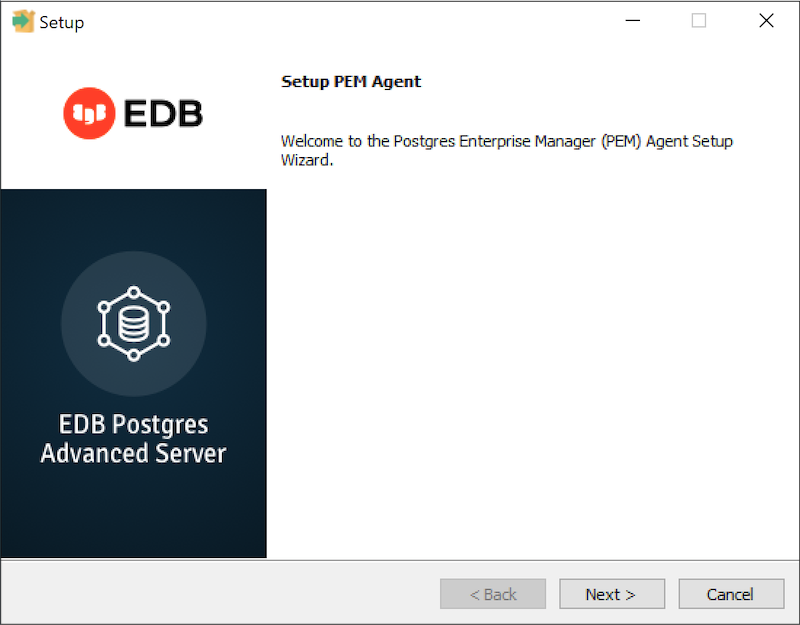
You can invoke the installer by right-clicking on the downloaded installer’s icon, and selecting Run as Administrator. The PEM Agent Setup Wizard opens, welcoming you.
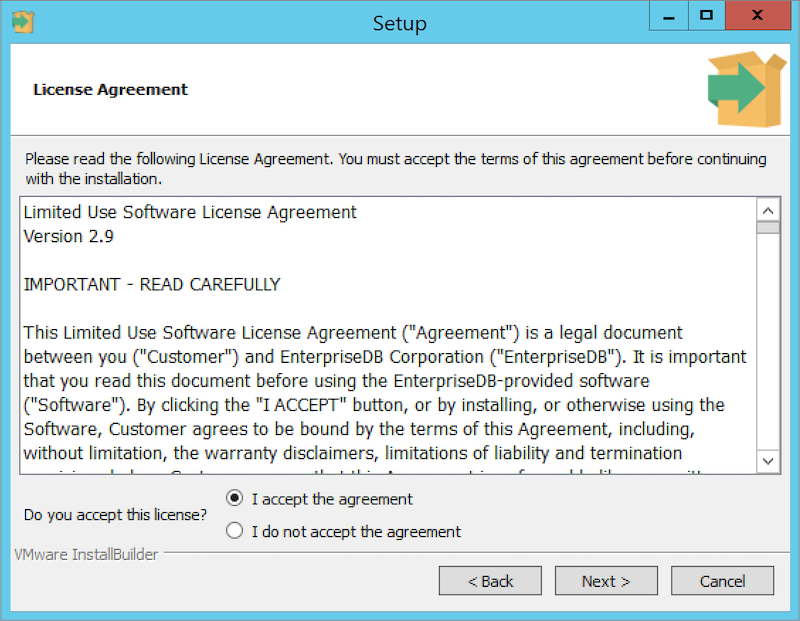
Read and accept the License Agreement before clicking Next to continue.
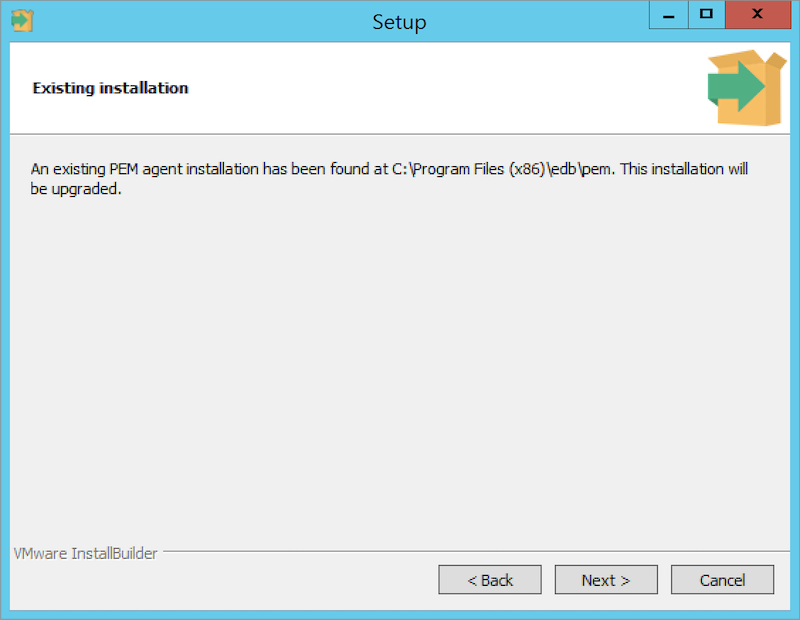
The setup wizard will automatically detect an existing agent, and upgrade the installed version. Click Next to continue.
The pemAgent service account dialog may prompt you for the password of the account under which the PEM Agent service runs.
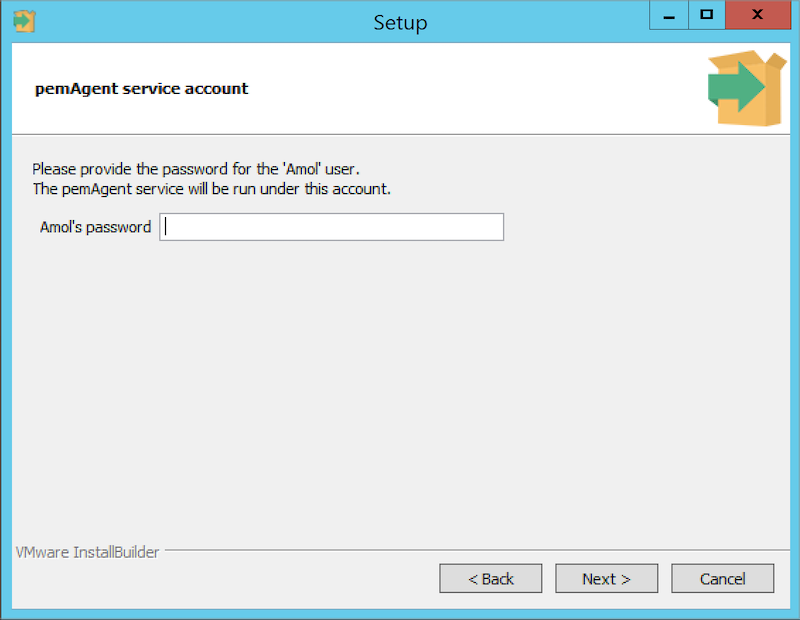
If prompted, provide the password, and click Next to continue.
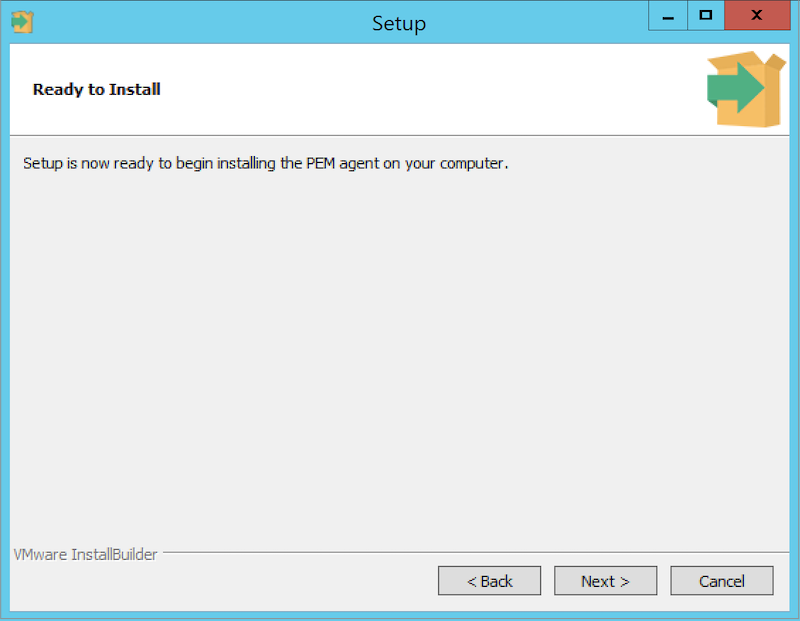
When the Ready to Install dialog informs you that the installation is about to begin, click Next to continue. It will upgrade your PEM Agent to the latest version.
The setup wizard displays progress bars to inform you of each component that is being installed.
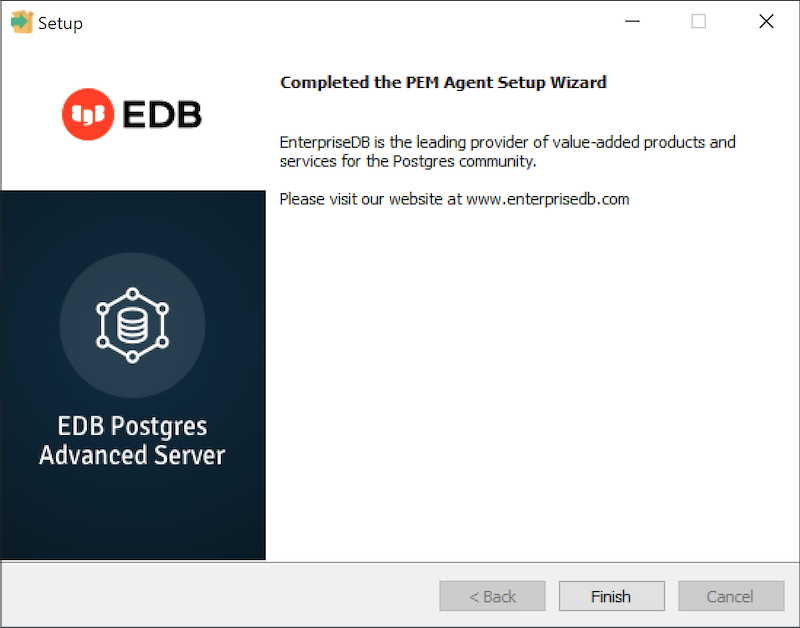
The PEM Agent Setup Wizard will inform you when the installation completes. Click Finish to exit the wizard and close the window.
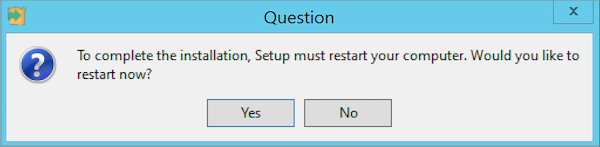
After the installation completes, a window pops-up to restart the machine. Click Yes to restart the machine and the PEM Agent.
Upgrading the PEM Server on a Windows Host
The PEM Server installer facilitates upgrading directly between major versions of the PEM Server; you can upgrade directly from version 5.0 to version 7.16 without first upgrading to version 6.0.
You can invoke the installer by right-clicking on the downloaded installer’s icon, and selecting Run as Administrator.
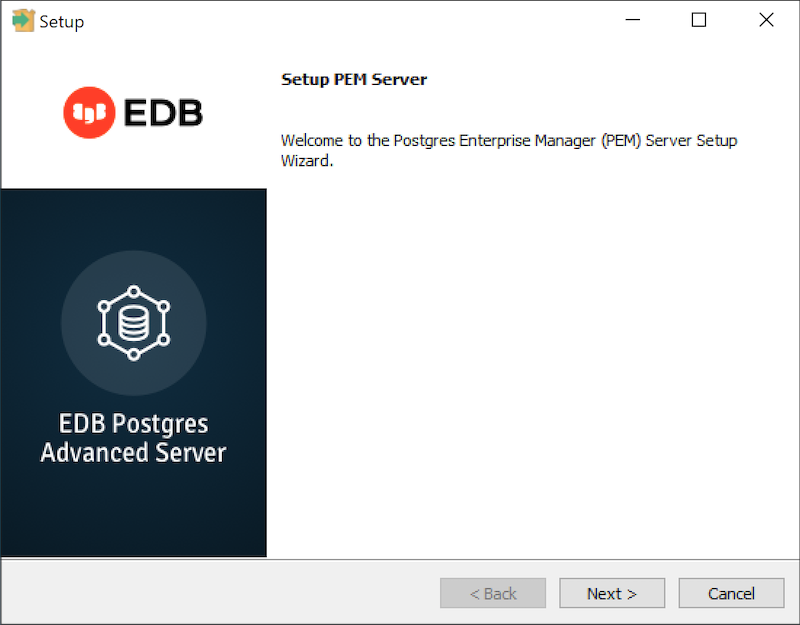
The PEM Server Setup Wizard welcomes you, as shown in the image. Click Next to continue to the License Agreement.
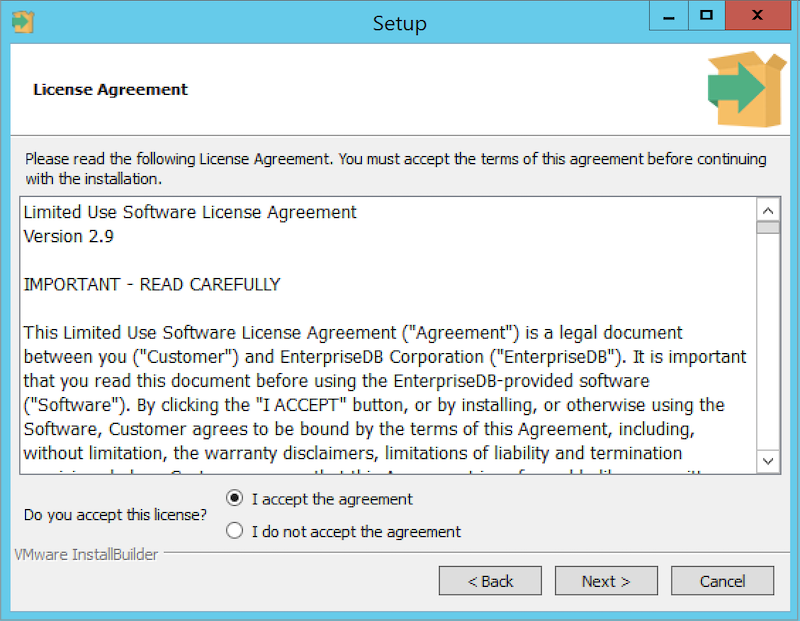
The PEM Server setup wizard will prompt you to accept the License Agreement. After reviewing the license agreement, check the radio button next to I accept the agreement, and click Next to continue to the Existing installation dialog.
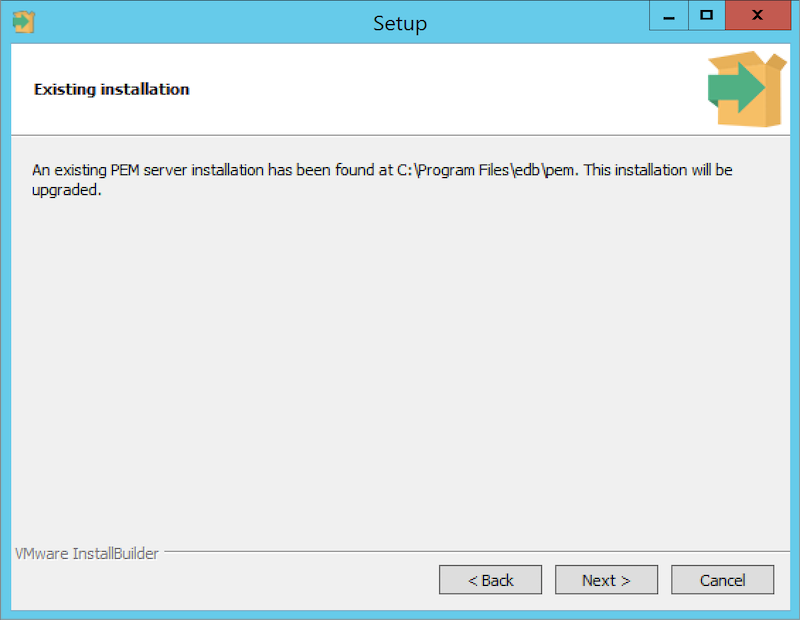
The wizard will check the PEM Server host for an existing PEM Server installation; if the wizard locates an installation, it will perform an upgrade. Click Next to continue.
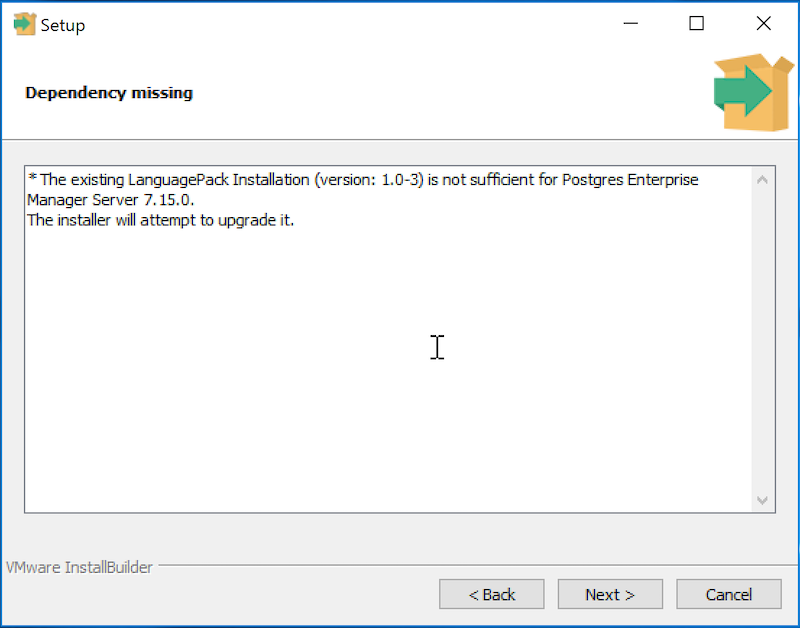
Before upgrading the PEM Server, the wizard will confirm that the requirements of the new PEM Server are present. If any supporting components are missing, or are a version that will not support the new PEM installation, the PEM installation wizard will inform you that it must upgrade the dependencies, and will invoke the required installers.
When the installation wizards complete the dependency upgrades, then a window pops-up asking whether you want to restart the machine or not.
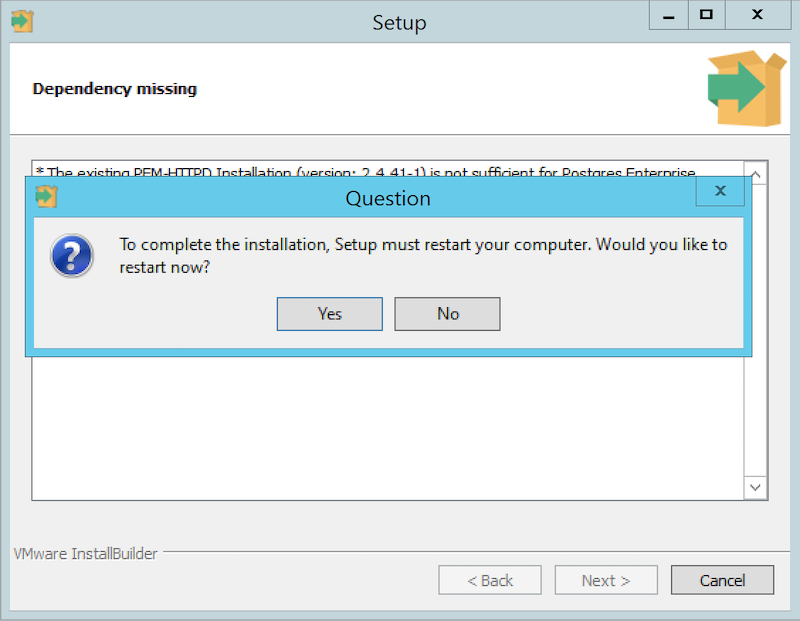
Click on No to continue the upgrade process.
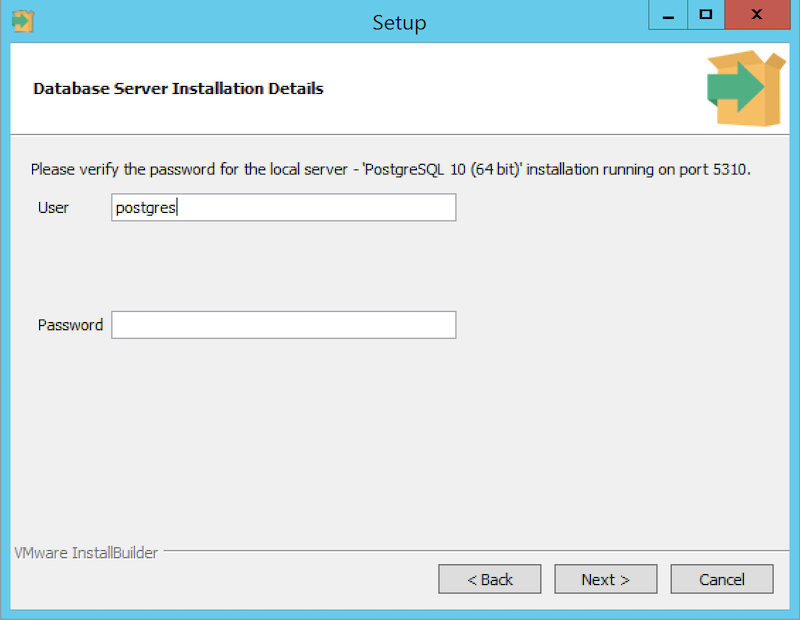
The wizard then opens the Database Server Installation Details dialog, prompting you for connection credentials for the database superuser of the PEM backend database. Provide:
- The name of the database superuser in the
Userfield. - The password associated with the database superuser in the
Passwordfield.
Click Next to continue.
The pemAgent service account dialog may prompt you for the password of the account under which the PEM agent service runs.
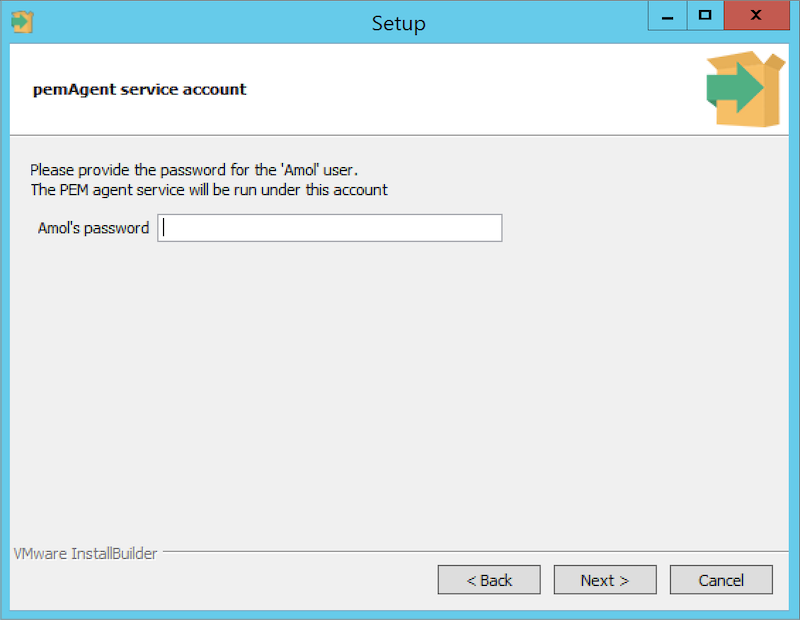
If prompted, provide the password, and click Next to continue.
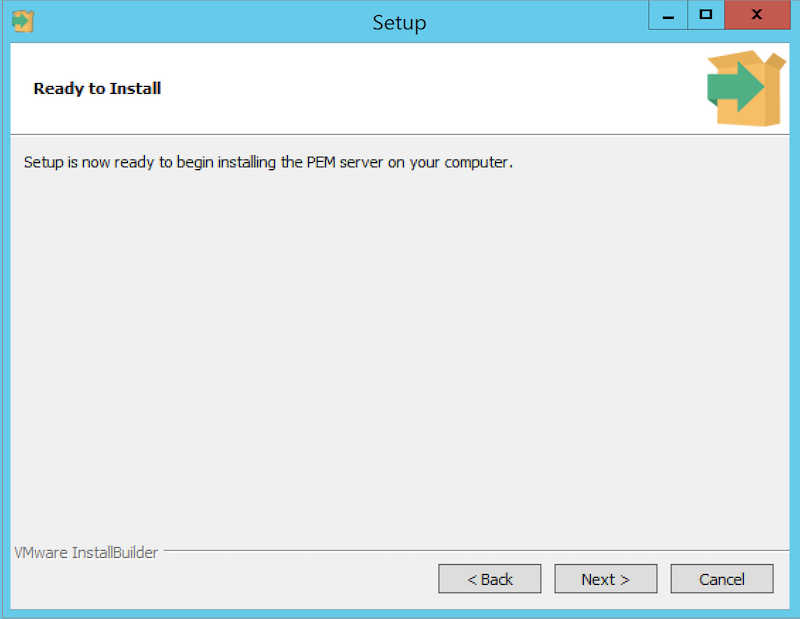
The Ready to Install dialog will inform you that the setup wizard is ready to perform the installation. Click Next to start the installation.
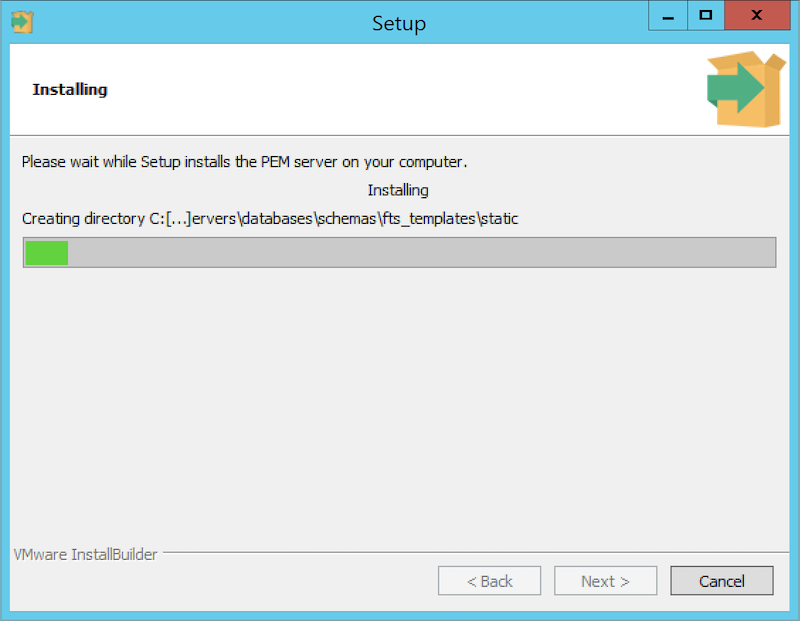
During the installation, progress bars will keep you informed of the progress of the update.
After upgrading the PEM Server (and the agent that resides on the same host as the PEM server) and configuring the web service, the PEM setup wizard notifies you of the port on which the service is listening. Use this port number when connecting to the PEM Server with the PEM client.
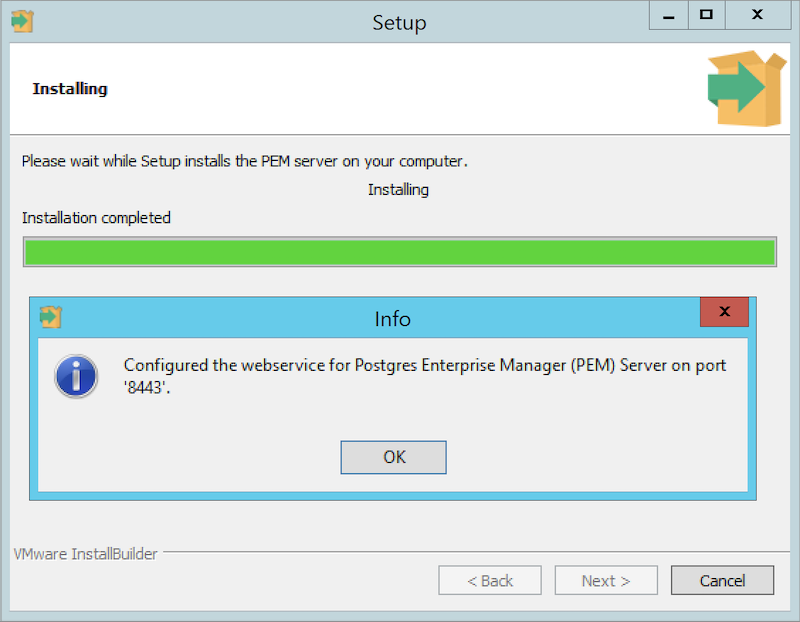
Click OK to close the Info popup. The PEM server setup wizard informs you that the installation is complete.
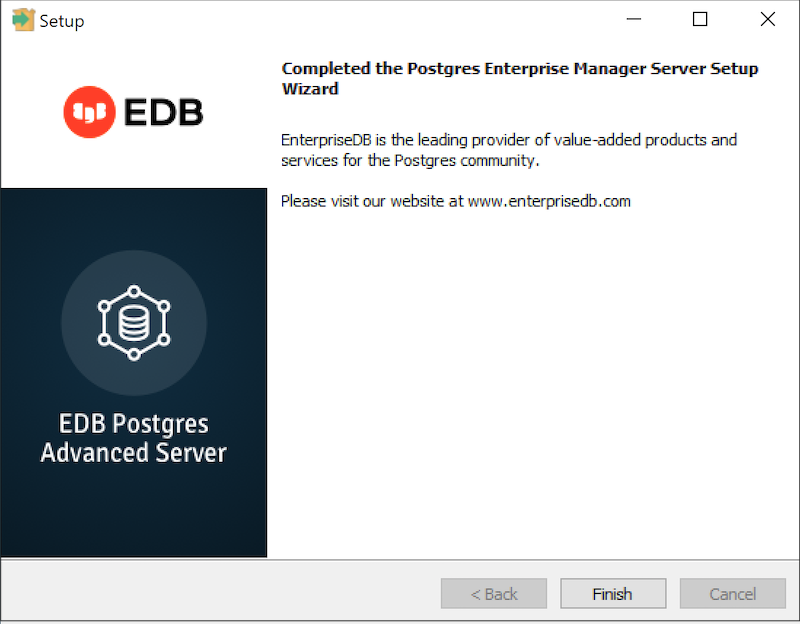
If the window pops-up asking to restart the machine, then click on Yes to restart the machine and hence the httpd service.
If you have installed the PEM backend database server and PEM-HTTPD on different hosts, then you must run the PEM Server installer twice – once on each host. Extract the language pack installer, and install it on the host of PEM-HTTPD before invoking the PEM installer. Include the following keywords when invoking the installer to extract the language pack:
--extract-languagepack <path>
Where <path> specifies an existing path for extracting the language pack installer.
Note By default EDB Language Pack is installed in
C:\edb\languagepack\v1.
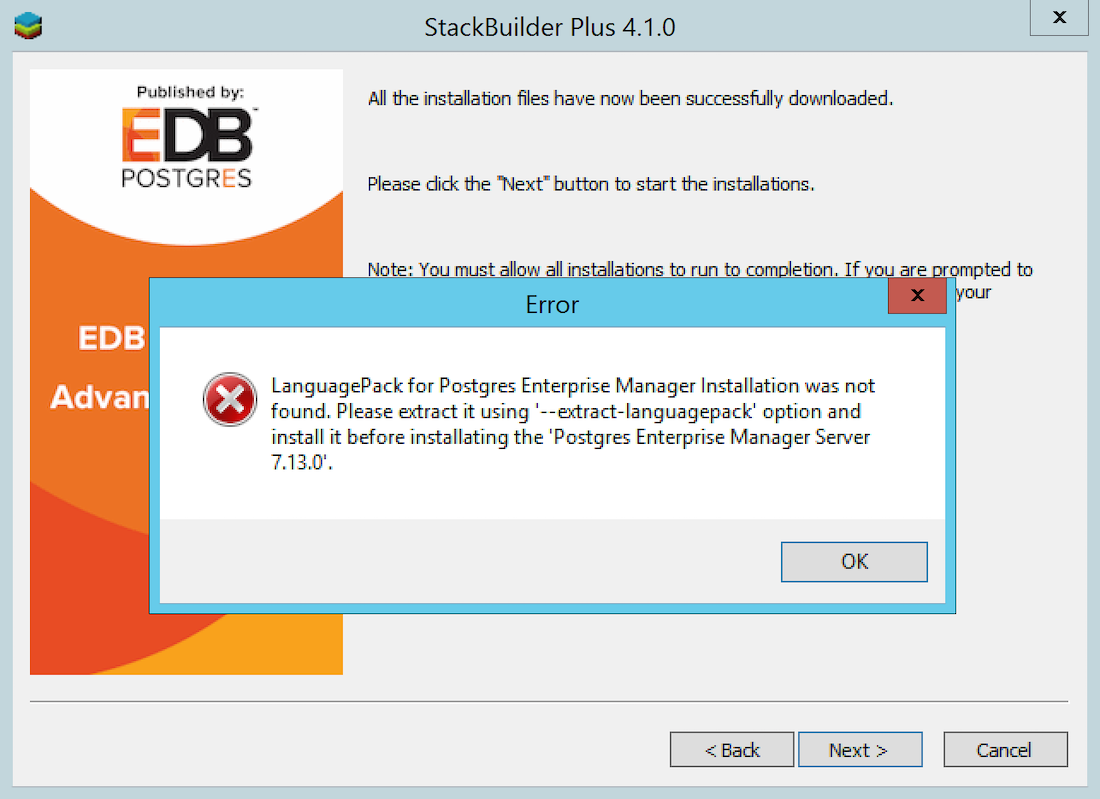
If you are upgrading the PEM Server via StackBuilder Plus then you might face the error shown below; after displaying the error, PEM will say that installation is completed. Please note that the installation is not done and you will need to do the installation by invoking the installer file from the location where it is downloaded.
After upgrading the PEM Server, you may wish to upgrade the backend database to a more recent version; for information about upgrading the backend database, see Upgrading the Backend Postgres Database.
Upgrading SQL Profiler on a Windows Host
If you are using SQL Profiler on a Windows host, Windows will lock any files that have been executed or loaded into memory. To release any locked files, you must stop the Postgres server before performing an upgrade.
On Windows, you can use the Services dialog to control the service. To open the Services dialog, navigate through the Control Panel to the System and Security menu. Select Administrative Tools, and then double-click the Services icon. When the Services dialog opens, highlight the service name in the list, and use the option provided on the dialog to Stop the service.
After stopping the Postgres Server:
Delete the existing SQL Profiler query set on each node by invoking the
uninstall-sql-profiler.sqlscript. By default, on a Windows host the script resides in theshare\contribdirectory under your Advanced Server or PostgreSQL installation.You can use the following server-specific commands.
For PostgreSQL:
psql -f C:\Program Files\PostgreSQL\<x>\share\contrib\uninstall-sql-profiler.sql -d postgres -U postgresWhere, x is the version of PostgreSQL and -d specifies the name of the maintenance database.
For Advanced Server:
psql -f C:\Program Files\edb\as<x>\share\contrib\uninstall-sql-profiler.sql -d edb -U enterprisedbWhere x is the version of Advanced Server and -d specifies the name of the maintenance database.
Invoke the new SQL Profiler installer on each node you wish to profile; run the installer as
Administrator.For PostgreSQL:
sqlprofiler-pg-<x>-<y>-windows-x64.exeWhere, x is the version of the PostgreSQL and y is the version of SQL Profiler. For example: sqlprofiler-pg-12-7.14.0-1-windows-x64.exe.
For Advanced Server:
sqlprofiler-edb-as<x>-<y>-windows-x64.exeWhere x is the version of Advanced Server and y is the version of SQL Profiler. For example: sqlprofiler-edb-as12-7.14.0-1-windows-x64.exe.
The SQL Profiler installer will detect the existing SQL Profiler installation and upgrade it with the latest version of SQL Profiler.
Run the
sql-profiler.sqlscript file in the maintenance database.For PostgreSQL:
psql -f C:\Program Files\PostgreSQL\<x>\share\contrib\sql-profiler.sql -d postgres -U postgresWhere x is the version of PostgreSQL and -d specifies the name of the maintenance database.
For Advanced Server:
psql -f C:\Program Files\edb\as<x>\share\contrib\sql-profiler.sql -d edb -U enterprisedbWhere, x is the version of Advanced Server and -d specifies the name of the maintenance database.
- Then, restart the Postgres Server to resume profiling the node from a PEM client.
After updating the PEM components, you are ready to update the backend database.
Upgrading a PEM Native Package Installation on a Linux Host
To upgrade PEM component software on Linux hosts, simply install a newer version of the PEM component native packages in the following order:
- Invoke the PEM agent native package installer on each monitored node
exceptthe PEM server host. - Invoke the PEM server native package installer; it will upgrade
boththe PEM server and the PEM agent that resides on the PEM server host.
During an installation, the component installation will automatically detect an existing installation, and perform an upgrade. After upgrading the PEM agent and server, you can upgrade SQL Profiler if required; this step is platform-specific.
Note If you have already configured or are planning to configure any shell/batch script run by a Linux agent that is upgraded from any lower version to 7.11 or later version, the user for the
batch_script_userparameter must be specified in theagent.cfgfile. It is strongly recommended that a non-root user is used to run the scripts. Using the root user may result in compromising the data security and operating system security. However, if you want to restore thepemagentto its original settings using a root user to run the scripts, then thebatch_script_userparameter value must be set toroot.
The following sections will walk you through the upgrade process on a Linux host, step-by-step.
Prerequisites to Upgrade a PEM Installation on Linux Host
PEM is dependent on third-party components from the vendor repository, including the python3, libboost, openssl, snmp++, libcurl, etc. To ensure these components are up to date, you should update your operating system using following platform-specific commands. Minimum version require for openssl is 1.0.2k. If you are using a version of PostgreSQL or Advanced Server older than version 10, before the upgrade you must install the libs package for version 10 or above on the system where the PEM server is installed. Use the following platform-specific commands to install the libs version 10 or above on your host:
Prerequisites to Upgrade a PEM Installation on a CentOS or RHEL Host
To upgrade packages on a CentOS or RHEL 7.x host
yum upgradeTo upgrade packages on a CentOS or RHEL 8.x host
dnf upgradeTo upgrade Advanced Server libs:
yum install edb-as<X>-server-libsTo upgrade PostgreSQL libs:
yum install postgresql<X>-libsWhere <X> is the PostgreSQL or Advanced Server version whose libs package you want to install.
Prerequisites to Upgrade a PEM Installation on a Debian or Ubuntu Host
To upgrade packages on a Debian or Ubuntu host
apt-get updateTo upgrade Advanced Server libs:
apt-get install edb-as<X>-server-libsTo upgrade PostgreSQL libs:
apt-get install postgresql<X>-libsWhere <X> is the PostgreSQL or Advanced Server version whose libs package you want to install.
Prerequisites to Upgrade a PEM Installation on a SLES Host
To upgrade packages on a SLES host
zypper updateTo upgrade Advanced Server libs:
zypper install edb-as<x>-server-libsTo upgrade PostgreSQL libs:
zypper install postgresql<x>-libsWhere <X> is the PostgreSQL or Advanced Server version whose libs package you want to install.
Upgrading a PEM Agent Native Package Installation
You can use native packages to upgrade existing PEM Agents that were initially installed using native packages. The upgrade process does not update the PEM agent configuration file. After installing the new agent, you must manually copy the configuration file of the existing agent to the new installation location.
Upgrading the PEM Agent on a CentOS or RHEL Host
For CentOS or RHEL 7.x or 8.x:
To upgrade a PEM agent, use the following command:
yum upgrade edb-pem-agentFor CentOS or RHEL 8.x, you can also use the following command:
dnf upgrade edb-pem-agentUpgrading a PEM Agent on a Debian or Ubuntu Host
To upgrade a PEM Agent, use the following command:
apt-get upgrade edb-pem-agentUpgrading a PEM Agent on a SLES Host
To upgrade a PEM Agent, use the following command:
zypper update edb-pem-agentUpgrading a PEM Server Native Package Installation
If you initially used native packages to install your PEM server, you can use native packages to upgrade your PEM server. The commands to upgrade are platform-specific; please refer to your platform’s section below.
If you wish to upgrade a PEM server that is installed on a machine in an isolated network, you need to create a PEM repository on that machine before you upgrade the PEM server. For more information about creating a PEM repository on an isolated network, see Creating a PEM Repository on an Isolated Network.
Upgrading a PEM Server on a CentOS or RHEL Host
To use an RPM package to upgrade an existing RPM installation you must:
You can use the yum package manager to upgrade the installed version of the PEM server on CentOS or RHEL 7.x or 8.x:
yum upgrade edb-pemYou can also use the dnf command on CentOS or RHEL 8.x:
dnf upgrade edb-pemNote If you are doing a fresh installation of the PEM Server on CentOS or RHEL 7.x host, the installer will install the edb-python3-mod_wsgi package along with the installation as the package is a requirement of the operating system. If you are upgrading the PEM Server on CentOS or RHEL 7.x host, the mod_wsgi package will be replaced by the edb-python3-mod_wsgi package to meet the requirements of the operating system.
After upgrading the PEM Server using yum or dnf, you must configure the PEM Server. For more detailed information see Configuring the PEM Server on Linux Platforms.
Upgrading the PEM Server on a Debian or Ubuntu Host
You can use the apt-get package manager to upgrade the installed version of the PEM Server on supported versions of Debian or Ubuntu:
apt-get upgrade edb-pemAfter upgrading the PEM Server with apt-get, you need to configure the PEM Server. For more detailed information see Configuring the PEM Server on Linux Platforms.
Upgrading the PEM Server on a SLES Host
You can use the zypper package manager to upgrade the installed version of the PEM Server on supported versions of SLES Host:
zypper update edb-pemAfter upgrading the PEM Server using zypper, you need to configure the PEM Server. For more detailed information see Configuring the PEM Server on Linux platforms.
Upgrading a SQL Profiler Native Package Installation
To upgrade a SQL Profiler installation that resides on a Linux host:
Delete the existing SQL Profiler query set on each node by invoking the
uninstall-sql-profiler.sqlscript. By default, on a Linux host the script resides in theshare/contribdirectory under your Advanced Server or PostgreSQL installation.You can use the following server-specific command:
For PostgreSQL:
/usr/pgsql-<x>/bin/psql -f /usr/pgsql-<x>/share/contrib/uninstall-sql-profiler.sql -d postgres -U postgresWhere, x is the version of PostgreSQL and -d specifies the name of the maintenance database.
For Advanced Server:
/usr/edb/as<x>/bin/psql -f /usr/edb/as<x>/share/contrib/uninstall-sql-profiler.sql -d edb -U enterprisedbWhere, x is the version of Advanced Server and -d specifies the name of the maintenance database.
Invoke the new SQL Profiler installer on each node you wish to profile.
For PostgreSQL:
yum upgrade postgresql<x>-sqlprofilerWhere, x is the version of the PostgreSQL.
For Advanced Server:
yum upgrade edb-as<x>-server-sqlprofilerWhere x is the version of Advanced Server.
The installer will detect the existing SQL Profiler installation and upgrade with the latest version of SQL Profiler.
Please see the following example of upgrading SQL Profiler for PostgreSQL:
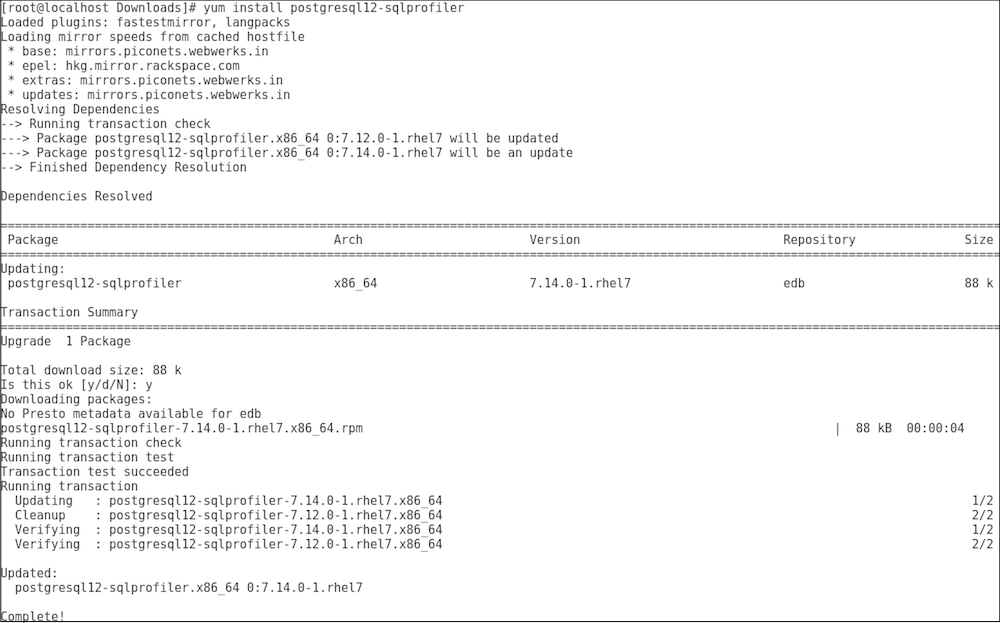
Then, run the
sql-profiler.sqlscript file in the maintenance database.For PostgreSQL:
/usr/pgsql-<x>/bin/psql -f /usr/pgsql-<x>/share/contrib/sql-profiler.sql -d postgres -U postgresWhere, x is the version of PostgreSQL and -d specifies the name of the maintenance database.
For Advanced Server:
/usr/edb/as<x>/bin/psql -f /usr/edb/as<x>/share/contrib/sql-profiler.sql -d edb -U enterprisedbWhere, x is the version of Advanced Server and -d specifies the name of the maintenance database.
- Restart the PostgreSQL/Advanced Server to resume profiling the node from the PEM Client.
After updating the PEM components, you are ready to update the backend database.
Creating a PEM Repository on an Isolated Network
You can create a local repository to act as a host for the PEM RPM packages if the server on which you wish to upgrade PEM cannot directly access the EDB repository. Please note that this is a high-level overview of the steps required; you may need to modify the process for your individual network. To create and use a local repository, you must:
- Use the following commands on a system with Internet access to download the dependencies for PEM:
yum install yum-plugin-downloadonly

mkdir /<pem_dir>

yum install --downloadonly --downloaddir=/<pem_dir>/ edb-pem

mkdir /<epel_dir>

yum install --downloadonly --downloaddir=/<epel_dir>/ epel-release*
Where <pem_dir> and <epel_dir> are the local directories that you create for downloading the RPMs.
Copy the directories
/<pem_dir>and/<epel_dir>to the machine that is in the isolated network.Create the repositories:
createrepo /<pem_dir>

createrepo /<epel_dir>- Create a repository configuration file called
/etc/yum.repos.d/pem.repowith connection information that specifies:
[pemrepo]
name=PEM Repository
baseurl=file:///pem7/
enabled=1
gpgcheck=0- Create a repository configuration file called
/etc/yum.repos.d/epel.repowith connection information that specifies:
[epelrepo]
name=epel Repository
baseurl=file:///pem7/
enabled=1
gpgcheck=0
After specifying the location and connection information for your local repository, you can use yum commands to install or upgrade PEM server:
To install PEM server:
yum install edb-pemTo upgrade PEM server:
yum upgrade edb-pemFor more information about creating a local yum repository, visit: https://wiki.centos.org/HowTos/CreateLocalRepos
Upgrading a Graphical PEM Installation on a Linux Host
To upgrade PEM component software on Linux hosts, simply install a newer version of the PEM component native packages in the following order:
- Invoke the PEM Agent native package installation on each monitored node
exceptthe PEM server host. - Invoke the PEM server native package installation; it will upgrade
boththe PEM server and the PEM Agent that resides on the PEM server host.
During an installation, the component installation will automatically detect an existing installation, and perform an upgrade. After upgrading the PEM Agent and server, you can upgrade SQL Profiler if required; this step is platform-specific.
The following section walks you through the process of upgrading a PEM installation that was performed via a graphical installer on a Linux host.
Prerequisites to Upgrade a PEM Installation on a Linux Host
If you are using a version of Postgres or Advanced Server released older than version 10, before the upgrade you must install the libs package for version 10 or above on the system where the PEM server is installed.
For Advanced Server:
yum install edb-as<X>-server-libsFor PostgreSQL:
yum install postgresql<X>-libsWhere <X> is the Postgres or Advanced Server version whose libs package you want to install.
Upgrading a PEM Agent (Graphical Installation) on a CentOS or RHEL Host
The default installation location for the PEM Agent when installed by the graphical installer is /opt/edb/pem. In the example that follows, substitute your server installation location for <PEM_installation_path>.
Use the version specific command to stop the
pemagentservice.On a CentOS or RHEL 7.x 0r 8.x host:
systemctl stop pemagent- Install the supporting
epel-releasepackage on the host by running any one of the following commands:
yum install epel-releaseyum -y install https://dl.fedoraproject.org/pub/epel/epel-release-latest-<X>.noarch.rpmWhere X is the OS version.
!!! Note You may need to enable the [extras] repository definition in the CentOS-Base.repo file (located in /etc/yum.repos.d).
If you are a Red Hat Network user,

-   You must also enable the `rhel-<x>-server-optional-rpms` repository to use EPEL packages, where *x* specifies the version of RHEL on the host. You can make the repository accessible by enabling the `RHEL optional subchannel` for `RHN-Classic`. If you have a certificate-based subscription, then you must also enable `rhel-<x>-server-eus-optional-rpms` repository to use EPEL packages or please see the `Red Hat Subscription Management Guide` for the required repository.
-   You must also enable the `rhel-<x>-server-extras-rpms` repository, where `x` specifies the version of the RHEL on the host.
Install and configure the
edb.repofile:- You must also have credentials that allow access to the EDB repository. To request credentials, visit:
- Create a repository configuration file; assume superuser privileges, and invoke the following command:
yum -y install https://yum.enterprisedb.com/edb-repo-rpms/edb-repo-latest.noarch.rpmThe repository configuration file is named edb.repo. The file resides in /etc/yum.repos.d.
- After creating the
edb.repofile, to ensure that the value of the enabled parameter is1, and theUSERNAMEandPASSWORDplaceholders in thebaseurlspecification are replaced with the name and password of a registered EDB user, run the following command:
sed -i "s@<username>:<password>@USERNAME:PASSWORD@" /etc/yum.repos.d/edb.repoIf you want to install PEM Agent on a machine that is in isolated network, you must first create PEM repository on that machine. For more information about creating PEM repository on an isolated network, see Creating a PEM repository in an Isolated Network.
The
yum makecachecommand downloads the metadata for the currently enabled repositories; when the command completes, check the available packages to confirm that the list includes the latest PEM Agent:On a CentOS or RHEL 7.x or 8.x:
yum makecache

yum list edb-pem-agent
On a CentOS or RHEL 8.x:
dnf makecache

dnf list edb-pem-agent
Install the PEM Agent RPM; when the installation completes, you can use the
yum infocommand to confirm installation information for the PEM Agent:On a CentOS or RHEL 7.x or 8.x:
yum install edb-pem-agent

yum info edb-pem-agent
On a CentOS or RHEL 8.x:
dnf install edb-pem-agent- After installation, copy the PEM Agent configuration file (
agent.cfg) from the previous location to the location required by the RPM installer:
cp /PEM_installation_path/agent/etc/agent.cfg /usr/edb/pem/agent/etc/agent.cfg!!! Note The Package Mangement and Stremaing Replication features are deprecated from PEM 7.16 version. Please remove these parameters from agent.cfg file while copying the file if existing - allow_package_management and allow_streaming_replication, to avoid any warning messages in the worker log file after PEM Agent service restart.
- Open the agent configuration file located at:
/usr/edb/pem/agent/etc/agent.cfgThen set the value of the ca_file parameter:
ca_file=/usr/libexec/libcurl-pem/share/certs/ca-bundle.crt- Take a backup of the service file and agent certificates:
On CentOS or RHEL 7.x or 8.x, use the following command to back up the service file:
cp /usr/lib/systemd/system/pemagent.service /usr/lib/systemd/system/pemagent.service_bkpThen, copy the agent certificates; in the following commands, <agent_id> should specify the agent identifier (for example, agent2 or agent3):
mv /root/.pem/<agent_id>.key /root/.pem/<agent_id>.key.bkp

mv /root/.pem/<agent_id>.crt /root/.pem/<agent_id>.crt.bkp- Uninstall the PEM agent using bitrock uninstaller:
/PEM_installation_path/agent/uninstall-pemagent- Use version specific commands to restore the service file backup and agent certificates to original location. For example:
On a RHEL or CentOS 7.x or 8.x host:
cp /usr/lib/systemd/system/pemagent.service_bkp /usr/lib/systemd/system/pemagent.serviceThen, move the agent certificate files; in the following commands, <agent_id> should specify the agent identifier (for example, agent2 or agent3):
mv /root/.pem/<agent_id>.key.bkp /root/.pem/<agent_id>.key

mv /root/.pem/<agent_id>.crt.bkp /root/.pem/<agent_id>.crt
Enable the
pemagentservice, and startpemagentandhttpd.On a RHEL or CentOS 7.x or 8.x host, use the commands:
systemctl enable pemagent

systemctl start pemagent
At this point, the PEM agent should be up and running; you can use the PEM web interface to check the agent version and status.
Upgrading a PEM Server that was Installed with a Graphical Installer
The default installation location for the PEM server when installed by the graphical installer is /opt/edb/pem. In the example that follows, substitute your server installation location for <PEM_installation_path>.
Upgrading a PEM Server that was Installed with a Graphical Installer on a CentOS or RHEL Host
Logout from PEM.
Stop the PEMHTTPD service on PEM server. In case PEM server and web server are on two different systems, run the command on the web server:
On a CentOS or RHEL 7.x 0r 8.x host:
systemctl stop PEMHTTPD
systemctl stop pemagent- Install the supporting
epel-releasepackage on the host by running any one of the following commands:
yum install epel-releaseyum -y install https://dl.fedoraproject.org/pub/epel/epel-release-latest-<X>.noarch.rpmWhere <X> is the OS version.
!!! Note You may need to enable the [extras] repository definition in the CentOS-Base.repo file (located in /etc/yum.repos.d).
If you are a Red Hat Network user,
- You must also enable the
rhel-<x>-server-optional-rpmsrepository to use EPEL packages, where x specifies the version of RHEL on the host. You can make the repository accessible by enabling theRHEL optional subchannelforRHN-Classic. If you have a certificate-based subscription, then you must also enablerhel-<x>-server-eus-optional-rpmsrepository to use EPEL packages or please see theRed Hat Subscription Management Guidefor the required repository. - You must also enable the
rhel-<x>-server-extras-rpmsrepository, wherexspecifies the version of the RHEL on the host.
Install and configure edb.repo file:
- You must also have credentials that allow access to the EDB repository. To request credentials, visit:
- Create a repository configuration file; assume superuser privileges, and invoke the following command:
yum -y install https://yum.enterprisedb.com/edb-repo-rpms/edb-repo-latest.noarch.rpmThe repository configuration file is named edb.repo. The file resides in /etc/yum.repos.d.
- After creating the
edb.repofile, to ensure that the value of the enabled parameter is1, and theusernameandpasswordplaceholders in thebaseurlspecification are replaced with the name and password of a registered EDB user, run the following command:.
sed -i "s@<username>:<password>@USERNAME:PASSWORD@" /etc/yum.repos.d/edb.repoIf you want to install PEM Agent on a machine that is in isolated network, you must first create PEM repository on that machine. For more information about creating PEM repository on an isolated network, see Creating a PEM repository in an Isolated Network.
The
yum makecachecommand downloads the metadata for the currently enabled repositories; when the command completes, check the available packages to confirm that the list includes the latest PEM Server:On a CentOS or RHEL 7.x or 8.x:
yum makecache

yum list edb-pem
On a CentOS or RHEL 8.x:
dnf makecache

dnf list edb-pem
Install the PEM Server RPM; when the installation completes, you can use the
yum infocommand to confirm installation information for the PEM Server:On a CentOS or RHEL 7.x or 8.x:
yum install edb-pem

yum info edb-pem
On a CentOS or RHEL 8.x:
dnf install edb-pem- After installation, copy the
agent.cfgfile from the current location (the location required by the graphical installer) to the location required by the RPM package:
cp /<PEM_installation_path>/agent/etc/agent.cfg /usr/edb/pem/agent/etc/agent.cfg- Open the agent configuration file located at:
/usr/edb/pem/agent/etc/agent.cfgThen, set the value of the ca_file parameter:
ca_file=/usr/libexec/libcurl-pem/share/certs/ca-bundle.crt- Copy the
pem.dbfile (and other required files) to the RPM installation location and change the file ownership. In case PEM server and web server are on two different systems, run the below commands on the web server:
cp -r /<PEM_installation_path>/server/share/pemhome/.pem/* /var/lib/pemhome/.pem/

chown -R pem:pem /var/lib/pemhome/.pem/- Change the home directory in the
passwdfile from the location identified by the graphical installer to the RPM location. In case PEM server and web server are on two different systems, run the commands on PEM server as well as web server:
usermod -m -d /var/lib/pemhome pem

cat /etc/passwd | grep pem- Take a backup of the PEM service file and agent certificates:
cp /usr/lib/systemd/system/pemagent.service /usr/lib/systemd/system/pemagent.service_bkp

mv /root/.pem/agent1.key /root/.pem/agent1.key.bkp

mv /root/.pem/agent1.crt /root/.pem/agent1.crt.bkp- Uninstall the PEM server using the graphical uninstaller from PEM server and web server machines:
/<PEM_installation_path> /server/uninstall-pemserver- Restore the service file backup and agent certificates to original location on PEM server.
cp /usr/lib/systemd/system/pemagent.service_bkp /usr/lib/systemd/system/pemagent.service

mv /root/.pem/agent1.crt.bkp /root/.pem/agent1.crt

mv /root/.pem/agent1.key.bkp /root/.pem/agent1.key
Install the sslutils through RPM or Installer (In case of Windows, you may want to stop the database server before installation as installer may not be able to overwrite the file otherwise it would require system restart)
Restart the database server (Restarting the database server is required as shared object of the extension has been upgraded)
Refer section Install sslutils
Use “ALTER EXTENSION” statement to upgrade the version
ALTER EXTENSION sslutils UPDATE [ TO new_version ]- Execute the PEM RPM configuration script on PEM server and web server; when prompted, provide the backend database details: the script should run without generating errors:
/usr/edb/pem/bin/configure-pem-server.shEnable the
pemagentservice on PEM server and web server. Start thepemagentandhttpdservices on the web server.On a CentOS or RHEL 7.x 0r 8.x host:
systemctl enable pemagent

systemctl start pemagent

systemctl start httpd
Launch the PEM web interface. Check the server and agent to confirm the PEM version, server status, and schema version. At this point, everything should be up and running.
You can now uninstall the PEMHTTD service from your web server, as it is no longer in use.
/opt/edb/pem/httpd/uninstall-pemhttpdUpgrading a SQL Profiler Installation with a Graphical Installer
SQL Profiler graphical installers are available for PostgreSQL and Advanced Server versions prior to 11.x (i.e. 10.x, 9.6).
To upgrade a SQL Profiler installation on a Linux host:
Delete the existing SQL Profiler query set on each node by invoking the
uninstall-sql-profiler.sqlscript. By default, if you are using PostgreSQL on a Linux host that was installed with a graphical installer, the script resides in theshare/postgresql/contribdirectory under the PostgreSQL installation; for Advanced Server, the script resides in theshare/contribdirectory under the Advanced Server installation. You can use the following server-specific commands.For PostgreSQL:
/opt/PostgreSQL/<x>/bin/psql -f /opt/PostgreSQL/<x>/share/postgresql/contrib/uninstall-sql-profiler.sql -d postgres -U postgresWhere, x is the version of PostgreSQL and -d specifies the name of the maintenance database.
For Advanced Server:
/opt/edb/as<x>/bin/psql -f /opt/edb/as<x>/share/contrib/uninstall-sql-profiler.sql -d edb -U enterprisedbWhere, x is the version of Advanced Server and -d specifies the name of the maintenance database.
Then, invoke the new SQL Profiler installer on each node you wish to profile. Run the installer as Administrator:
For a PostgreSQL host:
sqlprofiler-pg-<x>-<y>-linux.exeWhere x is the version of the PostgreSQL and y is the version of SQL Profiler. For example: sqlprofiler-pg-12-7.14.0-1-linux.exe.
For Advanced Server:
sqlprofiler-edb-as<x>-<y>-linux.exeWhere x is the version of Advanced Server and y is the version of SQL Profiler. For example: sqlprofiler-edb-as12-7.14.0-1-linux.exe.
The SQL Profiler installer will detect the existing SQL Profiler installation and upgrade it with the latest version of SQL Profiler.
Run the
sql-profiler.sqlscript file in the maintenance database.For PostgreSQL:
/opt/PostgreSQL/<x>/bin/psql -f /opt/PostgreSQL/<x>/share/postgresql/contrib/sql-profiler.sql -d postgres -U postgresWhere, x is the version of PostgreSQL and -d specifies the name of the maintenance database.
For Advanced Server:
/opt/edb/as<x>/bin/psql -f /opt/edb/as<x>/share/contrib/sql-profiler.sql -d edb -U enterprisedbWhere, x is the version of Advanced Server and -d specifies the name of the maintenance database.
- Restart the PostgreSQL/Advanced Server to resume profiling the node from the PEM Client.
After updating the PEM components, you are ready to update the backend database.
Configuring a PEM Server on a Linux Host
After upgrading the PEM Server you can use the following command to configure the PEM Server:
/usr/edb/pem/bin/configure-pem-server.shWhen invoking the configuration script, you can include command line options to specify configuration properties; the script will prompt you for values that you omit on the command line. The accepted options are:
| Option | Description |
|---|---|
-acp |
Defines PEM Agent certificate path. The default is /root/.pem. |
-ci |
CIDR formatted network address range that Agents will connect to the server from, to be added to the server’s pg_hba.conf file. For example, 192.168.1.0/24. The default is 0.0.0.0/0. |
-dbi |
The directory for the database server installation. For example, /usr/edb/as11 for Advanced Server or /usr/pgsql-11 for PostgreSQL. |
-ds |
The unit file name of the PEM database server. For Advanced Server, the default file name is edb-as-11; for PostgreSQL, it is postgresql-11. |
-ho |
The host address of the PEM database server. |
-p |
The port number of the PEM database server. |
-ps |
The service name of the pemagent; the default value is pemagent. |
-sp |
The superuser password of the PEM database server. This value is required. |
-su |
The superuser name of the PEM database server. |
-t |
The installation type: Specify 1 if the configuration is for web services and backend database, 2 if you are configuring web services, or 3 if you are configuring the backend database. If you specify 3, please note that the database must reside on the local host. |
-un |
To unregister the PEM server. |
-h |
Displays help. |
If you do not provide configuration properties on the command line, you will be prompted for values by the script. To view script-related help, use the command:
/usr/edb/pem/bin/configure-pem-server.sh --helpAfter executing the PEM server configuration file, use your version-specific service control command to restart the httpd service.
For detailed information about using an RPM package to install or configure the PEM server or PEM Agent, please see the PEM Linux Installation Guide.
Upgrading the PEM Backend Postgres Database
If you are updating both PEM components and the PEM backend database, you should perform PEM component updates (the server and Agent) before updating the backend database. For more information about updating PEM component software, see Upgrading a PEM Installation.
Note From PEM 8.0 onwards, the PostgreSQL or EPAS version 11 or higher are only supported as backend database server. Hence if your backend database server is lower than version 11 then first you need to upgrade your backend database server and then upgrade the PEM components.
The update process described in this section uses the pg_upgrade utility to migrate from one version of the backend server to a more recent version. pg_upgrade facilitates migration between any supported version of Postgres, and any subsequent release of Postgres that is supported on the same platform.
Note If the source PEM Server is lower than the 7.16 version, then you need to replace the following functions before you run
pg_upgrade:
- The
abstime,reltime, andtintervaldatatypes are deprecated from Postgres version 12 or later, hence to replace those dataypes withtimestamptzdata type use below command:
DO
$$
DECLARE
    rec record;
    cnt integer;
BEGIN
    -- Check for the deprecated type in our user info probe
    SELECT count(*) INTO cnt
    FROM pem.probe_column
    WHERE sql_data_type = ‘abstime’ AND internal_name = ‘valuntil’;
        IF cnt = 0 THEN
            RETURN;
        END IF;
    ALTER TABLE pemdata.user_info
        ALTER COLUMN valuntil SET DATA TYPE timestamptz;
    ALTER TABLE pemhistory.user_info
        ALTER COLUMN valuntil SET DATA TYPE timestamptz;
    -- Now update the pem.probe_column itself
    UPDATE pem.probe_column
    SET sql_data_type = ‘timestamptz’
    WHERE sql_data_type = ‘abstime’ AND internal_name = ‘valuntil’;
END;
$$ LANGUAGE ‘plpgsql’;- Replace the below function to avoid any alert errors:
CREATE OR REPLACE FUNCTION pem.check_alert_params_array_size(
template_id pem.alert_template.id%type, params text[]
)
RETURNS bool AS $FUNC$
DECLARE
    res bool := TRUE;
BEGIN
    /*
    * During restoring the pem database, it does not maintain the order while
    * inserting data in the table, and uses the sort table based on the
    * names.
    * Hence - we need to check the foreign key constraint is present before
    * validating these values.
    */
    IF EXISTS(
        SELECT 1 FROM information_schema.table_constraints
        WHERE constraint_name='alert_template_id_fkey' AND
        table_name='alert' AND table_schema='pem'
    ) THEN
  /*
   * Need to use the IS TRUE construct outside the main query, because
   * otherwise if there's no template by that ID then the query would return
   * 0 rows and the result of the function would be undefined and CHECK
   * constraint would succeed.
   * Probably this is being over-cautious, because pem.alert.template_id
   * references pem.alert_template.id. But the SQL standard (probably) does
   * not define the order in which the CHECK or the FOREIGN KEY constraints
   * should be validated; in case CHECK is validated first, we want it to
   * fail.
   */
EXECUTE $SQL$
    SELECT (
        SELECT pem.check_array_size_equal(t.param_names, $2)
        FROM pem.alert_template AS t
        WHERE id = $1
    ) IS TRUE
  $SQL$ INTO res USING template_id, params;
END IF;
 RETURN res;
END
$FUNC$ LANGUAGE 'plpgsql';
pg_upgrade supports a transfer of data between servers of the same type. For example, you can use pg_upgrade to move data from a PostgreSQL 9.6 backend database to a PostgreSQL 11 backend database, but not to an Advanced Server 11 backend database. If you wish to migrate to a different type of backend database (i.e from a PostgreSQL server to Advanced Server), see Moving the Postgres Enterprise Manager Server.
You can find more information about using pg_upgrade at:
http://www.postgresql.org/docs/current/static/pgupgrade.html
Download and invoke the updated installer; installers for PostgreSQL and Advanced Server are available through the EDB website:
https://www.enterprisedb.com/software-downloads-postgres
After downloading the installer for the server version to which you will be upgrading, invoke the installer on the host of the PEM server. Follow the onscreen instructions of the installation wizard to configure and install the Postgres server.
You can optionally use a custom-built PostgreSQL server as a host of the PEM backend database. Note that if you are upgrading from a PostgreSQL backend database listening on port
5432, the new server must be configured to listen on a different port.Configure SSL utilities on the new server. The new backend database must be running the same version of
sslutilsthat the current backend database is running; you can download the SSL Utils package that is used in EDB installers at:https://www.enterprisedb.com/downloads/modified-gpl-source-code
You are not required to manually add the
sslutilsextension when using the Advanced Server as the new backend database. The process of configuringsslutilsis platform-specific.On Linux
On an Advanced Server backend database, the sslutils extension is installed by default.
If you are using a PostgreSQL as PEM backend database, ensure you have access to the PostgreSQL community repository, and use the command:
yum install sslutils_<X>Where `<X>` is the server version.- If you are using a EDB one-click installer of PostgreSQL as PEM backend database
yum install gcc openssl-develSet the value of PATH so it can locate the pg_config program
export PATH=$PATH:/opt/postgres_inst_dir/<X>/bin/Move into the sslutils folder, and enter
 make USE_PGXS=1
 make USE_PGXS=1 install
Use psql to create the sslutils extension
CREATE EXTENSION sslutilsPlease note that Debian 10 and Ubuntu 20 has increased the requirements to accept the certificates due to security reason. If a user wants to install the PEM Agent on any of the machines, they must upgrade ssltuils to 1.3 where 4096 bit RSA key and sha256 signature algorithm support has added.If the user does not upgrade sslutils to 1.3, then PEM Agent may fail to connect to the PEM backend database server, and it might log the error ca md too weak.
On Windows
sslutilsmust be compiled on the new backend database with the same compiler that was used to compilesslutilson the original backend database. If you are moving to a Postgres database that was installed using a PostgreSQL one-click installer (from EDB) or an Advanced Server installer, use Visual Studio to buildsslutils. If you are upgrading to PostgreSQL 9.6 or later, use Visual Studio 2010.For detailed information about building a specific version of Postgres on Windows, please consult the core documentation for that version. Core documentation is available at the PostgreSQL project website at:
https://www.postgresql.org/docs/current/install-windows.html
While specific details of the process will vary by platform and compiler, the basic steps on each platform are the same. The example that follows demonstrates compiling OpenSSL support for PostgreSQL on a 32-bit Windows system.
Before compiling the OpenSSL extension, you must locate and install OpenSSL for your version of Windows. Before invoking the OpenSSL installer you may be required to download and install a pre-requisite redistributable (such as
vcredist_x86.exe).After installing OpenSSL, download and unpack the
sslutilsutility package available at:https://www.enterprisedb.com/downloads/modified-gpl-source-code
Copy the unpacked
sslutilsfolder to the Postgres installation directory (i.e.C:\ProgramFiles\PostgreSQL\<x.x>)Open the Visual Studio command line, and navigate into the
sslutilsdirectory. Use the following commands to buildsslutils:
SET USE_PGXS=1

SET GETTEXTPATH=\ <path_to_gettext>

SET OPENSSLPATH=\ <path_to_openssl>

SET PGPATH=\ <path_to_pg_installation_dir>

SET ARCH=x86

msbuild sslutils.proj /p:Configuration=Release
Where:
path_to_gettextspecifies the location of theGETTEXTlibrary and header files.path_to_opensslspecifies the location of the openssl library and header files.path_to_pg_installation_dirspecifies the location of the Postgres installation.For example, the following set of commands builds OpenSSL support into the PostgreSQL 11 server:
SET USE_PGXS=1

SET OPENSSLPATH=C:\OpenSSL-Win32

SET GETTEXTPATH="C:\Program Files\PostgreSQL\11"

SET PGPATH="C:\Program Files\PostgreSQL\11"

SET ARCH=x86

msbuild sslutils.proj /p:Configuration=Release
When the build completes, the
sslutilsdirectory will contain the following files:sslutils--1.3.sqlsslutils--unpackaged--1.3.sqlsslutils--pemagent.sql.insslutils.dllCopy the compiled sslutils files to the appropriate directory for your installation; for example:
COPY sslutils*.sql "%PGPATH%\share\extension\"

COPY sslutils.dll "%PGPATH%\lib\"

COPY sslutils.control "%PGPATH%\share\extension\"
Stop the services of both the old backend database and the new backend database.
On RHEL or CentOS 7.x or 8.x, open a command line and assume the identity of a superuser. Enter the command:
systemctl <service_name> stopWhere <service_name> specifies the name of the Postgres service.
On Windows, you can use the Services dialog to control the service. To open the Services dialog, navigate through the Control Panel to the System and Security menu. Select Administrative Tools, and then double-click the Services icon. When the Services dialog opens, highlight the service name in the list, and use the option provided on the dialog to stop the service.
Use the
pg_upgradeutility to perform an in-place transfer of existing data between the old backend database and the new backend database. If your server is configured to enforcemd5authentication, you may need to add an entry to the.pgpassfile that specifies the connection properties (and password) for the database superuser, or modify thepg_hba.conffile to allow trust connections before invokingpg_upgrade. For more information about creating an entry in the.pgpassfile, please see the PostgreSQL core documentation, available at:http://www.postgresql.org/docs/current/static/libpq-pgpass.html
During the upgrade process, pg_upgrade will write a series of log files. The cluster owner must invoke
pg_upgradefrom a directory in which they have write privileges. If the upgrade completes successfully,pg_upgradewill remove the log files when the upgrade completes. To instructpg_upgradeto not delete the upgrade log files, include the--retainkeyword when invokingpg_upgrade.To invoke
pg_upgrade, assume the identity of the cluster owner, navigate into a directory in which the cluster owner has write privileges, and execute the command:
<path_to_pg_upgrade> pg_upgrade

-d <old_data_dir_path>

-D <new_data_dir_path>

-b <old_bin_dir_path> -B <new_bin_dir_path>

-p <old_port> -P <new_port>

-u <user_name>
Where:
path_to_pg_upgradespecifies the location of the pg_upgrade utility. By default, pg_upgrade is installed in thebindirectory under your Postgres directory.old_data_dir_pathspecifies the complete path to the data directory of the old backend database.new_data_dir_pathspecifies the complete path to the data directory of the new backend database.old_bin_dir_pathspecifies the complete path to the bin directory of the old backend database.new_bin_dir_pathspecifies the complete path to the bin directory of the old backend database.old_portspecifies the port on which the old server is listening.new_portspecifies the port on which the new server is listening.user_namespecifies the name of the cluster owner.
For example, the following command:
C:\>"C:\Program Files\PostgreSQL\11\bin\pg_upgrade.exe"

-d "C:\Program Files\PostgreSQL\9.6\data"

-D "C:\Program Files\PostgreSQL\11\data"

-b "C:\Program Files\PostgreSQL\9.6\bin"

-B "C:\Program Files\PostgreSQL\11\bin"

-p 5432 -P 5433

-U postgres
Instructs pg_upgrade to migrate the PEM database from PostgreSQL 9.6 to PostgreSQL 11 on a Windows system (if the backend databases are installed in their default locations).
Once invoked, pg_upgrade will perform consistency checks before moving the data to the new backend database. When the upgrade is finished, pg_upgrade will notify you that the upgrade is complete.
For detailed information about using pg_upgrade options, or troubleshooting the upgrade process, please see:
http://www.postgresql.org/docs/current/static/pgupgrade.html
Copy the following certificate files from the
datadirectory of the old backend database to thedatadirectory of the new backend database:ca_certificate.crtca_key.keyroot.crtroot.crlserver.keyserver.crtOnce in place on the target server, the files should have the (platform-specific) permissions described below:
Permissions and Ownership on Linux
File Name Owner Permissions ca_certificate.crt postgres -rw——- ca_key.key postgres -rw——- root.crt postgres -rw——- root.crl postgres -rw——- server.key postgres -rw——- server.crt postgres -rw-r–r– On Linux, the certificate files must be owned by
postgres. You can use the following command at the command line to modify the ownership of the files:
chown postgres <file_name>Where file_name specifies the name of the certificate file.
The server.crt file may only be modified by the owner of the file, but may be read by any user. You can use the following command to set the file permissions for the server.crt file:
chmod 644 server.crtThe other certificate files may only be modified or read by the owner of the file. You can use the following command to set the file permissions:
chmod 600 <file_name>Where file_name specifies the name of the file.
Permissions and Ownership on Windows
On Windows, the certificate files moved from the source host must be owned by the service account that performed the PEM server and backend database installation on the target host. If you invoked the PEM server and Postgres installer using the Run as Administrator option (selected from the context menu of the installer), the owner of the certificate files will be Administrators.
To review and modify file permissions on Windows, right-click on the file name, and select Properties.
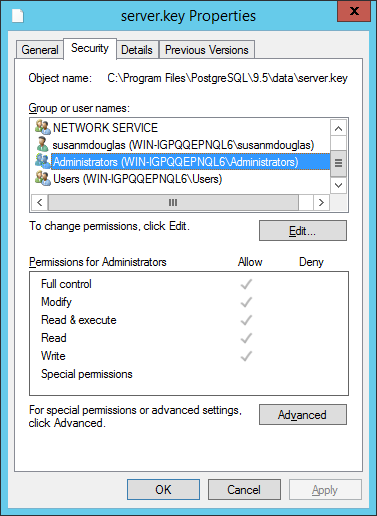 ** The Security tab **
Navigate to the Security tab and highlight a Group or user name to view the assigned permissions. Select Edit or Advanced to access dialogs that allow you to modify the permissions associated with the selected user.
The
postgresql.conffile contains parameter settings that specify server behavior. You will need to modify thepostgresql.conffile on the new server to match the configuration specified in thepostgresql.conffile of the old server.By default, the
postgresql.conffile is located:- For Postgres version lower than 10 on Linux, in
/opt/PostgreSQL/<X>/data - For Postgres version 10 or higher when installed with graphical installers on Linux, in
/opt/PostgreSQL/<X>/data - For Postgres version 10 or higher when installed with an RPM on Linux, in
/usr/pgsql/<X>/data - For any Postgres version on Windows, in
C:\Program Files\PostgreSQL\<X>\data
Where,
<X>is the version of Postgres on your system.Use your choice of editor to update the
postgresql.conffile of the new server. Modify the following parameters:- The
portparameter to listen on the port monitored by your original backend database (typically,5432). - The
sslparameter should be set toon.
You must also ensure that the following parameters are enabled. If the parameters are commented out, remove the pound sign from in front of each
postgresql.conffile entry:ssl_cert_file = 'server.crt' # (change requires restart)ssl_key_file = 'server.key' # (change requires restart)ssl_ca_file = 'root.crt' # (change requires restart)ssl_crl_file = 'root.crl'
Your installation may have other parameter settings that require modification to ensure that the new backend database behaves in a manner comparable to the old backend database. Review the
postgresql.conffiles carefully to ensure that the configuration of the new server matches the configuration of the old server.- For Postgres version lower than 10 on Linux, in
The
pg_hba.conffile contains parameter settings that specify how the server will enforce host-based authentication. When you install the PEM server, the installer modifies thepg_hba.conffile, adding entries to the top of the file:# Adding entries for PEM Agens and admins to connect to PEM serverhostssl pem +pem_user 192.168.2.0/24 md5hostssl pem +pem_agent 192.168.2.0/24 cert# Adding entries (localhost) for PEM Agens and admins to connect to PEM serverhostssl pem +pem_user 127.0.0.1/32 md5hostssl postgres +pem_user 127.0.0.1/32 md5hostssl pem +pem_user 127.0.0.1/32 md5hostssl pem +pem_agent 127.0.0.1/32 certBy default, the
pg_hba.conffile is located at the following location:- For Postgres version lower than 10 on Linux, in
/opt/PostgreSQL/<X>/data - For Postgres version 10 or higher when installed with graphical installers on Linux, in
/Opt/PostgreSQL/<X>/data - For Postgres version 10 or higher when installed with RPMs on Linux, in
/var/lib/pgsql/<X>/data - For Advanced Server version 10 or higher when installed with RPMs on Linux, in
/var/lib/edb/as<X>/data - For any Postgres version on Windows, in
C:\Program Files\PostgreSQL\<X>\data
Where,
<X>is the version of Postgres on your system.Using your editor of choice, copy the entries from the
pg_hba.conffile of the old server to thepg_hba.conffile for the new server.- For Postgres version lower than 10 on Linux, in
Restart the service of the new backend database.
On RHEL or CentOS 7.x or 8.x, open a command line and assume the identity of a superuser. Enter the command:
systemctl stop <service_name>Where service_name is the name of the backend database server.
If you are using Windows, you can use the Services dialog to control the service. To open the Services dialog, navigate through the Control Panel to the System and Security menu. Select Administrative Tools, and then double-click the Services icon. When the Services dialog opens, highlight the service name in the list, and use the option provided on the dialog to start the service.
Moving the Postgres Enterprise Manager Server
The steps in this section describe how to move a PEM server from one host machine to a new host machine. The PEM server on the new host (the target) must be installed with the same version of the PEM server installer as the original host (the source). Please note that if you do not use the same installer version, you may encounter a schema-mismatch error.
The backend database of the target server (either PostgreSQL or Advanced Server) may be of the same type and version, or a different type and version than the backend database of the source PEM server. A PEM server that resides on a PostgreSQL host can be migrated to an Advanced Server host, or vice versa.
Before starting the server migration, you should ensure that the firewalls between the source host, the target host, and the host of any PEM Agent will allow connections between the services.
Prepare the Target Host
Invoke the installer for the PEM server on the target host. Please note that you must use the same version of the PEM server installer that you used when installing the source PEM server.
The backend database of the target server may be a different version or type than the backend database of the source. If the new PEM server does not reside on the same type of backend database as the original server, you must ensure that the same version of the
sslutilsextension is installed on the new server host. The version ofsslutilsthat is distributed with the PEM installers is freely available for download from the EDB website at:https://www.enterprisedb.com/downloads/modified-gpl-source-code
For information about installing the PEM server or the
sslutilsextension, please refer to thePEM Installation Guides, available at:https://www.enterprisedb.com/docs/p/edb-postgres-enterprise-manager
Drop Existing Schemas from the New PEM Server
The migration process re-creates the
pem,pemdata, andpemhistoryschemas from the source PEM server on the target PEM server. In preparation for the move, use thepsqlclient to delete these schemas from thepemdatabase on the target host. You can open thepsqlclient at the command line, or by selectingSQL Shell (psql)from thePostgres Enterprise Managermenu.When the
psqlclient opens, connect to thepembackend database as the database superuser. After connecting to thepemdatabase on the target host, use the following commands to drop the schemas:
DROP SCHEMA pem CASCADE;

DROP SCHEMA pemdata CASCADE;

DROP SCHEMA pemhistory CASCADE;
When dropping the schemas, you must include the CASCADE keyword, instructing the server to delete all dependent objects. When executing the command, the psql client displays a list of the dependent objects; the client confirms each the schema is removed by displaying DROP SCHEMA.
Prepare the PEM Agents on the New PEM Server
Before moving the PEM server, you must identify the number of Agents that are monitored by the source PEM server, and create identities for that number of Agents (less one) on the target server. To discover the total number of
PEMAgents monitored by the PEM server, connect to the pem database on the source host with thepsqlclient, and query thepem.agenttable.
SELECT id FROM pem.agent WHERE active = true;You must manually create the number of Agents that reside on the original PEM server, less one; the PEM server installer has already created one Agent on the target host. For example, if the source server contains three Agents, you must manually create two additional Agents. Open a psql session with the pem database on the target server, and create the required Agents. Use the command:
CREATE USER agent<X>;Where <X> specifies an Agent number. Remember, agent1 is created on the target host by the PEM Server installer.
Then, use the GRANT command to assign each Agent that resides on the target PEM Server pem_agent permissions:
GRANT pem_agent TO agent<X>;Where <X> specifies an agent number.
Generate a Backup Script of the Source PEM Server
You can use the
pg_dumputility to generate a script that contains the commands required to recreate thepemdatabase on the target host. By default,pg_dumpis installed in thebindirectory under your Postgres installation. To invokepg_dump, open a command line, navigate to thebindirectory, and enter:
pg_dump -U <user_name> <db_name> > <file_name>Where:
<user_name>specifies the name of the database superuser for the PEM backend database.<db_name>specifies the name of the PEM backend database.<file_name>specifies the name of the script generated by pg_dump.When prompted, provide the password associated with the user specified.
The command shown instructs
pg_dumpto generate a script that (when executed) will re-create thepemdatabase. The script will be namedbackup.sql, and will be created in thetmpdirectory.pg_dumpis connecting to the server using the credentials of the user,postgres.Note that invoking the
pg_dumputility will not interrupt current database users.
!!! Note If the source PEM Server is lower than the 7.16 version, then you need to replace the following functions before you run pg_dump to take backup:
- The `abstime`, `reltime`, and `tinterval` datatypes are deprecated from Postgres version 12 or later, hence to replace those dataypes with `timestamptz` data type use below command:DO
$$
DECLARE
rec record;
cnt integer;
BEGIN
-- Check for the deprecated type in our user info probe
SELECT count(*) INTO cnt
FROM pem.probe_column
WHERE sql_data_type = ‘abstime’ AND internal_name = ‘valuntil’;
IF cnt = 0 THEN
RETURN;
END IF;
ALTER TABLE pemdata.user_info
ALTER COLUMN valuntil SET DATA TYPE timestamptz;
ALTER TABLE pemhistory.user_info
ALTER COLUMN valuntil SET DATA TYPE timestamptz;
-- Now update the pem.probe_column itself
UPDATE pem.probe_column
SET sql_data_type = ‘timestamptz’
WHERE sql_data_type = ‘abstime’ AND internal_name = ‘valuntil’;
END;
$$ LANGUAGE ‘plpgsql’;- Replace the below function to avoid any alert errors:CREATE OR REPLACE FUNCTION pem.check_alert_params_array_size(
template_id pem.alert_template.id%type, params text[]
)
RETURNS bool AS $FUNC$
DECLARE
res bool := TRUE;
BEGIN
/*
* During restoring the pem database, it does not maintain the order while
* inserting data in the table, and uses the sort table based on the
* names.
* Hence - we need to check the foreign key constraint is present before
* validating these values.
*/
IF EXISTS(
SELECT 1 FROM information_schema.table_constraints
WHERE constraint_name='alert_template_id_fkey' AND
table_name='alert' AND table_schema='pem'
) THEN
/*
* Need to use the IS TRUE construct outside the main query, because
* otherwise if there's no template by that ID then the query would return
* 0 rows and the result of the function would be undefined and CHECK
* constraint would succeed.
* Probably this is being over-cautious, because pem.alert.template_id
* references pem.alert_template.id. But the SQL standard (probably) does
* not define the order in which the CHECK or the FOREIGN KEY constraints
* should be validated; in case CHECK is validated first, we want it to
* fail.
*/
EXECUTE $SQL$
SELECT (
SELECT pem.check_array_size_equal(t.param_names, $2)
FROM pem.alert_template AS t
WHERE id = $1
) IS TRUE
$SQL$ INTO res USING template_id, params;
END IF;
RETURN res;
END
$FUNC$ LANGUAGE 'plpgsql';Move the Backup to the Target Host
Move the script generated by the
pg_dumputility to the target host of the PEM server.Restore the Backup on the Target Host
Open a command line on the target host and navigate into the
bindirectory (under the Postgres backend database installation directory). Startpsql, executing the script generated by thepg_dumputility:
psql -U <user_name> -d pem -f <file_name>Where:
<user_name>specifies the name of the database superuser. The user specified must have connection privileges for the backend database.<file_name>specifies the complete path to the backup script generated by pg_dump.
When prompted, provide the password associated with the database superuser.
The example shown uses the psql client to invoke a script named backup.sql to recreate the pem database. The script is invoked using the privileges associated with the database superuser, postgres.
Stop the Database Server on the Target Host
To stop the PEM Server on CentOS or RHEL 7.x or 8.x, use the command:
systemctl stop <service_name>Where, <service_name> specifies the name of the backend database server. For a PostgreSQL backend database, the service name is postgresql-<x>, and for an Advanced Server backend database, the service name is edb-as-<X>, where <X> specifies the version number.
If you are using Windows, you can use the Services dialog to control the service. To open the Services dialog, navigate through the Control Panel to the System and Security menu. Select Administrative Tools, and then double-click the Services icon. When the Services dialog opens, highlight the service name in the list, and use the option provided on the dialog to Stop the service.
Copy the Certificate Files to the Target Host
You must replace the certificate files that are created when the target host is installed with the certificate files of the source host. Copy the following files from the source PEM server to the target PEM server:
ca_certificate.crtca_key.keyroot.crtroot.crlserver.keyserver.crt
Copy the files to the
datadirectory under the Postgres installation that provides the backend database for the target cluster.On Linux, the files reside in:
/var/lib/pgsql/<X>/data/On Windows, the files reside in:
C:\Program Files\PostgreSQL\<X>\dataWhere:
<X> specifies the version of PostgresSQL on your system.
The files will already exist on the target cluster; delete the existing files before performing the copy, or overwrite the existing files with the files from the source server. Once in place on the target server, the files should have the (platform-specific) permissions described in the sections that follow.
Permissions and Ownership on Linux
| File Name | Owner | Permissions |
|---|---|---|
| ca_certificate.crt | postgres | -rw——- |
| ca_key.key | postgres | -rw——- |
| root.crt | postgres | -rw——- |
| root.crl | postgres | -rw——- |
| server.key | postgres | -rw——- |
| server.crt | postgres | -rw-r–r– |
On Linux, the certificate files must be owned by postgres. You can use the following command at the command line to modify the ownership of the files:
chown postgres <file_name>Where file_name specifies the name of the certificate file.
The server.crt file may only be modified by the owner of the file, but may be read by any user. You can use the following command to set the file permissions for the server.crt file:
chmod 644 server.crtThe other certificate files may only be modified or read by the owner of the file. You can use the following command to set the file permissions:
chmod 600 <file_name>Where file_name specifies the name of the file.
Permissions and Ownership on Windows
On Windows, the certificate files moved from the source host must be owned by the service account that performed the PEM server and backend database installation on the target host. If you invoked the PEM server and Postgres installer using the Run as Administrator option (selected from the context menu of the installer), the owner of the certificate files will be Administrators.
To review and modify file permissions on Windows, right-click on the file name, and select Properties.
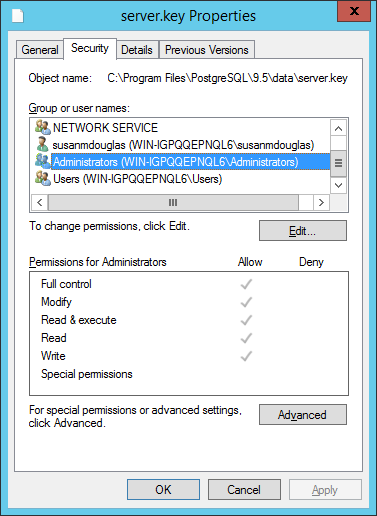 ** The Permissions tab **
Navigate to the Security tab and highlight a Group or user name to view the assigned permissions. Select Edit or Advanced to access dialogs that allow you to modify the permissions associated with the selected user.
Move the PEM Agent Certificate Files to the PEM Server Host
You must move the certificate files used by the PEM Agent of the source PEM server to the target host. This step is platform-specific.
On Linux
Copy the
agent1.keyandagent1.crtfiles from the source host to the target host. By default, on Linux, the files are installed in/root/.pem; copy the files to the same directory on the target host.File ownership and permissions of the files must be set to:
File Name Owner Permissions agent1.key root -rw——- agent1.crt root -rw-r–r– If necessary, navigate to
/root/.pem, and use the following commands to modify the permissions and ownership of theagent1.keyfile:
chmod 600 agent1.key

chown root agent1.key
Use the following commands to modify the permissions and ownership of the agent1.crt file:
chmod 644 agent1.crt

chown root agent1.crt
On Windows
Copy the agent1.key and agent1.crt files from the source host to the target host. On Windows, the files are located in:
C:\Users\<user_name>\AppData\Roaming\pemWhere user_name is the name of the user that invoked the PEM installer.
The ownership and permissions associated with the certificate files on the target machine should match the ownership and permissions of the certificate files on the source machine. If you invoked the PEM server and Postgres installer using the Run as Administrator option (selected from the context menu of the installer), the owner of the Agent certificate files will be Administrators.
To review and modify file permissions on Windows, right-click on the file name, and select Properties. Navigate to the Security tab and highlight a Group or user name to view the assigned permissions. Select Edit or Advanced to access dialogs that allow you to modify the permissions associated with the selected user.
Update the
pg_hba.confFiles on the Target HostModify the
pg_hba.conffile on the target host to allow connections from each PEM Agent. By default, thepg_hba.conffile is located in the data directory under your Postgres installation.Start the Server on the Target Host
After modifying the
pg_hba.conffile, you must restart the server for the changes to take effect.To restart the database server on Linux, use the command:
/etc/init.d/<service_name> startWhere service_name is the name of the backend database server.
If you are using Windows, you can use the Services dialog to control the service. To open the Services dialog, navigate through the Control Panel to the System and Security menu. Select Administrative Tools, and then double-click the Services icon. When the Services dialog opens, highlight the service name in the list, and use the option provided on the dialog to Start the service.
Connecting Monitored Agents to the New PEM Server Host
To instruct existing PEM Agents to connect to the new PEM server host, you must:
- Ensure that the PEM Agent host can connect to the new PEM server host.
- Modify the registry (on each Windows host with a PEM Agent) or the Agent configuration files (on each Linux host with a PEM Agent), specifying the IP address and port of the new PEM server.
- Restart the PEM Agent’s service. These steps are platform-specific:
If the PEM Agent Resides on Linux
Use your choice of editor to modify the
agent.cfgfile, specifying the new IP address and port number of the PEM server in thepem_hostandpem_portparameters.By default, the
agent.cfgfile is located in:/usr/edb/pem/agent/etc/agent.cfg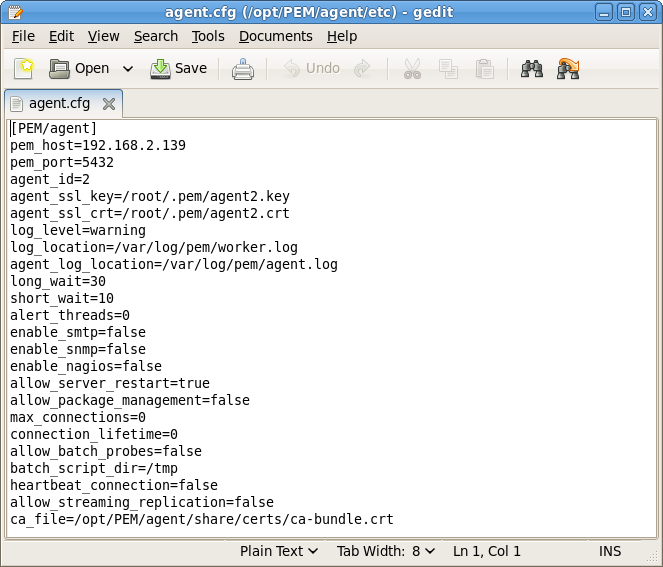
After modifying the
agent.cfgfile, you must restart the PEM Agent service; you can use thepemagentservice script on the Linux command line to restart the service:
/etc/init.d/pemagent restartIf the PEM Agent Resides on Windows
Before modifying the Windows registry on the monitored node, confirm that the firewall on the host of the PEM Agent will allow connections to the PEM server. After confirming that the PEM Agent host can connect to the PEM server host, you can use the Windows Registry Editor to review and edit the PEM_HOST and PEM_PORT entries to ensure that they correctly identify the host and port used by the PEM server. To open the Registry Editor, enter regedit in the Windows Run dialog or in the Windows start menu search box. Navigate through the registry tree control to view or modify registry entries.
On 64-bit Windows, the PEM Agent registry entries are located:
HKEY_LOCAL_MACHINE SOFTWARE wow6432Mode EnterpriseDB PEM Agent
On 32-bit Windows, the PEM Agent registry entries are located:
HKEY_LOCAL_MACHINE SOFTWARE EnterpriseDB PEM Agent
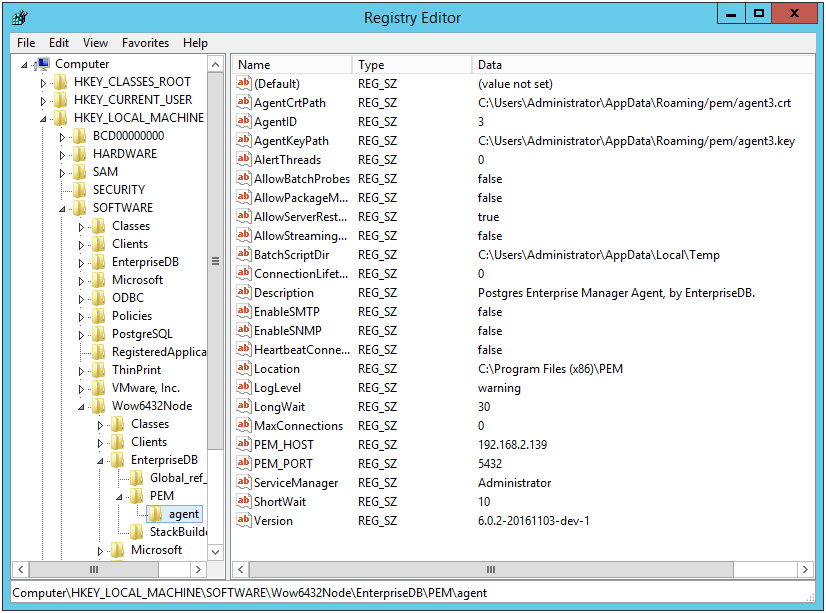
The PEM_HOST and PEM_PORT entries must specify the address and port number of the new PEM server on the target host. To modify a registry entry, right click on the entry Name, and select Modify from the context menu to open the Edit String dialog.
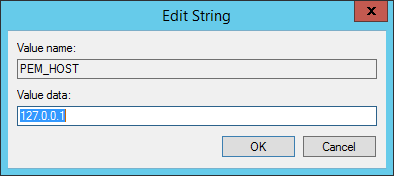
Use the Edit String dialog to make any changes to the value of the entry. When you’re finished, click OK to save your changes, or Cancel to exit without saving.
After modifying the registry, you must restart the PEM Agent’s service; you can use the Services dialog (accessed through the Windows Control Panel) to restart the Postgres Enterprise Manager - pemagent service .
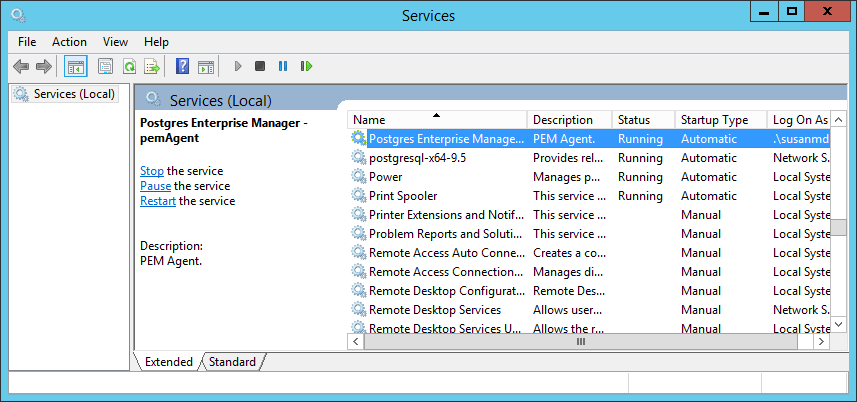 ** Restarting the PEM Agent service **
After moving the server, change the connection properties in any installed PEM clients to connect to the new host of the PEM server, Agents, and monitored servers.
Troubleshooting
Reconfiguring the PEM Server
In some situations you may need to uninstall the PEM server, install it again, and then reconfigure the server. Use the following commands in the given sequence:
- Use the following command to remove the PEM server configuration and uninstall:
/usr/edb/pem/bin/configure-pem-server.sh –un- Use the following command to remove the PEM packages:
yum erase edb-pem-server- Use the following command to drop the
pemdatabase:
DROP DATABASE pem- Move the certificates from
/root/.pem/to another location:
mv /root/.pem/* <new_location>- Move the
agent.cfgfile from/usr/edb/pem/agent/etc/agent.cfgto another location:
mv /usr/edb/pem/agent/etc/agent.cfg <new_location>- Then, use the following command to configure the PEM server again:
/usr/edb/pem/bin/configure-pem-server.sh