Installing and Configuring the .NET Connector
This chapter describes how to install and configure the Advanced Server .NET Connector.
Installing the .NET Connector
You can use the EnterpriseDB .NET Connector Installer (available
from the EnterpriseDB website) to add the
.NET Connector to your system. After downloading the installer, right-click on the installer icon, and
select Run As Administrator from the context menu. When prompted,
select an installation language and click OK to continue to the Setup window.
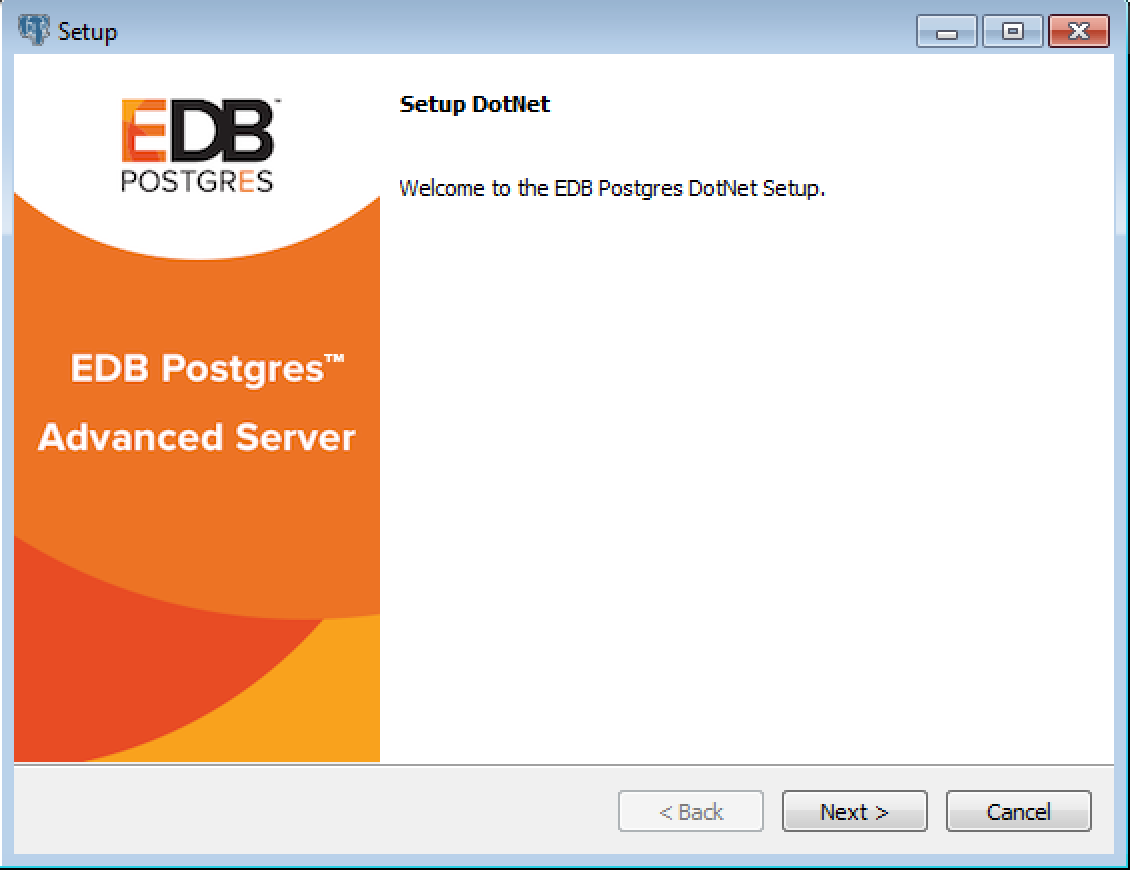
The .NET Connector Installation wizard
Click Next to continue.
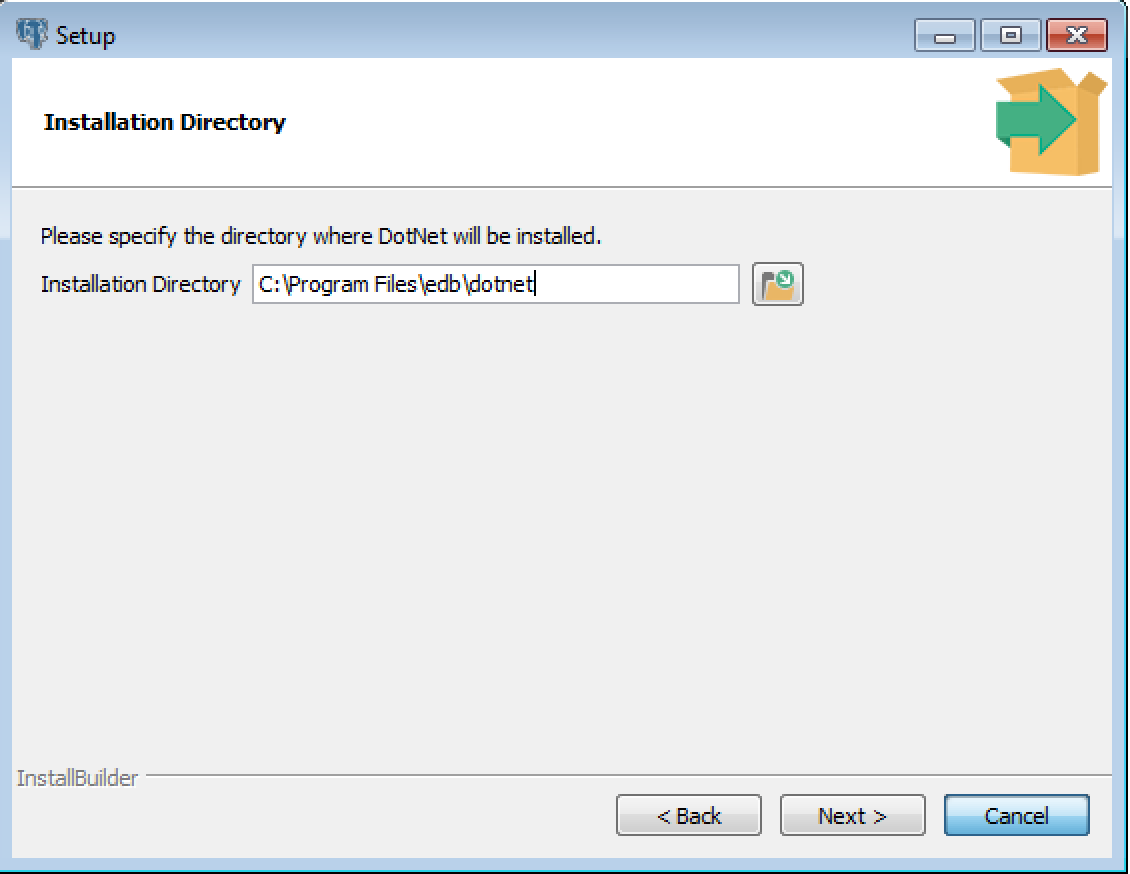
The Installation dialog
Use the Installation Directory dialog to specify the
directory in which the connector will be installed, and click Next to
continue.
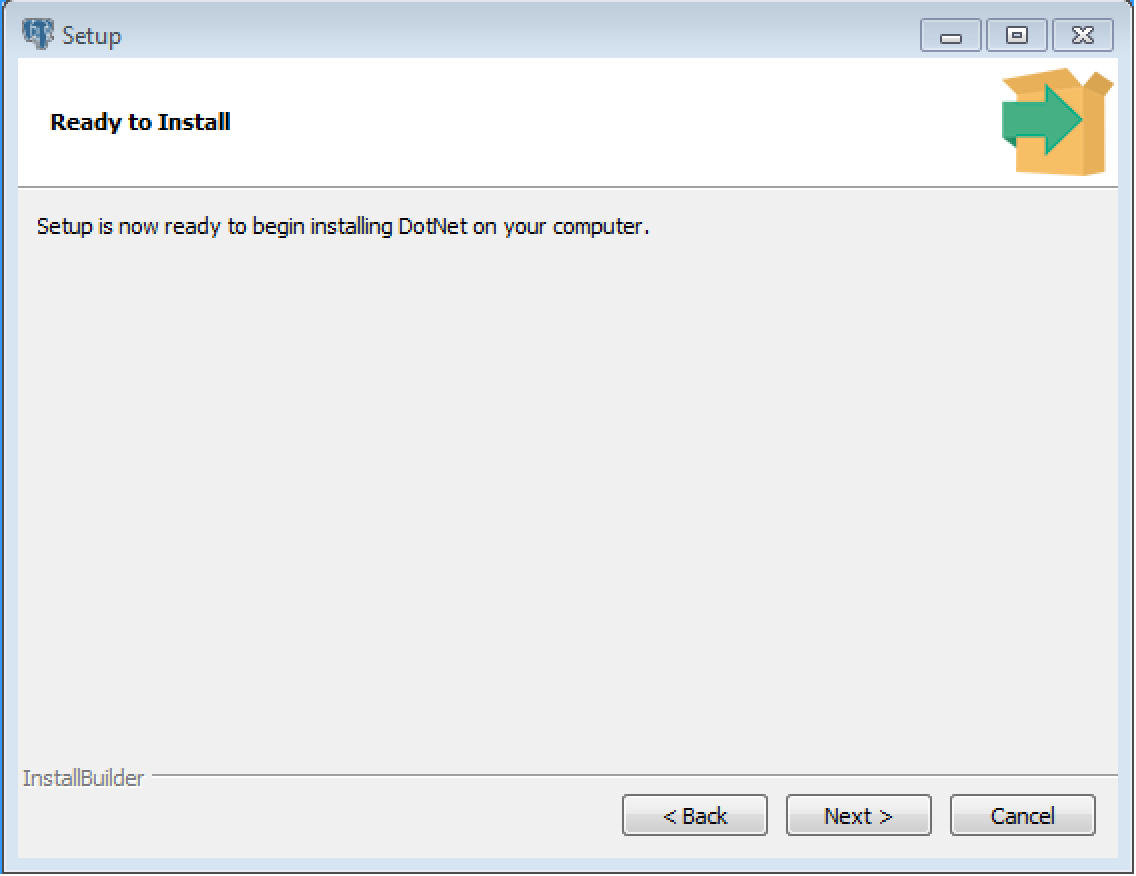
The Ready to Install dialog
Click Next on the Ready to Install dialog to start the
installation; popup dialogs confirm the progress of the installation
wizard.
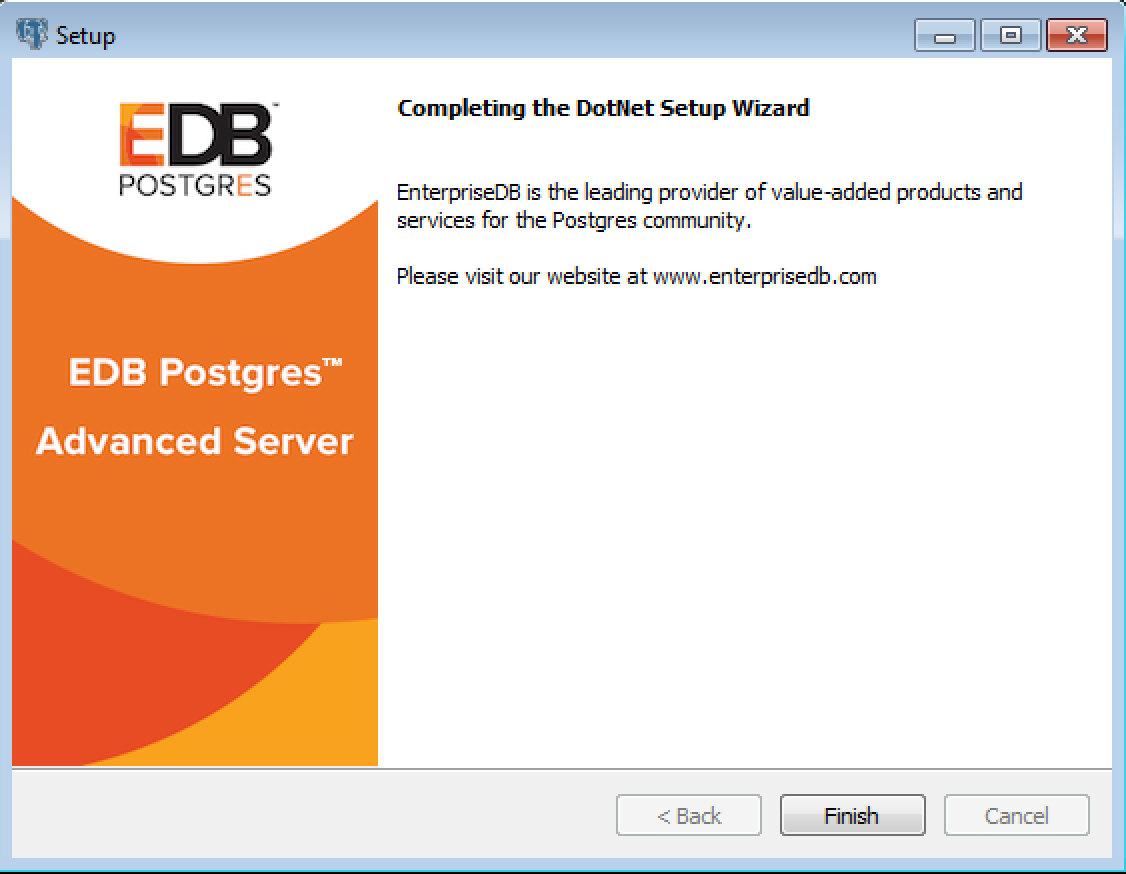
The installation is complete
When the wizard informs you that it has completed the setup, click the
Finish button to exit the dialog.
You can also use StackBuilder Plus to add or update the connector on an
existing Advanced Server installation; to open StackBuilder Plus, select
StackBuilder Plus from the Windows Apps menu.
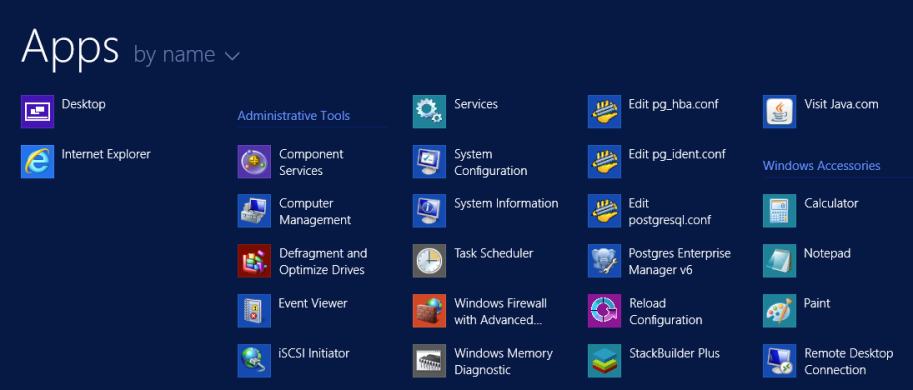
Starting StackBuilder Plus
When StackBuilder Plus opens, follow the onscreen instructions. Select
the EnterpriseDB.Net Connector option from the Database Drivers node of
the tree control.
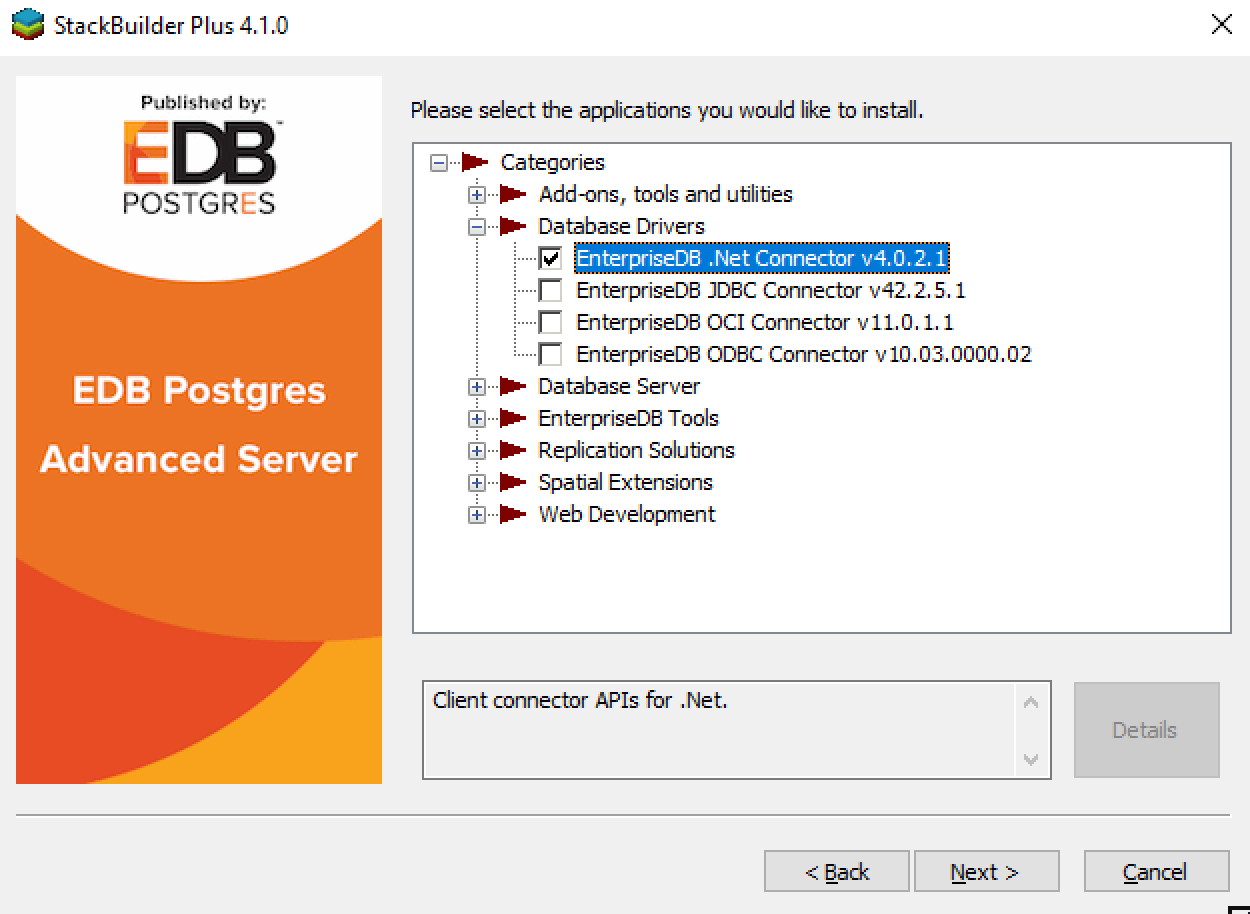
Selecting the Connectors installer
Follow the directions of the onscreen wizard to add or update an installation of the EnterpriseDB Connectors.
Configuring the .NET Connector
Please see the following environment-specific sections for information about configuring the .NET Connector:
Referencing the Library Files. General configuration information applicable to all components.
.NET Framework 4.0. Instructions for configuring for use with .NET Framework 4.0.
.NET Framework 4.5. Instructions for configuring for use with .NET Framework 4.5.
.NET Framework 4.5.1. Instructions for configuring for use with .NET Framework 4.5.1.
.NET Standard 2.0. Instructions for configuring for use with .NET Standard 2.0.
Entity Framework 5/6. Instructions for configuring for use with Entity Framework.
EnterpriseDB VSIX. Instructions for configuring for use with EnterpriseDB VSIX.
Referencing the Library Files
To reference library files with Microsoft Visual Studio:
Select the project in the
Solution Explorer.Select
Add Referencefrom theProjectmenu.When the
Add Referencedialog box opens, browse to select the appropriate library files.
Optionally, the library files can be copied to the specified location.
Before you can use an Advanced Server .NET class, you must import the namespace into your program. Importing a namespace makes the compiler aware of the classes available within the namespace. The namespace is:
EnterpriseDB.EDBClient
If you are using Entity Framework 6, the following additional namespace is required:
EntityFramework6.EntepriseDB.EDBClient
The method you use to include the namespace varies by the type of
application you are writing. For example, the following command imports
a namespace into an ASP.NET page:
<% import namespace="EnterpriseDB.EDBClient" %>
To import a namespace into a C# application, write:
using EnterpriseDB.EDBClient;
.NET Framework Setup
The following sections describe the setup for various .NET versions.
.NET Framework 4.0
If you are using .NET Framework version 4.0, the data provider installation path is:
C:\Program Files\edb\dotnet\net40\
The following shared library files are required:
EDBDataProvider.2.0.2.dll
Mono.Security.dll
see Referencing the Library Files for information about referencing library files.
Depending upon the type of application you use, you may be required to import the namespace into the source code (see Referencing the Library Files).
.NET Framework 4.5
If you are using .NET Framework version 4.5, the data provider installation path is:
C:\Program Files\edb\dotnet\net45\
The following shared library files are required:
EnterpriseDB.EDBClient.dll
System.Threading.Tasks.Extensions.dll
System.Runtime.CompilerServices.Unsafe.dll
System.ValueTuple.dll
System.Memory.dll
You must also add the following dependencies to your project:
System.Threading.Tasks.Extensions.dll
System.Runtime.CompilerServices.Unsafe.dll
System.ValueTuple.dll
System.Memory.dll
See Referencing the Library Files for information about referencing library files.
Depending upon the type of application you use, you may be required to import the namespace into the source code (see Referencing the Library Files).
.NET Framework 4.5.1
If you are using .NET Framework version 4.5.1, the data provider installation path is:
C:\Program Files\edb\dotnet\net451\
The following shared library files are required:
EnterpriseDB.EDBClient.dll
System.Threading.Tasks.Extensions.dll
System.Runtime.CompilerServices.Unsafe.dll
System.ValueTuple.dll
System.Memory.dll
You must also add the following dependencies to your project:
System.Threading.Tasks.Extensions.dll
System.Runtime.CompilerServices.Unsafe.dll
System.ValueTuple.dll
System.Memory.dll
See Referencing the Library Files for information on referencing library files.
Depending upon the type of application you use, you may be required to import the namespace into the source code (see Referencing the Library Files).
.NET Standard 2.0
For .NET Standard Framework 2.0, the data provider installation path is:
C:\Program Files\edb\dotnet\netstandard2.0\
The following shared library files are required:
EnterpriseDB.EDBClient.dll
System.Threading.Tasks.Extensions.dll
System.Runtime.CompilerServices.Unsafe.dll
System.ValueTuple.dll
You must also add the following dependencies to your project:
System.Runtime.CompilerServices.Unsafe.dll
System.ValueTuple.dll
Note
If your target framework is .Net Core 2.0, then include the following file in your project:
System.Threading.Tasks.Extensions.dll
See Referencing the Library Files for information about library files.
Depending upon the application type you use, you may be required to import the namespace into the source code (see Referencing the Library Files).
Entity Framework 5/6
To set up .NET Connector for usage with Entity Framework, the data provider installation path is:
C:\Program Files\edb\dotnet\EF\
The following shared library files are required:
EntityFramework5.EnterpriseDB.EDBClient.dll
EntityFramework6.EnterpriseDB.EDBClient.dll
Note
Entity Framework can be used with EnterpriseDB.EDBClient.dll
available in the net45 and net451 subdirectories.
See Referencing the Library Files for information about referencing library files.
Add the <DbProviderFactories> entries for the ADO.NET driver for
Postgres to the app.config file. Add the following entries:
<add name="EnterpriseDB.EDBClient"
  invariant="EnterpriseDB.EDBClient"
  description=".NET Data Provider for EnterpriseDB PostgreSQL”
  type="EnterpriseDB.EDBClient.EDBFactory, EnterpriseDB.EDBClient, Version=4.0.10.1, Culture=neutral, PublicKeyToken=5d8b90d52f46fda7"
  support="FF"/>
In the project’s app.config file add the following entry for provider
services under the EntityFramework/providers tag:
<provider invariantName="EnterpriseDB.EDBClient"
  type="EnterpriseDB.EDBClient.EDBServices, EntityFramework6.EnterpriseDB.EDBClient">
</provider>
The following is an example of the app.config file:
<?xml version="1.0" encoding="utf-8" ?>
<configuration>
  <configSections>
    <section name="entityFramework" type="System.Data.Entity.Internal.ConfigFile.EntityFrameworkSection, EntityFramework, Version=6.0.0.0, Culture=neutral, PublicKeyToken=b77a5c561934e089" requirePermission="false"/>
  </configSections>

    <startup>
        <supportedRuntime version="v4.0" sku=".NETFramework,Version=v4.5" />
    </startup>

 <entityFramework>
   <providers>
     <provider invariantName="EnterpriseDB.EDBClient" type="EnterpriseDB.EDBClient.EDBServices, EntityFramework6.EnterpriseDB.EDBClient"></provider>
   </providers>
 </entityFramework>

 <system.data>
   <DbProviderFactories>
     <remove invariant="EnterpriseDB.EDBClient"/>
     <add name="EnterpriseDB Data Provider" invariant="EnterpriseDB.EDBClient" support="FF" description=".Net Framework Data Provider for Postgresql" type="EnterpriseDB.EDBClient.EDBFactory, EnterpriseDB.EDBClient"/>
   </DbProviderFactories>
 </system.data>

</configuration>
Note
The same entries for <providers> and <DbProviderFactories> are
valid for the web.config file and the app.config file.
Depending upon the type of application you are using, you may be required to import the namespace into the source code (see Referencing the Library Files).
For usage information about Entity Framework, refer to the Microsoft documentation.
EnterpriseDB VSIX for Visual Studio 2015/2017/2019
EDB Data Designer Extensibility Provider (EnterpriseDB VSIX) is a
component that integrates Advanced Server database access into Visual
Studio, thus providing Visual Studio integrated features.
It allows connecting to Advanced Server from within Visual Studio’s Server Explorer, creating a model from an existing database, etc. Therefore, if Visual Studio features are desired, then EnterpriseDB VSIX must be utilized.
EnterpriseDB VSIX is located in the following directory:
C:\Program Files\edb\dotnet\vsix\
The files available at the above location are the following:
EnterpriseDB.vsixSSDLToPgSQL.tt
Installation and Configuration for Visual Studio 2015/2017/2019
The following are the steps to install and configure EnterpriseDB VSIX.
Step 1: Install EnterpriseDB VSIX to the desired version of Visual
Studio with the EnterpriseDB.vsix installer at the following location:
C:\Program Files\edb\dotnet\vsix\EnterpriseDB.vsix
If you already have an earlier version of the VSIX installed, it’s highly recommended that you uninstall them to avoid conflicts.
It is no longer necessary or recommended to have EnterpriseDB.EDBClient
in your global assembly cache (GAC).
Step 2: Relaunch Visual Studio and verify from Tools > Extensions
and Updates… menu that the EnterpriseDB extension is installed.
Step 3: Add the System.ValueTuple.dll assembly in the global
assembly cache (GAC) with the gacutil utility using the Visual Studio
Developers Command line from the following location.
C:\Program Files\edb\dotnet\vsix\System.ValueTuple.dll
For example:
> gacutil.exe /i System.ValueTuple.dll
Step 4: From Server Explorer, right-click on Data Connections, click
Add Connection, and verify the Enterprisedb Postgres Database data
source is available.
Model First and Database First Usage
Step 1: Add the EntityFramework5.EnterpriseDB.EDBClient.dll assembly
in the global assembly cache (GAC) with the gacutil utility using the
Visual Studio Developers Command line.
For example:
> gacutil.exe /i EntityFramework5.EnterpriseDB.EDBClient.dll
Step 2: Add the <DbProviderFactories> entries for the ADO.NET driver
of EDB Postgres in the machine.config file. The following are the
entries:
<add name="EnterpriseDB.EDBClient"
  invariant="EnterpriseDB.EDBClient"
  description=".NET Data Provider for EnterpriseDB PostgreSQL"
  type="EnterpriseDB.EDBClient.EDBFactory, EnterpriseDB.EDBClient, Version=4.0.10.1, Culture=neutral, PublicKeyToken=5d8b90d52f46fda7"
  support="FF"/>
For the attribute-value pairs, the double-quoted strings should not contain excess white space characters, but be configured on a single line. The examples shown in this section may be split on multiple lines for clarity, but should actually be configured within a single line such as the following:
description=".NET Data Provider for EnterpriseDB PostgreSQL"
For 64-bit Windows, the machine.config file is in the following
location:
C:\Windows\Microsoft.NET\Framework64\v4.0.30319\Config\machine.config
For 32-bit Windows, the machine.config file is in the following
location:
C:\Windows\Microsoft.NET\Framework\v4.0.30319\Config\machine.config
Step 3: Place the DDL generation template SSDLToPgSQL.tt in the
Visual Studio EntityFramework Tools\DBGen\ folder as in the following
example:
C:\Program Files (x86)\Microsoft Visual Studio 14.0\Common7\IDE\Extensions\Microsoft\EntityFramework Tools\DBGen\
Note
Select this template SSDLToPgSQL.tt in your EDMX file
properties.
Step 4: Add files EnterpriseDB.EDBClient.dll and
EntityFramework6.EnterpriseDB.EDBClient.dll in project references. see Referencing the Library Files for information about referencing library files.
Step 5: In the project’s app.config file add the following entry for
provider services under the EntityFramework/providers tag.
<provider invariantName="EnterpriseDB.EDBClient"
  type="EnterpriseDB.EDBClient.EDBServices, EntityFramework6.EnterpriseDB.EDBClient">
</provider>
The following is an example of the app.config file.
<?xml version="1.0" encoding="utf-8" ?>
<configuration>
  <configSections>
    <section name="entityFramework" type="System.Data.Entity.Internal.ConfigFile.EntityFrameworkSection, EntityFramework, Version=6.0.0.0, Culture=neutral, PublicKeyToken=b77a5c561934e089" requirePermission="false"/>
  </configSections>

    <startup>
        <supportedRuntime version="v4.0" sku=".NETFramework,Version=v4.5" />
    </startup>

  <entityFramework>
    <providers>
      <provider invariantName="EnterpriseDB.EDBClient" type="EnterpriseDB.EDBClient.EDBServices, EntityFramework6.EnterpriseDB.EDBClient"></provider>
    </providers>
  </entityFramework>

  <system.data>
    <DbProviderFactories>
      <remove invariant="EnterpriseDB.EDBClient"/>
      <add name="EnterpriseDB Data Provider" invariant="EnterpriseDB.EDBClient" support="FF" description=".Net Framework Data Provider for EDB Postgres" type="EnterpriseDB.EDBClient.EDBFactory, EnterpriseDB.EDBClient"/>
    </DbProviderFactories>
  </system.data>

</configuration>