Benchmarking
The CNPG kubectl plugin provides an easy way for benchmarking a PostgreSQL deployment in Kubernetes using CloudNativePG.
Benchmarking is focused on two aspects:
Note
pgbench and fio must be run in a staging or pre-production environment. Do not use these plugins in a production environment, as it might have catastrophic consequences on your databases and the other workloads/applications that run in the same shared environment.
pgbench
The kubectl CNPG plugin command pgbench executes a user-defined
pgbench job against an existing Postgres Cluster.
Through the --dry-run flag you can generate the manifest of the job
for later modification/execution.
A common command structure with pgbench is the following:
kubectl cnpg pgbench \
  -n <namespace> <cluster-name> \
  --job-name <pgbench-job> \
  --db-name <db-name> \
  -- <pgbench options>
Note
Please refer to the pgbench
for information about the specific options to be used in your jobs.
This example creates a job called pgbench-init that initializes for
pgbench OLTP-like purposes the app database in a Cluster
named cluster-example , using a scale factor of 1000:
kubectl cnpg pgbench \
  --job-name pgbench-init \
  cluster-example \
  -- --initialize --scale 1000
Note
This will generate a database with 100000000 records, taking approximately 13GB of space on disk.
You can see the progress of the job with:
kubectl logs jobs/pgbench-run
The following example creates a job called pgbench-run executing
pgbench against the previously initialized database for 30 seconds,
using a single connection:
kubectl cnpg pgbench \
  --job-name pgbench-run \
  cluster-example \
  -- --time 30 --client 1 --jobs 1
The next example runs pgbench against an existing database by using
the --db-name flag and the pgbench namespace:
kubectl cnpg pgbench \
  --db-name pgbench \
  --job-name pgbench-job \
  cluster-example \
  -- --time 30 --client 1 --jobs 1
By default, jobs do not expire. You can enable automatic deletion with
the --ttl flag. The job will be deleted after the specified duration
(in seconds).
kubectl cnpg pgbench \
  --job-name pgbench-run \
  --ttl 600 \
  cluster-example \
  -- --time 30 --client 1 --jobs 1
If you want to run a pgbench job on a specific worker node, you can
use the --node-selector option. Suppose you want to run the previous
initialization job on a node having the workload=pgbench label, you
can run:
kubectl cnpg pgbench \
  --db-name pgbench \
  --job-name pgbench-init \
  --node-selector workload=pgbench \
  cluster-example \
  -- --initialize --scale 1000
The job status can be fetched by running:
kubectl get job/pgbench-job -n <namespace>

NAME       COMPLETIONS   DURATION   AGE
job-name   1/1           15s        41s
Once the job is completed the results can be gathered by executing:
kubectl logs job/pgbench-job -n <namespace>
fio
The kubectl CNPG plugin command fio executes a fio job with default
values and read operations. Through the --dry-run flag you can
generate the manifest of the job for later modification/execution.
Note
The kubectl plugin command fio will create a deployment with predefined fio job values using a ConfigMap. If you want to provide custom job values, we recommend generating a manifest using the --dry-run flag and providing your custom job values in the generated ConfigMap.
Example of default usage:
kubectl cnpg fio <fio-name>
Example with custom values:
kubectl cnpg fio <fio-name> \
  -n <namespace>  \
  --storageClass <name> \
  --pvcSize <size>
Example of how to run the fio command against a StorageClass
named standard and pvcSize: 2Gi in the fio namespace:
kubectl cnpg fio fio-job \
  -n fio  \
  --storageClass standard \
  --pvcSize 2Gi
The deployment status can be fetched by running:
kubectl get deployment/fio-job -n fio

NAME          READY   UP-TO-DATE   AVAILABLE   AGE
fio-job        1/1     1            1           14s
After running kubectl plugin command fio .
It will:
Create a PVC
Create a ConfigMap representing the configuration of a fio job
Create a fio deployment composed by a single Pod, which will run fio on the PVC, create graphs after completing the benchmark and start serving the generated files with a webserver. We use the fio-tools image for that.
The Pod created by the deployment will be ready when it starts serving the results. You can forward the port of the pod created by the deployment
kubectl port-forward -n <namespace> deployment/<fio-name> 8000
and then use a browser and connect to http://localhost:8000/ to get
the data.
The default 8k block size has been chosen to emulate a PostgreSQL workload. Disks that cap the amount of available IOPS can show very different throughput values when changing this parameter.
Below is an example diagram of sequential writes on a local disk mounted on a dedicated Kubernetes node (1 hour benchmark):
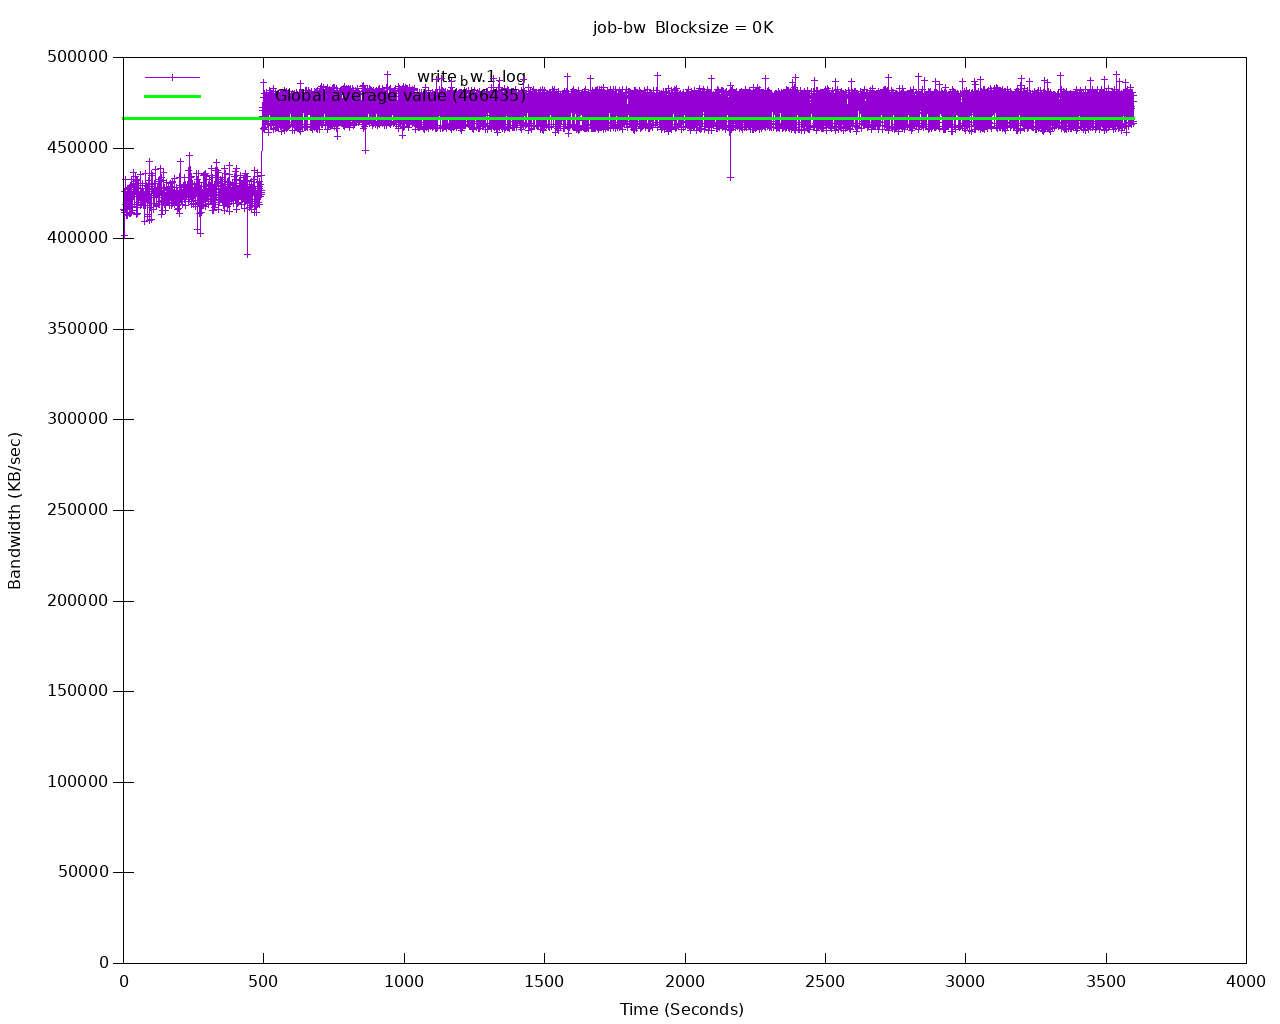
Sequential writes bandwidth
After all testing is done, fio deployment and resources can be deleted by:
kubectl cnpg fio <fio-job-name> --dry-run | kubectl delete -f -
make sure use the same name which was used to create the fio deployment and add namespace if applicable.